概要
由于上一次 Ubuntu 12.04 LTS 安装 ethereum 遇到了好多问题,所以系统直接升级到了 ubuntu 18.04;后续区块链开发都基于 ubuntu 18.04 平台。上一周安装了 ethereum 智能合约开发环境,这里将具体过程记录下来,以供大家参考;欢迎大家进入区块链开发领域,有问题可以一起沟通。
本文内容主要包括:
a. geth的快速安装以及常用命令(geth 是go ethereum 的简称,是go ethereum的一个客户端)
b. truffle & ganache-cli的安装
c. 基于truffle的智能合约开发
备注:由于笔者也是初学 ethereum,水平有限,本文错误欢迎批评指正,谢谢!
1. geth快速安装
(1)安装go ethereum客户端geth
sudo apt-get install software-properties-common
sudo add-apt-repository -y ppa:ethereum/ethereum
sudo apt-get update
sudo apt-get install ethereum
具体请参考官方说明:https://github.com/ethereum/go-ethereum/wiki/Installation-Instructions-for-Ubuntu
(2)创建本地私有节点
创建本地配置文件 genesis.json
{
"config":
{
"chainId": 89120348581,
"homesteadBlock": 0,
"eip155Block": 0,
"eip158Block": 0
},
"difficulty": "0",
"gasLimit":"2100000",
"alloc":
{
"0xf699937288af210b402bc506e8c13c426c770375":
{
"balance": "30000000000000000000000"
},
"0x75b0ee239b0b18dc5f933ae2b8010c419442349a":
{
"balance": "40000000000000000000000"
}
}
}
上面配置文件每个字段的意思暂不解释。
然后执行以下命令:
geth --datadir ./eth-data init genesis.json

启动节点:
geth --datadir ./eth-data --networkid 89120348581 --rpc --rpcapi "db, eth, net, web3,debug, admin,personal, miner" --rpcaddr localhost --rpccorsdomain "*" console

此时已经进入了geth命令行模式,eth, personal, web3命令使用暂时不展开,以后会详细记录;
大家可以玩一玩几个常用的,如
eth.accounts//查看账户
personal.newAccounts//创建账户
大家可以输入命令后,按tab键查看,如:

每个命令的详细使用方法笔者也不是特别熟悉,你们可以在网络上查询help文档。
2. truffle & ganache-cli的安装
truffle是进行ethereum开发的一个框架,目的是提高ethereum的开发效率。引用truffle官网介绍如下,truffle详细的使用说明请参阅官方文档:http://truffleframework.com/
Truffle is a world class development environment, testing framework
and asset pipeline for Ethereum, aiming to make life as an Ethereum
developer easier. With Truffle, you get:
Built-in smart contract compilation, linking, deployment and binary management.
Automated contract testing for rapid development.
Scriptable, extensible deployment & migrations framework.
Network management for deploying to any number of public & private networks.
Package management with EthPM & NPM, using theERC190standard.
Interactive console for direct contract communication.
Configurable build pipeline with support for tight integration.
External script runner that executes scripts within a Truffle environment.
Ganache本质上是一个本地ethereum节点仿真器,分为GUI版本和命令行版本;GUI版本请参阅http://truffleframework.com/ganache/,命令行版本请参阅https://github.com/trufflesuite/ganache-cli,这里我选择了命令行版本。
以上简单地介绍了truffle 和 ganache,让我们来安装他们;采用npm安装,所以需要首先安装nodejs,安装最新版nodejs命令如下:
sudo apt-get update
sudo apt-get install -y python-software-properties software-properties-common
sudo add-apt-repository ppa:chris-lea/node.js
sudo apt-get update
sudo apt-get install nodejs
sudo apt-get install nodejs-legacy
sudo apt -getinstall npm
sudo npm config set registry https://registry.npm.taobao.org
sudo npm config list
sudo npm install n -g
sudo n stable
sudo node -v
按照以上命令可以安装最新的nodejs,验证以下是否安装成功:
node -v
npm -v
现在来安装truffle和ganache-cli,命令很简单:
sudo npm install -g truffle
sudo npm install -g ganache-cli
运行truffle -v 验证是否安装成功,执行ganache-cli命令如下,默认创建了10个账户:

3. 基于truffle开发智能合约
以上成功安装了truffle和ganache-cli,现在演示一下怎样基于truffle开发智能合约。
(1)新建合约工程目录,如~/workspace/ethereum/truffle/demo0
(2) 执行truffle init, 注意这步是需要联网的

执行成功之后目录下面生成了3个文件夹和2个js脚本文件,简要说明一下:
contracts:智能合约的源文件
migrations:发布合约的脚本
test:合约测试脚本
truffle-config.js:truffle环境配置,注意这个是windows环境配置脚本
truffle.js: linux 环境配置脚本。
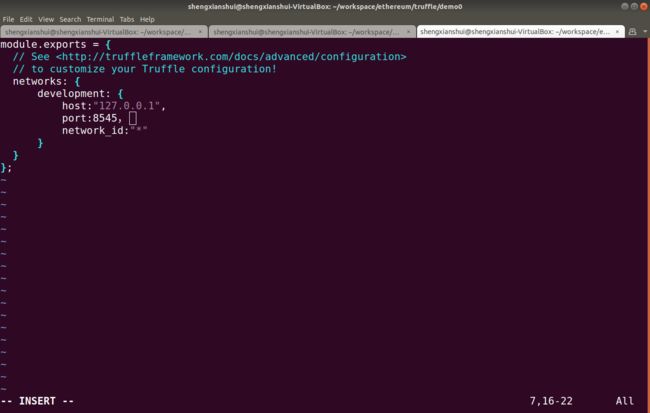
(3)配置truffle.js
(4) 编写智能合约
进入contracts目录,编写智能合约,这里以hello world为例:

(5)编写发布脚本,进入migration目录,copy第一份脚本,修改如下:

(6) 编译智能合约
在工程目录中执行truffle compile -all,如有语法错误修正后重新编译;
(7)发布合约
首先在另外一个终端中通过ganache-cli启动一个节点:如,ganache-cli -s 123
然后在truffle demo0目录下执行:truffle migrate --reset
如下图,合约发布成功,且地址为:0x1d11db040f83eb772b123ea866213a8e2e9ce324

同时在ganache-cli终端中查看挖矿出块的情况:

(8)合约调用
在demo0工程目录中执行truffle console,输入以下命令进行调用,可以看出合约调用成功。

好了,我们已经把geth, truffle and ganache-cli的安装步骤和大家分享完了,同时分享了如何通过truffle创建智能合约,发布合约,调用合约。如有错误,欢迎大家指正,谢谢!