在iOS开发过程中,经常会用到一些相似的代码。比如常用到的TableView的代理方法,每个页面每个类都要重复写一遍,会不会觉得很麻烦,如果能把这些代码块保留下来,就像系统方法一样,一键联想就好了。那目前的Xcode能不能这样做呢,答案是可以的。
下面就分开Xcode9和Xcode10来分别说明怎么添加自定义代码块。
Xcode9
在Xcode9中,core snippet模块是放在右侧边栏的最下面,如图所示

1、如何添加?
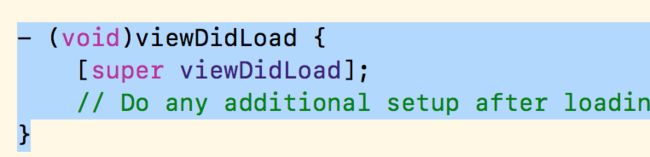
选中你想添加的代码,比如
然后拖动到右下角Core Snippet区域,就会出现
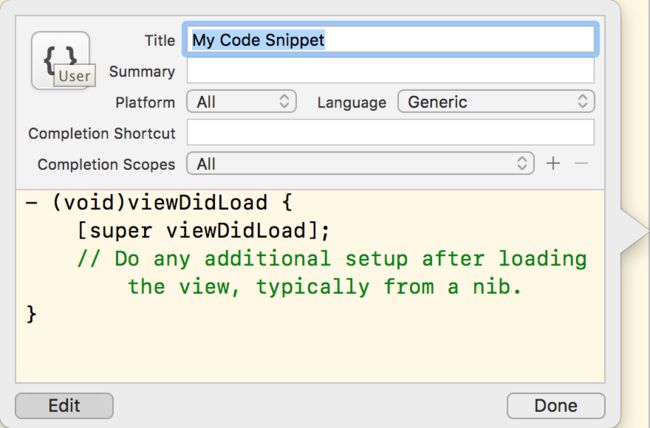
其中
Title:标题。
Summary:描述文字。
Platform:可以使用的平台(如iOS)。
Language:可以在哪些语言中使用(如 Objective-C)。
Completion Shortcut:快捷方式,以字母开头(支持少数符号,如@)。
Completion Scopes:作用范围,一般写在正确的位置拖动即可,Xcode会自行选择好。
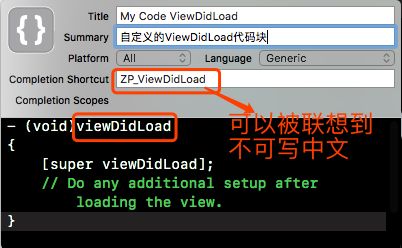
但是建议你添加的这个Completion Shortcut,最好是以一个你自己固定的前缀,加跟你添加的这个方法名称一样或类似的作为后缀,比如viewDidLoad,你可以写LZ_viewDidLoad类似这样的,这样的好处是当你编写代码的时候,写viewDidLoad的时候既会联想出系统的方法,也会联想出你自己自定义的方法,方便选择。
2、如何编辑?
选择你要编辑的代码块,然后再单击你的代码块即可

3、如何删除?
选择你的代码块,然后shift+delete快捷键即可

Xcode10
在Xcode10中,core snippet模块不再放在右侧边栏里,苹果为了方便我们开发者,特地把这个常用模块放到了顶栏中
1、如何添加?
跟Xcode9不同,因为点击后是个浮层,不能再像Xcode9那样选择代码后左键拖到那个区域就能生成代码块。那在10中该如何添加呢?
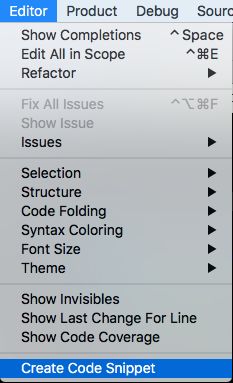
第一种方法,点击Edit->Create Code Snippet
然后会出现一个浮层,添加你想添加的代码块上去即可,如图所示
但是建议你添加的这个Completion Shortcut,最好是以一个你自己固定的前缀,加跟你添加的这个方法名称一样或类似的作为后缀,比如viewDidLoad,你可以写LZ_viewDidLoad类似这样的,这样的好处是当你编写代码的时候,写viewDidLoad的时候既会联想出系统的方法,也会联想出你自己自定义的方法,方便选择。

添加好了之后,就能在Core Snippet里看到你添加的代码块了。
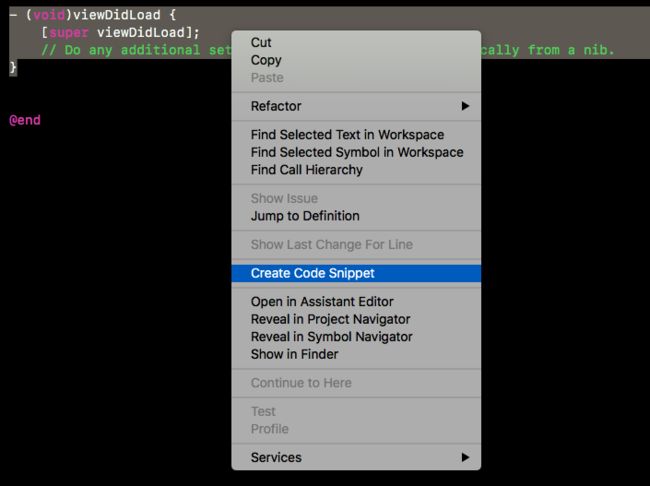
第二种方法,复制你的代码,然后右键,选择Create Code Snippet,这样代码就会自动放到Code Snippet里
2、如何编辑?
选择你要编辑的代码块,然后再单击你的代码块即可

3、如何删除?
选择你的代码块,然后shift+delete快捷键即可

设置自定义代码块的好处
有了这些自定义的代码块,可以极大的帮助到我们快速开发。预先设置一些常用但是代码量又很多的代码放到Core Snippet里,会让开发速度大幅提升。
下面简单举些例子:
1、单例的创建
+ (instancetype)sharedInstance {
    static <#Class#> *_sharedInstance = nil;
    static dispatch_once_t onceToken;
    dispatch_once(&onceToken, ^{
        _sharedInstance = [[self alloc] init];

    });
    return _sharedInstance;
}
2、创建tableView
- (void)setupTableView
{
    UITableView *tableView = [[UITableView alloc] initWithFrame:CGRectZero style:UITableViewStylePlain];
    [tableView registerClass:[<#classCell#> class] forCellReuseIdentifier:<#kReuseIdentifier#>];
    tableView.separatorStyle = UITableViewCellSeparatorStyleNone;
    tableView.dataSource = self;
    tableView.delegate = self;
    [<#view#> addSubview:tableView];
}
3、创建tableView的Delegate和DataSource
#pragma mark - UITableViewDataSource

- (NSInteger)tableView:(UITableView *)tableView numberOfRowsInSection:(NSInteger)section
{
    return <#count#>;
}

- (UITableViewCell *)tableView:(UITableView *)tableView cellForRowAtIndexPath:(NSIndexPath *)indexPath
{
    <#classCell#> *cell = [tableView dequeueReusableCellWithIdentifier:<#kReuseIdentifier#> forIndexPath:indexPath];

    return cell;
}

#pragma mark - UITableViewDelegate

- (CGFloat)tableView:(UITableView *)tableView heightForRowAtIndexPath:(NSIndexPath *)indexPath
{
    return <#rowHeight#>;
}

- (void)tableView:(UITableView *)tableView didSelectRowAtIndexPath:(NSIndexPath *)indexPath
{

}
4、属性
@property (nonatomic, copy) <#Class#> *<#name#>;
@property (nonatomic, weak) <#Class#> *<#name#>;
、、、
5、weakSelf、strongSelf
__weak typeof(self) weakSelf = self;
__strong typeof(<#weakSelf#>) strongSelf = <#weakSelf#>;
6、其他,比如常用的UIButton、UILabel等
UIButton *button = [UIButton buttonWithType:<#(UIButtonType)#>];
button.backgroundColor = [UIColor <#backgroundColor#>];
button.titleLabel.font = [UIFont <#font#>];
[button setTitle:<#title#> forState:UIControlStateNormal];
[button setTitleColor:[UIColor <#titleColor#>] forState:UIControlStateNormal];
[button addTarget:self action:@selector(<#btnClick:#>) forControlEvents:UIControlEventTouchUpInside];
[<#view#> addSubview:button];
一些常用UI控件或者组件,你可以自行进行添加,当你维护出一套自己的Core Snippet之后,你会发现,你的编码效率会大幅度提升。
最后,建议自己整理一套Core Snippet,然后提到自己的github上,这样在多台设备上都可以随时使用。