MapKit框架使用(初级)
导入框架
导入主头文件
#import
MapKit框架须知
1.MapKit框架数据类型的前缀都是MK
2.MapKit框架有一个比较重要的UI控件:MKMapView,专门用于地图显示
添加地图(storyboard - Map View,代码)
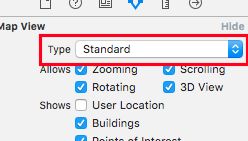
storyboard
可以通过设置MKMapView的 mapType 设置地图类型
代码
先来个属性
@property (weak, nonatomic) IBOutlet MKMapView *mapView;
-(void)touchesBegan:(NSSet *)touches withEvent:(UIEvent *)event
{
    self.mapView.mapType = MKMapTypeHybrid;
}
//    MKMapTypeSatelliteFlyover
//    MKMapTypeHybridFlyover
//    以上两个,只能使用代码实现
也能够实现有无功能及控件,即能否缩放/滑动/指南针/比例尺等,一定注意 属性所对应的系统版本
 self.mapView.zoomEnabled = NO;
 self.mapView.showsCompass = NO;
self.mapView.showsScale = YES;
设置用户追踪模式
获取用户当前的位置信息。
self.mapView.showsUserLocation = YES;
会获取用户隐私,需要获得用户的授权,请求授权只能在CoreLocation中
#import
@property(nonatomic,strong)CLLocationManager * lm;
-(CLLocationManager *)lm
{
    if (!_lm) {
        _lm = [[CLLocationManager alloc] init];
      //请求授权,做适配
        if ([_lm respondsToSelector:@selector(requestAlwaysAuthorization)]) {
            [_lm requestAlwaysAuthorization];
        }
    }
    return _lm;
}
//下面方法中调用
[self lm];
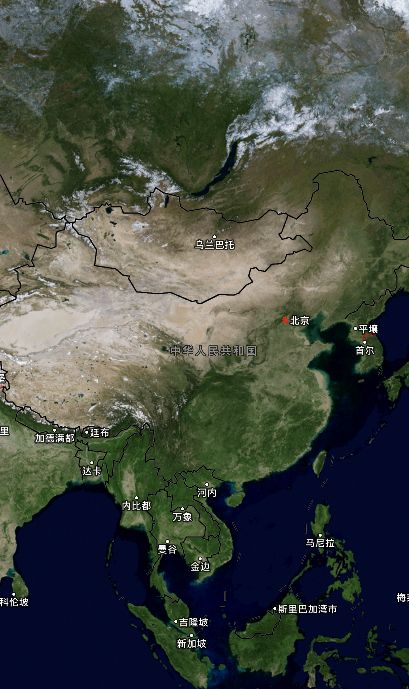
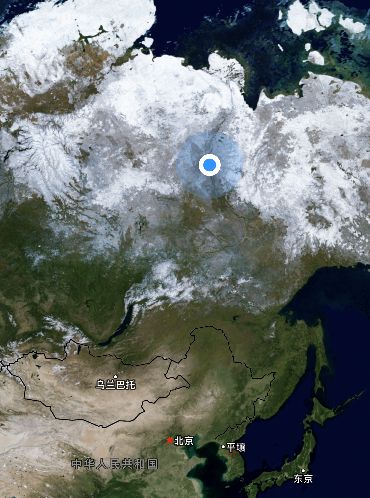
好了,在世界地图上找到你的位置,就是闪动的蓝点,不要急,全世界找找
没错,我在西伯利亚,呵呵,你懂的,偶尔出出国
放大一点看看啊,得一点一点放大,好烦啊,有没有快捷一点的方式呢?
//用户轨迹模式 需要获取用户位置,授权。授权方法请看上方
    self.mapView.userTrackingMode = MKUserTrackingModeFollowWithHeading;
好了,基本的使用结束了
MapKit框架使用(中级)
让我们进化吧
呵呵哒
查看当前用户位置信息
将视图中心位置调整为用户当前所在位置
现在来调整一下。先设置一下代理,storyBoard里是拖线,代码就不说了。遵循协议
#pragma mark - MKMapViewDelegate
/**
 *  更新到位置
 *
 *  @param mapView      地图
 *  @param userLocation 位置对象
 */
-(void)mapView:(MKMapView *)mapView didUpdateUserLocation:(MKUserLocation *)userLocation
{
    /**
     *  MKUserLocation (大头针模型)
     */
    userLocation.title = @"来吧,进化吧";
    userLocation.subtitle = @"NO!!!";
    // 设置地图显示中心 就是你一点击,你的位置就在屏幕中心
    [self.mapView setCenterCoordinate:userLocation.location.coordinate animated:YES];
}
调整当前地图显示区域
好了,现在要改动一下了,
-(void)touchesBegan:(NSSet *)touches withEvent:(UIEvent *)event
{
    [self lm];
    //获取用户的位置信息
    self.mapView.showsUserLocation = YES;
    //用户轨迹模式
//    self.mapView.userTrackingMode = MKUserTrackingModeFollowWithHeading;
}
-(void)mapView:(MKMapView *)mapView didUpdateUserLocation:(MKUserLocation *)userLocation
{
    /**
     *  MKUserLocation (大头针模型)
     *
     *
     */

    userLocation.title = @"来吧,进化吧";
    userLocation.subtitle = @"NO!!!";

    //设置地图显示区域
    MKCoordinateSpan span = MKCoordinateSpanMake(0.05, 0.03);
    MKCoordinateRegion  region  = MKCoordinateRegionMake(userLocation.location.coordinate, span);
    [self.mapView setRegion:region animated:YES];
}
//怎么知道比例是(0.05, 0.03)呢,先把 setRegion: animated:方法注释,调用如下方法,调到适当比例即可
-(void)mapView:(MKMapView *)mapView regionDidChangeAnimated:(BOOL)animated
{
    NSLog(@"%f----%f", mapView.region.span.latitudeDelta, mapView.region.span.longitudeDelta);
}
//这个方法用完就注释了
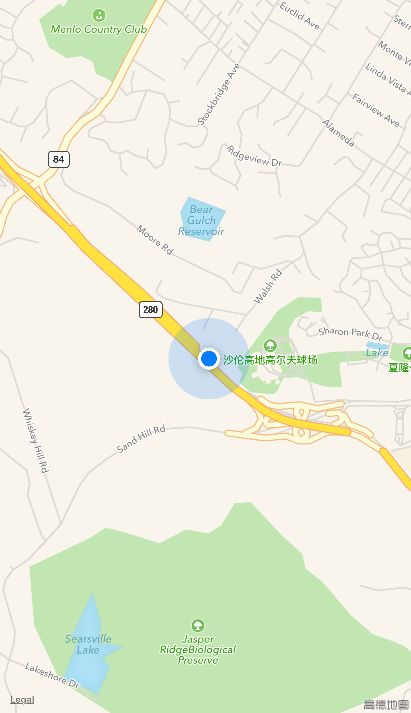
就是下图这样了
大头针的基本使用
来新的了哦
大头针的使用,我们在这里新建一个工具类(继承于NSObject)
// .h
#import
@interface FWLAnno : NSObject
@property (nonatomic, assign) CLLocationCoordinate2D coordinate;
@property (nonatomic, copy, nullable) NSString *title;
@property (nonatomic, copy, nullable) NSString *subtitle;
在控制器中,引入框架(MapKit,CoreLocation),工具类,遵循协议,设置代理(MKMapViewDelegate)
好了,写一个设置大头针的方法,方便调用
//创建大头针数据模型,放在地图上,调用代理方法
- (void)addAnnoPT:(CLLocationCoordinate2D)pt
{
    FWLAnno * anno = [[FWLAnno alloc] init];
    anno.coordinate = pt;
    anno.title = @"主标题";
    anno.subtitle = @"子标题";
    [self.mapView addAnnotation:anno];
}
添加大头针模型时调用的方法
/**
 *  当我们添加大头针模型时调用
 *
 *  @param mapView    视图
 *  @param annotation 大头针
 *
 *  @return 模型
 */
-(MKAnnotationView *)mapView:(MKMapView *)mapView viewForAnnotation:(id)annotation{
//返回为空,就调用系统默认
    return nil;
}
添加大头针
-(void)touchesBegan:(NSSet *)touches withEvent:(UIEvent *)event
{
    //1.获取当前触摸点
    CGPoint point = [[touches anyObject] locationInView:self.mapView];
    //2.转换成经纬度
    CLLocationCoordinate2D pt = [self.mapView convertPoint:point toCoordinateFromView:self.mapView];
    //3.添加大头针
    [self addAnnoPT:pt];
}
标题,子标题写死了,很没意思哎,修改一下,使用反地理编码
//反地理编码
@property(nonatomic,strong)CLGeocoder * geo;
//懒加载
-(CLGeocoder *)geo{
    if (!_geo) {
        _geo = [[CLGeocoder alloc] init];
    }
    return _geo;
}
//在添加大头针的方法里赋值
- (void)addAnnoPT:(CLLocationCoordinate2D)pt
{
   __block FWLAnno * anno = [[FWLAnno alloc] init];
    anno.coordinate = pt;
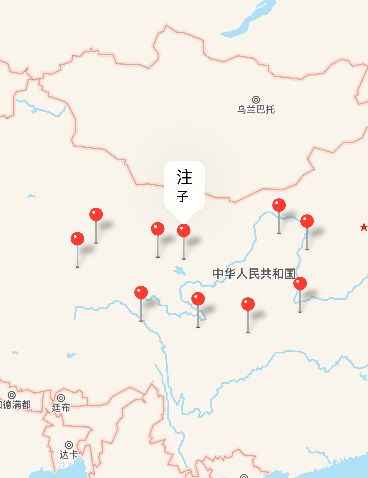
    anno.title = @"注";
    anno.subtitle = @"子";
    [self.mapView addAnnotation:anno];

    //反地理编码
    CLLocation *location = [[CLLocation alloc] initWithLatitude:anno.coordinate.latitude longitude:anno.coordinate.longitude];

    [self.geo reverseGeocodeLocation:location completionHandler:^(NSArray * _Nullable placemarks, NSError * _Nullable error) {
        CLPlacemark * pl = [placemarks firstObject];
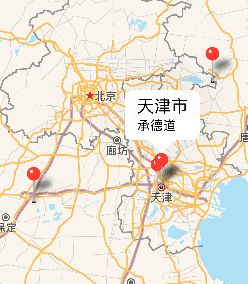
        anno.title = pl.locality;
        anno.subtitle = pl.thoroughfare;
    }];
    // 添加多个大头针
    //    self.mapView addAnnotations:<#(nonnull NSArray> *)#>

}
昨天有事离开了,今天继续。
移除(所有)大头针
使用removeAnnotations
-(void)touchesMoved:(NSSet *)touches withEvent:(UIEvent *)event
{
    // 移除大头针(模型)
    NSArray *annos = self.mapView.annotations;
    [self.mapView removeAnnotations:annos];
}
MapKit框架使用(高级)
自定义大头针
还记得上面添加大头针的那个方法 mapView: viewForAnnotation:
不写或者返回值是空的时候,使用的是系统默认的那个大头针。现在模拟一下,当它返回nil时底层是怎么实现的(有助于理解)
在使用UItableView的时候,里面的cell可以重复利用。在这里,大头针也可以重复利用。
-(MKAnnotationView *)mapView:(MKMapView *)mapView viewForAnnotation:(id)annotation
{
    //系统默认的大头针视图如下
    static NSString * identifier = @"anno";
    MKPinAnnotationView * pin =(MKAnnotationView *) [mapView dequeueReusableAnnotationViewWithIdentifier:identifier];
if (pin == nil) {
        pin = [[MKPinAnnotationView alloc] initWithAnnotation:annotation reuseIdentifier:identifier];
    }
//下面这个方法的作用 -- 如果大头针 pin 为空的话,if中会创建。但是重复利用时候会出现问题(再次从重用池中取时,没有在赋值,会出现混乱),所以要再赋值一次
pin.annotation = annotation;

//温馨的提醒来喽,此时运行,你会发现大头针的提示不会出现。系统默认的属性是NO
    // 设置是否弹出标注
    pin.canShowCallout = YES;

//更改大头针颜色
    pin.pinTintColor = [UIColor blackColor];
//掉落效果
pin.animatesDrop = YES;
return pin;

}
拖拽大头针
(此时要把移动屏幕取消大头针方法注释掉 touchesMoved)
pin.draggable = YES;
自定义大头针图片
//设置大头针图片(系统大头针无效)
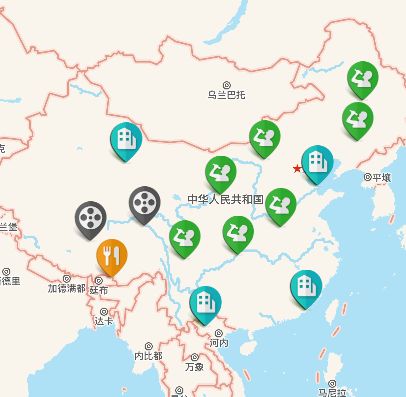
pin.image = [UIImage imageNamed:@"category_5"];
但是发现根本没有改变,为什么呢?
如果使用的是系统的MKPinAnnotationView ,父类里设置的东西基本对它无效(图片,标准什么的)。
如果我们要自定义一个大头针,只能使用MKAnnotationView的这样的父类,或是自定义一个继承于他的类。
首先,在大头针模型里加一个字段
/*类型 */
//此处影协成一个枚举为好
@property (nonatomic, assign) NSInteger type;
其次,在addAnnoPT(添加大头针方法)中添加
//图片是1~5
    anno.type = arc4random_uniform(5);
-(MKAnnotationView *)mapView:(MKMapView *)mapView viewForAnnotation:(id)annotation{
    //直接使用父类
    static NSString * inden = @"anno";
    MKAnnotationView * pin =[mapView dequeueReusableAnnotationViewWithIdentifier:inden];
    if (pin == nil) {
        pin = [[MKAnnotationView alloc] initWithAnnotation:annotation reuseIdentifier:inden];
    }
    pin.annotation = annotation;
    //设置是否弹出标注
    pin.canShowCallout = YES;
   //标注偏移
    pin.calloutOffset = CGPointMake();
    pin.draggable = YES;

 //标注左右视图
    UIImageView *iv = [[UIImageView alloc] initWithFrame:CGRectMake(0, 0, 44, 44)];
    iv.image = [UIImage imageNamed:@"htl"];
    pin.leftCalloutAccessoryView = iv;

    UIImageView *ivR = [[UIImageView alloc] initWithFrame:CGRectMake(0, 0, 44, 44)];
    ivR.image = [UIImage imageNamed:@"eason"];
    pin.rightCalloutAccessoryView = ivR;
    //标注视图
    pin.detailCalloutAccessoryView = [UISwitch new];
    return pin;
}
选中,取消选中的代理方法
// 不选中
-(void)mapView:(MKMapView *)mapView didDeselectAnnotationView:(MKAnnotationView *)view
{
    NSLog(@"不选中");
    NSLog(@"%@", view.annotation);
}

// 选中
-(void)mapView:(MKMapView *)mapView didSelectAnnotationView:(MKAnnotationView *)view
{
       NSLog(@"选中");
}
视图是视图,模型归模型,现在是混在一起了,下去再整理
利用自带app导航
记住MKMapItem,调用[MKMapItem openMapsWithItems: launchOptions:]方法,其他的东西需要什么写什么
//引入框架
#import
该怎么写呢,写一个方法
-(void)beginNavWithBpl:(CLPlacemark *)beginP andEndP:(CLPlacemark *)endP
{
    //由于CLPlacemark地标对象中的属性是readonly,所以写出经纬度,就用地理编码
    //创建开始的地图项
    CLPlacemark * clPB =beginP;
    MKPlacemark * mkpB = [[MKPlacemark alloc] initWithPlacemark:clPB];
    MKMapItem * beginI = [[MKMapItem alloc] initWithPlacemark:mkpB];
    //创建结束的地图项
    CLPlacemark * clP =endP;
    MKPlacemark * mkp = [[MKPlacemark alloc] initWithPlacemark:clP];
    MKMapItem * endI = [[MKMapItem alloc] initWithPlacemark:mkp];

    //地图项数组 起点终点啊
    NSArray * items = @[beginI,endI] ;
    //启动字典   进头文件里自己看吧
    NSDictionary * dic = @{
                           MKLaunchOptionsDirectionsModeKey: MKLaunchOptionsDirectionsModeDriving,
                           //key-value value不能是基本数据类型啊,只能是对象,包装一下
                           MKLaunchOptionsMapTypeKey:@(MKMapTypeHybrid),
                           MKLaunchOptionsShowsTrafficKey:@(YES)
                           };

    [MKMapItem openMapsWithItems:items launchOptions:dic];
}
调用方法
//把这个方法封装,哪需要就在哪调用
-(void)startNav
{
    [self.geoC geocodeAddressString:@"北京" completionHandler:^(NSArray * _Nullable placemarks, NSError * _Nullable error) {
        // 广州地标
        CLPlacemark *gzP = [placemarks firstObject];

        [self.geoC geocodeAddressString:@"上海" completionHandler:^(NSArray * _Nullable placemarks, NSError * _Nullable error) {
            // 上海地标
            CLPlacemark *shP = [placemarks firstObject];
//调用方法(为什么写在这里呢 - 在这里即可以获得起始点的位置,也可以获得终点的位置)
            [self beginNavWithBpl:gzP andEndP:shP];
        }];
    }];
}
了解一下3D视角(sele.mapView.camera)
先建立一个mapView
  MKMapCamera * cam = [MKMapCamera cameraLookingAtCenterCoordinate:(CLLocationCoordinate2DMake(39.915168, 116.403875)) fromEyeCoordinate:(CLLocationCoordinate2DMake(39.915168, 116.403875)) eyeAltitude:100];
    self.mapView.camera = cam;
地图快照(MKMapSnapshotter) 略
获取导航信息 MKDirections
做一个请求,在请求里告诉它起点和终点,用MKDirections的对象调用方法开始计算导航路线。导航路线的结果是一个response响应,响应里有routes数组,数组里又有一个MKRoute这样的对象,里面又有一些属性。多尽头文件看看,会省力很多。
#import "ViewController.h"
#import
#import
@interface ViewController ()
@property(nonatomic,strong)CLGeocoder * geoC;
@end

@implementation ViewController

- (CLGeocoder *)geoC
{
    if (!_geoC) {
        _geoC = [[CLGeocoder alloc] init];
    }
    return _geoC;
}

-(void)touchesBegan:(NSSet *)touches withEvent:(UIEvent *)event
{

    [self.geoC geocodeAddressString:@"北京" completionHandler:^(NSArray * _Nullable placemarks, NSError * _Nullable error) {

        CLPlacemark * bjP = [placemarks firstObject];

        [self.geoC geocodeAddressString:@"上海" completionHandler:^(NSArray * _Nullable placemarks, NSError * _Nullable error) {

            CLPlacemark * shP = [placemarks firstObject];

            [self getRouteWithBeginPL:bjP andEndPL:shP];
        }];
    }];
}

- (void)getRouteWithBeginPL:(CLPlacemark *)beginP andEndPL:(CLPlacemark *)endPL
{

    MKDirectionsRequest *request = [[MKDirectionsRequest alloc] init];


    // 起点
    CLPlacemark *clP = beginP;
    MKPlacemark *mkP = [[MKPlacemark alloc] initWithPlacemark:clP];
    MKMapItem *sourceItem = [[MKMapItem alloc] initWithPlacemark:mkP];
    request.source = sourceItem;

    // 终点
    CLPlacemark *clP2 = endPL;
    MKPlacemark *mkP2 = [[MKPlacemark alloc] initWithPlacemark:clP2];
    MKMapItem *endItem = [[MKMapItem alloc] initWithPlacemark:mkP2];
    request.destination = endItem;


    MKDirections *direction = [[MKDirections alloc] initWithRequest:request];

    [direction calculateDirectionsWithCompletionHandler:^(MKDirectionsResponse * _Nullable response, NSError * _Nullable error) {
        /**
         *  MKDirectionsResponse
         routes : 路线数组MKRoute

         */
        /**
         *  MKRoute
         name : 路线名称
         distance : 距离
         expectedTravelTime : 预期时间
         polyline : 折线(数据模型)
         steps
         */
        /**
         *  steps
         instructions : 行走提示
         */
        //        NSLog(@"%@", response);

        [response.routes enumerateObjectsUsingBlock:^(MKRoute * _Nonnull obj, NSUInteger idx, BOOL * _Nonnull stop) {
            NSLog(@"%@---%zd---%f", obj.name, obj.expectedTravelTime, obj.distance);
/********************************我是低调的分割线*****************************************************/


            [obj.steps enumerateObjectsUsingBlock:^(MKRouteStep * _Nonnull obj, NSUInteger idx, BOOL * _Nonnull stop) {
                NSLog(@"%@", obj.instructions);
            }];
        }];
    }];
}

@end
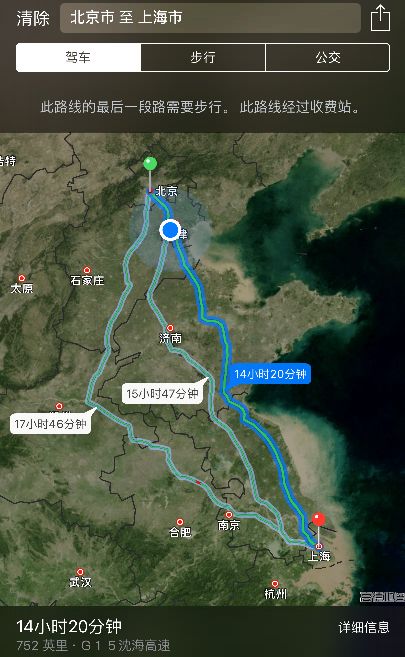
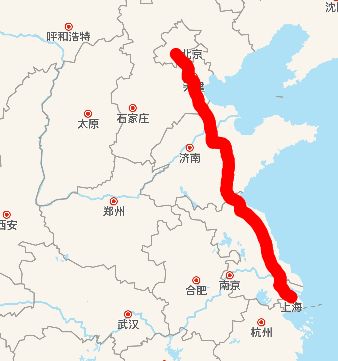
好了,现在来做一个有意思的,导航线路绘制 MKPolyline
首先,得先有一个mapView。在上面添加覆盖层。
哦,对了,我这个是几个放到一起了,写到现在才想起来,估计到现在也看乱了。。。能看到这里的人,真是抱歉了。
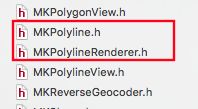
现在在哪添加呢?找到了polyline,就在它下面
在这里有MKRoute对象,遍历出每一条线路
//遵循代理
//导入MapKit框架
-(MKOverlayRenderer *)mapView:(MKMapView *)mapView rendererForOverlay:(id)overlay
{
    if ([overlay isKindOfClass:[MKCircle class]]) {
        MKCircleRenderer *circleR = [[MKCircleRenderer alloc] initWithOverlay:overlay];

        circleR.fillColor = [UIColor cyanColor];
        circleR.alpha = 0.5;

        return circleR;
    }


    if ([overlay isKindOfClass:[MKPolyline class]])
    {
        MKPolylineRenderer *render = [[MKPolylineRenderer alloc] initWithOverlay:overlay];

        // 设置线宽
        render.lineWidth = 10;
        // 设置颜色
        render.strokeColor = [UIColor redColor];

        return render;
    }


    return nil;
}
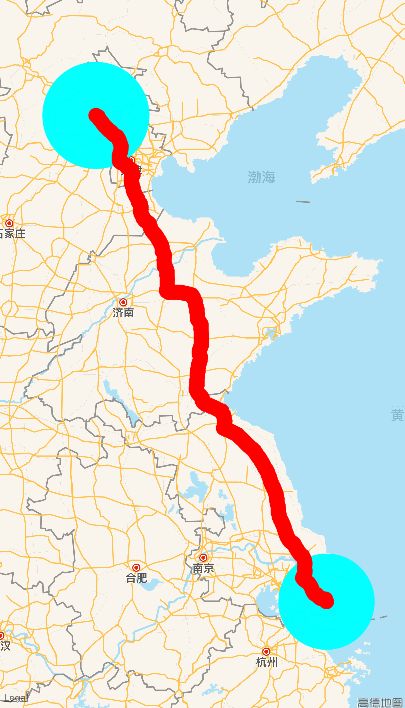
在起点和终点添加圆圈进行标记。首先在获得到起点和终点的地方加入,然后在代理的方法处返回覆盖层。这时不知道你有没有 疑问,为什么代理方法的返回值不是MKOverlayRenderer,而是MKPolylineRenderer(折线渲染图层)。你可以到MapKit框架的.h文件看看
//要加载创建起点和终点的地方啊
 MKCircle *circle = [MKCircle circleWithCenterCoordinate:beginP.location.coordinate radius:10000];
    [self.mapView addOverlay:circle];

    MKCircle *circle2 = [MKCircle circleWithCenterCoordinate:endPL.location.coordinate radius:10000];
    [self.mapView addOverlay:circle2];

    MKDirectionsRequest *request = [[MKDirectionsRequest alloc] init];

