一 各种打包方法简介:
- Xcode 打包:
XCode -- > Product --> Archive 常规打包方式,需要提前配置好签名信息.
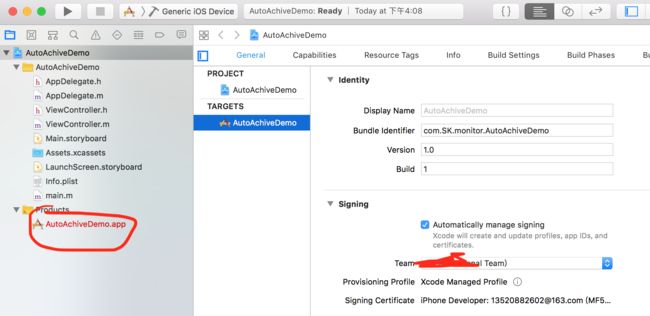
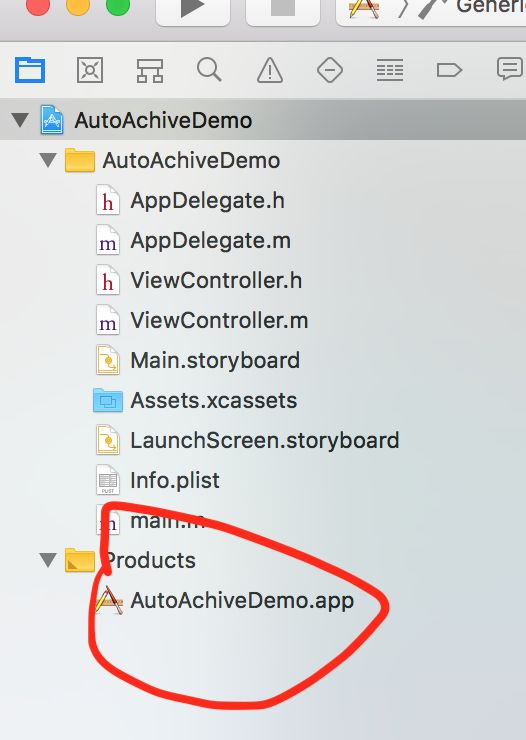
2.提取工程目录Products下的.app文件进行包装打包:
3.使用命令行工具xcodebuild进行打包.
4.python编写自动化打包脚本,运行脚本实现一键打包部署.
二 Xcode 打包:
略.... 你懂得
三 .app文件进行包装打包:
具体步骤如下:
1. XCode -- >Build
2.新建文件夹,命名Payload.
3.提取Products下的.app文件,放进Payload文件夹中,然后把Payload进行压缩得到Payload.zip.
4.将Payload.zip名字改为: 工程名.zip
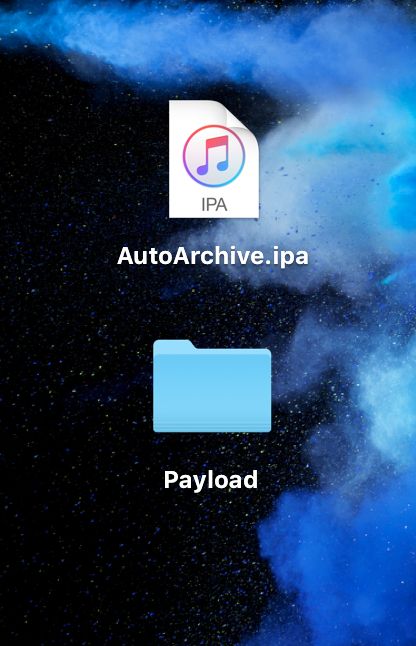
5.工程名.zip的后缀名改为工程名.ipa
上图:
四. xcodebuild命令行打包:
具体操作如下:
- cd到工程目录下
$ xcodebuild clean -workspace xxxx.xcworkspace -scheme xxxx -configuration Release
1.将其中`xxxx`替换成你的工程名.
2. `Release`是编译模式,分为`Release`和`Debug`,根据需要自行配置.
- $
xcodebuild archive -workspace xxxx.xcworkspace -scheme xxxx -configuration Release -archivePath /Users/pactepacterara/Desktops/xxxx
1.xxxx是工程名
2./Users/pactepacterara/Desktops/是archive文件的输出路径,我这里默认放桌面,可自行配置,后面跟项目名.
- $
xcodebuild -exportArchive -archivePath /Users/pactepacterara/Desktop/xxxx.xcarchive -exportPath /Users/pactepacterara/Desktop -exportOptionsPlist /Users/pactepacterara/Desktop/ExportOptions.plist
1.  /Users/pactepacterara/Desktop/ExportOptions.plist这是ExportOptions.plist文件的路径.
2. ExportOptions.plist文件需要你使用Xcode先手动构建一次,然后将ExportOptions.plist文件放到指定路径,我是放桌面.
执行上述操作,即可完成打包.
五. python自动化打包
编写python文件,使用Xcode就可以
直接上代码:
#!/usr/bin/env python
#coding=utf-8
#环境: UAT&SIT

import os
import requests
import webbrowser
import subprocess
import time
import smtplib

# 路径信息
project_name     = 'AutoPackageDemo'                 # 项目名称
project_path     = '/Users/pactepacterara/iOS'       # 项目路径
export_directory = '/Users/pactepacterara/Desktop'   # 输出的路径
exporrt_folder   = 'auto_archive'                    # 输出的文件夹


# 蒲公英app地址、USER_KEY、API_KEY,具体见蒲公英官网: 账户设置-->API信息
ipa_download_url = 'https://www.pgyer.com/manager/dashboard/app/xxxxxxxxxxxxxxxx'
USER_KEY         = 'xxxxxxxxxxxxxxxxxxxxxxxxxxxxxxxx'
API_KEY          = 'xxxxxxxxxxxxxxxxxxxxxxxxxxxxxxxx'


class AutoArchive(object):

    def __init__(self):
        pass

    def clean(self):

        print("\n\n===========开始clean操作===========")
        start = time.time()
        clean_opt = 'xcodebuild clean -workspace %s/%s.xcworkspace -scheme %s -configuration Release' % (project_path, project_name, project_name)
        clean_opt_run = subprocess.Popen(clean_opt, shell=True)
        clean_opt_run.wait()
        end = time.time()

        # clean 结果
        clean_result_code = clean_opt_run.returncode
        if clean_result_code != 0:
            print("===========clean失败,用时:%.2f秒===========" % (end - start))
        else:
            print("===========clean成功,用时:%.2f秒===========" % (end - start))
            self.archive()

    def archive(self):
        print("\n\n===========开始archive操作===========")

        subprocess.call(['rm', '-rf', '%s/%s' % (export_directory, exporrt_folder)])
        time.sleep(1)
        subprocess.call(['mkdir', '-p', '%s/%s' % (export_directory, exporrt_folder)])
        time.sleep(1)

        start = time.time()
        archive_opt = 'xcodebuild archive -workspace %s/%s.xcworkspace -scheme %s -configuration Release -archivePath %s/%s' %(project_path, project_name, project_name, export_directory, exporrt_folder)
        archive_opt_run = subprocess.Popen(archive_opt, shell=True)
        archive_opt_run.wait()
        end = time.time()

        # archive 结果
        archive_result_code = archive_opt_run.returncode
        if archive_result_code != 0:
           print("===========archive失败,用时:%.2f秒===========" % (end - start))
        else:
           print("===========archive成功,用时:%.2f秒===========" % (end - start))

        # 导出IPA
        self.export()

    def export(self):
        print("\n\n===========开始export操作===========")
        start = time.time()
        export_opt = 'xcodebuild -exportArchive -archivePath %s/%s.xcarchive -exportPath %s/%s -exportOptionsPlist %s/ExportOptions.plist' % ( export_directory,exporrt_folder,export_directory, exporrt_folder,export_directory)
        export_opt_run = subprocess.Popen(export_opt, shell=True)
        export_opt_run.wait()
        end = time.time()

        # ipa导出结果
        export_result_code = export_opt_run.returncode
        if export_result_code != 0:
            print("===========导出IPA失败,用时:%.2f秒===========" % (end - start))
        else:
            print("===========导出IPA成功,用时:%.2f秒===========" % (end - start))

        # 删除archive.xcarchive文件
        subprocess.call(['rm', '-rf', '%s/%s.xcarchive' % (export_directory, exporrt_folder)])
        self.upload('%s/%s/ZBank.ipa' % (export_directory, exporrt_folder))

    def upload(self, ipa_path):

        print("\n\n===========开始上传蒲公英操作===========")
        if ipa_path:

            # 蒲公英操作API
            # https://www.pgyer.com/doc/api
            url = 'http://www.pgyer.com/apiv1/app/upload'
            data = {
                    'uKey': USER_KEY,
                    '_api_key': API_KEY,
                    'installType': '2',
                    'password':pwd,
                    'updateDescription': description
            }
            files = {'file': open(ipa_path, 'rb')}
            r = requests.post(url, data=data, files=files)
            if r.status_code == 200:
                self.open_browser(self)

        else:
            print("\n\n===========没有找到对应的ipa===========")
            return

    @staticmethod
        # 上传成功,通过浏览器打开蒲公英网站
    def open_browser(self):
        webbrowser.open(ipa_download_url, new=1, autoraise=True)


if __name__ == '__main__':
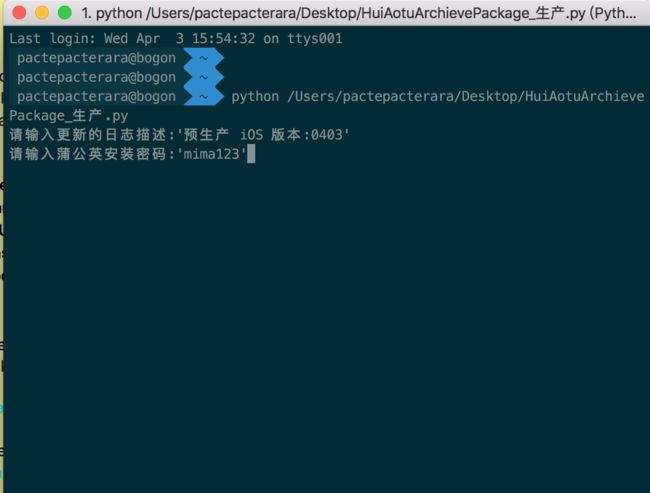
    description = input("请输入更新的日志描述:")
    pwd=input("请输入蒲公英安装密码:")
    archive = AutoArchive()
    archive.clean()
终端执行命令:
$ python /Users/pactepacterara/Desktop/HuiAotuArchievePackage_生产.py
注意事项:
1.问题场景:
当现有描述文件发生改变,比如在开发者中心维护了新的测试设备,更新-->下载--> 安装描述文件以后,继续使用先前配置好的python进行打包时,发现新注册的测试设备并没有添加到描述中,自然也就无法正确安装,对ipa文件进行解包发现描述文件中确实不包含新注册的设备.
2.解决办法:更新描述文件后,重新使用xcode成功打包一次后,在使用python打包
3.原因:从苹果开发者中心网站下载的描述文件并非原封不动的打进我们的app包里面的,而是经过了xcode的二次包装,其中签名时生成一个,导出ipa时生成一个.
当我们选择先清空xcode本地安装的描述文件,再安装最新的描述文件,再运行python自动打包脚本时,会在导出ipa步骤时报错,具体报错为找不到对应的描述文件.


