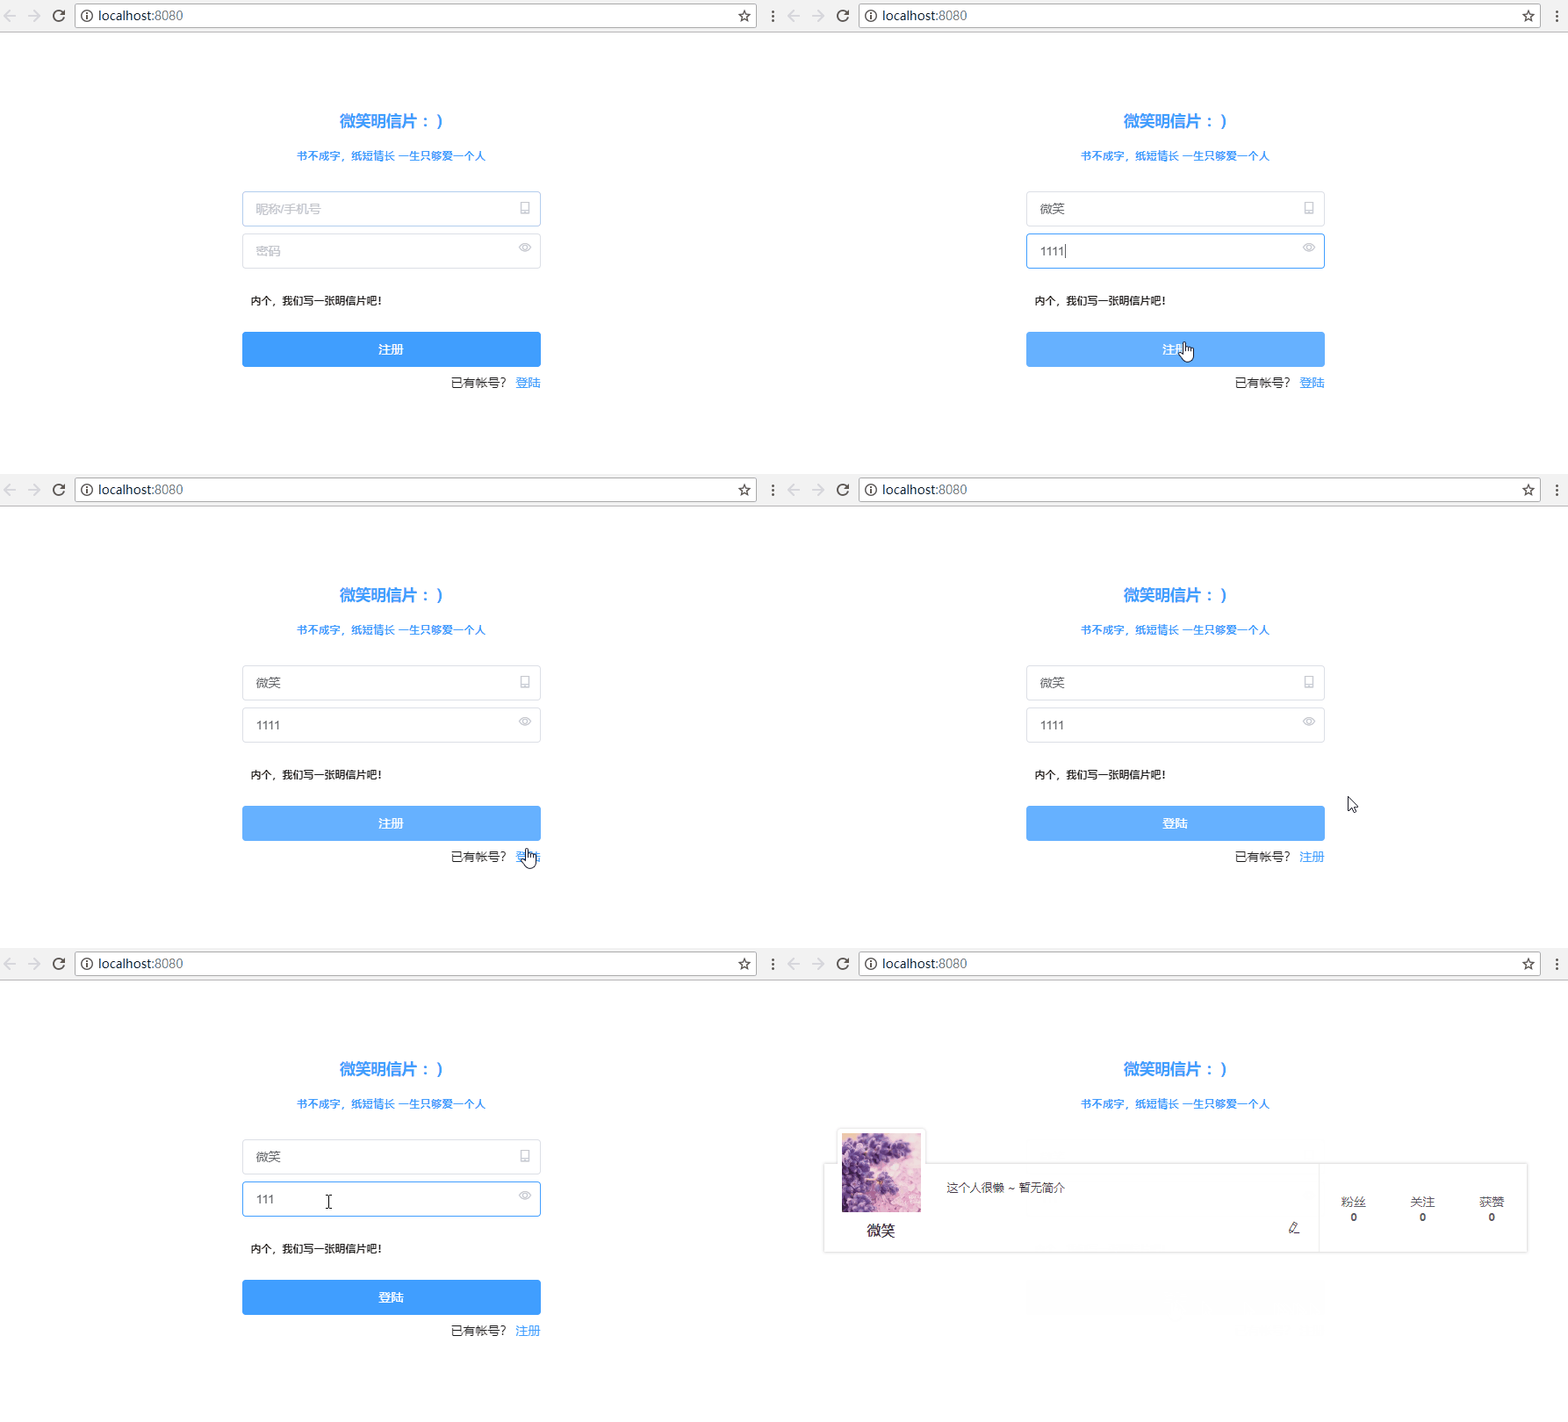
想做一个微笑明信片:)边做边总结点吧
前端要实现注册登陆,创建明信片,上传分享到首页的明信片精选,用户可以互相关注、点赞互动。
后台实现对用户管理及用户作品的增删该查,进行运营统计。
项目地址:
前端:https://github.com/woaigmz/postcard
后台:https://github.com/woaigmz/mp
欢迎大家fork star 提出建议,感谢:)
出门装(环境):
①node(自带npm)
mac:通过homebrew 安装 node
安装homebrew
/usr/bin/ruby -e "$(curl -fsSL https://raw.githubusercontent.com/Homebrew/install/master/install)"
安装node
brew install node
win:https://nodejs.org/en/download/
②vscode(code - debug)强大的调试功能,node后台的利器
https://code.visualstudio.com/
③chrome
最新版通过科学上网工具下载
④mongodb
mac:
brew install mongodb
配置:https://github.com/woaigmz/woaigmz/blob/master/mongodb-mac
win:http://dl.mongodb.org/dl/win32/x86_64
配置:https://github.com/woaigmz/woaigmz/blob/master/mongodb-win
mongon 可视化工具 https://robomongo.org/download
对线装 :
①cnpm
npm install -g cnpm --registry=https://registry.npm.taobao.org
②webpack
可单独安装,vue-cli安装的不是最新的
cnpm install webpack -g
③vue-cli脚手架,用于帮助搭建所需的模板框架
cnpm install --global vue-cli
④vue全家桶(vue-router,vue-resource,vuex)
建议安装到本地npm install xxx --save  //cd 到 项目目录下
cnpm install vue-router --save
cnpm install vue-resource --save
cnpm install vuex --save
前端
创建项目:
首先我们要通过vue-cli脚手架创建一个项目:
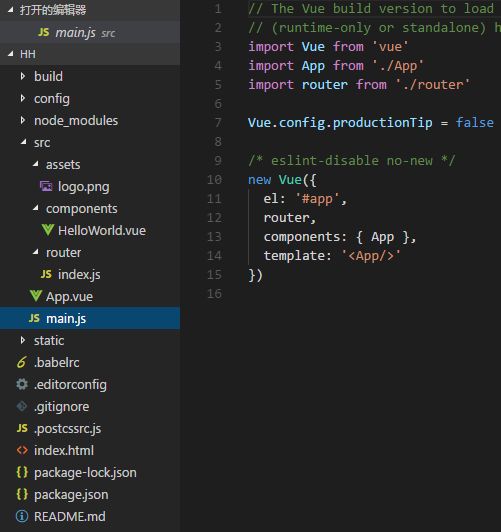
目录结构:
入口是main.js 引入项目所需组件:
element-ui :http://element-cn.eleme.io/#/zh-CN/component/installation
import Vue from 'vue'
import App from './App'
import router from './router'
import ElementUI from 'element-ui';
import 'element-ui/lib/theme-chalk/index.css';
import VueResource from 'vue-resource'
Vue.config.productionTip = false
Vue.use(ElementUI);
Vue.use(VueResource);
/* eslint-disable no-new */
new Vue({
el: '#app',
router,
components: { App },
template: 'vue-router的使用:
App.vue可以直接作为放置路由界面的容器:
router/index.js 引入页面,配置路由,可以潜逃,具体官网 https://router.vuejs.org/zh/guide/
import Vue from 'vue'
import Router from 'vue-router'
import HelloWorld from '@/components/HelloWorld'
import home from '@/components/HomePage'
import personal from '@/components/PersonalPage'
import toolbar from '@/components/Toolbar'

Vue.use(Router)

export default new Router({
 mode:'history',//可设置模式
 routes: [
   {
     path: '/',
     name: 'home',
     component: home
   },
   {
     path: '/home',
     name: 'home',
     component: home
   },
   {
     path: '/personal',
     name: 'personal',
     component: personal
   },
   {
     path: '/toolbar',
     name: 'toolbar',
     component: toolbar
   },
   {
     path: '/hello',
     name: 'HelloWorld',
     component: HelloWorld
   }
 ]
})
配置路由,使用方法 =>
代码方式:
 goPersonalPage: function() {
     console.log(this);
     this.$router.push({ path: "/personal" });
   },
element-ui使用:HomePage.vue
内个,我们写一张明信片吧!
{{user_action}}
已有帐号?
{{user_action_ctrl}}
![]() {{user_form.name!=""?user_form.name:"微笑"}}
这个人很懒 ~ 暂无简介
{{user_form.name!=""?user_form.name:"微笑"}}
这个人很懒 ~ 暂无简介
注意,标签是element-ui的不可再使用class,要用id设置,否则会出现一些问题,需要看element-ui源码
vueresource使用:
register函数:es6的Promise暂时没看到,后面再优化代码
register: function() {
     var that = this;
     this.user_form.name = this.input_name;
     this.user_form.password = this.input_pwd;

     if (utils.isEmpty(this.input_name) || utils.isEmpty(this.input_pwd)) {
       that.showSnap("error", "输入格式错误");
       console.log("111");
     } else {
       this.$http
         .post("http://localhost:3001/api/register", this.user_form)
         .then(
           response => {
             if (response.ok) {
               if (
                 !utils.isEmpty(response.body.data.name) &&
                 !utils.isEmpty(response.body.data.password)
               ) {
                 if (response.body.code == "201") {
                   that.showSnap("warning", response.body.message);
                 } else {
                   that.showSnap("success", response.body.message);
                   //TODO:登陆
                   that.login_form.name = response.body.data.name;
                   that.login_form.password = response.body.data.password;
                   that.login_form.token = response.body.data.token;
                   that.login();
                 }
               } else {
                 that.showSnap("success", "响应格式错误");
               }
             }
           },
           () => {
             that.showSnap("error", "注册失败,请检查网络连接");
           }
         );
     }
   },
后台
express + mongoess +mongodb +body-parser(没有这个无法解析body)
入口app.js
const express  = require('express');
const mongooes = require('mongoose');
const bodyParser = require('body-parser');
const user = require('./router/user');
const config = require('./config/params');
const logger = require('morgan');

const db = mongooes.connect(config.mongodb);

const app = express();
//设置全局参数 'jwt-secret'
app.set('jwt-secret', config.jwtsecret);
app.use(bodyParser.json());
//body parser 拿到 req
app.use(bodyParser.urlencoded({extended:false}));
//跨域访问
app.use("*", function (req, res, next) {
   res.header('Access-Control-Allow-Origin', '*');
   res.header("Access-Control-Allow-Headers", "Content-Type,Content-Length, Authorization, Accept,X-Requested-With");
   res.header("Access-Control-Allow-Methods","PUT,POST,GET,DELETE,OPTIONS");
   if (req.method === 'OPTIONS') {
     res.send(200)
   } else {
     next()
   }
 });
//morgan 输出日志到控制台
app.use(logger('dev'));

//路由
app.use('/api',user);

//开启服务
app.listen(config.serverPort,() => {
   console.log('app listening on port'+config.serverPort);
})
morgan 打印日志到终端,很好用的工具,能快速定位错误
/config/params 将一些重要参数抽离出来:
module.exports =  {
   serverPort:3001,
   mongodb : "mongodb://localhost:27017/mp",
   jwtsecret:"5525278",
}
控制器 Controller => router/
eg:user.js 引入Model,定义api,最后处理完逻辑通过router导出
const express = require('express');
const router = express.Router();
const UserModel = require('../model/userSchema');
const StringUtil = require('../utils/StringUtil');
const JsonUtil = require('../utils/JsonUtil');
const TokenCheckUtil = require('../utils/TokenCheckUtil');


//登陆
router.post("/login", (req, res) => {

 UserModel.where({ name: req.body.name }).findOne((err, success) => {
   if (err) {
     JsonUtil.response(res, '200', err, "返回错误");
   } else {
     if (!StringUtil.isEmpty(success)) {
       console.log(success);
       if (req.body.password == success.password) {
         var token = TokenCheckUtil.getToken({ _id: success._id },req.app);
         UserModel.update({ _id: success._id }, { $set: { token: token }}).exec();
         JsonUtil.response(res, '200', {
           "username": success.name,
           "password": success.password,
           "token":token
         }, "登陆成功");
       } else {
         JsonUtil.response(res, '200', {
           "username": req.body.name,
           "password": req.body.password,
           "token":""
         }, "密码错误");
       }
     }else{
       JsonUtil.response(res, '200', {
         "username": req.body.name,
         "password": req.body.password,
         "token":""
       }, "用户不存在,请先注册");
     }
   }
 });

})


//注册  code == '201' 已注册
router.post("/register", (req, res) => {
 //name唯一     name 已注册?“已注册”:“creat user”;
 UserModel.where({ name: req.body.name }).findOne((err, success) => {
   if (err) {
     JsonUtil.response(res, '200', err, "返回错误");
   } else {
     if (StringUtil.isEmpty(success)) {
       if (StringUtil.isEmpty(req.body.name) || StringUtil.isEmpty(req.body.password)) {
         JsonUtil.response(res, '200', {
           "name": req.body.name,
           "password": req.body.password
         }, "用户名密码不为能空");
       } else {
         UserModel.create(req.body, (err, success) => {
           if (err) {
             JsonUtil.response(res, '200', err, "返回错误");
           } else {
             JsonUtil.response(res, '200', success, "返回成功");
           }
         });
       }
     } else {
       JsonUtil.response(res, '201', success, "返回成功,账号已存在");
     }
   }
 });
})


module.exports = router;
工具类:
JsonUtil 规范返回值 code data message:
exports.response =function(res,code,data,message){
   var str = {
     "code": code,
     "data": data,
     "message": message
   };
   res.end(JSON.stringify(str));
 };
StringUtil 做一些字符验证:
exports.isEmpty = function(obj){
   if(typeof obj == "undefined" || obj == null || obj == ""){
       return true;
   }else{
       return false;
   }
 }
TokenCheckUtil 做jwt校验:
注意app参数,通过req.app获取,因为通过require加载即使在app导出这里引入,也会延迟导致拿不到app对象
const jwt = require('jsonwebtoken');

exports.getToken = function (obj,app) {
   return jwt.sign(obj, app.get('jwt-secret'), {
       expiresIn: 60 * 60 * 72
   });
}

//api 请求校验 token
exports.verifyToken = function(req, res, next){

   var token = req.body.token || req.query.token || req.headers['x-access-token'];
   if(token){
       jwt.verify(token, req.app.get('jwt-secret') , function(err,decoded) {
           if(err) {
             return res.json({code:"401",message:'token错误'})
           }else {
             //解析成功
             next()
           }
         })
   }else{
       return res.status(403).json({
           code: '403',
           message: '没有提供token!'
       });
   }

}
数据模型Model
model/userSchema.js ORM模型映射数据库表:
const mongoose = require('mongoose')

const userSchema = mongoose.Schema({
 name :String,
 age : String,
 sex : String,
 address : String,
 imgArr:String,
 phone:String,
 password:String,
 token:String,
}, { collection: 'user'})
//这里mongoose.Schema要写上第二个参数,明确指定到数据库中的哪个表取数据


const User = module.exports = mongoose.model('user',userSchema);
暂时到这里,后面做点其他再更新:)
谢谢 φ(゜▽゜*)♪


