由于iOS运行在不同设备之上,因而作为代码搬运工的我们经常需要对不同的屏幕尺寸进行适配。我们常用的方法有NSLayoutConnstraints类、xib或storybroad、Masonry等第三方库。
xib或story broad
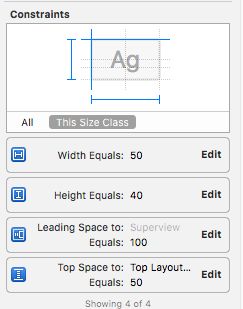
xib或storyborad.png
NSLayoutConstraints类
- 常用创建方法
    // 创建按钮
    _button1 = [UIButton new];
    [_button1 setTitle:@"点我" forState:0];
    [_button1 setTitleColor:[UIColor blackColor] forState:0];
    [_button1 addTarget:self action:@selector(updateConstraints) forControlEvents:UIControlEventTouchUpInside];
    // 关闭自动约束,必须关闭
    _button1.translatesAutoresizingMaskIntoConstraints = NO;
    [self.view addSubview:_button1];

    _button2 = [UIButton new];
    [_button2 setTitleColor:[UIColor blackColor] forState:0];
    [_button2 setTitle:@"就不点" forState:0];
    // 关闭自动约束
    _button2.translatesAutoresizingMaskIntoConstraints = NO;
    [self.view addSubview:_button2];

    // 创建约束
    //当约束与其他试图相关时,参数multiplier不能为0
    NSLayoutConstraint * topConstraint = [NSLayoutConstraint constraintWithItem:_button1 attribute:NSLayoutAttributeTop relatedBy:NSLayoutRelationEqual toItem:self.view attribute:NSLayoutAttributeTop multiplier:1 constant:30];
    NSLayoutConstraint * leftConstraint = [NSLayoutConstraint constraintWithItem:_button1 attribute:NSLayoutAttributeLeft relatedBy:NSLayoutRelationEqual toItem:self.view attribute:NSLayoutAttributeLeft multiplier:1 constant:30];
    NSLayoutConstraint * widthConstraint = [NSLayoutConstraint constraintWithItem:_button1 attribute:NSLayoutAttributeWidth relatedBy:NSLayoutRelationEqual toItem:nil attribute:0 multiplier:0 constant:70];
    NSLayoutConstraint * heightConstraint = [NSLayoutConstraint constraintWithItem:_button1 attribute:NSLayoutAttributeHeight relatedBy:NSLayoutRelationEqual toItem:nil attribute:0 multiplier:0 constant:40];

    NSLayoutConstraint * top1Constraint = [NSLayoutConstraint constraintWithItem:_button2 attribute:NSLayoutAttributeTop relatedBy:NSLayoutRelationEqual toItem:self.view attribute:NSLayoutAttributeTop multiplier:1 constant:130];
    NSLayoutConstraint * left1Constraint = [NSLayoutConstraint constraintWithItem:_button2 attribute:NSLayoutAttributeLeft relatedBy:NSLayoutRelationEqual toItem:self.view attribute:NSLayoutAttributeLeft multiplier:1 constant:30];
    NSLayoutConstraint * width1Constraint = [NSLayoutConstraint constraintWithItem:_button2 attribute:NSLayoutAttributeWidth relatedBy:NSLayoutRelationEqual toItem:nil attribute:0 multiplier:0 constant:70];
    NSLayoutConstraint * height1Constraint = [NSLayoutConstraint constraintWithItem:_button2 attribute:NSLayoutAttributeHeight relatedBy:NSLayoutRelationEqual toItem:nil attribute:0 multiplier:0 constant:40];

    // 添加自身相关约束
    [_button1 addConstraints:@[widthConstraint, heightConstraint]];
    [_button2 addConstraints:@[width1Constraint, height1Constraint]];
    // 添加间距等约束
    [self.view addConstraints:@[topConstraint, leftConstraint, top1Constraint, left1Constraint]];

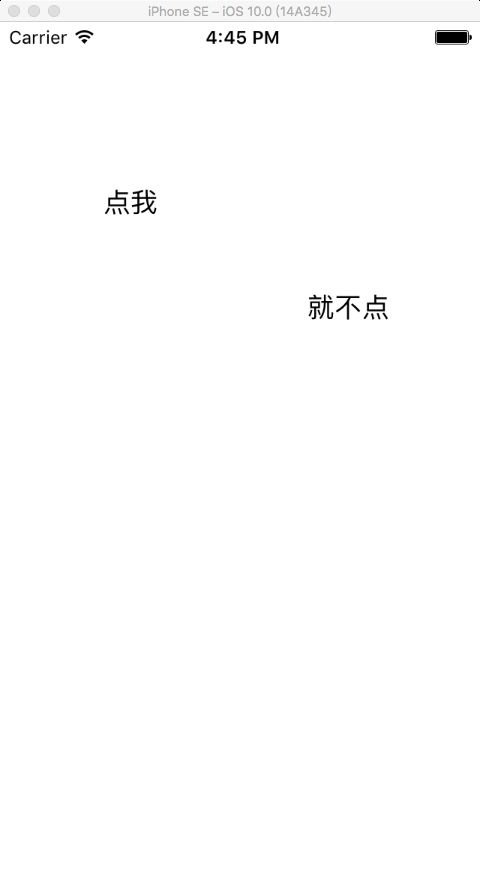
constraintWithItem.png
- 通过指定格式创建约束
    NSDictionary * viewsDic = @{@"button1":_button1, @"button2":_button2};

    NSArray * hConstraints = [NSLayoutConstraint constraintsWithVisualFormat:@"H:|-(30)-[button1]-(30)-[button2(button1)]-(30)-|" options:0 metrics:@{@"width":@(70)} views:viewsDic];
    NSArray * vConstraints = [NSLayoutConstraint constraintsWithVisualFormat:@"V:|-(30)-[button1(height)]-(30)-[button2(40)]" options:0 metrics:@{@"height":@(40)} views:viewsDic];

    // button1和button2左对齐
//    CGFloat W = self.view.frame.size.width;
//    NSArray * hConstraints = [NSLayoutConstraint constraintsWithVisualFormat:@"H:|-(30)-[button1(width)]" options:0 metrics:@{@"width":@(W - 60)} views:viewsDic];
//    NSArray * h2Constraints = [NSLayoutConstraint constraintsWithVisualFormat:@"H:|-(30)-[button2(width)]" options:0 metrics:@{@"width":@(W - 60)} views:viewsDic];
//    NSArray * vConstraints = [NSLayoutConstraint constraintsWithVisualFormat:@"V:|-(30)-[button1(height)]-(30)-[button2(40)]" options:0 metrics:@{@"height":@(40)} views:viewsDic];

//    [self.view addConstraints:h2Constraints];
    [self.view addConstraints:hConstraints];
    [self.view addConstraints:vConstraints];
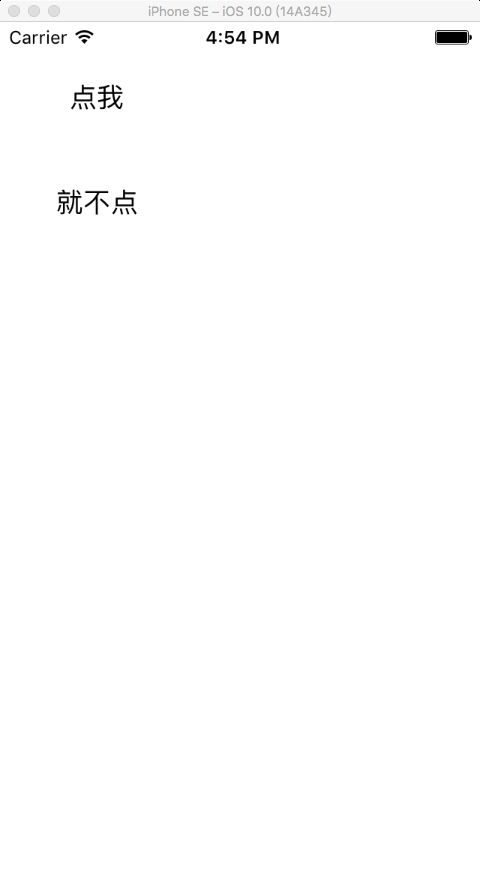
constraintWithFormat.png
例:
NSArray * hConstraints = [NSLayoutConstraint constraintsWithVisualFormat:@"H:|-(30)-[button1]-(30)-[button2(button1)]-(30)-|" options:0 metrics:@{@"width":@(70)} views:viewsDic];
这句代码中@"H:|-(30)-[button1]-(30)-[button2(button1)]-(30)-|" "所表示的意思是:_button1与父视图的左边间距是30,_button1的宽度为width(width的值即后面字典中的值);_button2与_button1的左间距是0,宽度和_button1的宽度相等。
参数解释及看法
- format:可视样式字符串,具体字符释义如下:
"H:" 、"V:" :表示这是水平或垂 直方向的约束
"|":表示父视图的边界
"-()-":表示间距
"[]":表示在水平上的宽度或垂直上的高度 - options:format中约束的规则,常置为0
- metrics:字符串中各数值的字典。key为字符串中使用名称,value为代表的值(NSNumber)
- views:相同层级的视图的字典。key为字符串中使用的名称,value为对应的视图
- 看法:由于
format中只有H、V作为约束方向,所以一次只能创建一条水平线或垂线上的控件之间的约束;设置对齐等效果时代码繁琐,不如Masonry、constraintWithItem:attribute:relatedBy:toItem:attribute:multiplier:constant:方便,所以这种创建方法不应广泛使用
Masonry等第三方库
使用第三方进行手写约束,目前我就使用过Masonry。所以一下代码为Masonry的布局代码。
    __weak typeof(self) weakSelf = self;

    [_button1 mas_makeConstraints:^(MASConstraintMaker *make) {
        make.top.equalTo(weakSelf.view.mas_top).offset(30);
        make.left.equalTo(weakSelf.view.mas_left).offset(30);
        make.width.mas_equalTo(70);
        make.height.equalTo(@40);
    }];

    [_button2 mas_makeConstraints:^(MASConstraintMaker *make) {
        make.top.equalTo(weakSelf.button1.mas_bottom).offset(30);
        make.left.equalTo(weakSelf.button1.mas_left);
        make.width.equalTo(weakSelf.button1.mas_width);
        make.height.equalTo(weakSelf.button1.mas_height);
    }];
constraintWithMasonry.png
如上代码表示
button1与父视图的左上间距都为30,宽为70,高为40;其中宽高都为常量,但我们使用了两个语法:
mas_equalTo()括号中需要传入的值为基本类型,而
equalTo()中需要传入的值为
id类型。
更新约束
- NSLayoutConstraint
[UIView animateWithDuration:1 animations:^{
            for (NSLayoutConstraint * constraint in weakSelf.view.constraints) {
                if (constraint.firstItem == weakSelf.button1 && constraint.firstAttribute == NSLayoutAttributeTop) {
                    constraint.constant = 100;
                    break;
                }
            }
            [weakSelf.view updateConstraintsIfNeeded];
        }];
找到你需要改变的约束对象,然后改变其constant值,最后调用updateConstraintsIfNeeded。
- Masonry
  [UIView animateWithDuration:1 animations:^{
            [weakSelf.button1 mas_updateConstraints:^(MASConstraintMaker *make) {
                make.top.equalTo(weakSelf.view.mas_top).offset(100);
            }];
        }];
Masonry更新约束需调用mas_updateConstraints:,在block中重新设置需要改变的约束即可。
参考资料
- 使用Auto Layout中的VFL(Visual format language)--代码实现自动布局
- Masonry Github仓库
- NSLayoutConstraintDemo
- 注意:本文所有代码都是在XCode 8 的环境下编写的;若有不对之处欢迎指出。