aircraft-war(一)
Game Scene 布局
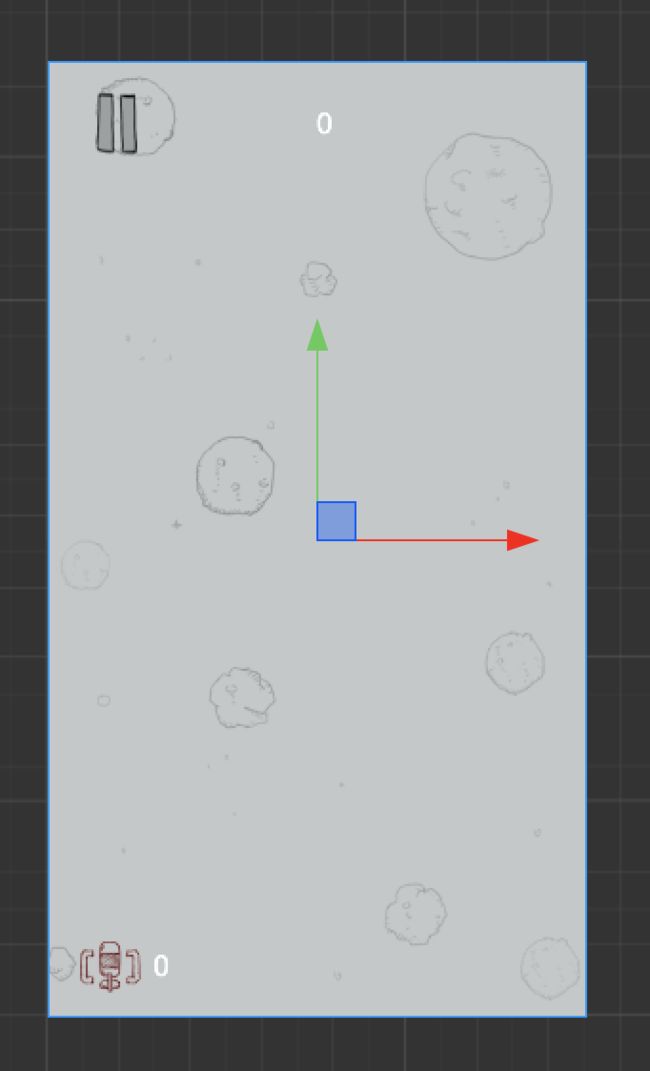
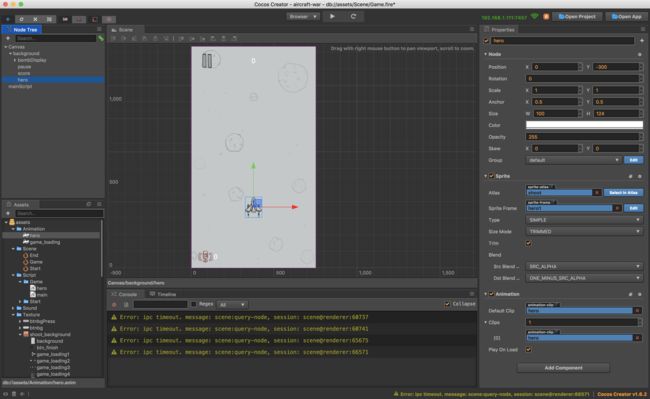
首先制作场景中的部件,早cocos creator中创建,然后放到适当的位置:
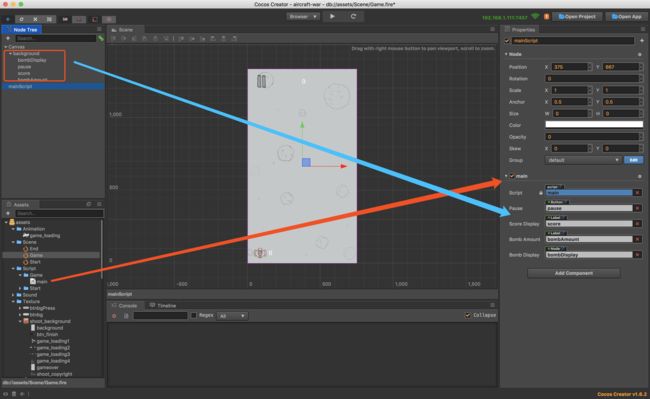
接下来将组件绑定到脚本上,先创建一个main脚本作为Game场景的,首先要考虑的是界面中的固定布局元素,比如:分数,暂停按钮,炸弹等。所以脚本中先构造这些布局元素:
properties: {
      pause: cc.Button,
      scoreDisplay: cc.Label,
      bombAmount: cc.Label,
      bombDisplay: cc.Node
    },
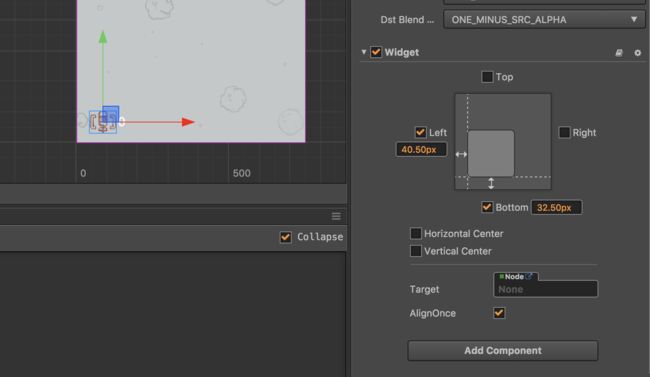
接下来分别给这些组件添加widge布局组件进行布局处理。举一个例子,其余的也差不多类似:
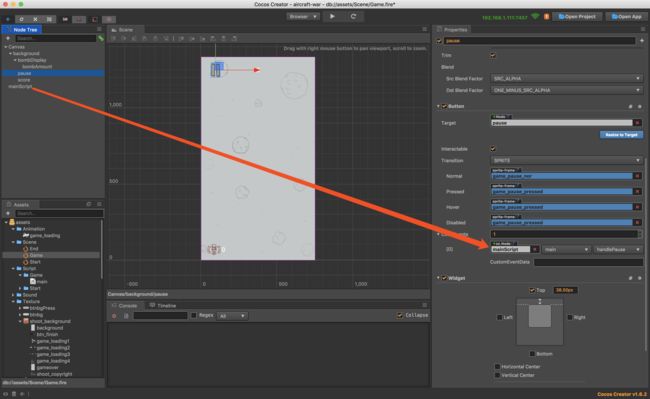
接下来处理暂停按钮,要让暂停按钮按下后替换成开始的按钮,实现的思路很多,例如切换两个button组件,这里使用替换图片的方式。首先要在main脚本中添加按钮图片组:
let pause = false;

cc.Class({
    extends: cc.Component,

    properties: {
        pause: cc.Button,
        scoreDisplay: cc.Label,
        bombAmount: cc.Label,
        bombDisplay: cc.Node,
        pauseSprite: {
          default: [],
          type: cc.SpriteFrame,
          tooltip:'暂停按钮图片组',
        },
    },

    // use this for initialization
    onLoad: function () {

    },

    handlePause: function () {
        if (pause) {
            this.pause.normalSprite = this.pauseSprite[0];
            this.pause.pressedSprite = this.pauseSprite[1];
            this.pause.hoverSprite = this.pauseSprite[1];
            return pause = !pause
        }
        this.pause.normalSprite = this.pauseSprite[2];
        this.pause.pressedSprite = this.pauseSprite[3];
        this.pause.hoverSprite = this.pauseSprite[3];
        return pause = !pause;
    }


    // called every frame, uncomment this function to activate update callback
    // update: function (dt) {

    // },
});
这里需要注意
在handlePause中使用了ES6的箭头函数语法,但是this找不到上下文,有可能是兼容上还有些问题,保持function写法即可。
这时可以启动游戏试试看是否如预期的结果那样。
Hero移动
接下来来制作Hero。首先想一想可能面临的问题都有哪些?
首先要处理玩家拖动Hero移动,接下来Hero是可以发射子弹的,当然,Hero被敌机撞击是会爆炸的,爆炸涉及的是碰撞检测后播放爆炸动画。
那么先从Hero移动开始做起,先创建Hero精灵。
创建好Hero精灵后,需要将hero图片添加到here节点上的Sprite属性中的Sprite Frame中。然后还要添加一个动画组件,并且在左下角的资源区创建Animation资源。然后将其添加到hero节点上的Animation组件中。
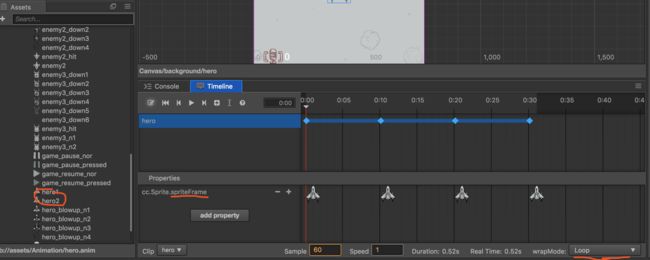
编辑动画如下所示:
接下来处理Hero移动,游戏中按住Hero来进行拖动,所以需要监听“触摸事件”类型。CCC系统事件类型创建hero脚本来处理Hero相关的事物。
cc.Class({
    extends: cc.Component,
    properties: {

    },
    // use this for initialization
    onLoad: function () {
        // 监听拖动事件
        this.node.on('touchmove', this.onHandleHeroMove, this);
    },

    onHandleHeroMove: function (event) {
        // touchmove事件中 event.getLocation() 获取当前已左下角为锚点的触点位置(world point)
        let position = event.getLocation();
        // 实际hero是background的子元素,所以坐标应该是随自己的父元素进行的,所以要将“world point”转化为“node point”
        let location = this.node.parent.convertToNodeSpaceAR(position);
        this.node.setPosition(location);
    }
});
接下来将脚本绑定到Hero精灵上就可以启动看看Hero已经可以被拖动了。
Hero发射子弹
先想一下发射子弹这个动作,需要怎么去实现?不知道大家有没有注意过大街上的LED广告牌,横向移动的字会让你觉得“字”是在移动的。而原理和帧动画差不多,就是每个亮起的显示单元不停的在变化,从而造成“移动的错觉”。
子弹是否可以像这样的实现思路去做呢?把子弹依次排开,铺满整个屏幕,Hero有一个出发点去触发亮起的子弹,然后依次亮起该列向上所有的子弹。我觉得是可以的,说实话第一次看到这个游戏,第一时间想到的就是LED显示牌。
那么还是换一种更“cocos”的方式来做,和刚刚实现Hero移动的方式一样。子弹是自动发射,所以要处理的是获取到当前Hero的位置,然后从当前位置,不断累加“positionY”的值来实现向上移动。
无限子弹(基础版)
首先要明确一下游戏规则,游戏中分为两种类型的子弹,普通单道子弹和道具双道子弹,现在先来制作普通单道子弹。
有点需要注意,ccc中不断重复创建的组件做成Prefab这个是很有必要的,虽然不用Prefab也是可以达到目的。
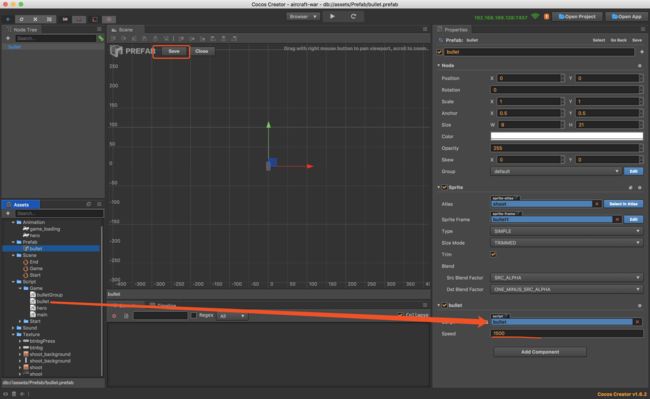
首先把图片资源从资源管理器中拖到层级管理器中,在属性检查器中调整好大小等参数后,将其拖拽到资源管理器相对应的目录下即可,然后删除层级管理器中的原资源即可。(图中属性是随意拖拽显示的,具体请自己尝试。)
接下来开始编写脚本,首先需要知道的参数应该有位置、速度这两个参数目前就够了,位置需要通过获取Hero的位置原点,速度可以由自己给出,所以脚本如下:
// 提供思路参考用的代码
cc.Class({
    extends: cc.Component,
    properties: {
        speed: cc.Integer,
        bullet: cc.Prefab
    },
    // use this for initialization
    onLoad: function () {
        // cc.instantiate() 克隆指定的任意类型的对象,或者从 Prefab 实例化出新节点。
        this.newNode = cc.instantiate(this.bullet);
        this.node.addChild(this.newNode);
        this.newNode.setPosition({x: 0, y: 0});
    },
    // called every frame, uncomment this function to activate update callback
    update: function (dt) {
        this.newNode.y += dt * this.speed;
    },
});
起初我的想法是,将上述脚本绑在Hero上,这样{x: 0, y: 0}就是子弹发出的起始点,但是实际运行中,出现的问题是,Hero是需要移动的,子弹Prefab也就作为了Hero的子元素,会随着Hero移动而移动,如下GIF所以:
所以子弹应该单独作为一层去处理,或者将bullet脚本绑在“background”层上,然后将Hero的位置通过传参的形式传过来即可。参考代码是单独用子弹层处理所有子弹的事件,所以也参考这种做法,用单独的层级去处理这个层级的所有相关事物。
在层级管理器中创建空节点并命名为bulletGroup,这个节点需要做的事就是处理Hero与Bullet的发射位置与发射频率。所以首先需要的就是Hero与Bullet-Prefab,发射频率的话,需要用到ccc中的定时器来实现固定间隔创建bullet节点并发射炮弹的功能,所以需要一个cc.Integer类型的变量。
有一个非常值得注意的性能问题:
在运行时进行节点的创建(cc.instantiate)和销毁(node.destroy)操作是非常耗费性能的,因此在比较复杂的场景中,通常只有在场景初始化逻辑(onLoad)中才会进行节点的创建,在切换场景时才会进行节点的销毁。
所以,要实现不间断发射子弹,除了定时器,还需要引入对象池(cc.NodePool)。
无限子弹(进阶版)
下面开始构建脚本:
首先修改脚本bullet.js,bullet作为Prefab,只需要完成自己作为子弹的使命,那就是发射,销毁,碰撞检测。所以先来做一个只有发射的基础子弹脚本。
cc.Class({
    extends: cc.Component,

    properties: {
        speed: cc.Integer,
    },

    // use this for initialization
    onLoad: function () {

    },
    // called every frame, uncomment this function to activate update callback
    update: function (dt) {
        this.node.y += dt * this.speed;
    },
});
然后将脚本添加到bullet的Prefab上,设定速度为1500。
接着开始编写bulletGroup的脚本:
cc.Class({
    extends: cc.Component,

    properties: {
        bullet: cc.Prefab,
        hero: cc.Node,
        rate: cc.Integer
    },

    onLoad: function () {
            // 创建子弹对象池
        this.genBulletPool();
            // 设置定时器,每个0.2s创建一个新的bullet
        this.schedule(function () {
            this.startShoot(this.bulletPool)
        }.bind(this), this.rate);
    },

    genBulletPool: function () {
        this.bulletPool = new cc.NodePool();
        let initCount = 100;
        for (let i = 0; i < initCount; ++i) {
            let newBullet = cc.instantiate(this.bullet); // 创建节点
            this.bulletPool.put(newBullet); // 通过 putInPool 接口放入对象池
        }
    },
    //获取子弹位置
    getBulletPosition: function(){
        let heroP = this.hero.getPosition();
        let newV2_x = heroP.x;
        let newV2_y = heroP.y;
        return cc.p(newV2_x, newV2_y);
    },
      // 发射子弹
    startShoot: function (pool) {
        let newNode = null;
        if (pool.size() > 0) {
            newNode = pool.get();
            this.node.addChild(newNode);
            let p = this.getBulletPosition();
            newNode.setPosition(p);
        }
    },
    //销毁子弹
    destroyBullet: function (bullet) {
    }

    // called every frame, uncomment this function to activate update callback
    // update: function (dt) {

    // },
});
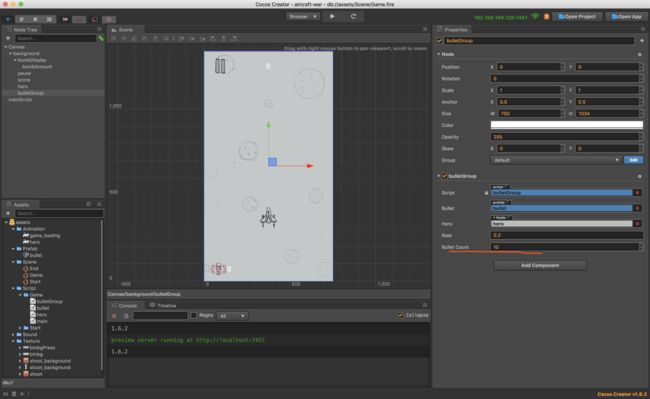
然后将组建绑到脚本上:
在bulletGroup脚本中,直接给对象池中放了一百发子弹,打完了却没有回收,这是不合理的,接下来要处理的就是回收资源。要注意的是对象池中的数量与发射子弹的关系,如果对象池中的对象用完了,而这时却没有及时补充,就会“延迟发货”。可以试着调整bulletCount来验证效果。如果对象池中的对象太多,每次最多只能用10个,之后就会被补充进来,那么剩下的就会浪费了。
如下bulletGroup.js:
cc.Class({
    extends: cc.Component,

    properties: {
        bullet: cc.Prefab,
        hero: cc.Node,
        rate: cc.Integer,
        bulletCount: {
            default: 10,
            type: cc.Integer
        }
    },

    onLoad: function () {
        this.genBulletPool();
        this.schedule(function () {
            this.startShoot(this.bulletPool)
        }.bind(this), this.rate);
           // 将对象池添加到window对象中,方便浏览器查看对象池状态
        window.pool = this.bulletPool;
    },

    genBulletPool: function () {
        this.bulletPool = new cc.NodePool();
        for (let i = 0; i < this.bulletCount; ++i) {
            let newBullet = cc.instantiate(this.bullet); // 创建节点
            this.bulletPool.put(newBullet); // 通过 putInPool 接口放入对象池
        }
    },
    //获取子弹位置
    getBulletPosition: function(){
        let heroP = this.hero.getPosition();
        let newV2_x = heroP.x;
        let newV2_y = heroP.y;
        return cc.p(newV2_x, newV2_y);
    },
    startShoot: function (pool) {
        let newNode = null;
        if (pool.size() > 0) {
            newNode = pool.get();
            this.node.addChild(newNode);
            let p = this.getBulletPosition();
            newNode.setPosition(p);
            newNode.getComponent('bullet').bulletGroup = this;
        }
    },

    // called every frame, uncomment this function to activate update callback
    // update: function (dt) {

    // },
});
子弹的销毁就是当子弹飞出屏幕之后,将其重新放回对象池中,这样一直都是对象池中的对象在被使用,而没有不断创建新的对象。目前先在bullet脚本中去处理对象销毁。
cc.Class({
    extends: cc.Component,

    properties: {
        speed: cc.Integer,
    },

    // use this for initialization
    onLoad: function () {

    },
    // called every frame, uncomment this function to activate update callback
    update: function (dt) {
        this.node.y += dt * this.speed;
        if (this.node.y > this.node.parent.height){
            this.bulletGroup.bulletPool.put(this.node);
        }
    },
});
目前无限子弹类型已经差不多完成了,但是只是实现了功能,接下来做双弹道的子弹。
