2019.3.23
因为自己没什么动力,真的很久没有顺着自己的心思来学习了,趁着有数据分析的课,今天一大早起来学习一下Numpy库的使用。特以此文记录学习进度。
一.ndarray数组的创建
1. 概述
numpy官网
NumPy是使用Python进行科学计算的基础包。它包含其他内容:一个强大的N维数组对象、复杂的(广播)功能、用于集成C / C ++和Fortran代码的工具、有用的线性代数,傅里叶变换和随机数功能除了明显的科学用途外,NumPy还可以用作通用数据的高效多维容器。可以定义任意数据类型。这使NumPy能够无缝快速地与各种数据库集成。Numpy具有两类对象,分别是ndarray(N-dimensional Array Object)以及ufunc(Universal Function Object),前者类似于多维数组,后者则是可以对前者操作的函数。
2. 基本方法
- numpy.array(object, dtype=None, copy=True, order='K', subok=False, ndmin=0)
numpy.array()是最原始的手动生成ndarray对象的方法。其中的object 需传入一个数组对象(n维)。注:当ndarray的维度过大时,numpy的输出会折叠中间结果。如果想要取消折叠。需要这样设置
np.set_printoptions(threshold=np.nan)
# Use the numpy.array to create the ndarray
import numpy as np
array1 = np.array([[1, 2, 3], [4, 5, 6]]) #必须传入一个列表或数组
"""Output:
[[1 2 3]
 [4 5 6]]
"""
-
常用属性
常用属性 属性说明 ndim 矩阵的秩,即轴的数量或维度的数量 shape 数组的维度,对于矩阵,n 行 m 列 size 数组元素的总个数,相当于 .shape 中 nm 的值* dtype ndarray 对象的元素类型 real ndarray元素的实部 imag ndarray 元素的虚部 -
使用样例
# Use the numpy.array to create the ndarray
import numpy as np
array1 = np.array([[1, 2, 3], [4, 5, 6]])
print(array1.ndim)
""" Output: 2 """
- arange([start]stop[,step], dtype=Nope)
numpy.arange()用于生成一个指定步长的等差数组。其做法与range()相似,包括start而不包括stop。其中start和step为可选参数,默认start为0,step为1;stop指定了区间的结束(开区间);dtype默认为Nope。可惜的是,无法指定其形状shape,故只能通过修改shape的值的方法来生成多维数组。
-
使用样例
# Use the numpy.array to create the ndarray
import numpy as np
print("利用arange()来创建一个ndarray:", np.arange(0, 1, 0.1))
""" Output: 利用arange()来创建一个ndarray: [0. 0.1 0.2 0.3 0.4 0.5 0.6 0.7 0.8 0.9] """
- numpy.linspace(start, stop, num=50, endpoint=True, retstep=False, dtype=None, axis=0)
numpy.logspace()用于创建一个等比数组。其中start, stop 都是必须给出的参数,表示区间(规则与range()相同)。num表示元素的个数,默认50。在闭合区间[start,stop]或半开区间[start,stop]中存在数量等间距的样本(取决于端点是True还是False)。
- numpy.logspace(start, stop, num=50, endpoint=True, base=10.0, dtype=None, axis=0)
numpy.logspace()与numpy.lonspqce()的区别在于,前者多了一个参数base,这意味着numpy.logspace()是根据10为底数来创建等比数组的(当然,可以传入别的值作为底),start与stop将被理解为“在[10^start, 10^stop]区间内构建等比数组”。
- 几个构建特殊矩阵数组的函数(不予以例子说明)
numpy.zeros(): 需要一个元组类似于(3,4)来指定形状,元素全部用0充填
numpy.ones():需要一个元组类似于(3,4)来指定形状,元素全部用1充填
numpy.eye():只需传入一个代表维数的int型整数即可,生成一个单位n维矩阵
numpy.diag():需要传入一个具有n个元素的一维数组, 生成一个n维的,对角线上的元素依次为传入的一维数组的元素的矩阵(类似于对角矩阵)
二.Numpy的各种操作方式
- 矩阵运算
import numpy as np
a = np.array([20, 30, 40, 50])
b = np.arange(4)
print(a-b)
""" Output: [20 29 38 47] """
print(b**2)
""" Output: [0 1 4 9] """
print(10*np.sin(a))
""" Output: array([ 9.12945251, -9.88031624,  7.4511316 , -2.62374854]) """
print(a<35)
""" Output: [ True  True False False] """
与大部分的数学语言(如MATLAB)不同,Numpy中的乘号(*) 的数组运算是求元素积,而不是数量积(矩阵相乘)。如果需要求数量积,就需要使用@或者dot()。其他的诸如加减除(+ - /)等运算符,均在Numpy中通用。还有一些诸如求和,求最大最小值的函数也可用(sum(), min()等)。
import numpy as np
A = np.array([[1, 1],  [0, 1]])
B = np.array([[2, 0],  [3, 4]])
print(A * B)
""" Output:
[[2, 0]
 [0, 4]]
"""
print(A @ B)
""" Output:
[[5, 4]
 [3, 4]]
"""
print(A.dot(B))
""" Output:
[5, 4]
 [3, 4]]
"""
- 通用函数
一些通用的数学函数,例如sin、cos、exp等,此类函数被称作 通用函数,其操作的对象也是数组的元素,即元素积之类的。
import numpy as np
B = np.arange(3)
print(np.exp(B))
""" Output: [1.         2.71828183 7.3890561 ] """
print(np.sqrt(B))
""" Output: [0.         1.         1.41421356] """
- 索引
ndarray的索引使用方法与列表的写法相近。如果是多维的数组,则每一维的索引用逗号分隔。 其中还有一种比较有趣的写法--- 省略号:表示全集(即那个维度的全部元素)。索引甚至可以是一个数组,表示一次索引多个值、还可以是布尔表达式。 还有更多的高级玩法就不一一演示了。
import numpy as np
a = np.arange(10)**3 # 幂的写法,表示3次方
print(a[2:5])
""" Output: [ 8 27 64] """
def f(x, y):
  return 10*x + y
# fromfunction()可以从一个函数中获得数据来创建ndarray
b = np.fromfunction(f, (5, 4), dtype=int)
print(b[1:3, 2:3])
"""Output:
[[12]
 [22]]
"""
print(b[:2 ,...]) #表示第二维输出全部元素
"""Output:
[[ 0  1  2  3]
 [10 11 12 13]]
"""
print(b[..., :2]) #表示第一维输出所有元素
"""Output:
[[ 0  1]
 [10 11]
 [20 21]
 [30 31]
 [40 41]]
"""
- 遍历
对一个多维的ndarray对象使用迭代器的话,默认是遍历一行。
import numpy as np
def f(x, y):
  return 10*x + y
b = np.fromfunction(f, (5, 4), dtype=int)
for row in b:
  print(row)
"""Output:
[0 1 2 3]
[10 11 12 13]
[20 21 22 23]
[30 31 32 33]
[40 41 42 43]
"""
for elements in b.flat:
    print(elements)
"""Output:
0
1
2
3
...
"""
- 维度控制
numpy中有很多函数可以改变一个ndarray的维度。以下列出几个常用的。
- ravel(): 对多维的矩阵进行降到一维的操作。并且,numpy.ravel()返回的是视图,会影响原始矩阵。
- flatten():功能与ravel()一致。但其是对矩阵的一个深拷贝进行操作,所以不会改变原矩阵。(不予以例子)
import numpy as np
a = np.array([[1, 2, 3], [4, 5, 6], [7, 8, 9], [10, 11, 12]])
print(a) # 输出原矩阵
"""Output:
[[ 1  2  3]
 [ 4  5  6]
 [ 7  8  9]
 [10 11 12]]
"""
a = a.ravel()
print(a) #输出降维的矩阵,发现确实改变了原矩阵
"""Output: [ 1  2  3  4  5  6  7  8  9 10 11 12] """
- reshape()与resize():两者的功能都是将矩阵改变成指定的维度。reshape()传入一个元组,表示指定的维度(要合理);resize()需要传入矩阵,和一个指定的元组。区别是,resize()会改变原矩阵。
import numpy as np
a = np.array([[1, 2, 3], [4, 5, 6], [7, 8, 9], [10, 11, 12]])
print(a.reshape(3, 4))
"""Output:
[[ 1  2  3  4]
 [ 5  6  7  8]
 [ 9 10 11 12]]
"""Output:
print(a) # 原数组并没有被改变
"""Output:
[[ 1  2  3]
 [ 4  5  6]
 [ 7  8  9]
 [10 11 12]]
"""
print(np.resize(a, (3, 4))) # 必须这样来调用
"""Output:
[[ 1  2  3  4]
 [ 5  6  7  8]
 [ 9 10 11 12]]
"""
print(a) # 原矩阵被改变
"""Output:
[[ 1  2  3  4]
 [ 5  6  7  8]
 [ 9 10 11 12]]
"""
print(a.reshape(2, -1)) # 可以传入-1,numpy会自动计算剩下的维度,但还是要合理
"""Output:
[[ 1  2  3  4  5  6]
 [ 7  8  9 10 11 12]]
"""
- 复制
一般的矩阵复制并不会复制任何内存(只是改变了标签名)。 而视图(view)是矩阵的一个浅拷贝,虽不是原矩阵(即会另外分配内存),但对视图的操作会影响到原矩阵。 深复制则是另外分配内存,把原矩阵所有值复制过来,操作不会改变原矩阵。
import numpy as np
a = np.arange(12).reshape(3, 4)
b = a
b is a # True表示b和a是同一个内存对象
"""Output: True """
c = a.view()
c is a # c并不和a是同一个对象
"""Output: False """
print(a) # 输出原矩阵
"""Output:
[[ 0  1  2  3]
 [ 4  5  6  7]
 [ 8  9 10 11]]
"""
c[0, 0] = 111
print(a) # 改变视图,原矩阵元素改变
"""Output:
[[111   1   2   3]
 [  4   5   6   7]
 [  8   9  10  11]]
"""
b = a.copy()
b is a # 深拷贝不是同一对象
"""Output: False """
b[0, 0] = 222
print(a) # 深拷贝的操作不会改变原矩阵
"""Output:
[[111   1   2   3]
 [  4   5   6   7]
 [  8   9  10  11]]
"""
更多的进阶功能:
官方教程
函数详细说明文档及手册
三.实例联系:康威生命棋(用Numpy和pygame模拟)
剑桥大学 约翰·何顿·康威(John Horton Conway) 教授设计了一个叫做“生命游戏”的计算机程序,生命游戏是一个二维网格游戏,这个网格中每个方格居住着一个活着或死了的细胞。一个细胞在下一个时刻的生死取决于相邻8个方格中活着或死了的细胞的数量。如果相邻方格活着的细胞数量过多,这个细胞会因为资源匮乏而在下一个时刻死去;相反,如果周围活细胞过少,这个细胞会因为孤单而死去。
大致规则
(1)当前细胞为死亡状态时,当周围有3个存活细胞时,则迭代后该细胞变成存活状态(模拟繁殖);若原先为生,则保持不变。
(2)当前细胞为存活状态时,当周围的邻居细胞低于两个(不包含两个)存活时,该细胞变成死亡状态(模拟生命数量稀少)。
(3)当前细胞为存活状态时,当周围有两个或3个存活细胞时,该细胞保持原样。
(4)当前细胞为存活状态时,当周围有3个以上的存活细胞时,该细胞变成死亡状态(模拟生命数量过多)。
这里就不多说什么了,直接上训练的代码。
import sys
import numpy as np # numpy用于存储康威生命棋的矩阵
import pygame # pygame可以提供游戏窗口


def life_step(x, y, world):
    # sum(a[, axis, dtype, out, keepdims]) 给定轴上的数组元素的总和
    neighbours = np.sum(world[x-1:x+2, y-1:y+2])-world[x, y]
    if world[x, y] == 1 and not 2 <= neighbours <= 3:
         return 0
    elif neighbours == 3:
         return 1
    return world[x, y]


def main():
    screen_size = 500
    tile_size = 10
    background_color = (0, 0, 0)
    cell_color = (255, 55, 255)
    pygame.init()
    screen = pygame.display.set_mode((screen_size, screen_size))
    pygame.display.set_caption('Convay\'s Game of Life')
    clock = pygame.time.Clock()
    world = np.random.choice(a=[0], size=(screen_size // tile_size + 1, screen_size // tile_size+1))
    gun = [(5, 1), (5, 2), (6, 1), (6, 2), (5, 11), (6, 11), (7, 11), (4, 12),
              (3, 13), (3, 14), (8, 12), (9, 13), (9, 14), (6, 15), (4, 16), (5, 17),
              (6, 17), (7, 17), (6, 18), (8, 16), (3, 21), (4, 21), (5, 21), (3, 22),
              (4, 22), (5, 22), (2, 23), (6, 23), (1, 25), (2, 25), (6, 25), (7, 25),
              (3, 35), (4, 35), (3, 36), (4, 36)]

    # 根据gun里的元素,将world相应位置的元素设置为1
    for i, j in gun:
        world[j, i] = 1

    fps = 0
    epoch = 0

    while True:
        for event in pygame.event.get():
            if event.type == pygame.QUIT:
                pygame.quit()
                sys.exit()
        pygame.display.set_caption("Convay\'s Game of Life /" + str(fps) +"FPS /" + str(epoch) + "epoch")
        screen.fill(background_color)
        new_world = np.copy(world)
        for (x, y), value in np.ndenumerate(world):
            new_world[x, y] = life_step(x, y, world)
            if new_world[x, y] == 1:
                pygame.draw.rect(screen, cell_color, (tile_size*(x-1), tile_size*(y-1), tile_size, tile_size), 0)
        world = new_world
        epoch += 1
        pygame.display.update()
        clock.tick(fps)


if __name__ == '__main__':
    main()
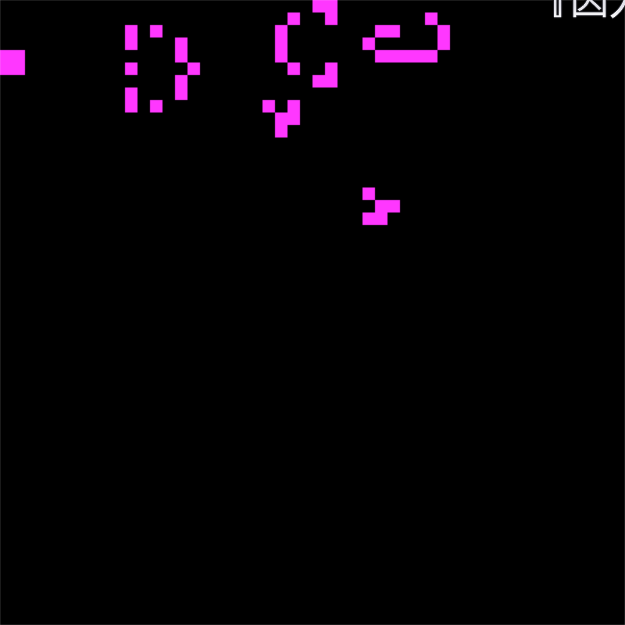
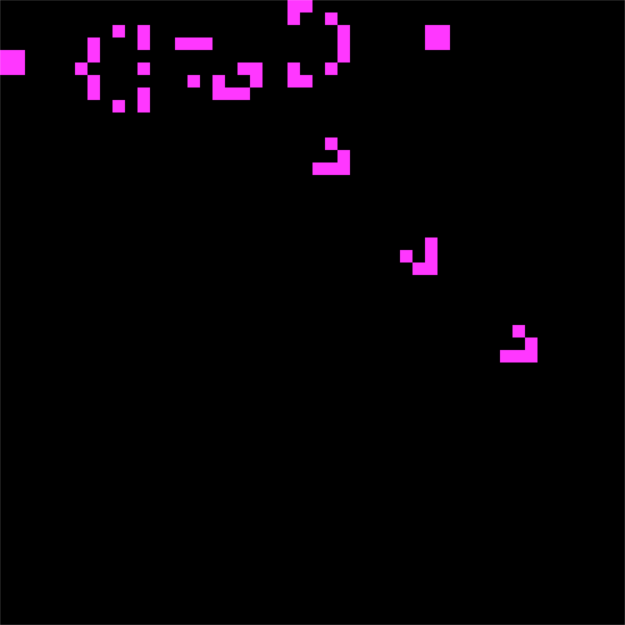
运行截图


