1.MySQL数据库
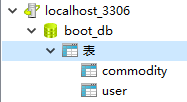
1.1数据库结构:
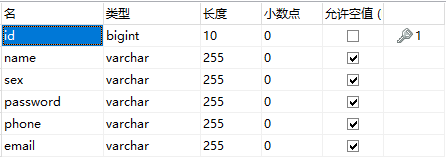
1.2user表结构:
1.3user表数据:
1.4commodity表结构:
1.5commodity表数据:
2.使用注解方式实现Mybatis
2.1引入依赖jar包
在build.gradle中添加Mysql驱动及Mybatis所需jar包如下
dependencies {
    compile('org.springframework.boot:spring-boot-starter')
testCompile('org.springframework.boot:spring-boot-starter-test')
//使用 Controller 的时候需要引入 web 包
    compile('org.springframework.boot:spring-boot-starter-web')

compile 'mysql:mysql-connector-java'
//配置mybatis 数据源
    compile("org.mybatis.spring.boot:mybatis-spring-boot-starter:1.3.0")
    testCompile('org.mybatis.spring.boot:mybatis-spring-boot-starter-test:1.3.0')
}
2.2配置数据库连接
将src/main/resources中的application.properties重命名为application.yml,并打开编辑配置项目所需数据库的地址、用户名、密码,格式如下
spring:
  datasource:
    url: jdbc:mysql://localhost:3306/boot_db?characterEncoding=utf8
    username: root
    password: 123456
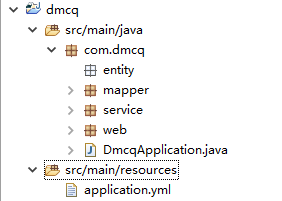
2.3创建web项目各层级包
在src/main/java中的创建entity、mapper、service、web的package包如下
2.4编写Mapper接口
在刚刚建的mapper包中新建interface接口UserMapper,并以注解方式添加一个查询方法如下
import org.apache.ibatis.annotations.Select;

public interface UserMapper {

    @Select("select name from user where id = #{id}")
    String findUsername(Long id);
}
2.5编写Service层
在service包中new一个interface接口UserService.java,包含一个查询方法如下
public interface UserService {
    String findUsername(Long id);
}
在service包中创建impl包,并创建接口实现类UserServiceImpl.java
UserService的实现类UserServiceImpl具体代码如下
@Service
public class UserServiceImpl implements UserService {

    @Autowired
    private UserMapper userMapper;

    @Override
    public String findUsername(Long id) {
        String name = userMapper.findUsername(id);
        return name;
    }
}
实现类需加@Service注解,并将UserMapper用@Autowired注入。
2.6编写Controller层
在Web包中创建Controller类如下
@RestController
@RequestMapping(value = "user")
public class UserController {

    @Autowired
    private UserService userService;

    @RequestMapping("/userName")
    String findUserNameById(Long id) {
        String name = userService.findUsername(id);
        return name;
    }
}
2.7运行测试
打开Application启动类,去掉之前步骤中测试使用的接口代码,
并为该类添加Mapper扫描注解,修改后代码如下
@MapperScan("com.dmcq.mapper")
@SpringBootApplication
public class DmcqApplication {

    public static void main(String[] args) {
        SpringApplication.run(DmcqApplication.class, args);
    }
}
运行该类main方法启动服务,控制台输出信息如下,显示出了服务启动的端口(8080),则服务启动成功。
服务启动成功后,浏览器get方式传参请求Controller层web接口,测试请求根据id查询数据库中用户姓名的功能:
浏览器测试访问http://localhost:8080/user/userName?id=1结果如下
根据id查询数据库中用户姓名功能完成,测试成功。
3.使用XML方式实现Mybatis
在2的基础上进行以下操作
3.1创建实体类
在entity包中创建实体类User如下
public class User {
    private long id ;               //id
    private String name;        // 姓名

public Long getId() {
        return id;
    }
    public void setId(Long id) {
        this.id = id;
    }
    public String getName() {
        return name;
    }
    public void setName(String name) {
        this.name = name;
    }
}
3.2添加Mapper接口
打开2.4中创建的UserMapper接口类,根据需求添加一个接口方法get()如下
public interface UserMapper {

    @Select("select name from user where id = #{id}")
    String findUsername(Long id);

    User get(User user);
}
3.3创建XML文件
(1)创建mappers文件夹
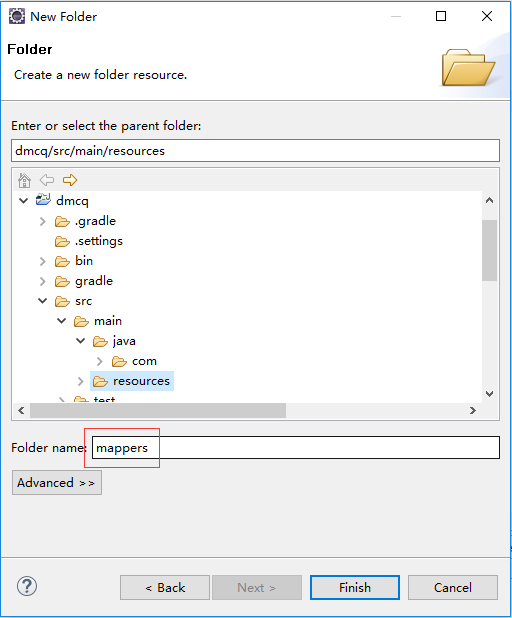
在src/main/resources下创建mappers文件夹:
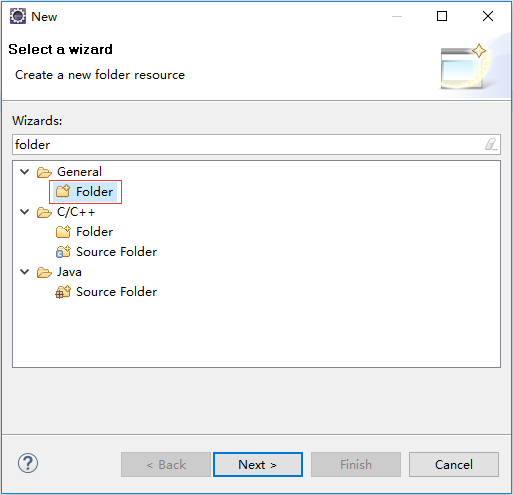
右击resources→New→other
选择Folder,点击Next
将Folder name命名为mappers,点击Finish完成创建文件夹。
(2)创建UserMapper.xml
在新建的mappers文件夹下创建UserMapper.xml文件,如下
打开UserMapper.xml,编辑如下
a.id AS "id",
a.name AS "name"
3.4添加service层测试方法
打开UserService.java,添加一个接口方法,如下
public interface UserService {
    String findUsername(Long id);
    User getUser(User user);
}
打开UserServiceImpl.java,添加实现方法,如下
@Service
public class UserServiceImpl implements UserService {
    @Autowired
    private UserMapper userMapper;
    @Override
    public String findUsername(Long id) {
        String name = userMapper.findUsername(id);
        return name;
    }
    @Override
    public User getUser(User user) {
        user = userMapper.get(user);
        return user;
    }
}
3.5添加Controller层测试方法
打开UserController.java,添加一个方法
@RestController
@RequestMapping(value = "user")
public class UserController {

    @Autowired
    private UserService userService;

    @RequestMapping("/userName")
    String findUserNameById(Long id) {
        String name = userService.findUsername(id);
        return name;
    }

    @RequestMapping("/findUserNameByUser ")
    String findUserNameByUser(User user) {
        String name = userService.getUser(user).getPersonName();
        return name;
    }
}
3.6配置Mybatis
打开src/main/resources的下application.yml添加mybatis配置如下
spring:
  datasource:
    url: jdbc:mysql://localhost:3306/boot_db?characterEncoding=utf8
    username: root
    password: 1234

mybatis:
    type-aliases-package: com.dmcq.entity
    mapper-locations: classpath:mappers/**/*.xml
    check-config-location: true
type-aliases-package配置别名为实体类所在包,若未配置则xml文件中
3.7运行测试
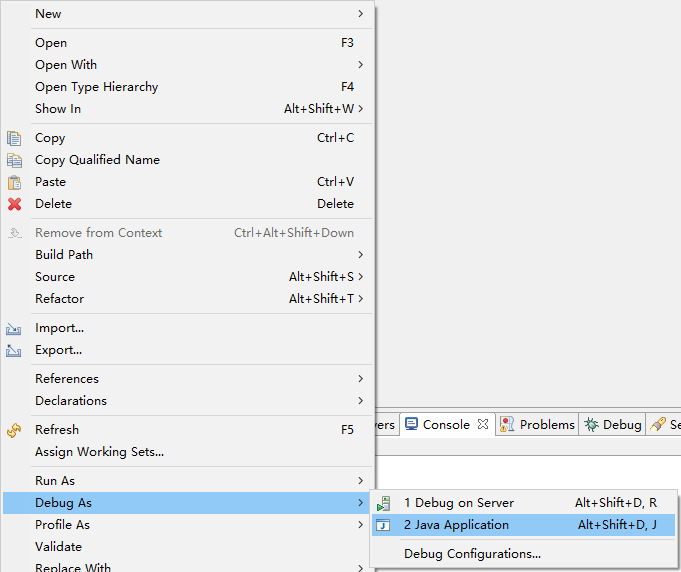
右键点击Application.java启动类
Run As/Debug As→Java Application,启动web服务
浏览器访问
http://localhost:8080/user/findUserNameByUser?id=2
结果如下
测试成功。
