####实验环境 centos 6.5
####需要的安装包
jdk-7u65-linux-x64.gz
apache-tomcat-7.0.54.tar.gz
nginx-1.6.0.tar.gz
两台tomcat服务器,一台Nginx 服务器
tomcat1 的ip 192.168.1.100:8080
tomcat2 的ip 192.168.1.101:8080
Nginx 的ip 192.168.1.102
注:试验中必须关闭防火墙,selinux和安装了gcc的环境
=========================tomcat1 的配置=============================
(1)安装JDK,配置JAVA 环境
[root@localhost ~]# tar zxvf jdk-7u65-linux-x64.gz
[root@localhost ~]# mv jdk1.7.0_65/ /usr/local/java
[root@localhost ~]# vim /etc/profile.d/java.sh #在此路径下写一个脚本,内容如下
export JAVA_HOME=/usr/local/java
export PATH=$PATH:$JAVA_HOME/bin
[root@localhost ~]# source /etc/profile.d/java.sh
(2)安装配置Tomcat
[root@localhost ~]# tar xf apache-tomcat-7.0.54.tar.gz
[root@localhost ~]# mv apache-tomcat-7.0.54 /usr/local/tomcat7
[root@localhost ~]# /usr/local/tomcat7/bin/startup.sh #启动tomcat,如下所示
Using CATALINA_BASE: /usr/local/tomcat7
Using CATALINA_HOME: /usr/local/tomcat7
Using CATALINA_TMPDIR: /usr/local/tomcat7/temp
Using JRE_HOME: /usr/local/java
Using CLASSPATH: /usr/local/tomcat7/bin/bootstrap.jar:/usr/local/tomcat7/bin/tomcat-juli.jar
Tomcat started.
You have new mail in /var/spool/mail/root
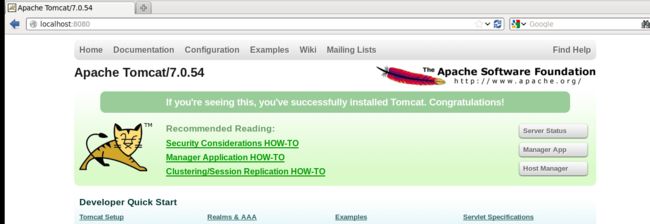
(3)打开浏览器访问测试,http:// 192.168.1.100:8080,出现如下界面则成功
(4)建立JAVA的WEB 站点
[root@localhost ~]# mkdir -pv /web/webapp1 #创建web页面的目录
[root@localhost ~]# vim /usr/local/tomcat7/conf/server.xml #修改配置文件,指定路径,添加×××区域内容
内容如下:
[root@localhost ~]# vim /web/webapp1/index.jsp #添加测试页面
内容如下:
[root@localhost java]# cat /web/webapp1/index.jsp
<%@ page language="java" import="java.util.*" pageEncoding="UTF-8"%>
<% out.println("welcome to test site,http://www.test1.com");%>
(5)验证测试成功
打开浏览器,输入http://192.168.1.100:8080,出现如下所示
=========================Tomcat2 的配置=====================
Tomcat2 的配置方法基本同tomcat1,其中包括
(1)关闭iptables 防火墙
(2)安装JDK, 配置JAVA 环境,版本与Tomcat1 server 保持一致
(3)安装配置Tomcat,版本与Tomcat1 server 保持一致
(4)创建/web/webapp1 目录,修改Tomcat配置文件server.xml,将网站文件目录更改到/web/webapp1/路径下
(5)在/web/webapp1/路径下建立Index.jsp,为了区别测试页面index.jsp 的内容更改如下
[root@localhost ~]# cat /web/webapp1/index.jsp
<%@ page language="java" import="java.util.*" pageEncoding="UTF-8"%>
<% out.println("welcome to test site,http://www.test2.com");%>
==========================Nginx 的配置==============================
[root@localhost 桌面]# yum -y install prce-devel zlib-devel openssl-devel
[root@localhost 桌面]# groupadd www
[root@localhost 桌面]# useradd -g www www -s /bin/false
root@localhost 桌面]# mv nginx-1.6.0.tar.gz ~
[root@localhost 桌面]# cd ~
[root@localhost ~]# tar zxvf nginx-1.6.0.tar.gz
[root@localhost ~]# cd nginx-1.6.0
[root@localhost nginx-1.6.0]# ./configure --prefix=/usr/local/nginx --user=www --group=www --with-file-aio --with-http_stub_status_module --with-http_gzip_static_module --with-http_flv_module --with-http_ssl_module
[root@localhost nginx-1.6.0]# make && make install
安装完成后编辑配置文件(前面为配置文件的行数,红色部分为添加内容)
[root@localhost init.d]# vim /usr/local/nginx/conf/nginx.conf
32 #gzip on;
33 upstream tomcat_server {
34 server 192.168.1.100:8080 weight=1;
35 server 192.168.1.101:8080 weight=2;
36
37 }
43
44 #access_log logs/host.access.log main;
45
46 location / {
47 root html;
48 index index.html index.htm;
49 proxy_pass http://tomcat_server;
50 }
51
52 #error_page 404 /404.html;
为了启动方便写一个Nginx 的脚本,并把它放在环境变量中,脚本内容如下
[root@localhost init.d]# vim /etc/init.d/nginx
#!/bin/bash

#chkconfig: - 99 20
#description: Nginx Server Control Script

PROG="/usr/local/nginx/sbin/nginx"
PIDF="/usr/local/nginx/logs/nginx.pid"
case "$1" in
 start)
  $PROG
  ;;
  stop)
   kill -s QUIT $(cat $PIDF)
  ;;
  restart)
   $0 stop
   $0 start
  ;;
  reload)
  kill -s HUP $(cat $PIDF)
  ;;
  *)
   echo "Usage: $0 (start|stop|restart|reload)"
   exit 1
esac
exit 0
[root@localhost init.d]# echo "PATH=$PATH:/etc/init.d/" >> /etc/profile
[root@localhost init.d]# . /etc/profile
[root@localhost init.d]# nginx restart #重启Nginx
测试配置文件是否正确
[root@localhost init.d]# /usr/local/nginx/sbin/nginx -t
nginx: the configuration file /usr/local/nginx/conf/nginx.conf syntax is ok
nginx: configuration file /usr/local/nginx/conf/nginx.conf test is successful
重新启动nginx
[root@localhost init.d]# nginx restart
[root@localhost init.d]# netstat -anpt | grep nginx
tcp 0 0 0.0.0.0:80 0.0.0.0:* LISTEN 40041/nginx
测试负载均衡效果
打开浏览器输入http://192.168.1.102
不断刷新浏览器测试发现权重相同,页面会反复在两个页面来回切换。
注:如果是虚拟机调到同一个wmnat中,且配置ip地址是永久的,尽量不要配临时的容易出错


