环境介绍
lnmp环境参考 http://www.jianshu.com/p/d9f33d1189d8
本章所需安装包也可从此处下载:http://note.youdao.com/noteshare?id=536754ff144a19e9df7b93d399ed4b01&sub=399EB921DC844C19913FEC264C9ECEA4
!!!文章中防火墙策略根据自身环境所需可修改指定IP或IP段访问,在这里只是测试环境所以对所有开放
!!!!文中所有包都放在root下,可以自定义。
IP :192.168.1.99
环境搭建
一.php编译安装
1.1)yum 依赖包
yum -y install vim wget gcc-c++ gd libxml2-devel libjpeg-devel libpng-devel net-snmp-devel curl-devel libxslt-devel pcre-devel libjpeg libpng libxml2 libcurl4-openssl-dev libcurl-devel libcurl libmysqlclient freetype-config freetype freetype-devel unixODBC libxslt make
1.2)下载icu源码包
wget http://download.icu-project.org/files/icu4c/52.1/icu4c-52_1-src.tgz
1.3)安装icu库
tar -zxf  /root/icu4c-52_1-src.tgz -C /root
mkdir /usr/local/icu
cd /root/icu/source
./configure --prefix=/usr/local/icu
make && make install
1.4)下载并解压php包
http://php.net/downloads.php 包下载地址
tar -zxf /root/php-7.0.8.tar.gz -C /root
1.5)进入php解压包目录下,编译安装
cd /root/php-7.0.8
./configure --prefix=/usr/local/php708 --with-curl --with-gd --with-gettext --with-iconv-dir --with-kerberos --with-libdir=lib64 --with-libxml-dir --with-mysql --with-mysqli --with-openssl --with-pcre-regex --with-pdo-mysql --with-pdo-sqlite --with-pear --with-png-dir --with-freetype-dir --with-jpeg-dir --with-xmlrpc --with-xsl --with-zip --with-zlib --enable-fpm --enable-bcmath --enable-libxml --enable-inline-optimization --enable-gd-native-ttf --enable-mbregex --enable-mbstring --enable-opcache --enable-pcntl --enable-shmop --enable-soap --enable-sockets --enable-sysvsem --enable-xml --enable-zip --enable-intl --with-icu-dir=/usr/local/icu
make && make install
1.6)配置文件及启动文件
cp /root/php-7.0.8/php.ini-development /usr/local/php708/lib/php.ini
cp /usr/local/php708/etc/php-fpm.conf.default /usr/local/php708/etc/php-fpm.conf
cp /usr/local/php708/etc/php-fpm.d/www.conf.default /usr/local/php708/etc/php-fpm.d/www.conf
cp -R /root/php-7.0.8/sapi/fpm/php-fpm /etc/init.d/php-fpm

/etc/init.d/php-fpm
1.7)查看端口
netstat -ntpl | grep "9000"

root      3435  0.0  0.0 103264   872 pts/0    S+   18:26   0:00 grep 9000
二.nginx安装及配置
2.1)安装yum依赖包
yum install perl gcc-c++ make elinks zlib-devel openssl openssl-devel -y
2.2)解压pcre即可
tar -zxf /root/pcre-8.40.tar.gz -C /usr/local/
2.3)解压nginx安装包
tar -zxf /root/nginx-1.8.0.tar.gz -C /root
2.4)开始编译安装nginx-1.8.0
cd /root/nginx-1.8.0
./configure --prefix=/usr/local/nginx --with-pcre=/usr/local/pcre-8.40 --with-http_stub_status_module --with-http_ssl_module && make && make install
2.5)修改nginx.conf配置文件
mkdir /usr/local/nginx/conf/conf.d
sed -i '116s/$/include \/usr\/local\/nginx\/conf\/conf.d\/*.conf;/g' /usr/local/nginx/conf/nginx.conf
2.6)测试nginx+php
mkdir /opt/test

echo "" > /opt/test/index.php
2.7)配置nginx支持php
vim /usr/local/nginx/conf/conf.d/php.conf
server {
        listen          80;
        server_name     192.168.1.99;   #本地ip
        index           index.php;
        root            /opt/test;      #php的路径

        location /
        {
                try_files $uri $uri/ /index.php?$args;
        }

        location ~ ^(.+.php)(.*)$ {
                fastcgi_split_path_info ^(.+.php)(.*)$;
                include fastcgi.conf;
                fastcgi_pass  127.0.0.1:9000;
                fastcgi_index index.php;
                fastcgi_param  PATH_INFO          $fastcgi_path_info;
        }
}
2.8)启动nginx
/usr/local/nginx/sbin/nginx
2.9)查看80端口
netstat -ntpl |grep "80"
2.10)添加防火墙策略,允许所有访问80端口并重启防火墙使之生效
-A INPUT -m state --state NEW -m tcp -p tcp --dport 80 -j ACCEPT
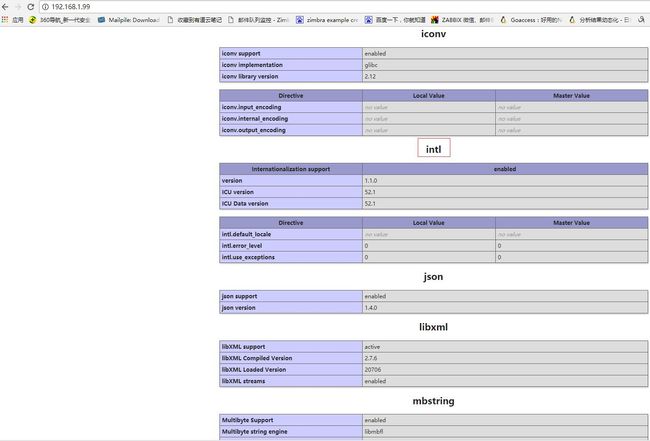
访问php,http://192.168.1.99/
三.mysql安装
3.1)安装yum依赖包
yum install gcc-c++ wget ncurses-devel perl-Module-Install.noarch libtool openssl-devel make -y
3.2)cmake安装
tar -zxf /root/cmake-3.4.0.tar.gz -C /usr/local/
cd /usr/local/cmake-3.4.0
./configure && make && make install
3.3)mysql解压
tar -zxf /root/mysql-5.6.29.tar.gz -C /root
cd /root/mysql-5.6.29
3.4)mysql安装
cmake -DCMAKE_INSTALL_PREFIX=/usr/local/mysql -DSYSCONFDIR=/usr/local/mysql/data -DMYSQL_DATADIR=/usr/local/mysql/data -DMYSQL_UNIX_ADDR=/usr/local/mysql/mysqld.sock -DWITH_MYISAM_STORAGE_ENGINE=1 -DWITH_INNOBASE_STORAGE_ENGINE=1 -DWITH_PARTITION_STORAGE_ENGINE=1 -DWITH_ARCHIVE_STORAGE_ENGINE=1 -DWITH_BLACKHOLE_STORAGE_ENGINE=1 -DWITH_FEDERATED_STORAGE_ENGINE=1 -DWITH_PERFSCHEMA_STORAGE_ENGINE=1 -DENABLED_LOCAL_INFILE=1 -DMYSQL_TCP_PORT=3306 -DWITH_EXTRA_CHARSETS=all -DWITH_DEBUG=0 -DENABLE_DEBUG_SYNC=0 -DWITH_SSL=system -DWITH_ZLIB=system -DWITH_READLINE=1 -DZLIB_INCLUDE_DIR=/usr -DWITH_READLINE=1
make

make install
3.5)创建mysql系统用户组和用户,并将mysql安装目录赋予root组和root用户
groupadd mysql

useradd -g mysql -s /sbin/nologin -M mysql

chown mysql.mysql -R /usr/local/mysql
3.6)初始化mysql数据库
/usr/local/mysql/scripts/mysql_install_db --user=mysql --basedir=/usr/local/mysql --datadir=/usr/local/mysql/data
3.7)复制mysql启动脚本
cp /usr/local/mysql/support-files/mysql.server /etc/init.d/mysqld
3.8)直接执行修改文件
sed -i '46s/$/\/usr\/local\/mysql/g' /etc/init.d/mysqld
sed -i '47s/$/\/usr\/local\/mysql\/data/g' /etc/init.d/mysqld
sed -i '263s/datadir/basedir/g' /etc/init.d/mysqld
3.9)写入mysql配置文件my.cnf
echo "[mysqld]
basedir=/usr/local/mysql
datadir=/usr/local/mysql/data
socket=/usr/local/mysql/mysqld.sock
user = mysql port = 3306
server_id = 2
#log-bin = mysql-bin
#log_bin_index = binlog.index
character_set_server = utf8
 #lower_case_table_names = 1
#binlog_ignore_db = mysql
 #replicate-do-db = mysql
sql_mode=NO_ENGINE_SUBSTITUTION,STRICT_TRANS_TABLES
 innodb_file_per_table=1

 [mysql.server]
 character_set_server = utf8
socket=/usr/local/mysql/mysqld.sock

[client]
socket=/usr/local/mysql/mysqld.sock
 default-character-set = utf8

 [mysqld_safe]
 character_set_server = utf8

 [mysql]
socket=/usr/local/mysql/mysqld.sock
default-character-set = utf8

[mysqldump]
socket=/usr/local/mysql/mysqld.sock
default-character-set = utf8

 [mysqladmin]
socket=/usr/local/mysql/mysqld.sock
character_set_server = utf8 " > /usr/local/mysql/my.cnf
3.10)将mysql加入centos系统环境变量
echo -e "export MYSQL_HOME=\"/usr/local/mysql\"
export PATH=\"\$PATH:\$MYSQL_HOME/bin\"" >> /etc/profile
3.11)刷新环境变量
source /etc/profile
3.12)启动/停止/重启 mysql服务
/etc/init.d/mysqld start
/etc/init.d/mysqld stop
/etc/init.d/mysqld restart
3.13)查看3306端口
netstat -ntpl |grep "3306"
3.14)shell界面进入mysql 删除默认的多余root账户
mysql -uroot -p
回车,输入密码
delete from mysql.user where Host='::1';

delete from mysql.user where Host='localhost.localdomain';

delete from mysql.user where User='';
3.15)将所有的root用户更改密码
update mysql.user set password=password("root") where user="root";
3.16)创建一个可以从其他任何地方访问mysql的用户 密码为root
grant all privileges on *.* to 'root'@'%' identified by "root";
3.17)对用户进行增删改后需要重启数据库或者执行刷新权限
flush privileges;
3.18)查看mysql用户
select user,host,password from mysql.user;
四 ftp安装及配置
!!!!关闭selinux
yum安装ftp
yum -y install vsftpd ftp
创建用户并设置密码
useradd wff -s /sbin/nologin -M
passwd wff
>New password:
>Retype new password:
创建文件或目录再给相应的权限
mkdir /opt/soft
usermod -d /opt/soft/ wff
chown -R wff:wff /opt/soft
设置用户可以访问文件的位置
vim /etc/vsftpd/chroot_list
wff    /opt/soft
将用户添加至ftp用户列表
vim /etc/vsftpd/user_list
wff
修改主配置文件
vim /etc/vsftpd/vsftpd.conf
#修改
anonymous_enable=NO

#去掉注释
ascii_upload_enable=YES
ascii_download_enable=YES
ftpd_banner=Welcome to blah FTP service.
chroot_local_user=YES
chroot_list_enable=YES
chroot_list_file=/etc/vsftpd/chroot_list


#添加
userlist_deny=NO
userlist_file=/etc/vsftpd/user_list
pasv_enable=YES
pasv_min_port=40040
pasv_max_port=40050
添加web访问的一段端口,如果省略,则可能造成web访问失败
-A INPUT -m state --state NEW -m tcp -p tcp --dport 21 -j ACCEPT
-A INPUT -p tcp --dport 40040:40050 -j ACCEPT

/etc/init.d/iptables restart
启动/关闭/重启 ftp服务
/etc/init.d/vsftpd start
/etc/init.d/vsftpd stop
/etc/init.d/vsftpd restart
测试
ftp
>open 127.0.0.1            #本地访问用127.0.0.1。远程访问,可用ftp服务器iP
>用户
>密码
>ls

