教程:https://github.com/EOSIO/eos/wiki/Local-Environment
环境:Ubuntu Server 16.04.1 LTS 64位
2核 8GB 1Mbps 50G
先看看EOS 源码的目录结构吧:
├─.git // github 工程配置文件
├─build // 编译后的程序在此
├─CMakeModules // EOS 项目使用CMake构建
├─contracts // 示例智能合约代码
│ ├─currency //示例代币合约
│ ├─dice
│ ├─eos
│ ├─eoslib
│ ├─exchange
│ ├─infinite
│ ├─proxy
│ ├─simpledb
│ ├─skeleton
│ ├─social
│ ├─storage
│ ├─test_api
│ └─tic_tac_toe // 使用智能合约开发的小游戏
├─Docker // EOS 支持 Docker 容器
├─docs // HTML 格式的 API 文档
├─libraries //各种库代码
│ ├─abi_generator // 自动 abi 生成器
│ ├─appbase // eos 服务器端插件的框架
│ ├─chain
│ ├─chainbase
│ ├─egenesis
│ ├─fc
│ ├─src
│ ├─native_contract
│ ├─types
│ ├─utilities
│ └─wasm-jit // eos 智能合约使用 WabAssembly 架构
├─plugins // 服务器端的各种插件代码
│ ├─account_history_api_plugin
│ ├─account_history_plugin
│ ├─chain_api_plugin
│ ├─chain_plugin
│ ├─database_plugin
│ ├─db_plugin
│ ├─faucet_testnet_plugin
│ ├─http_plugin
│ ├─net_api_plugin
│ ├─net_plugin
│ ├─producer_plugin
│ ├─template_plugin
│ ├─txn_test_gen_plugin
│ ├─wallet_api_plugin
│ └─wallet_plugin
├─programs // 主程序代码
│ ├─abi_gen
│ ├─codegen
│ ├─debug_node
│ ├─eos-walletd // EOS 服务器端钱包插件
│ ├─eosc // EOS 客户端
│ ├─eosd // EOS 服务器端
│ ├─launcher
│ └─snapshot
├─scripts
├─tests 测试程序
└─tools // 工具集
坑一:云服务器的配置低于2核8G,不能运行eos安装包
  ubuntu@VM-0-7-ubuntu:~/eos$ ./eosio_build.sh

Beginning build version: 1.2
Wed May  9 03:37:01 UTC 2018
User: ubuntu
git head id: 799924c35cf1c969b6730763c211722acfe37210
Current branch: * master

ARCHITECTURE: Linux

OS name: Ubuntu
OS Version: 16.04
CPU speed: 2394.454Mhz
CPU cores: 1
Physical Memory: 864 Mgb
Disk install: /dev/vda1
Disk space total: 49G
Disk space available: 44G
Your system must have 7 or more Gigabytes of physical memory installed.
Exiting now.
坑二:CMake Error at externals/CMakeLists.txt:1 (add_subdirectory):
add_subdirectory given source "binaryen" which is not an existing
directory.


建议先更新模块,如果操作没有用在尝试下面:
第一次编译的时候,获取EOS源码及其所有子模块:
git clone https://github.com/EOSIO/eos.git --recursive
如果克隆代码时未带--recursive参数,那么可切换到项目路径下面执行如下命令,更新子模块。
git submodule update --init --recursive
然后编译./eosio_build.sh
就出现了上面的问题。
rm -rf eos,重新下载后,重新编译,
换一种编译脚本:
./eosio_build.sh darwin full
可能第一次编译需要这样,编译成功后,./eosio_build.sh ,是没有问题
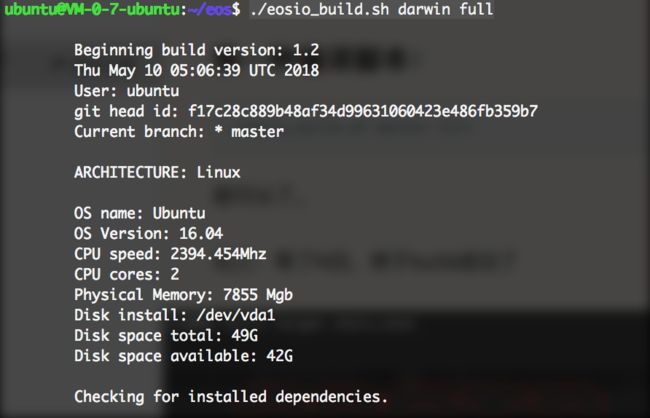
就可以了。
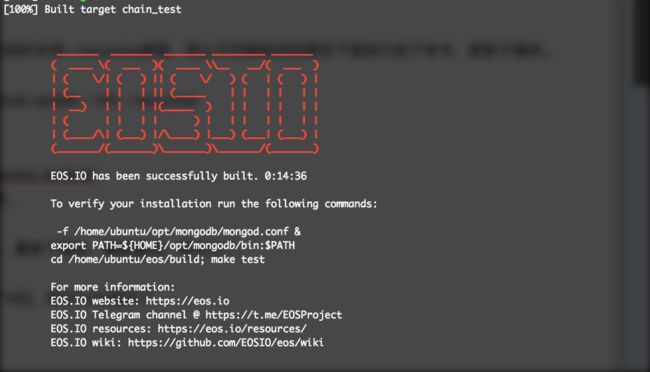
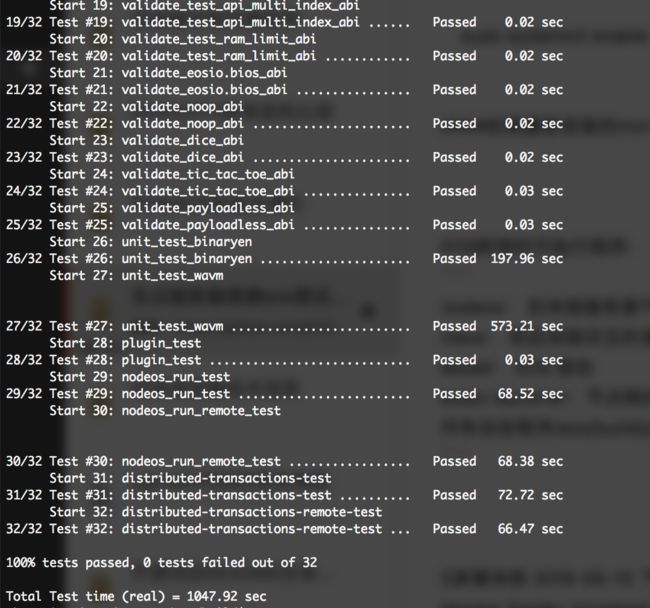
等了N久,终于build成功了。
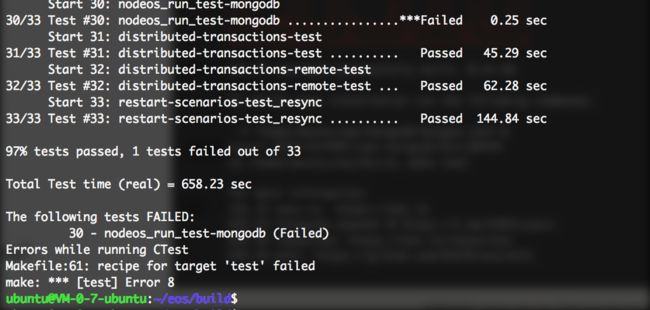
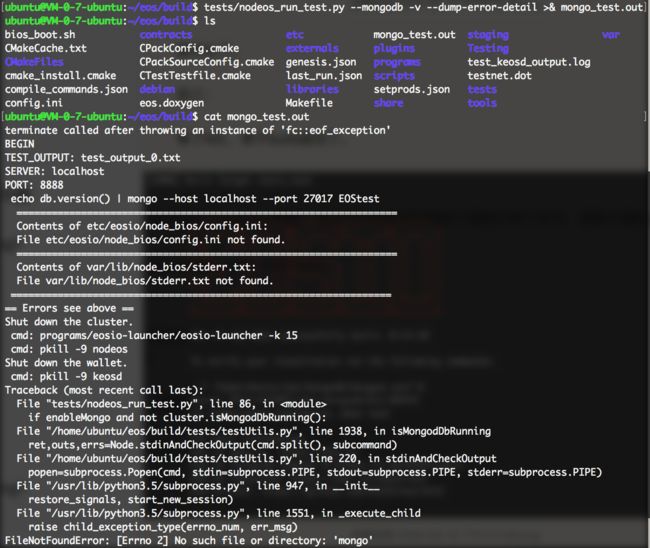
坑三:make test 的时候,nodeos_run_test-mongodb fails
删掉MongoDB,然后重新安装:
1.导入包管理系统使用的公钥
ubuntu@VM-0-7-ubuntu:~/eos/build$ sudo apt-key adv -- keyserver hkp://keyserver.ubuntu.com:80 --recv 0 C49F3730359A14518585931BC711F9BA15703C6
2.为MongoDB创建一个列表文件
根据版本创建/etc/apt/sources.list.d/mongodb-org-3.4.list 列表文件
Ubuntu 16.04
ubuntu@VM-0-7-ubuntu:~/eos/build$ echo "deb [ arch=amd64,arm64 ] http://repo.mongodb.org/apt/ubuntu xenial/mongodb-org/3.4 multiverse" | sudo tee
deb [ arch=amd64,arm64 ] http://repo.mongodb.org/apt/ubuntu xenial/mongodb-org/3.4 multiverse
3.更新本地包数据库
sudo apt-get update
4.安装最新版本的MongoDB
ubuntu@VM-0-7-ubuntu:~$ sudo apt-get install -y mongodb
这个问题好像是mongodb没有启动。
The following tests FAILED:
30 - nodeos_run_test-mongodb (Failed)
Errors while running CTest
Makefile:61: recipe for target 'test' failed
5.查看配置文件
配置文件mongod.conf所在路径:
ubuntu@VM-0-7-ubuntu:/etc$ cat mongodb.conf
6.启动和关闭MongoDB
创建配置文件:
  ubuntu@VM-0-7-ubuntu:/var/lib/mongodb$ sudo service mongod stop
    Failed to stop mongod.service: Unit mongod.service not loaded.
sudo nano /etc/systemd/system/mongodb.service
2.在里面追加文本:
[Unit]
Description=High-performance, schema-free document-oriented database
After=network.target
[Service]
User=mongodb
ExecStart=/usr/bin/mongod --quiet --config /etc/mongod.conf
[Install]
WantedBy=multi-user.target
ubuntu@VM-0-7-ubuntu:/var/lib/mongodb$ sudo nano     /etc/systemd/system/mongodb.service
ubuntu@VM-0-7-ubuntu:/var/lib/mongodb$
ubuntu@VM-0-7-ubuntu:/var/lib/mongodb$ cat     /etc/systemd/system/mongodb.service
3.按ctrl+X退出
4.启动服务
sudo systemctl enable mongodb
如果重新安装的mongoDB还是有问题,就等待下一个版本吧,不是稳定版本。
比如我升级到eos4.2后,没有这个问题了
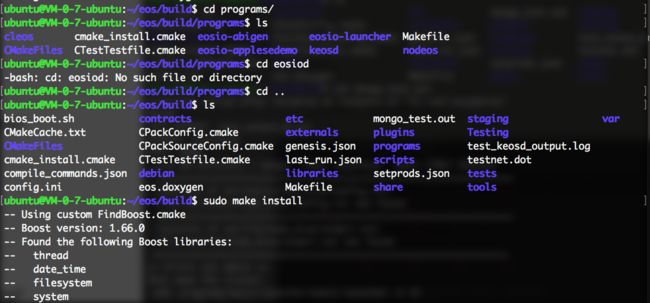
EOS附带的可执行程序:
nodeos: 区块链服务器节点生成组建
cleos: 和区块链交互的接口命令
keosd: EOS 钱包
eosio-launcher:节点网络组成和部署的应用
所有这些程序/eos/build/programs都存在于这个文件夹。
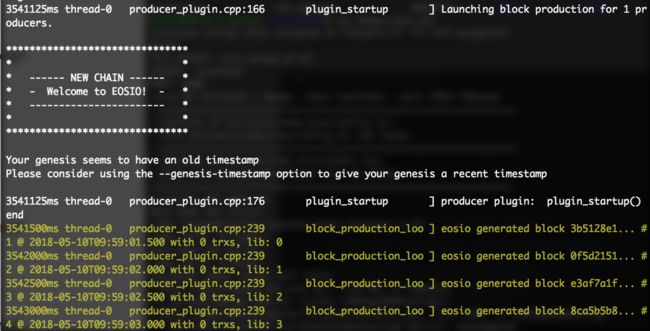
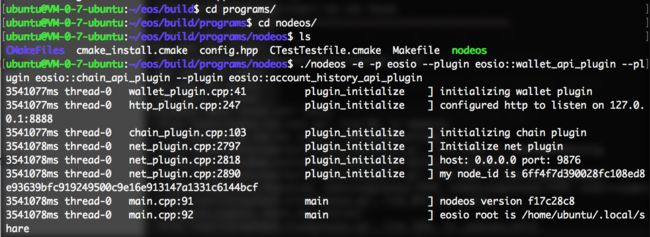
建立区块链节点
切换到目录eos/build/programs/nodeos下面,然后执行如下命令。

./nodeos命令可附带 --data-dir 节点文件夹名字 参数,默认文件夹为nodeos
Support/eosio/nodeos/config/genesis.json表示创建了一个nodeos节点文件夹。
config是区块链配置文件,data是区块链交易数据、钱包数据存储文件。我们需要修改config.ini文件里面的相关配置。
接下来再次启动./nodeos程序,每0.5秒会产生一个区块。