其他数据结构绘图
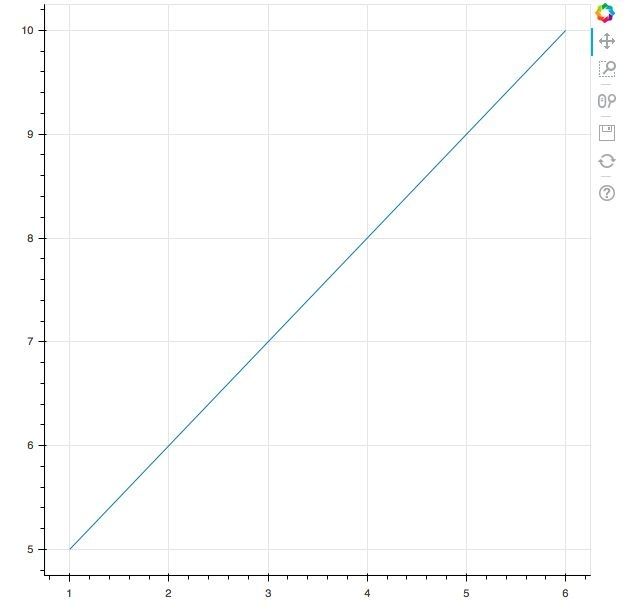
使用numpy创建线状图
#Creating line plots using NumPy arrays
#Import required packages
import numpy as np
import random
from bokeh.io import output_file, show
from bokeh.plotting import figure

#Creating an array for the points along the x and y axes
array_x =np.array([1,2,3,4,5,6])
array_y = np.array([5,6,7,8,9,10])

#Creating a line plot
plot = figure()
plot.line(array_x, array_y)

#Output the plot
output_file('numpy_line.html')
show(plot)
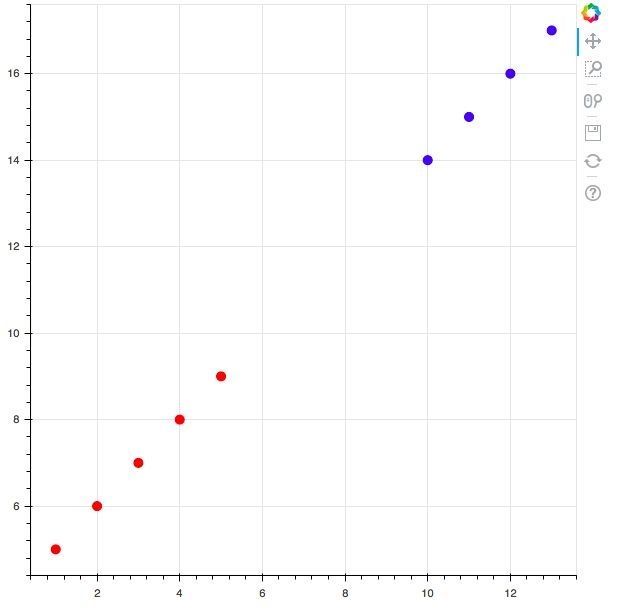
使用numpy创建散列图
#Creating scatter plots using NumPy arrays
#Import required packages
import numpy as np
import random
from bokeh.io import output_file, show
from bokeh.plotting import figure

#Creating arrays for two different categories of points
x_red = np.array([1,2,3,4,5])
y_red = np.array([5,6,7,8,9])
x_blue = np.array([10,11,12,13])
y_blue = np.array([14,15,16,17])

#Creating the categorical scatter plot

plot = figure()
plot.circle(x_red, y_red, size = 9, color = 'red', alpha = 0.8)
plot.circle(x_blue, y_blue, size = 9, color = 'blue', alpha = 0.8)

#Output the plot
output_file('numpy_scatter.html')
show(plot)
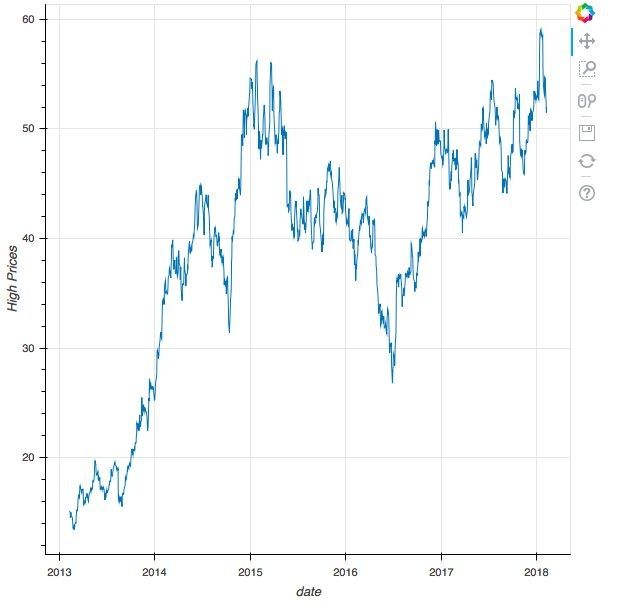
使用pandas DataFrame创建时序图
苹果股票的高值:
#Creating a time series plot using a Pandas DataFrame
#Importing the required packages
import pandas as pd

#Read in the data
df = pd.read_csv('/home/andrew/code/kaggle-code/stock_data/all_stocks_5yr.csv')

#Filtering for apple stocks
df_apple = df[df['Name'] == 'AAL']
#df_apple.loc['date'] = df_apple['date'].astype('datetime64')
df_apple['date'] = pd.to_datetime(df_apple['date'])
print(df_apple.dtypes)

#Import the required packages
from bokeh.io import output_file, show
from bokeh.plotting import figure

#Create the time series plot
plot = figure(x_axis_type = 'datetime', x_axis_label = 'date', y_axis_label = 'High Prices')
plot.line(x = df_apple['date'], y = df_apple['high'])

#Output the plot
output_file('pandas_time.html')
show(plot)
- 参考资料
https://pandas.pydata.org/pandas-docs/stable/generated/pandas.to_datetime.html
https://pandas.pydata.org/pandas-docs/stable/generated/pandas.DataFrame.astype.html
https://stackoverflow.com/questions/20625582/how-to-deal-with-settingwithcopywarning-in-pandas
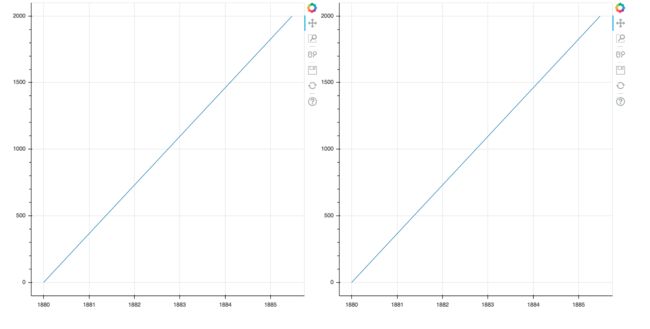
另外一个更简单的演示:
import pandas as pd
import numpy as np
from bokeh.plotting import figure, output_file, show
from bokeh.layouts import row

output_file('fig.html')

test = pd.DataFrame({'datetime':pd.date_range('1/1/1880', periods=2000),'foo':np.arange(2000)})

print(test['datetime'])

fig = figure(x_axis_type="datetime")
fig.line(x='datetime',y='foo', source=test)

test = test.set_index('datetime')

fig2 = figure(x_axis_type="datetime")
fig2.line(x='datetime', y='foo', source=test)
show(row(fig, fig2))
- 参考资料
https://stackoverflow.com/questions/34974615/timeseries-in-bokeh-using-a-dataframe-with-index
https://bokeh.pydata.org/en/latest/docs/user_guide/plotting.html
https://github.com/CNuge/kaggle-code
层
- 同一行创建多个图
- 同一列创建多个图
- 行和列中创建多个图
- 选项卡式布局创建多个绘图
- 创建强大的网格布局
- 将多个图表链接在一起
同一行创建多个图
bokeh自带了很多数据,可以用如下方式下载:
In [2]: import bokeh

In [3]: bokeh.sampledata.download()
Creating /home/andrew/.bokeh directory
Creating /home/andrew/.bokeh/data directory
Using data directory: /home/andrew/.bokeh/data
Downloading: CGM.csv (1589982 bytes)
   1589982 [100.00%]
Downloading: US_Counties.zip (3182088 bytes)
   3182088 [100.00%]
Unpacking: US_Counties.csv
Downloading: us_cities.json (713565 bytes)
    713565 [100.00%]
Downloading: unemployment09.csv (253301 bytes)
    253301 [100.00%]
Downloading: AAPL.csv (166698 bytes)
    166698 [100.00%]
Downloading: FB.csv (9706 bytes)
      9706 [100.00%]
Downloading: GOOG.csv (113894 bytes)
    113894 [100.00%]
Downloading: IBM.csv (165625 bytes)
    165625 [100.00%]
Downloading: MSFT.csv (161614 bytes)
    161614 [100.00%]
Downloading: WPP2012_SA_DB03_POPULATION_QUINQUENNIAL.zip (5148539 bytes)
   5148539 [100.00%]
Unpacking: WPP2012_SA_DB03_POPULATION_QUINQUENNIAL.csv
Downloading: gapminder_fertility.csv (64346 bytes)
     64346 [100.00%]
Downloading: gapminder_population.csv (94509 bytes)
     94509 [100.00%]
Downloading: gapminder_life_expectancy.csv (73243 bytes)
     73243 [100.00%]
Downloading: gapminder_regions.csv (7781 bytes)
      7781 [100.00%]
Downloading: world_cities.zip (646858 bytes)
    646858 [100.00%]
Unpacking: world_cities.csv
Downloading: airports.json (6373 bytes)
      6373 [100.00%]
Downloading: movies.db.zip (5067833 bytes)
   5067833 [100.00%]
Unpacking: movies.db
Downloading: airports.csv (203190 bytes)
    203190 [100.00%]
Downloading: routes.csv (377280 bytes)
    377280 [100.00%]
#Preparing all the plots needed for this chapter

import pandas as pd
from bokeh.sampledata.stocks import AAPL

df_apple = pd.DataFrame(AAPL)
df_apple['date'] = pd.to_datetime(df_apple['date'])


#Import the required packages

from bokeh.io import output_file, show
from bokeh.plotting import figure
from bokeh.plotting import ColumnDataSource


#Create the ColumnDataSource object

data = ColumnDataSource(data = {
    'x' : df_apple['high'],
    'y' : df_apple['low'],
    'x1': df_apple['open'],
    'y1': df_apple['close'],
    'x2': df_apple['date'],
    'y2': df_apple['volume'],
})


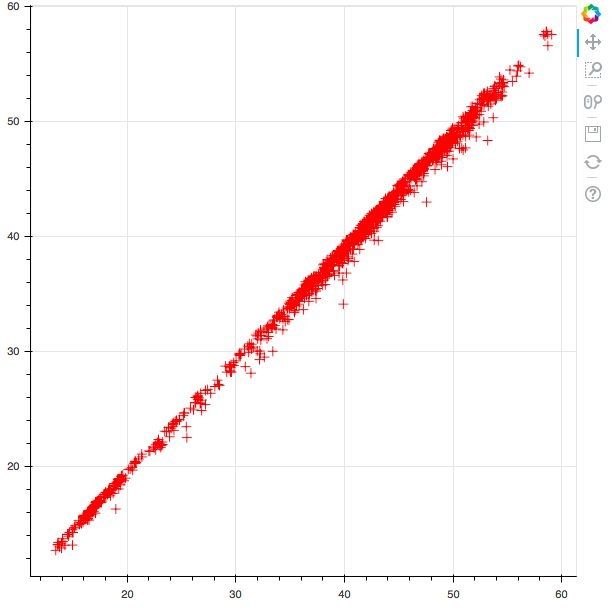
#Create the first scatter plot
plot1 = figure()
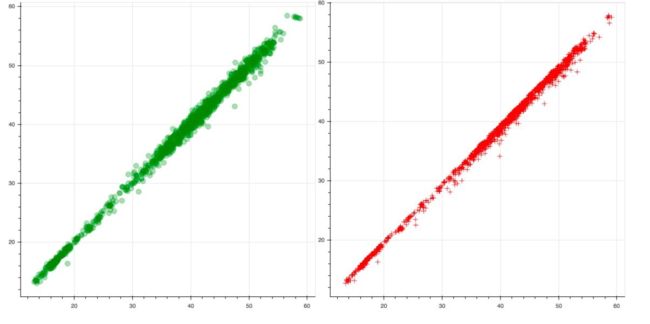
plot1.cross(x = 'x', y = 'y', source = data, color = 'red', size = 10, alpha = 0.8)

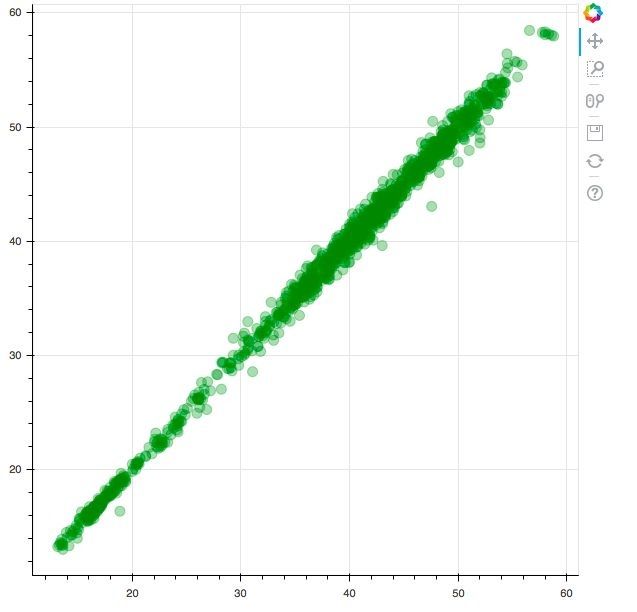
#Create the second scatter plot
plot2 = figure()
plot2.circle(x = 'x1', y = 'y1', source = data, color = 'green', size = 10, alpha = 0.3)

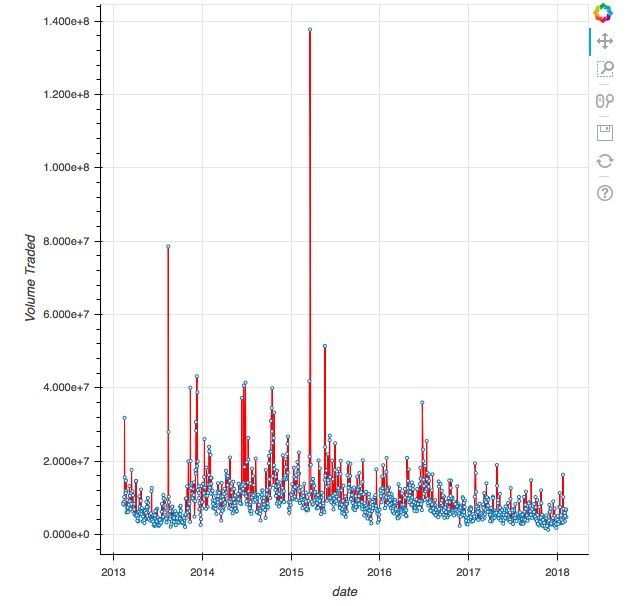
#Create the third scatter plot
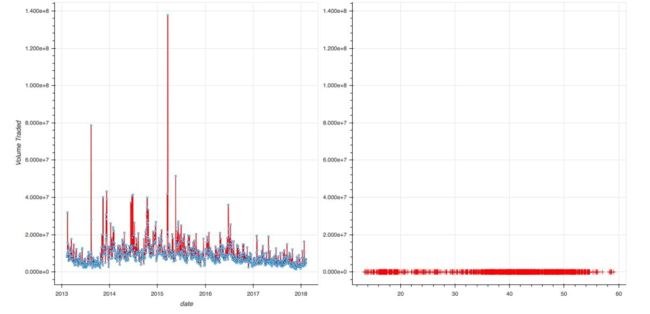
plot3 = figure(x_axis_type = 'datetime', x_axis_label = 'date', y_axis_label = 'Volume Traded')
plot3.line(x = 'x2', y = 'y2', source = data, color = 'red')
plot3.circle(x = 'x2', y = 'y2', source = data, fill_color = 'white', size = 3)


#Output the 3 plots
#Output the plot1
output_file('first_plot.html')
show(plot1)

#Output the plot2
output_file('second_plot.html')
show(plot2)


#Output the plot3
output_file('third_plot.html')
show(plot3)


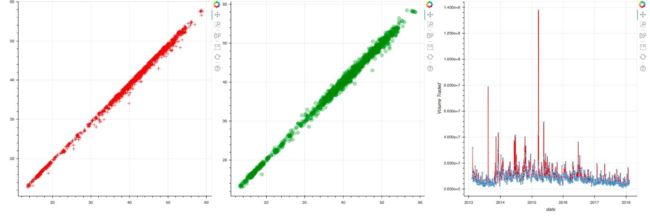
#Creating multiple plots along the same row
#Import the required packages
from bokeh.layouts import row
from bokeh.io import output_file, show

#Group the 3 plots into a 'row' layout
row_layout = row(plot1,plot2,plot3)

#Output the plot
output_file('horizontal.html')
show(row_layout)


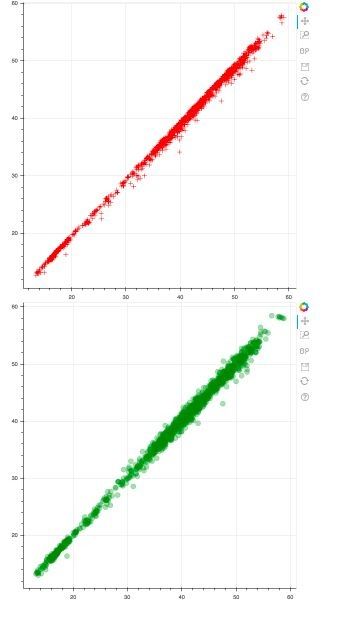
#Creating multiple plots along the same column

#Import the required packages

from bokeh.layouts import column
from bokeh.io import output_file, show

#Group the 2 plots into a 'column' layout
col_layout = column(plot1,plot2)

#Output the plot
output_file('vertical.html')
show(col_layout)

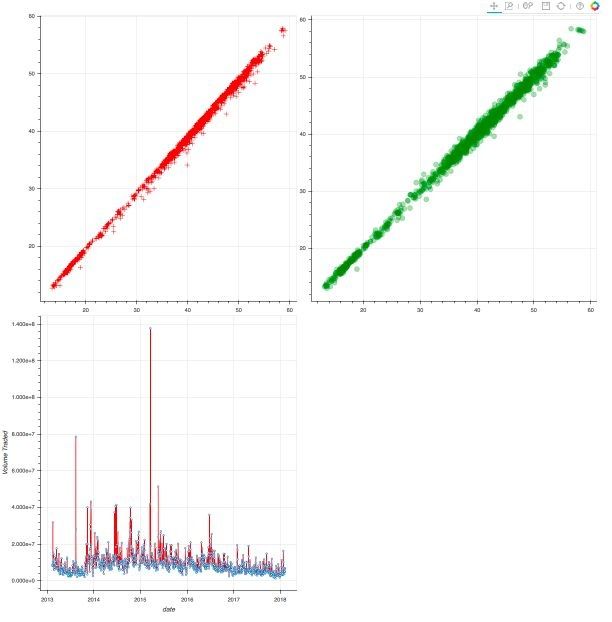
#Creating multiple plots along a row and column

#Import the required packages

from bokeh.layouts import column, row
from bokeh.io import output_file, show

#Construct the nested layout
nested_layout = column(row(plot1,plot2), plot3)

#Output the plot
output_file('nested.html')
show(nested_layout)


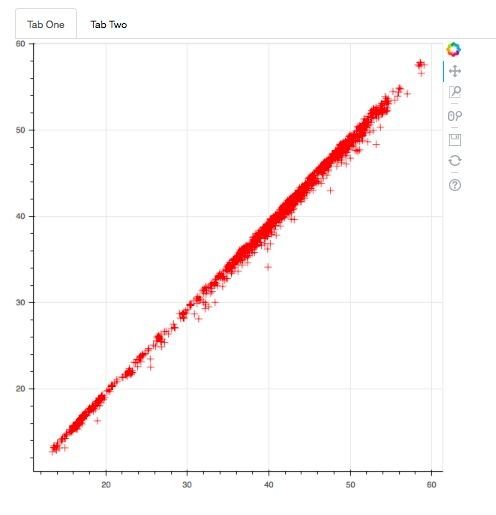
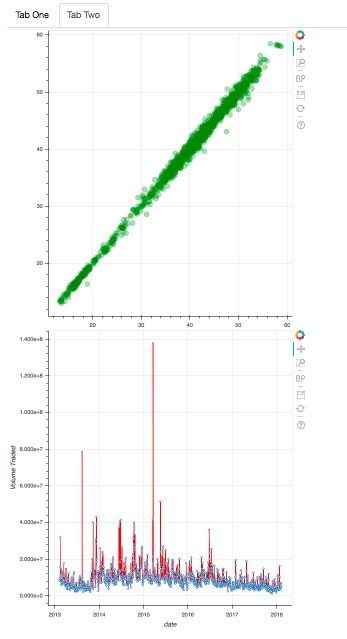
#Creating multiple plots on a tabbed layout

#Import the required packages
from bokeh.models.widgets import Tabs, Panel
from bokeh.io import output_file, show
from bokeh.layouts import column, row

#Create the two panels

tab1 = Panel(child = plot1, title = 'Tab One')
tab2 = Panel(child = column(plot2,plot3), title = 'Tab Two')

#Feed the tabs into a Tabs object
tabs_object = Tabs(tabs = [tab1, tab2])

#Output the plot
output_file('tab_layout.html')
show(tabs_object)


#Creating a grid layout
#Import required packages

from bokeh.io import output_file, show
from bokeh.layouts import gridplot

#Create the grid layout
grid_layout = gridplot([plot1, plot2], [plot3, None])

#Output the plot
output_file('grid.html')
show(grid_layout)


#Linking multiple plots along the y axis
#Import the required packages

from bokeh.io import output_file, show
from bokeh.layouts import row

#Creating equal y axis ranges
plot3.y_range = plot1.y_range

#Create the row layout
row_layout = row(plot3, plot1)

#Output the plot
output_file('grid.html')
show(row_layout)


#Linking multiple plots along the x axis
#Import the required packages
from bokeh.io import output_file, show
from bokeh.layouts import row

#Creating equal x-axis ranges
plot2.x_range = plot1.x_range

#Create the row layout
row_layout = row(plot2, plot1)

#Output the plot
output_file('row.html')
show(row_layout)
参考资料
- 本文涉及的python测试开发库 请在github上点赞,谢谢!
- 本文相关书籍下载
-
讨论qq群144081101 591302926 567351477 钉钉免费群21745728
