Android学习笔记(九) 视图的应用布局效果
最近少了写博客,可能最近忙吧,工作上忙,因为工作原因也忙于学习,也没记录什么了,也没有按照之前的计划去学习了。现在就记录一下最近学到的。
要做Android应用,界面设计少不了,可惜之前一直在用WindowPhone的,对别的系统的界面风格严重不了解,稍留意了一下,发现有几种风格的,上网找了代码学习了一下,还是能做出来的
豌豆荚的布局

这种布局类似用Tab来布局,通过左右滑动切换不同的界面,或者点击顶部的文字来切换。不过在这里我并没有用上TabHost,对整个页面来说我把它切成了3部分:文字导航、绿色的那小条子,还有下面主要的内容
- 最上面的文字导航我就用一个线性布局把TextView排列起来
- 绿色的小条子也是用了一个线性布局里面放了一个ImageView,这个ImageView是需要加动画的
- 主要内容我就用了ViewPager,这是一个好东西,滑动切换时有效果,这里是用到了碎片Fragment,虽然说是Android3.0后才加上去的东西,但是2.3的系统还是能用得上。
然后用一个线性布局把上面这三块排列起来就行了
下面就展示一下布局的代码
 1 <LinearLayout xmlns:android="http://schemas.android.com/apk/res/android"

 2     android:layout_width="match_parent"

 3     android:layout_height="match_parent"

 4     android:orientation="vertical" >

 5

 6     <LinearLayout

 7         android:layout_width="match_parent"

 8         android:layout_height="wrap_content"

 9         android:orientation="vertical" >

10

11

12

13         <LinearLayout

14             android:id="@+id/imf_linearLayout1"

15             android:layout_width="fill_parent"

16             android:layout_height="wrap_content"

17             android:paddingBottom="5dip"

18             android:paddingTop="10dip" >

19

20

21

22             <TextView

23                 android:id="@+id/imfLbRealTime"

24                 android:layout_width="fill_parent"

25                 android:layout_height="fill_parent"

26                 android:layout_weight="1.0"

27                 android:gravity="center"

28                 android:text="Tab1"

29                 android:textColor="@color/select"/>

30

31             <TextView

32                 android:id="@+id/imfLbOnLine"

33                 android:layout_width="fill_parent"

34                 android:layout_height="fill_parent"

35                 android:layout_weight="1.0"

36                 android:gravity="center"

37                 android:text="Tab2"

38                 android:textColor="@color/unselect"/>

39         </LinearLayout>

40

41         <LinearLayout

42             android:layout_width="match_parent"

43             android:layout_height="2dip"

44             android:layout_gravity="bottom"

45             android:orientation="vertical"

46             android:paddingBottom="3dip"

47             android:background="#ddd">

48

49             <ImageView

50                 android:id="@+id/imfImgButtomLine"

51                 android:layout_width="40dip"

52                 android:layout_height="2dip"

53                 android:scaleType="matrix"

54                 android:src="@color/select" />

55         </LinearLayout>

56     </LinearLayout>

57

58     <android.support.v4.view.ViewPager

59         android:id="@+id/imfVpContent"

60         android:layout_width="wrap_content"

61         android:layout_height="wrap_content"

62         android:layout_gravity="center"

63         android:layout_weight="1.0"

64         android:flipInterval="30"

65         android:persistentDrawingCache="animation" />

66

67

68 </LinearLayout>
这里为了兼容,ViewPager也是用了support.v4里面的视图,导航的条子的宽度这里是乱设的,因为它到时的宽度会在java代码中进行设置。还有颜色呢只是在color.xml里面定义的颜色而已
Java文件就不打算完全贴出来,因为这个可以用在碎片里面,也可以用在活动里面,我就用在了碎片里面。
在构造碎片的方法里面或者构造视图的方法里面,依次调用下面定义的方法
 1     private void IniWidth()

 2     {

 3         DisplayMetrics dm=new DisplayMetrics();

 4         getActivity().getWindowManager().getDefaultDisplay().getMetrics(dm);

 5         int screenW = dm.widthPixels;

 6         buttomLine=(ImageView)view.findViewById(R.id.domfImgButtomLine);

 7         buttomLine.getLayoutParams().width=screenW/5;

 8         buttomLine.setLayoutParams(buttomLine.getLayoutParams());

 9

10         buttomLineWidth=buttomLine.getLayoutParams().width;

11         offset = (int) ((screenW / 5.0 - buttomLineWidth) / 2);

12

13         positionOne = (int) (screenW / 5.0);

14         positionTwo = positionOne * 2;

15         positionThree=positionOne * 3;

16         positionFour=positionOne * 4;

17     }
这个方法先获取获取当前屏幕的宽度,再通过宽度对小条的吃长度进行设置,最后用到的几个position是后面在给小条动画效果时用到的值,它们都是int类型,记录着每个导航标题的位置。
 1     private void IniViews()

 2     {

 3         lbCheck=(TextView)view.findViewById(R.id.domfLbCheck);

 4         lbPublish=(TextView)view.findViewById(R.id.domfLbPublish);

 5         lbQuery=(TextView)view.findViewById(R.id.domfLbQuery);

 6         lbRecommand=(TextView)view.findViewById(R.id.domfLbRecommand);

 7         lbSend=(TextView)view.findViewById(R.id.domfLbSend);

 8

 9

10         lbQuery.setOnClickListener(new MyOnClickListener(0));

11         lbCheck.setOnClickListener(new MyOnClickListener(1));

12         lbPublish.setOnClickListener(new MyOnClickListener(2));

13         lbSend.setOnClickListener(new MyOnClickListener(3));

14         lbRecommand.setOnClickListener(new MyOnClickListener(4));

15     }
视图设置,给相应的导航标题对象添加引用,以及绑定事件,绑定事件目的在于点击文字时会切换到相应的页面中去,事件的定义如下
 1     class MyOnClickListener implements View.OnClickListener {

 2         private int index = 0;

 3

 4         public MyOnClickListener(int i) {

 5             index = i;

 6         }

 7

 8         @Override

 9         public void onClick(View v) {

10             mPager.setCurrentItem(index);

11         }

12 };
最后设置ViewPager了
 1     private void IniViewPager()

 2     {

 3         mPager=(ViewPager)view.findViewById(R.id.domfVpContent);

 4

 5

 6         ArrayList<Fragment> fragLst=new ArrayList<Fragment>();

 7         checkFrag =new DataOptionCheckFragment();

 8         publishFrag =new DataOptionPublishFragment();

 9         queryFrag =new DataOptionQueryFragment();

10         recommandFrag =new DataOptionRecommandFragment();

11         sendFrag =new DataOptionSendFragment();

12         fragLst.add(queryFrag);

13         fragLst.add(checkFrag);

14         fragLst.add(publishFrag);

15         fragLst.add(sendFrag);

16         fragLst.add(recommandFrag);

17

18         adapter=new MyViewPageAdapter(getActivity().getSupportFragmentManager(),fragLst);

19         mPager.setAdapter(adapter);

20         mPager.setCurrentItem(0);

21         mPager.setOnPageChangeListener(new MyOnPageChangeListener());

22         mPager.setCurrentItem(0);

23     }
这里主要是设置构造相应的碎片,然后添加到相应的adapter里面,加入到ViewPager里面,重点在于PageChange事件的定义
  1     class MyOnPageChangeListener implements OnPageChangeListener {

  2

  3         @Override

  4         public void onPageScrollStateChanged(int arg0) {

  5             // TODO Auto-generated method stub

  6

  7         }

  8

  9         @Override

 10         public void onPageScrolled(int arg0, float arg1, int arg2) {

 11             // TODO Auto-generated method stub

 12

 13         }

 14

 15         @Override

 16         public void onPageSelected(int selectedIndex) {

 17

 18

 19             Animation animation=null;

 20             if(selectedIndex==currIndex)

 21             {

 22

 23             }

 24             switch (selectedIndex) {

 25             case 0:

 26                 if (currIndex == 1) {

 27                     animation = new TranslateAnimation(positionOne, 0, 0, 0);

 28                     lbCheck.setTextColor(resources.getColor(R.color.unselect));

 29                 } else if (currIndex == 2) {

 30                     animation = new TranslateAnimation(positionTwo, 0, 0, 0);

 31                     lbPublish.setTextColor(resources.getColor(R.color.unselect));

 32                 } else if (currIndex == 3) {

 33                     animation = new TranslateAnimation(positionThree, 0, 0, 0);

 34                     lbSend.setTextColor(resources.getColor(R.color.unselect));

 35                 }else if (currIndex == 4) {

 36                     animation = new TranslateAnimation(positionFour, 0, 0, 0);

 37                     lbRecommand.setTextColor(resources.getColor(R.color.unselect));

 38                 } else if(selectedIndex==currIndex){

 39                     animation=new TranslateAnimation(0, 0, 0, 0);

 40                     lbQuery.setTextColor(resources.getColor(R.color.unselect));

 41                 }

 42                 lbQuery.setTextColor(resources.getColor(R.color.select));

 43                 break;

 44             case 1:

 45                 if (currIndex == 0) {

 46                     animation = new TranslateAnimation(offset, positionOne, 0, 0);

 47                     lbQuery.setTextColor(resources.getColor(R.color.unselect));

 48                 } else if (currIndex == 2) {

 49                     animation = new TranslateAnimation(positionTwo, positionOne, 0, 0);

 50                     lbPublish.setTextColor(resources.getColor(R.color.unselect));

 51                 } else if (currIndex == 3) {

 52                     animation = new TranslateAnimation(positionThree, positionOne, 0, 0);

 53                     lbSend.setTextColor(resources.getColor(R.color.unselect));

 54                 }else if (currIndex == 4) {

 55                     animation = new TranslateAnimation(positionFour, positionOne, 0, 0);

 56                     lbRecommand.setTextColor(resources.getColor(R.color.unselect));

 57                 }else if(selectedIndex==currIndex){

 58                     animation=new TranslateAnimation(0, positionOne, 0, 0);

 59                     lbQuery.setTextColor(resources.getColor(R.color.unselect));

 60                 }

 61                 lbCheck.setTextColor(resources.getColor(R.color.select));

 62                 break;

 63             case 2:

 64                 if (currIndex == 0) {

 65                     animation = new TranslateAnimation(offset, positionTwo, 0, 0);

 66                     lbQuery.setTextColor(resources.getColor(R.color.unselect));

 67                 } else if (currIndex == 1) {

 68                     animation = new TranslateAnimation(positionOne, positionTwo, 0, 0);

 69                     lbCheck.setTextColor(resources.getColor(R.color.unselect));

 70                 } else if (currIndex == 3) {

 71                     animation = new TranslateAnimation(positionThree, positionTwo, 0, 0);

 72                     lbSend.setTextColor(resources.getColor(R.color.unselect));

 73                 }else if (currIndex == 4) {

 74                     animation = new TranslateAnimation(positionFour, positionTwo, 0, 0);

 75                     lbRecommand.setTextColor(resources.getColor(R.color.unselect));

 76                 }else if(selectedIndex==currIndex){

 77                     animation=new TranslateAnimation(0, positionTwo, 0, 0);

 78                     lbQuery.setTextColor(resources.getColor(R.color.unselect));

 79                 }

 80                 lbPublish.setTextColor(resources.getColor(R.color.select));

 81                 break;

 82             case 3:

 83                 if (currIndex == 0) {

 84                     animation = new TranslateAnimation(offset, positionThree, 0, 0);

 85                     lbQuery.setTextColor(resources.getColor(R.color.unselect));

 86                 } else if (currIndex == 1) {

 87                     animation = new TranslateAnimation(positionOne, positionThree, 0, 0);

 88                     lbCheck.setTextColor(resources.getColor(R.color.unselect));

 89                 } else if (currIndex == 2) {

 90                     animation = new TranslateAnimation(positionTwo, positionThree, 0, 0);

 91                     lbPublish.setTextColor(resources.getColor(R.color.unselect));

 92                 }else if (currIndex == 4) {

 93                     animation = new TranslateAnimation(positionFour, positionThree, 0, 0);

 94                     lbRecommand.setTextColor(resources.getColor(R.color.unselect));

 95                 }else if(selectedIndex==currIndex){

 96                     animation=new TranslateAnimation(0, positionThree, 0, 0);

 97                     lbQuery.setTextColor(resources.getColor(R.color.unselect));

 98                 }

 99                 lbSend.setTextColor(resources.getColor(R.color.select));

100                 break;

101             case 4:

102                 if (currIndex == 0) {

103                     animation = new TranslateAnimation(offset, positionFour, 0, 0);

104                     lbQuery.setTextColor(resources.getColor(R.color.unselect));

105                 } else if (currIndex == 1) {

106                     animation = new TranslateAnimation(positionOne, positionFour, 0, 0);

107                     lbCheck.setTextColor(resources.getColor(R.color.unselect));

108                 } else if (currIndex == 2) {

109                     animation = new TranslateAnimation(positionTwo, positionFour, 0, 0);

110                     lbPublish.setTextColor(resources.getColor(R.color.unselect));

111                 }else if (currIndex == 3) {

112                     animation = new TranslateAnimation(positionThree, positionFour, 0, 0);

113                     lbSend.setTextColor(resources.getColor(R.color.unselect));

114                 }else if(selectedIndex==currIndex){

115                     animation=new TranslateAnimation(0, positionFour, 0, 0);

116                     lbQuery.setTextColor(resources.getColor(R.color.unselect));

117                 }

118                 lbRecommand.setTextColor(resources.getColor(R.color.select));

119                 break;

120

121             }

122

123             currIndex=selectedIndex;

124             animation.setFillAfter(true);

125             animation.setDuration(300);

126             buttomLine.startAnimation(animation);

127

128         }

129

130     }
这里根据之前选中的标题是哪个,确定要把小滑块从原本位置移动到新位置上,把原本选中颜色的文字变回不选中,把新选中文字的颜色更替。
设置ViewPager时还涉及到一个adapter的定义,代码如下
 1 public class MyViewPageAdapter extends FragmentPagerAdapter {

 2     private ArrayList<Fragment> arrayList;

 3

 4     public MyViewPageAdapter(FragmentManager fm) {

 5         super(fm);

 6         // TODO Auto-generated constructor stub

 7     }

 8

 9     public MyViewPageAdapter(FragmentManager fm,ArrayList<Fragment> arrayList)

10     {

11         super(fm);

12         this.arrayList=arrayList;

13     }

14

15

16     @Override

17     public Fragment getItem(int position) {

18         // TODO Auto-generated method stub

19         return arrayList.get(position);

20     }

21

22     @Override

23     public int getCount() {

24         // TODO Auto-generated method stub

25         return arrayList.size();

26     }

27

28     @Override

29     public int getItemPosition(Object object) {

30         return POSITION_NONE;

31     }

32 }
有个争议的地方,就是对public Object instantiateItem (ViewGroup container, int position)方法的重写,在网上看对这个方法重写后,多次切换ViewPager之后内容就会被清空掉,但是我重写了之后内容才不会被清空,有次还尝试了无论有没有重写照样被清空。
底部Tab导航
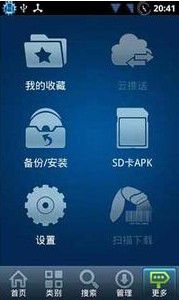
这个用的是TabHost了,个人认为主要的是TabHost和TabWidget,而主要还是靠TabWidget这部分把Tab的效果呈现出来,而页面的内容最终还是靠碎片来实现,这里可以用FrameLayout显示一个碎片,也可以通过ViewPager显示,布局文件如下
<?xml version="1.0" encoding="utf-8"?>

<TabHost

    xmlns:android="http://schemas.android.com/apk/res/android"

    android:id="@android:id/tabhost"

    android:layout_width="match_parent"

    android:layout_height="match_parent">


    <LinearLayout

        android:orientation="vertical"

        android:layout_width="match_parent"

        android:layout_height="match_parent"

        android:id="@+id/tabEnableLayout">


        <FrameLayout

            android:id="@+id/realtabcontent"

            android:layout_width="match_parent"

            android:layout_height="0dp"

            android:layout_weight="1"/>


        <TabWidget

            android:id="@android:id/tabs"

            android:layout_width="match_parent"

            android:layout_height="wrap_content"

            android:tabStripEnabled="false"

            android:background="#04508b"

            android:layout_weight="0"/>


    </ LinearLayout >

</TabHost>
然后java文件构造的方法中按顺序调用下面定义的方法
 1     //设置tab选项的内容

 2     private void SetViews()

 3     {

 4         fm=this.getActivity().getSupportFragmentManager();

 5

 6         tabHost=(TabHost)contentView. findViewById(android.R.id.tabhost);

 7         tabWidget=(TabWidget)contentView. findViewById(android.R.id.tabs);

 8         LinearLayout layout=(LinearLayout)tabHost.getChildAt(0);

 9         TabWidget tw=(TabWidget)layout.getChildAt(1);

10

11         relative1=(RelativeLayout)LayoutInflater.from(this.getActivity()).inflate(R.layout.tab_indicator_item, tw, false);

12         ((ImageView)relative1.getChildAt(0)).setBackgroundResource(R.drawable.selector_tab_home);

13         ((TextView)relative1.getChildAt(1)).setText("首页");

14

15         relative2=(RelativeLayout)LayoutInflater.from(this.getActivity()).inflate(R.layout.tab_indicator_item, tw, false);

16         ((ImageView)relative2.getChildAt(0)).setBackgroundResource(R.drawable.selector_tab_data);

17         ((TextView)relative2.getChildAt(1)).setText("数据");

18

19         relative3=(RelativeLayout)LayoutInflater.from(this.getActivity()).inflate(R.layout.tab_indicator_item, tw, false);

20         ((ImageView)relative3.getChildAt(0)).setBackgroundResource(R.drawable.selector_tab_room);

21         ((TextView)relative3.getChildAt(1)).setText("站房");

22

23         relative4=(RelativeLayout)LayoutInflater.from(this.getActivity()).inflate(R.layout.tab_indicator_item, tw, false);

24         ((ImageView)relative4.getChildAt(0)).setBackgroundResource(R.drawable.selector_tab_more);

25         ((TextView)relative4.getChildAt(1)).setText("更多");

26

27         indexFragment=new IndexFragment();

28         dataOptionFragment=new DataOptionFragment();

29         roomEnvFragment =new RoomEnvFragment();

30         moreFragment=new MoreFragment();

31

32     }
这里主要是获取了TabWidget,然后把逐个标签设置进去,标签的内容也是通过布局文件来设置。
 1 private void SetTabHost()

 2     {

 3         tabHost.setup();

 4         TabHost.OnTabChangeListener tabChangeListener = new TabHost.OnTabChangeListener(){

 5             @Override

 6             public void onTabChanged(String arg0) {

 7

 8                 catch(Exception ex)

 9                 {}

10

11                 if(arg0.equalsIgnoreCase("Home")){

12                     ChangeFragment(indexFragment);

13                     SELECT_TAB=1;

14                 }

15

16                 else if(arg0.equalsIgnoreCase("Data")){

17                     ChangeFragment(dataOptionFragment);

18                     SELECT_TAB=2;

19                 }

20

21                 else if(arg0.equalsIgnoreCase("Room")){

22                     ChangeFragment(roomEnvFragment);

23                     SELECT_TAB=3;

24                 }

25                 else if(arg0.equalsIgnoreCase("More")){

26                     ChangeFragment(moreFragment);

27                     SELECT_TAB=4;

28                 }

29

30                 else

31                 {

32                     switch (SELECT_TAB) {

33                     default:

34                     case 1:

35                         ChangeFragment(indexFragment);

36                         break;

37                     case 2:

38                         ChangeFragment(dataOptionFragment);

39                         break;

40                     case 3:

41                         ChangeFragment(roomEnvFragment);

42                         break;

43                     case 4:

44                         ChangeFragment(moreFragment);

45                         break;

46                     }

47                 }

48             }

49         };

50         tabHost.setCurrentTab(0);

51         tabHost.setOnTabChangedListener(tabChangeListener);

52         IniTab();

53         tabHost.setCurrentTab(0);

54     }
这里大部分代码都是定义Tab切换的事件,因为在Android中的TabHost跟之前在WinFor中的TabControl那样,标签切换了,内容跟着切换。切换时调用了一个方法,处理碎片的切换
1     private void ChangeFragment(Fragment frag)

2     {

3         ft= fm.beginTransaction();

4         ft.setTransition(FragmentTransaction.TRANSIT_FRAGMENT_FADE);

5         ft.replace(R.id.realtabcontent, frag);

6         ft.commit();

7     }
还有另一个方法是真的把Tab添加都TabHost里面去了
 1     //增添Tab的内容

 2     private void IniTab()

 3     {

 4         TabSpec tSpecHome=tabHost.newTabSpec("Home");

 5         TabSpec tSpecData=tabHost.newTabSpec("Data");

 6         TabSpec tSpecRoom=tabHost.newTabSpec("Room");

 7         TabSpec tSpecMore=tabHost.newTabSpec("More");

 8

 9         tSpecHome.setIndicator(relative1);

10         tSpecHome.setContent(new MyTabContent(this.getActivity().getBaseContext()));

11         tSpecData.setIndicator(relative2);

12         tSpecData.setContent(new MyTabContent(this.getActivity().getBaseContext()));

13         tSpecRoom.setIndicator(relative3);

14         tSpecRoom.setContent(new MyTabContent(this.getActivity().getBaseContext()));

15         tSpecMore.setIndicator(relative4);

16         tSpecMore.setContent(new MyTabContent(this.getActivity().getBaseContext()));

17

18         tabHost.addTab(tSpecHome);

19         tabHost.addTab(tSpecData);

20         tabHost.addTab(tSpecRoom);

21         tabHost.addTab(tSpecMore);

22

23     }
侧栏菜单
这个感觉比较简单,但是效果没那么好,主要用到的是FrameLayout布局(或者RelativeLayout布局)和ListView,因为FrameLayout只能让内容显示在左上角(RelativeLayout默认也是把内容显示在左上角),所以把ListView设置在FrameLayout(或RelativeLayout)最下面就可以了。
 1 <RelativeLayout

 2     xmlns:android="http://schemas.android.com/apk/res/android"

 3     android:layout_width="fill_parent"

 4     android:layout_height="fill_parent"

 5     >

 6      <RelativeLayout

 7            android:id="@+id/divTitle"

 8             android:layout_width="fill_parent"

 9             android:layout_height="45dp"

10             android:orientation="horizontal"

11             android:background="#007ACC"

12             >

13             <TextView

14                 android:layout_width="wrap_content"

15                 android:layout_height="wrap_content"

16                 android:textSize="22dp"

17                 android:layout_centerInParent="true"

18                 android:textColor="@android:color/white"

19                 android:text="@string/app_name"

20                 />

21                 <Button

22                     android:layout_width="wrap_content"

23                     android:layout_height="wrap_content"

24                     android:layout_alignParentRight="true"

25                     android:layout_centerVertical="true"

26                     android:text="刷新"

27                     android:id="@+id/titleBtnRefresh"

28                     />

29

30         </RelativeLayout>

31

32

33     <fragment

34         android:id="@+id/titles"

35         android:layout_width="wrap_content"

36         android:layout_height="match_parent"

37         android:layout_weight="1"

38         class="com.sysu.cityenv.androidapp.Fragments.TabHostFragment"/>

39     </LinearLayout>

40

41

42      <ListView

43         android:id="@+id/left_menu"

44         android:layout_height="fill_parent"

45         android:layout_width="120dp"

46         android:background="#F0F0F0"/>

47

48

49

50 </RelativeLayout>
ListView设置的代码就不列举了,拉出侧栏的代码是通过触控事件来实现的,在点击下去的时候记录开始位置,到提起来的时候就判断移动的方向,从而把ListView设置成显示和隐藏
 1     @Override

 2     public boolean onTouchEvent(MotionEvent event)

 3     {

 4         float xDelta=(float) Math.abs(mPostion-event.getX());

 5         if(event.getAction()==MotionEvent.ACTION_DOWN){

 6             mPostion= event.getX();

 7             mPositionY=event.getY();

 8

 9         }

10         if(event.getAction()==MotionEvent.ACTION_UP&&xDelta>70)

11         {

12             if(xDelta>Math.abs(mPositionY-event.getY())){

13

14                 boolean isVisiable=leftMenu.getVisibility()==View.VISIBLE;

15                 if(mPostion>event.getX()&&isVisiable)     Hide();

16                 else if(mPostion<event.getX()&&mPostion<=sWidth*0.1)    Show();

17             }

18         }

19

20         return super.onTouchEvent(event);

21     }
不过侧栏滑出来了,后面的内容还是会有事件响应的,就算在这里把返回值设成false也没用(true表明在事件冒泡中还需要处理,false则表示不需要处理了),因为在整个事件冒泡过程中,这个OnTouch的时间在最后才触发,那只能把后面视图作处理,让它的返回是false,我的处理是这样子的,把ListView下面的内容放在一个Layout的布局中去,那个Layout是自己拓展某个Layout视图,重写它的onInterceptTouchEvent方法,让它在适当的时候返回false,不对触控有响应,那么点击事件也没响应了,因为Click事件是包在了两个Touch事件里面的(DOWN和UP)。
 1     @Override

 2     public boolean onTouchEvent(MotionEvent event)

 3     {

 4         float xDelta=(float) Math.abs(mPostion-event.getX());

 5         if(event.getAction()==MotionEvent.ACTION_DOWN){

 6             mPostion= event.getX();

 7             mPositionY=event.getY();

 8

 9             if(mPostion<=sWidth*0.1)

10                 ((MyLinearLayout)findViewById(R.id.tabEnableLayout)).SetControlEnable(false);

11         }

12         if(event.getAction()==MotionEvent.ACTION_UP&&xDelta>70)

13         {

14             if(xDelta>Math.abs(mPositionY-event.getY())){

15

16                 boolean isVisiable=leftMenu.getVisibility()==View.VISIBLE;

17                 if(mPostion>event.getX()&&isVisiable)     Hide();

18                 else if(mPostion<event.getX()&&mPostion<=sWidth*0.1)    Show();

19             }

20         }

21         else if(event.getAction()==MotionEvent.ACTION_UP&&mPostion<=sWidth*0.1)

22         {

23             ((MyLinearLayout)findViewById(R.id.tabEnableLayout)).SetControlEnable(true);

24         }

25

26         return super.onTouchEvent(event);

27     }
代码就成这样子,但是这样有个弊端是,滑动的距离太小的时候,侧栏没显示出来,但是侧栏下面的内容已经停止了事件响应,暂时没好办法去处理。