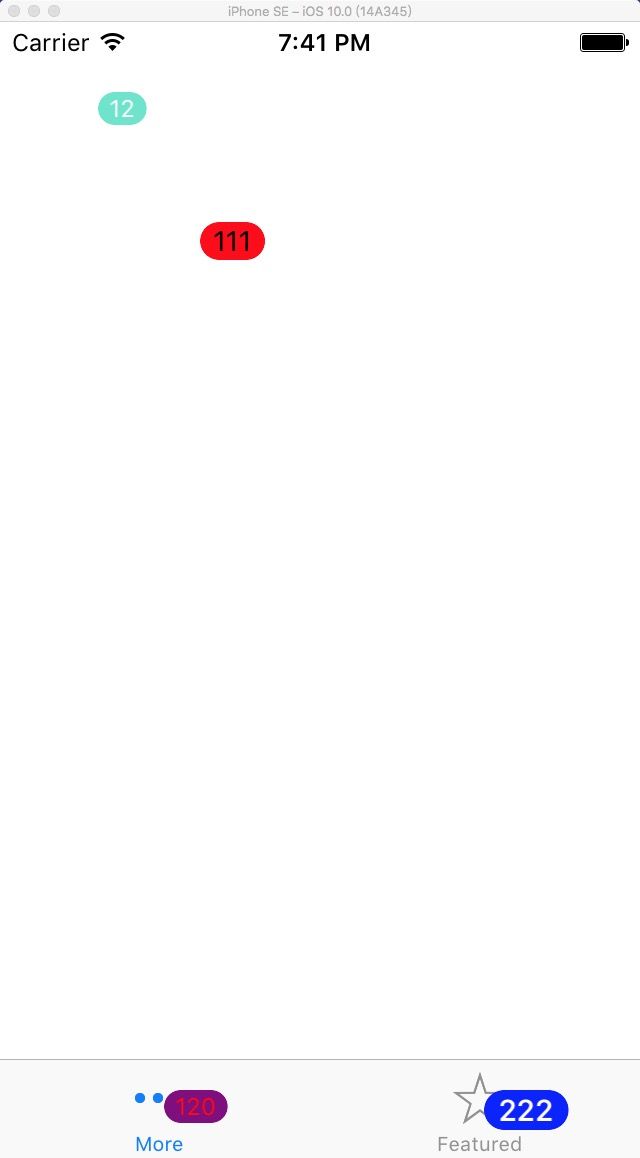
介绍
一个简单易用的badgeview,支持自定义背景色,字体,文字颜色。通过扩展UITabbar,任意显示在某个tabbarItem。github地址在此。
为什么要扩展UITabbar呢
UITabbarItem中其实有设置badgeValue的方法,但是在iOS10后,才能自定义背景色,但是项目中往往会自定义背景色。
@property(nullable, nonatomic, copy) NSString *badgeValue; // default is nil
@property (nonatomic, readwrite, copy, nullable) UIColor *badgeColor NS_AVAILABLE_IOS(10_0) UI_APPEARANCE_SELECTOR;
功能点
- 支持手写frame和autolayout,支持在IB中直接设置bgColor,textColor,badgeValue
- 自动计算size,手写frame时,只需调用sizetoFit,autolayout设置instrinsicContentSize为placeholder。具体可以看demo。
实现
BadgeView
BadgeView的实现比较简单,View里面加个label。
手写frame时,重写了sizeToFit,自适应大小。
- (void)sizeToFit {
    [super sizeToFit];

    CGRect frame = self.frame;
    frame.size = [self size];
    self.frame = frame;
}
在autolayout下,重写intrinsicContentSize,设置内部size。
- (CGSize)intrinsicContentSize {
    return [self size];
}
UITabbar+Badge
讲下UITabbar+Badge,主要利用category的关联属性,将各个badgeView,以{index:badgeView}放到dict中。主要代码如下:
- (NSMutableDictionary *)badgeDict {
    NSMutableDictionary *dict = objc_getAssociatedObject(self, _cmd);
    if (!dict) {
        dict = [NSMutableDictionary dictionaryWithCapacity:0];
        objc_setAssociatedObject(self, _cmd, dict, OBJC_ASSOCIATION_RETAIN);
    }

    return dict;
}

- (BadgeView *)badgeViewAtIndex:(NSInteger)index {
    BadgeView *badgeView =  [self.badgeDict objectForKey:@(index)];
    if (!badgeView && self.items.count > 0) {
        badgeView = [[BadgeView alloc] init];

        [badgeView sizeToFit];

        float tabItemWidth = self.bounds.size.width / self.items.count;

        CGRect frame = badgeView.frame;
        frame.origin = CGPointMake(tabItemWidth * index + tabItemWidth / 2 + 2, 15);
        badgeView.frame = frame;

        [self addSubview:badgeView];

        [self.badgeDict setObject:badgeView forKey:@(index)];
    }

    return badgeView;
}
暴露了几个基础方法,有需要可自行添加。
@interface UITabBar (Badge)

// 更新badge和bgColor
- (void)updateBadge:(NSString *)badge bgColor:(UIColor *)bgColor atIndex:(NSInteger)index;

// 更新badge
- (void)updateBadge:(NSString *)badge atIndex:(NSInteger)index;

// 更新文本颜色
- (void)updateBadgeTextColor:(UIColor *)textColor atIndex:(NSInteger)index;

// 更新背景色
- (void)updateBadgeBgColor:(UIColor *)bgColor atIndex:(NSInteger)index;

// 更新文本字体
- (void)updateBadgeTextFont:(UIFont *)textFont atIndex:(NSInteger)index;

@end
使用
直接将BadgeView.h/m,UITabbar+Badge.h/m拖动工程中。
1.手写frame
只需设置origin。
BadgeView *badgeView = [[BadgeView alloc] initWithFrame:CGRectMake(100, 100, 0, 0)];

badgeView.badgeValue = @"111";
badgeView.textColor = [UIColor blackColor];
badgeView.textFont = [UIFont systemFontOfSize:14];
badgeView.bgColor = [UIColor redColor];
[badgeView sizeToFit];

[self.view addSubview:badgeView];
2.tabbar添加badge
在tabbarController里面,这里测试放在了viewDidLoad里面。
- (void)viewDidLoad {
    [super viewDidLoad];
    // Do any additional setup after loading the view.

    [self.tabBar updateBadge:@"120" bgColor:[UIColor purpleColor] atIndex:0];
    [self.tabBar updateBadgeTextColor:[UIColor redColor] atIndex:0];

    [self.tabBar updateBadge:@"222" bgColor:[UIColor blueColor] atIndex:1];
    [self.tabBar updateBadgeTextFont:[UIFont boldSystemFontOfSize:15] atIndex:1];
}
