1~开发准备
JDK:1.8
Spring Boot:1.5.9.RELEASE
Spring Coud:Edgware.RELEASE
IDE:IntelliJ IDEA 2017
Maven:3.3.9
2~创建服务注册中心
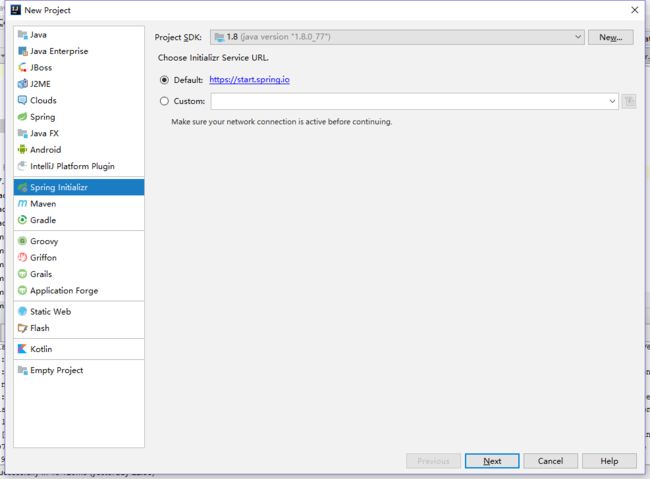
File->New->Projects->Spring Initializr
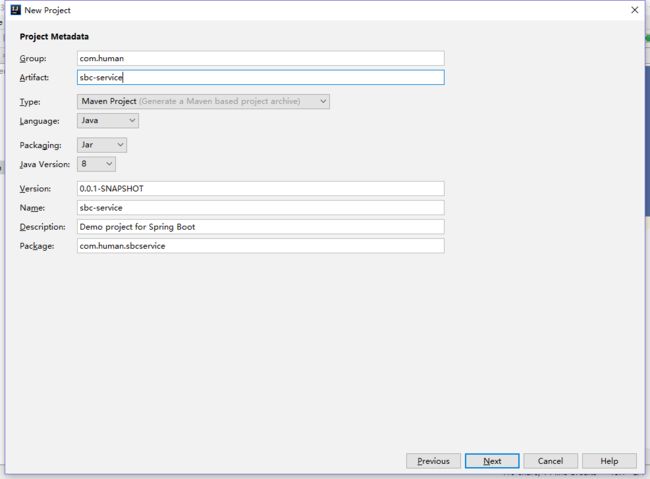
点击Next,填写信息如下:
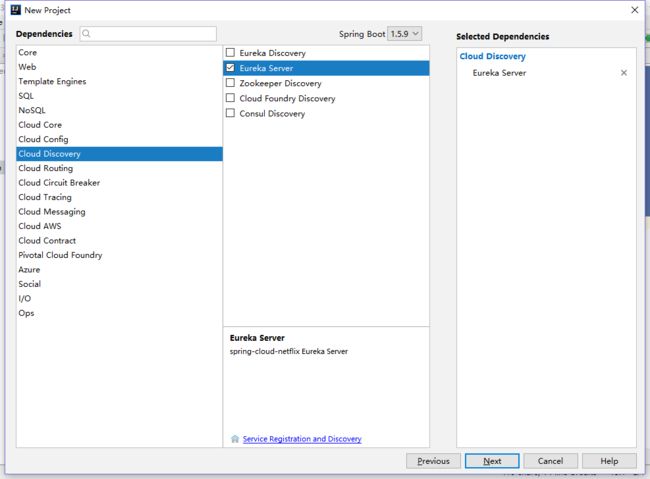
然后点击Next,选择如下:
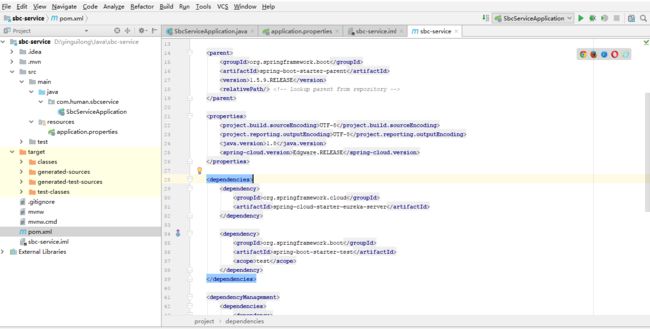
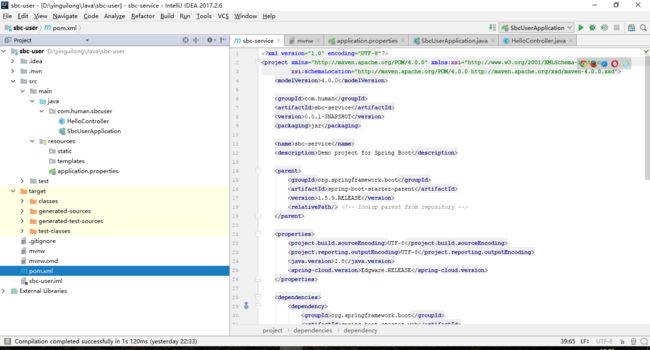
点击Next,然后点击Finish.项目结构如下:其中pom.xml文件内容如下:
[](javascript:void(0); "复制代码")
[
 4.0.0
 com.human
sbc-service
0.0.1-SNAPSHOT
jar

sbc-service
Demo project for Spring Boot


    org.springframework.boot
    spring-boot-starter-parent
    1.5.9.RELEASE


    UTF-8
    UTF-8
    1.8
    Edgware.RELEASE


        org.springframework.cloud
        spring-cloud-starter-eureka-server


        org.springframework.boot
        spring-boot-starter-test
        test


            org.springframework.cloud
            spring-cloud-dependencies
            ${spring-cloud.version}
            pom
            import


            org.springframework.boot
            spring-boot-maven-plugin
](javascript:void(0); "复制代码")
项目初始化完成,修改resources文件夹下application.properties文件,内容如下:
[](javascript:void(0); "复制代码")
server.port=8081[
spring.application.name=human-service
eureka.instance.hostname=localhost
eureka.client.registerWithEureka=false
eureka.client.fetchRegistry=false
eureka.client.serviceUrl.defaultZone=http://{server.port}/eureka/
](javascript:void(0); "复制代码")
然后修改主程序代码如下:
[](javascript:void(0); "复制代码")
package com.human.sbcservice; import org.springframework.boot.SpringApplication; import org.springframework.boot.autoconfigure.SpringBootApplication; import org.springframework.cloud.netflix.eureka.server.EnableEurekaServer;[@SpringBootApplication
@EnableEurekaServer public class SbcServiceApplication { public static void main(String[] args) {
SpringApplication.run(SbcServiceApplication.class, args);
}
}
](javascript:void(0); "复制代码")
至此,一个微服务注册中心完成
3~创建微服务提供者
大体上与创建注册中心相同,在选择依赖的时候如下图
选择完毕,点击Next,然后点击Finish,完成后项目结构如图:
pom.xml代码如下:
[](javascript:void(0); "复制代码")
[
 4.0.0
 com.human
sbc-user
0.0.1-SNAPSHOT
jar

sbc-user3
Demo project for Spring Boot


    org.springframework.boot
    spring-boot-starter-parent
    1.5.9.RELEASE


    UTF-8
    UTF-8
    1.8
    Edgware.RELEASE


        org.springframework.cloud
        spring-cloud-starter-eureka


        org.springframework.boot
        spring-boot-starter-web


        org.springframework.boot
        spring-boot-starter-test
        test


            org.springframework.cloud
            spring-cloud-dependencies
            ${spring-cloud.version}
            pom
            import


            org.springframework.boot
            spring-boot-maven-plugin
](javascript:void(0); "复制代码")
然后打开主程序文件,修改代码如下:
[](javascript:void(0); "复制代码")
package com.human.sbcuser; import org.springframework.boot.SpringApplication; import org.springframework.boot.autoconfigure.SpringBootApplication; import org.springframework.cloud.client.discovery.EnableDiscoveryClient;[@EnableDiscoveryClient//Eureka微服务注解
@SpringBootApplication public class SbcUserApplication { public static void main(String[] args) {
SpringApplication.run(SbcUserApplication.class, args);
}
}
](javascript:void(0); "复制代码")
修改application.properties文件,内容如下:
server.port=8082
 eureka.client.service-url.defaultZone=http://localhost:8081/eureka/
 spring.application.name=cloud-simple-service
新建一个名为HelloController文件,具体代码:
[](javascript:void(0); "复制代码")
package com.human.sbcuser; import org.springframework.stereotype.Controller; import org.springframework.web.bind.annotation.RequestMapping; import org.springframework.web.bind.annotation.ResponseBody;[@Controller public class HelloController {
@RequestMapping("/")
@ResponseBod public String hello()
{ return "hello KinY ~KoKo";
}
}
](javascript:void(0); "复制代码")
至此,一个简单的服务提供者创建完毕
4~创建微服务消费者
利用Rbbon创建客户端,其中group:com.human,Artifact:sbc-consumer,剩下基本上与创建注册中心相同,其中选择依赖时如下图:
完成后,pom.xml文件内容如下:
[](javascript:void(0); "复制代码")
[
 4.0.0
 com.human
sbc-consumer
0.0.1-SNAPSHOT
jar

sbc-service
Demo project for Spring Boot


    org.springframework.boot
    spring-boot-starter-parent
    1.5.9.RELEASE


    UTF-8
    UTF-8
    1.8
    Edgware.RELEASE


        org.springframework.boot
        spring-boot-starter-web


        org.springframework.cloud
        spring-cloud-starter-eureka-server


        org.springframework.cloud
        spring-cloud-starter-ribbon


        org.springframework.boot
        spring-boot-starter-test
        test


            org.springframework.cloud
            spring-cloud-dependencies
            ${spring-cloud.version}
            pom
            import


            org.springframework.boot
            spring-boot-maven-plugin
](javascript:void(0); "复制代码")
修改程序主类,内容如下:
[](javascript:void(0); "复制代码")
package com.human.sbconsumer; import org.springframework.boot.SpringApplication; import org.springframework.boot.autoconfigure.SpringBootApplication; import org.springframework.cloud.client.discovery.EnableDiscoveryClient; import org.springframework.cloud.client.loadbalancer.LoadBalanced; import org.springframework.context.annotation.Bean; import org.springframework.web.client.RestTemplate;[@EnableDiscoveryClient
@SpringBootApplication public class SbcConsumerApplication {@Bean @LoadBalanced RestTemplate restTemplate(){ return new RestTemplate(); } public static void main(String[] args) { SpringApplication.run(SbcConsumerApplication.class, args); }}
](javascript:void(0); "复制代码")
修改配置文件application.properties,内容如下:
server.port=8083
 eureka.client.service-url.defaultZone=http://localhost:8081/eureka/
 spring.application.name=cloud-simple-consumer
新增HelloController文件,内容如下:
[](javascript:void(0); "复制代码")
package com.human.sbconsumer; import org.springframework.beans.factory.annotation.Autowired; import org.springframework.stereotype.Controller; import org.springframework.web.bind.annotation.RequestMapping; import org.springframework.web.bind.annotation.ResponseBody; import org.springframework.web.bind.annotation.RestController; import org.springframework.web.client.RestTemplate;[@RestController public class HelloController {
@Autowired
RestTemplate restTemplate;
@RequestMapping("/") public String hello()
{ return restTemplate.getForEntity("http://cloud-simple-service/",String.class).getBody();
}
}
](javascript:void(0); "复制代码")
至此编码完成.
5~运行
先运行注册中心项目(sbc-service),然后运行服务提供者项目(sbc-user),打开浏览器输入地址:http://localhost:8081/,显示内容如下:
其中红色框内,说明服务提供者注册成功,此时访问地址:http://localhost:8082/ 输出文本:hello KinY ~KoKo,说明服务提供者正常运行,下面运行服务消费者(sbc-consumer),再访问http://localhost:8081/ 发现变成如下内容:
说明服务客户端也成功注册,下面直接访问 http://localhost:8083/ 浏览器输出文本:hello KinY ~KoKo 大功告成!!
至此一个简配的微服务架构搭建完毕.
6~补充
①:在选择端口时注意不要与其他程序冲突
②:其中消费者基于Ribbon创建,Ribbon是基于http和tcp的客户端负载均衡器
