一、规划
1、swarm01作为manager节点,swarm02和swarm03作为worker节点。
# cat /etc/hosts
127.0.0.1   localhost
192.168.139.175  swarm01
192.168.139.176  swarm02
192.168.139.177  swarm03
2、配置SSH免密登陆
# ssh-keygen -t rsa -P ''
# ssh-copy-id -i .ssh/id_rsa.pub [email protected]
# ssh-copy-id -i .ssh/id_rsa.pub [email protected]
二、安装docker和ansible
1、安装配置ansible
# yum -y install ansible
# cat /etc/ansible/hosts | grep -v ^# | grep -v ^$
[node]
192.168.139.176
192.168.139.177
# sed -i "s/SELINUX=enforcing/SELINUX=disabled" /etc/selinux/config
# ansible node -m copy -a 'src=/etc/selinux/config dest=/etc/selinux/'
# systemctl stop firewalld
# systemctl disable firewalld
# ansible node -a 'systemctl stop firewalld'
# ansible node -a 'systemctl disable firewalld'
注:这里选择关闭防火墙,实际环境中可自行开放端口。
2、安装docker
在manager节点安装docker
# yum install -y yum-utils device-mapper-persistent-data lvm2
# yum-config-manager --add-repo http://mirrors.aliyun.com/docker-ce/linux/centos/docker-ce.repo
# yum list docker-ce --showduplicates | sort -r
# yum -y install docker-ce
# docker --version
Docker version 17.06.0-ce, build 02c1d87
# systemctl start docker
# systemctl status docker
# systemctl enable docker
使用ansible在worker节点安装docker
# ansible node -m copy -a 'src=/etc/yum.repos.d/docker-ce.repo dest=/etc/yum.repos.d/'
# ansible node -m yum -a "state=present name=docker-ce"
# ansible node -a 'docker --version'
192.168.139.173 | SUCCESS | rc=0 >>
Docker version 17.06.0-ce, build 02c1d87
192.168.139.174 | SUCCESS | rc=0 >>
Docker version 17.06.0-ce, build 02c1d87
# ansible node -a 'systemctl start docker'
# ansible node -a 'systemctl status docker'
# ansible node -a 'systemctl enable docker'
三、配置docker swarm集群
1、创建docker swarm集群
# docker swarm init --listen-addr 0.0.0.0
Swarm initialized: current node (a1tno675d14sm6bqlc512vf10) is now a manager.
To add a worker to this swarm, run the following command:
    docker swarm join --token SWMTKN-1-3sp9uxzokgr252u1jauoowv74930s7f8f5tsmm5mlk5oim359e-dk52k5uul50w49gbq4j1y7zzb 192.168.139.175:2377
To add a manager to this swarm, run 'docker swarm join-token manager' and follow the instructions.
2、查看节点
# docker node ls
ID                           HOSTNAME      STATUS      AVAILABILITY   MANAGER STATUS
a1tno675d14sm6bqlc512vf10 *  swarm01        Ready         Active           Leader
3、查看加入集群manager管理节点的命令
# docker swarm join-token manager
To add a manager to this swarm, run the following command:
    docker swarm join --token SWMTKN-1-3sp9uxzokgr252u1jauoowv74930s7f8f5tsmm5mlk5oim359e-7tdlpdnkyfl1bnq34ftik9wxw 192.168.139.175:2377
4、查看加入集群worker节点的命令
# docker swarm join-token worker
To add a worker to this swarm, run the following command:
    docker swarm join --token SWMTKN-1-3sp9uxzokgr252u1jauoowv74930s7f8f5tsmm5mlk5oim359e-dk52k5uul50w49gbq4j1y7zzb 192.168.139.175:2377
5、将前面规划的两个worker节点加入集群
# docker swarm join --token SWMTKN-1-3sp9uxzokgr252u1jauoowv74930s7f8f5tsmm5mlk5oim359e-dk52k5uul50w49gbq4j1y7zzb 192.168.139.175:2377
This node joined a swarm as a worker.
6、查看worker节点是否已加入集群
# docker node ls
ID                        HOSTNAME    STATUS  AVAILABILITY  MANAGER STATUS
7zkbqgrjlsn8c09l3fagtfwre     swarm02  Ready      Active
a1tno675d14sm6bqlc512vf10 *   swarm01  Ready      Active         Leader
apy9zys2ch4dlwbmgdqwc0pn3     swarm03  Ready      Active
7、查看docker swarm的管理网络
# docker network ls
NETWORK ID          NAME                DRIVER              SCOPE
05efca714d2f        bridge              bridge              local
c9cd9c37edd7        docker_gwbridge     bridge              local
10ac9e48d81b        host                host                local
n60tdenc5jy7        ingress             overlay             swarm
a9284277dc18        none                null                local
这里,一个docker swarm集群就搭建好了
四、搭建docker swarm的UI—Portainer
Portainer地址:https://portainer.io/。
1、使用该命令部署Portainer
# docker service create \
--name portainer \
--publish 9000:9000 \
--constraint 'node.role == manager' \
--mount type=bind,src=//var/run/docker.sock,dst=/var/run/docker.sock \
portainer/portainer \
-H unix:///var/run/docker.sock
# docker images |grep portainer
portainer/portainer  latest  07cde96d4789   2 weeks ago  10.4MB
# docker service ls                    ###查看集群列表
ID              NAME        MODE     REPLICAS      IMAGE             PORTS
p5bo3n0fmqgz  portainer  replicated    1/1   portainer/portainer:latest   *:9000->9000/tcp
这就部署好了
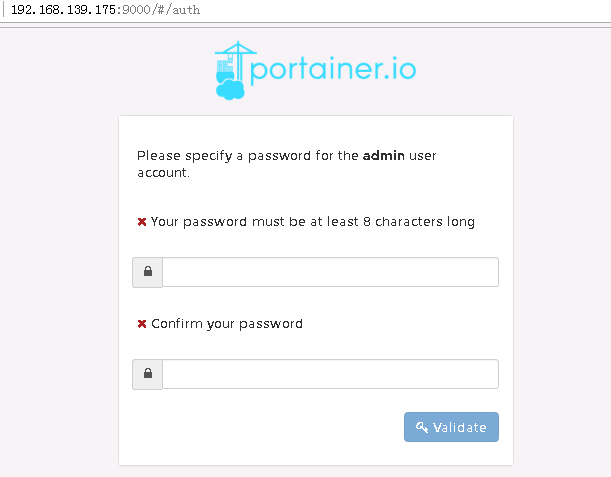
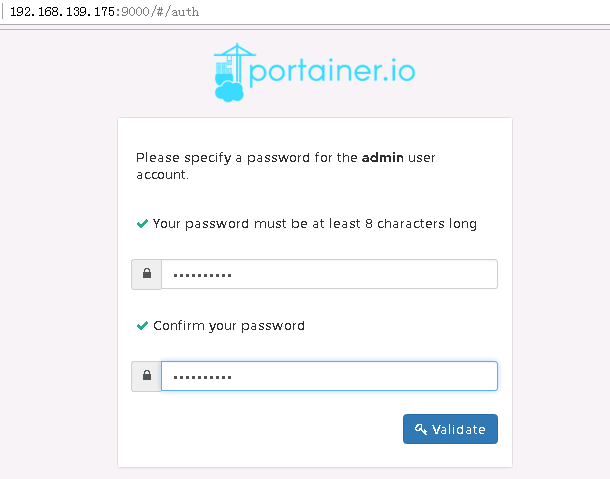
2、浏览器输入http://localhost:9000进入该UI界面,如下所示,第一次进入Portainer,配置8位数的admin密码
密码修改完成后点击“validate”验证
如下图所示,输入admin用户名和密码进入Portainer
首页如下
查看swarm节点模块
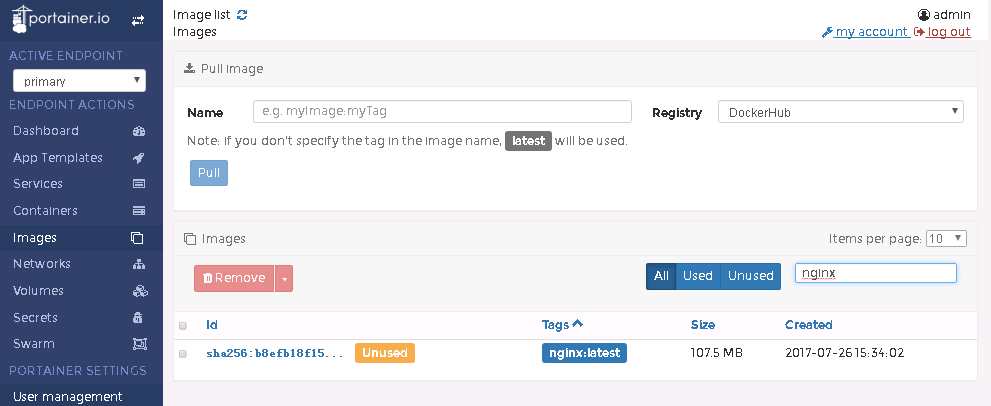
这里可以在images模块pull镜像,在这里我pull了nginx
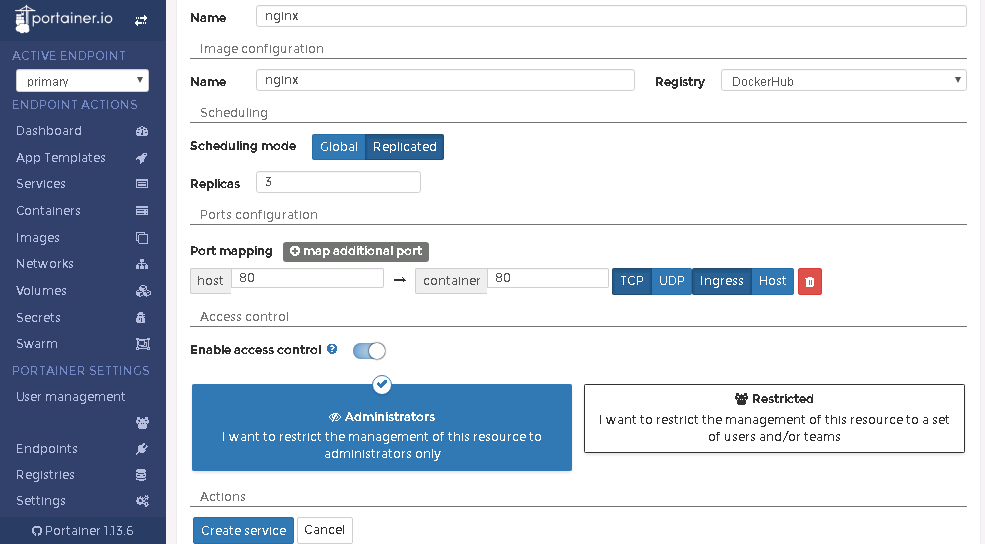
在Services模块下创建nginx服务,Services > Add service,这里创建三个副本,并将80端口映射出去,最后点击“Create Service”创建服务
刷新服务列表,查看是否创建成功
3、使用命令进行确认
# docker images | grep nginxnginx   latest    b8efb18f159b     7 days ago     107MB
# ansible node -m shell -a 'docker images|grep nginx'
192.168.139.177 | SUCCESS | rc=0 >>
nginx   latest    b8efb18f159b     8 days ago     107MB
192.168.139.176 | SUCCESS | rc=0 >>
nginx   latest    b8efb18f159b     8 days ago     107MB
# docker service ls        ###查看服务的任务列表
ID             NAME     MODE     REPLICAS   IMAGE        PORTS
emrs3rj73bwh  Nginx  replicated   3/3    nginx:latest  *:80->80/tcp
p5bo3n0fmqgz  portainer  replicated  1/1  portainer/portainer:latest   *:9000->9000/tcp
# docker service ps Nginx
ID                  NAME                IMAGE               NODE
0smpndfx0bwc        Nginx.1             nginx:latest        swarm03
werrrzlyfbf1        Nginx.2             nginx:latest        swarm01
l7puro0787cj        Nginx.3             nginx:latest        swarm02

DESIRED STATE       CURRENT STATE          ERROR               PORTS
Running          Running 15 minutes ago
Running          Running 15 minutes ago
Running          Running 15 minutes ago
五、搭建docker swarm的UI—Shipyard
Shipyard的UI也是比较简单的,但是比较反复,它需要在每个节点都pull相应镜像才能加入Shipyard的UI。
1、先pull相应镜像到本地,这里我使用的是网易蜂巢的镜像,很快而且镜像也是比较新的
# docker pull hub.c.163.com/library/alpine:latest
# docker pull hub.c.163.com/library/rethinkdb:latest
# docker pull hub.c.163.com/longjuxu/microbox/etcd:latest
# docker pull hub.c.163.com/wangjiaen/shipyard/docker.io/shipyard/docker-proxy:latest
# docker pull hub.c.163.com/library/swarm:latest
# docker pull hub.c.163.com/wangjiaen/shipyard/docker.io/shipyard/shipyard:latest
2、给这些镜像新建一个tag标签
# docker tag 7328f6f8b418 alpine
# docker tag 4a511141860c rethinkdb
# docker tag 6aef84b9ec5a microbox/etcd
# docker tag cfee14e5d6f2 shipyard/docker-proxy
# docker tag 0198d9ac25d1 swarm
# docker tag 36fb3dc0907d shipyard/shipyard
3、使用如下命令搭建Shipyard的UI
# curl -sSL https://shipyard-project.com/deploy | bash -s
Deploying Shipyard
 -> Starting Database
 -> Starting Discovery
 -> Starting Cert Volume
 -> Starting Proxy
 -> Starting Swarm Manager
 -> Starting Swarm Agent
 -> Starting Controller
Waiting for Shipyard on 192.168.139.175:8080
..
Shipyard available at http://192.168.139.175:8080
Username: admin Password: shipyard
4、根据提示输入http://localhost:8080,输入用户名admin,密码shipyard进入shipyard
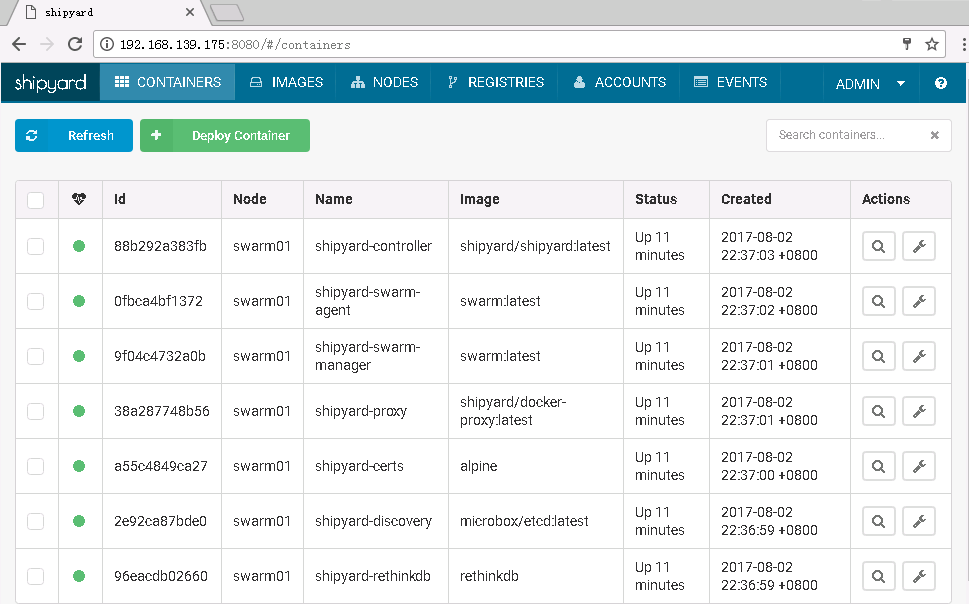
5、进入shipyard首页容器界面
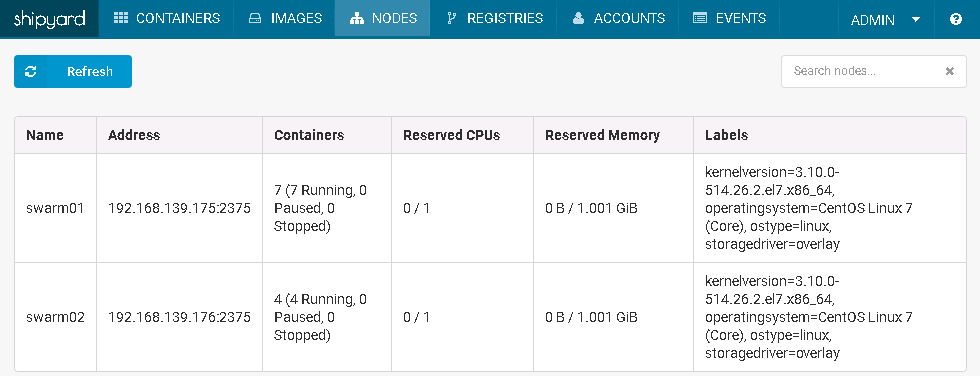
6、进入nodes模块查看,这里现在只有manager节点
7、在worker节点上pull并tag镜像,即是重复如上的第①和第②步,之后,在该worker节点上输入如下命令将其加入shipyard
# curl -sSL https://shipyard-project.com/deploy | ACTION=node DISCOVERY=etcd://192.168.139.175:4001 bash -s
Adding Node
 -> Starting Cert Volume
 -> Starting Proxy
 -> Starting Swarm Manager
 -> Starting Swarm Agent
Node added to Swarm: 192.168.139.176
其他节点同理。
对比两种UI,其实都是比较简单的,个人认为Portainer较好,在manager节点pull一个镜像即可搭建UI。
问题:
manager:
# docker swarm init --advertise-addr 192.168.139.175
worker:
# docker swarm join --token SWMTKN-1-4dwtfbdvjmuf3limglbpy66k85ply2cn66hd0ugsaxfed5fj1d-3rp33pedt9k7ewpfizbzc9bvi 192.168.139.175:2377
Error response from daemon: Timeout was reached before node was joined. The attempt to join the swarm will continue in the background. Use the "docker info" command to see the current swarm status of your node.
出现worker节点无法加入集群的问题,这里需要设置监听地址全零。
本文出自https://www.centos.bz/2017/08/docker-swarm-cluster-shipyard-ui-manager/
