Xamarin.Android开发实践(六)
Xamarin.Android通知详解
一、发送通知的机制
在日常的app应用中经常需要使用通知,因为服务、广播后台活动如果有事件需要通知用户,则需要通过通知栏显示,而在Xamarin.Android下的通知需要获取NotificationManager服务,而该服务需要通过GetSystemService获取,同时还要传递一个标识符。获取了通知管理器后我们就可以实例化Notification,然后再由NotificationManager发送出去。这就是整个过程了。下面我们将一一详解通知。
二、前期准备
为了下面的学习和演示我们需要做好一些前期的准备
1.打开Main.axml删除上面的控件
2.打开MainActivity.cs文件并写入以下内容
1 [Activity(Label = "NotificationStudy", MainLauncher = true, Icon = "@drawable/icon")] 2 public class MainActivity : Activity 3 { 4 private NotificationManager nMgr; 5 6 protected override void OnCreate(Bundle bundle) 7 { 8 base.OnCreate(bundle); 9 SetContentView(Resource.Layout.Main); 10 11 //获取通知管理类 12 nMgr = (NotificationManager)GetSystemService(NotificationService);
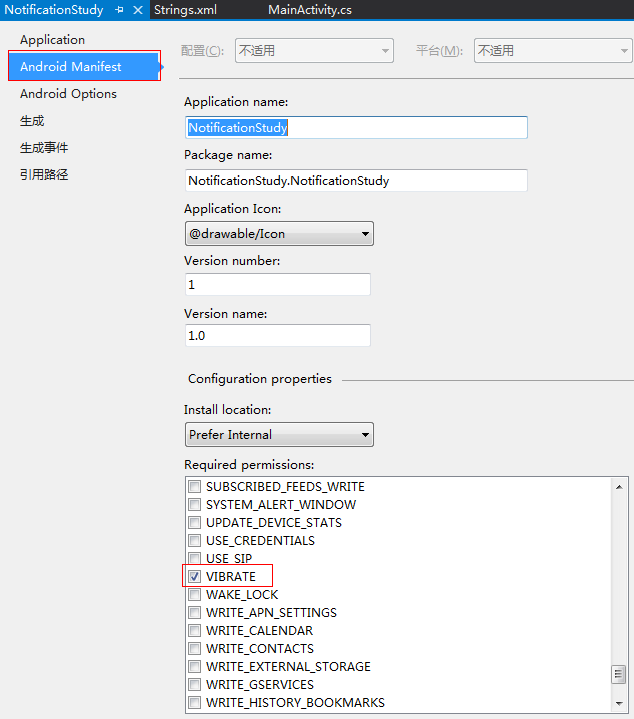
3.右击项目-》属性然后按照如下所示加上能够控制振动的权限
三、发送普通通知
首先我们打开Main.axml文件,然后设置如下一个按钮:

并设置id为@+id/normalButton
在MainActivity.cs先获取按钮对象:
1 Button normalButton = FindViewById<Button>(Resource.Id.normalButton);
监听normalButton按钮的点击事件:
 1             normalButton.Click += (e, s) =>

 2  {  3 //设置通知的图标以及显示的简介Title  4 Notification notify = new Notification(Resource.Drawable.Icon, "普通通知");  5 //初始化点击通知后打开的活动  6 PendingIntent pintent = PendingIntent.GetActivity(this, 0, new Intent(this, typeof(MainActivity)), PendingIntentFlags.UpdateCurrent);  7 //设置通知的主体  8 notify.SetLatestEventInfo(this, "普通通知标题", "普通通知内容", pintent);  9 //发送通知 10 nMgr.Notify(0, notify); 11 };
其中我们先实例化了一个Notification对象,并设置其图标以及Ticker文字:
1 Notification notify = new Notification(Resource.Drawable.Icon, "普通通知");
当然众所周知当我们点击通知之后都会打开对应的活动,所以我们需要初始化一个延迟意图,以便通知可以打开:
1 PendingIntent pintent = PendingIntent.GetActivity(this, 0, new Intent(this, typeof(MainActivity)), PendingIntentFlags.UpdateCurrent);
这个PendingIntent仅仅只是Intent的一个封装。最后是设置通知的标题和内容以及对应的活动,最后就是发送这个通知,再发送通知的Notify方法中第一个参数为该通知的ID,有了这个ID后面就可以取消这个通知。
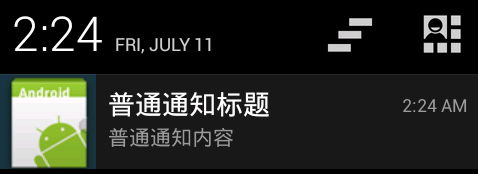
下面我们测试,发送该通知:
四、取消通知
通过上面的代码我们已经发送了一个通知,那么我们还需要关闭这个通知,这里我们再在Main.axml中添加一个按钮:

并设置其id为@+id/cancelNotifyButton
打开MainActivity.cs文件,并绑定监听事件:
1 Button cancelNotifyButton = FindViewById<Button>(Resource.Id.cancelNotifyButton); 2 cancelNotifyButton.Click += (e, s) => 3 { 4 //根据id取消通知 5 nMgr.Cancel(0); 6 };
然后发送一个通知后,点击取消普通通知,会发现通知栏中不存在我们发送的通知了。
五、发送带有声音、震动和LED灯的通知
首先我们还是要在Main.axml中添加一个按钮:

并设置它的id为@+id/lsvButton
打开MainActivity.cs并写入如下代码:
1 Button lsvButton = FindViewById<Button>(Resource.Id.lsvButton); 2 lsvButton.Click += (e, s) => 3 { 4 Notification notify = new Notification(Resource.Drawable.Icon, "带有声音、LED光和震动的通知"); 5 //设置该通知具有声音、LED光和震动 6 notify.Defaults = NotificationDefaults.All; 7 8 //获取系统默认的通知声音 9 Android.Net.Uri ringUri = RingtoneManager.GetDefaultUri(RingtoneType.Notification); 10 //设置通知的声音 11 notify.Sound = ringUri; 12 13 //设置一秒的震动 14 notify.Vibrate = new long[] { 1000 }; 15 16 //设置LED的颜色为绿色 17 notify.LedARGB = Color.Green; 18 //设置LED显示时间为1s 19 notify.LedOnMS = 1000; 20 //设置LED熄灭时间为1s 21 notify.LedOffMS = 1000; 22 //设置标志位,否则无法显示LED 23 notify.Flags = NotificationFlags.ShowLights | notify.Flags; 24 25 PendingIntent pintent = PendingIntent.GetActivity(this, 0, new Intent(this, typeof(MainActivity)), 0); 26 27 notify.SetLatestEventInfo(this, "标题", "内容", pintent); 28 29 nMgr.Notify(1, notify); 30 };
下面我们来分析一下代码,既然这个通知带有声音等,那么我们需要设置Defaults:
1 notify.Defaults = NotificationDefaults.All;
因为笔者使用了所有,所以直接是All,当然还可以是Sound、Vibrate和Lights的组合
为了能够贴近系统,所以我们并没有设置个性的声音,而是获取了系统本身的通知声音,下面的代码就是获取代码:
1 Android.Net.Uri ringUri = RingtoneManager.GetDefaultUri(RingtoneType.Notification);
最后是将这个声音赋给通知:
1 notify.Sound = ringUri;
然后就是震动:
1 notify.Vibrate = new long[] { 1000 };
笔者设置的是震动一秒,当然这是一个数组。而规则就是 震动的毫秒数,静止的毫秒数,震动的毫秒数…这种规则
最后就是比较麻烦的LED,首先是指定LED灯的颜色(如果不存在该颜色,系统会选择临近的颜色):
1 notify.LedARGB = Color.Green;
然后笔者设置了显示的毫秒数与熄灭的毫秒数:
1 //设置LED显示时间为1s 2 notify.LedOnMS = 1000; 3 //设置LED熄灭时间为1s 4 notify.LedOffMS = 1000;
为了能够确保LED能够显示我们还需要设置Flags:
1 notify.Flags = NotificationFlags.ShowLights | notify.Flags;
最后发送通知(模拟器上看不出来,建议真机测试)
六、通过Builder发送通知
这个方式相对于Notification更简单,也更快捷,但是只有在Android 3.0以上才支持(面对如今都是Android 4.0以上应该没有问题了)
先在Main.axml中添加对应的按钮:

并设置对应的id为@+id/builderButton
最后就是MainActivity.cs中的代码:
1 Button builderButton = FindViewById<Button>(Resource.Id.builderButton); 2 builderButton.Click += (e, s) => 3 { 4 var pintent = PendingIntent.GetActivity(this, 0, new Intent(this, typeof(MainActivity)), 0); 5 6 var notify = new Notification.Builder(this) 7 .SetTicker("来自Builder的通知") //设置通知的简介文字 8 .SetSmallIcon(Resource.Drawable.Icon) //设置通知的图标 9 .SetDefaults(NotificationDefaults.All) //设置该通知具备声音、LED和震动 10 .SetSound(RingtoneManager.GetDefaultUri(RingtoneType.Notification)) //设置通知声音 11 .SetVibrate(new long[] { 1000 }) //设置震动频率 12 .SetLights(Color.Red, 1, 0) //设置LED 13 .SetContentTitle("标题") //设置标题 14 .SetContentText("内容") //设置内容 15 .SetContentInfo("信息") //设置右下角显示的文字 16 .SetAutoCancel(true) //点击该通知后是否自动消失 17 //通过 SetLargeIcon 可以设置大图标 18 .SetContentIntent(pintent); 19 20 nMgr.Notify(3, notify.Notification); 21 };
这里我们可以看到通过Builder方式创建一个通知是多么的方便,只要通过SetXXXXX就可以完成了,最后只要在发送通知的时候传入其Notification属性即可,当然这里很多的方法跟通过Nitification是一样的就不单独解释了,而且也有注释说明。
七、进度条式通知
大家在下载文件的时候,都会看到通知栏会有当前下载任务的进度,而这个通知可以通过Builder方式实现,而且更快捷。
在Main.axml中添加对应的按钮

并设置id为@+id/builderButton
其次就是MainActivity.cs文件
1 Button progressButton = FindViewById<Button>(Resource.Id.progressButton); 2 progressButton.Click += (e, s) => 3 { 4 var notify = new Notification.Builder(this) 5 .SetTicker("进度条通知") 6 .SetSmallIcon(Resource.Drawable.Icon) 7 .SetOngoing(true) //设置该通知是否可以被用户移除 true 表示不可以 8 .SetNumber(2) //设置该同时的条数 会在右下角显示数量 9 .SetContentTitle("标题") 10 .SetProgress(100, 50, true); //第三个参数如果设置为true则进度条变成不确定进度条 11 12 nMgr.Notify(4, notify.Notification); 13 };
这里主要使用了SetProgress方法来设置进度条的最大值,当前值。最后一个参数设置为true则表示该进度条为不确定进度条,就是只会显示滑动,不会显示当前的进度。
1 SetProgress(100, 50, true);
这里我们还使用了一个新方法SetOngoing,通过前面的通知,大家会发现这些通知用户完全可以通过手动的方式移除掉,但是我们如何创建一个用户无法移除的通知呢?就是通过使用SetOngoing方法,并传入一个true即可。
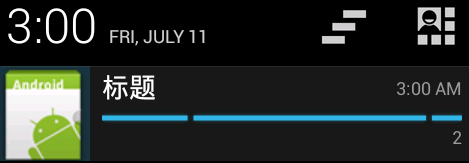
下面为实际运行图:
八、自定义视图通知
大家在使用音乐相关的应用的时候会发现通知栏会有一个简单的功能界面,有当前歌曲 的名称,专辑图片和暂停,下一曲等按钮,这些当然不是通知自带的,而是通过自定义通知来实现的,而本节我们不仅仅会学习如何使用自定义通知,同时还会学习 如何设置自定义通知中控件的值,以及绑定监听事件。
首先我们在Main.axml中添加按钮

设置其id为@+id/customeViewButton
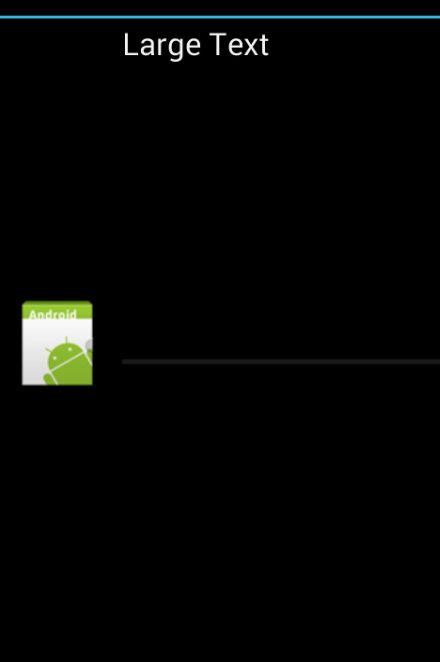
既然是自定义视图,当然还需要一个视图,所以我们在Resources/layout下新建一个视图,并命名为NotificationCustomeView,并在其中写入如下的xml:
1 <?xml version="1.0" encoding="utf-8"?> 2 <RelativeLayout xmlns:p1="http://schemas.android.com/apk/res/android" 3 p1:minWidth="25px" 4 p1:minHeight="25px" 5 p1:layout_width="match_parent" 6 p1:layout_height="match_parent" 7 p1:id="@+id/relativeLayout1" 8 p1:padding="5dp"> 9 <ImageView 10 p1:src="@drawable/Icon" 11 p1:layout_width="wrap_content" 12 p1:layout_height="match_parent" 13 p1:id="@+id/imageView1" /> 14 <RelativeLayout 15 p1:minWidth="25px" 16 p1:minHeight="25px" 17 p1:layout_width="match_parent" 18 p1:layout_height="match_parent" 19 p1:layout_toRightOf="@id/imageView1" 20 p1:id="@+id/relativeLayout2" 21 p1:paddingLeft="10dp"> 22 <TextView 23 p1:text="Large Text" 24 p1:textAppearance="?android:attr/textAppearanceLarge" 25 p1:layout_width="match_parent" 26 p1:layout_height="wrap_content" 27 p1:id="@+id/ncvTextView" /> 28 <ProgressBar 29 style="?android:attr/progressBarStyleHorizontal" 30 p1:layout_width="match_parent" 31 p1:layout_height="match_parent" 32 p1:layout_below="@id/ncvTextView" 33 p1:id="@+id/ncvProgressBar" 34 p1:indeterminateOnly="false" 35 p1:indeterminate="false" /> 36 </RelativeLayout> 37 </RelativeLayout>
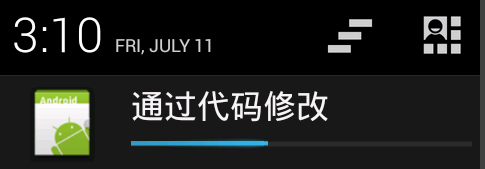
当然最终的结果图如下所示:
打开MainActivity.cs文件
1 Button customeViewButton = FindViewById<Button>(Resource.Id.customeViewButton); 2 customeViewButton.Click += (e, s) => 3 { 4 //初始化自定义视图 5 var customeView = new RemoteViews(this.PackageName, Resource.Layout.NotificationCustomeView); 6 7 var notify = new Notification.Builder(this) 8 .SetTicker("自定义视图通知") 9 .SetSmallIcon(Resource.Drawable.Icon) 10 .SetNumber(2) 11 .SetContent(customeView); //设置通知的自定义视图 12 13 //设置自定义视图中textview的文字 14 notify.Notification.ContentView.SetTextViewText(Resource.Id.ncvTextView, "通过代码修改"); 15 16 //设置自定义视图中Progressbar的进度 17 notify.Notification.ContentView.SetProgressBar(Resource.Id.ncvProgressBar, 100, 40, false); 18 19 //给自定义视图中的ProgressBar绑定事件 20 var pIntent = PendingIntent.GetActivity(this, 0, new Intent(this, typeof(MainActivity)), 0); 21 //绑定事件 22 notify.Notification.ContentView.SetOnClickPendingIntent(Resource.Id.ncvProgressBar, pIntent); 23 24 nMgr.Notify(5, notify.Notification); 25 };
首先我们需要实例化一个RemoteViews封装自定义视图:
1 var customeView = new RemoteViews(this.PackageName, Resource.Layout.NotificationCustomeView);
然后通过通知的SetContent将其传入
1 SetContent(customeView)
下面我们还需要访问自定义视图中的控件并设置他们的值,这里我们需要使用ContentView的Setxxxxxx来设置,如下下面我们就设置了TextView的文字和ProgressBar的进度:
1 //设置自定义视图中textview的文字 2 notify.Notification.ContentView.SetTextViewText(Resource.Id.ncvTextView, "通过代码修改"); 3 4 //设置自定义视图中Progressbar的进度 5 notify.Notification.ContentView.SetProgressBar(Resource.Id.ncvProgressBar, 100, 40, false);
最后就是绑定事件,通知里面的绑定事件不同于其他的,只能将一个意图与这个事件绑定(实际运用中也应该如此,比如你点击了暂停按钮,将会通过意图传递对应的参数到服务中从而停止播放)
1 notify.Notification.ContentView.SetOnClickPendingIntent(Resource.Id.ncvProgressBar, pIntent);
下面为实际的运行图
