环境:centos7
IP:10.0.0.7
通过部署lnmp架构更好的了解每个服务之间的配置。
编译安装nginx服务
下载nginx相关依赖包
[09:03:47 root@a7 ~]#yum install -y gcc gcc-c++ glibc glibc-devel pcre pcre-devel openssl openssl-devel systemd-devel net-tools iotop bc zip unzip zlib-devel bash-completion nfs-utils automake libxml2 libxml2-devel libxslt libxslt-devel perl perl-ExtUtils-Embed
创建系统用户nginx
[10:02:42 root@a7 ~]#useradd -s /sbin/nologin nginx -u 2000
进入/usr/local/src/目录等会好存放nginx的安装包
[09:10:45 root@a7 ~]#cd /usr/local/src/
[09:10:56 root@a7 src]#
进入nginx官网下载nginx-1.18.0安装包
[09:10:56 root@a7 src]#wget http://nginx.org/download/ngi...
解压到当前目录
[09:13:18 root@a7 src]#tar xf nginx-1.18.0.tar.gz
进入nginx解压好之后的目录,并生成编译环境。
[09:14:04 root@a7 src]#cd nginx-1.18.0/
[09:15:03 root@a7 nginx-1.18.0]#./configure --prefix=/apps/nginx --user=nginx --group=nginx --with-http_ssl_module --with-http_v2_module --with-http_realip_module --with-http_stub_status_module --with-http_gzip_static_module --with-pcre --with-stream --with-stream_ssl_module --with-stream_realip_module
编译&安装
[09:16:21 root@a7 nginx-1.18.0]#make -j 6 && make install
修改nginx配置文件使其支持php-fpm服务。
[09:19:06 root@a7 nginx-1.18.0]#vim /apps/nginx/conf/nginx.conf
user nginx;
worker_processes 1;
events {
worker_connections 1024;
}
http {
include mime.types;
default_type application/octet-stream;
sendfile on;
keepalive_timeout 65 65;
server_tokens off;
server {
listen 80;
server_name 10.0.0.7;
charset utf-8;
location / {
error_page 500 502 503 504 404 /50x.html;
root /apps/nginx/html/;
index index.php index.html index.htm;
}
location = /50x.html {
root html;
}
location ~ \.php$ {
root /apps/nginx/html/;
fastcgi_pass 127.0.0.1:9000;
fastcgi_index index.php;
fastcgi_param SCRIPT_FILENAME $document\_root$fastcgi_script_name;
include fastcgi_params;
}
}
}
查看nginx版本号
[09:55:02 root@a7 nginx-1.18.0]#/apps/nginx/sbin/nginx -V
nginx version: nginx/1.18.0
built by gcc 4.8.5 20150623 (Red Hat 4.8.5-39) (GCC)
built with OpenSSL 1.0.2k-fips 26 Jan 2017
TLS SNI support enabled
configure arguments: --prefix=/apps/nginx --user=nginx --group=nginx --with-http_ssl_module --with-http_v2_module --with-http_realip_module --with-http_stub_status_module --with-http_gzip_static_module --with-pcre --with-stream --with-stream_ssl_module --with-stream_realip_module
启动nginx,并且查看端口80是否开启
[10:03:20 root@a7 nginx-1.18.0]#/apps/nginx/sbin/nginx
[10:03:23 root@a7 nginx-1.18.0]#ss -ntl
State Recv-Q Send-Q Local Address:Port Peer Address:Port
LISTEN 0 128 *:111 *:*
LISTEN 0 128 *:80 *:*
nignx配置文件解析
因为我们在生成编译环境的时候--prefix=/apps/nginx 参数制定了nginx的安装目录,所以我们在编辑nginx的配置文件就直接到/apps/nginx目录下。
nginx配置文件详解:
user nginx; #全局配置端,对全局生效,主要设置nginx的启动用户/组,启动的工作进程数量,工作模式,Nginx的PID路径,日志路径等。
worker_processes 1; #启动工作进程数数量 ,这个值默认是1(正常情况下是我们
events { #events设置块,主要影响nginx服务器与用户的网络连接,比如是否允许同时接受多个网络连接,使用哪种事件驱动模型处理请求,每个工作进程可以同时支持的最大连接数,是否开启对多工作进程下的网络连接进行序列化等。
worker_connections 1024; #设置单个nginx工作进程可以接受的最大并发,作为web服务器的时 候最大并发数为worker_connections * worker_processes,作为反向代理的时候为 要除以2(worker_connections * worker_processes)/2 因为作为反向代理的时候是自身来处理,所以本身扛得住。
}
http { #http块是Nginx服务器配置中的重要部分,缓存、代理和日志格式定义等绝大多数功能和第三方模块都可以在这设置,http块可以包含多个server块,而一个server块中又可以包含多个location块,server块可以配置文件引入、MIME-Type定义、日志自定义、是否启用sendfile、连接超时时间和单个链接的请求上限等。
include mime.types; #支持的mime类型,MIME(Multipurpose Internet Mail Extensions)多用途互联网邮件扩展类型,MIME消息能包含文本、图像、音频、视频以及其他应用程序专用的数据,是设定某种扩展名的文件用一种应用程序来打开的方式类型,当该扩展名文件被访问的时候,浏览器会自动使用指定应用程序来打开。多用于指定一些客户端自定义的文件名,以及一些媒体文件打开方式。
default_type application/octet-stream; #默认类型应用程序/八进制
sendfile on; #作为web服务器的时候打开sendfile加快静态文件传输,指定是否使用sendfile系统调用来传输文件,sendfile系统调用在两个文件描述符之间直接传递数据(完全在内核中操作),从 而避免了数据在内核缓冲区和用户缓冲区之间的拷贝,操作效率很高,被称之为零拷贝,硬盘 >> kernel buffer (快速拷贝到kernelsocket buffer) >>协议栈。
keepalive_timeout 65 65; #长连接超时时间,单位是秒 通常加两个,让客户端和服务器的持续链接时间相同
server_tokens off; #安全优化-隐藏版本号
server { #设置一个虚拟机主机,可以包含自己的全局块,同时也可以包含多个location模块。比如本虚拟机监听的端口、本虚拟机的名称和IP配置,多个server 可以使用一个端口,比如都使用80端口提供web服务、本身可以多次监听同一个端口
listen 80; #配置server监听的端口默认监听所有80
server_name 10.0.0.7; #本server的名称,当访问此名称的时候nginx会调用当前serevr内部的配置进程匹配nginx可以有多个虚拟主机,只要使用域名区分即可。
charset utf-8; #设置编码格式,默认是俄语格式,可以改为utf-8 让他支持全球标准语法
location / { #location其实是server的一个指令,为nginx服务器提供比较多而且灵活的指令,都是在location中提现的,主要是基于nginx接受到的请求字符串,对用户请求的UIL进行匹配,并对特定的指令进行处理,包括地址重定向、数据缓存和应答控制等功能都是在这部分实现,另外很多第三方模块的配置也是在location模块中配置。
error_page 500 502 503 504 404 /50x.html; #出现这几个状态即可跳转到50x.html文件
root /apps/nginx/html/; #定义错误页面的时候做的处理,这个50x.html其实是一个文件。
index index.php index.html index.htm; #nginx配置默认首页
}
location = /50x.html {
root html;
}
location ~ \.php$ { #以http的方式转发php请求到指定web服务器
root /apps/nginx/html/; #php文件存放路径
fastcgi_pass 127.0.0.1:9000; #指明后端php-fpm服务器主机及端口
fastcgi_index index.php; #默认使用的php文件
fastcgi_param SCRIPT_FILENAME $document\_root$fastcgi_script_name; ##默认脚本路径
include fastcgi_params; #这里面写的是一堆变量
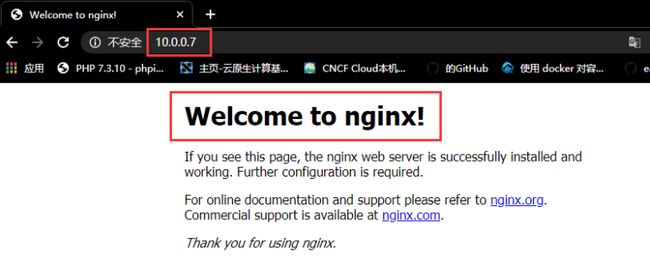
浏览器访问10.0.0.7
nginx就编译安装完成
编译安装php-fpm
编译好了nginx之后我们开始解决nginx的php问题。
进入/usr/locak/src目录
[10:15:26 root@a7 ~]#cd /usr/local/src/
[10:15:31 root@a7 src]#
解决php-fpm的依赖问题。
[10:15:31 root@a7 src]#yum install libxml2-devel bzip2-devel libmcrypt-devel sqlite-devel -y
php-fpm官方下载安装包
[10:16:38 root@a7 src]#wget https://www.php.net/distribut...
解压php安装包
[10:20:09 root@a7 src]#tar xf php-7.4.6.tar.gz
进入php目录
[10:20:17 root@a7 src]#cd php-7.4.6/
[10:20:53 root@a7 php-7.4.6]#
生成编译环境
[10:22:38 root@a7 php-7.4.6]#./configure --prefix=/app/php --enable-mysqlnd --with-mysqli=mysqlnd --with-pdo-mysql=mysqlnd --with-openssl --with-freetype-dir --with-jpeg-dir --with-png-dir --with-zlib --with-libxml-dir=/usr --with-config-file-path=/etc --with-config-file-scan-dir=/etc/php.d --enable-mbstring --enable-xml --enable-sockets --enable-fpm --enable-maintainer-zts --disable-fileinfo --disable-mbregex
编译安装
[11:01:58 root@a7 php-7.4.6]#make -j 6 && make install
系统使用php.ini中的设置并且在/etc/目录下
[11:03:34 root@a7 php-7.4.6]#cp -f php.ini-production /etc/php.ini
拷贝systemd到系统服务启动文件
[11:03:45 root@a7 php-7.4.6]#cp -f sapi/fpm/php-fpm.service /usr/lib/systemd/system/
拷贝www.conf.default文件为 www.conf
进入到/app/php/etc/php-fpm.d下
[11:07:25 root@a7 php-fpm.d]#cd /app/php/etc/php-fpm.d
[11:09:59 root@a7 php-fpm.d]#cp www.conf.default www.conf
修改www.conf配置文件内容、主要修改user、group、listen这三项
[11:15:31 root@a7 etc]#vim /app/php/etc/php-fpm.d/www.conf
22 ; will be used.
23 user = nginx
24 group = nginx
25
26 ; The address on which to accept FastCGI requests.
27 ; Valid syntaxes are:
28 ; 'ip.add.re.ss:port' - to listen on a TCP socket to a specific I Pv4 address on
29 ; a specific port;
30 ; '[ip:6:addr:ess]:port' - to listen on a TCP socket to a specific I Pv6 address on
31 ; a specific port;
32 ; 'port' - to listen on a TCP socket to all addresse s
33 ; (IPv6 and IPv4-mapped) on a specific port ;
34 ; '/path/to/unix/socket' - to listen on a unix socket.
35 ; Note: This value is mandatory.
36 listen = 0.0.0.0:9000
然后在回到php的配置文件目录下拷贝为php-fpm.conf
[11:10:04 root@a7 php-fpm.d]#cd /app/php/etc/
[11:10:42 root@a7 etc]#cp php-fpm.conf.default php-fpm.conf
重新加载系统服务,并启动php-fpm、和查看9000端口
[11:10:57 root@a7 etc]#systemctl daemon-reload
[11:11:37 root@a7 etc]#systemctl start php-fpm.service
[11:16:44 root@a7 etc]#ss -ntl
State Recv-Q Send-Q Local Address:Port Peer Address:Port
LISTEN 0 128 *:9000
在nginx的html目录下编一个php测试页面
编辑php服务访问页面
[11:26:57 root@a7 etc]#vim /apps/nginx/html/test.php
phpinfo();
?>
打开浏览器http://10.0.0.7/test.php已经支持php 7.4.6
安装数据库
这里我通过yum安装一个数据库
[11:36:31 root@a7 etc]#yum install mariadb-server -y
启动mysql数据库服务
[11:37:44 root@a7 etc]#systemctl start mariadb
创建一个为wordpress网页提供服务的ZZZ数据库
[11:37:52 root@a7 etc]#mysql
Welcome to the MariaDB monitor. Commands end with ; or \g.
Your MariaDB connection id is 7
Server version: 10.5.3-MariaDB MariaDB Server
Copyright (c) 2000, 2018, Oracle, MariaDB Corporation Ab and others.
Type 'help;' or '\h' for help. Type '\c' to clear the current input statement.
MariaDB [(none)]> create database ZGY;
Query OK, 1 row affected (0.001 sec)
MariaDB [(none)]> grant all on ZGY.* to zgy@'127.0.0.1' identified by "12345";
Query OK, 0 rows affected (0.001 sec)
MariaDB [(none)]>
安装wordpress服务
进入到/usr/local/src
[11:46:40 root@a7 ~]#cd /usr/local/src/
[11:46:47 root@a7 src]#
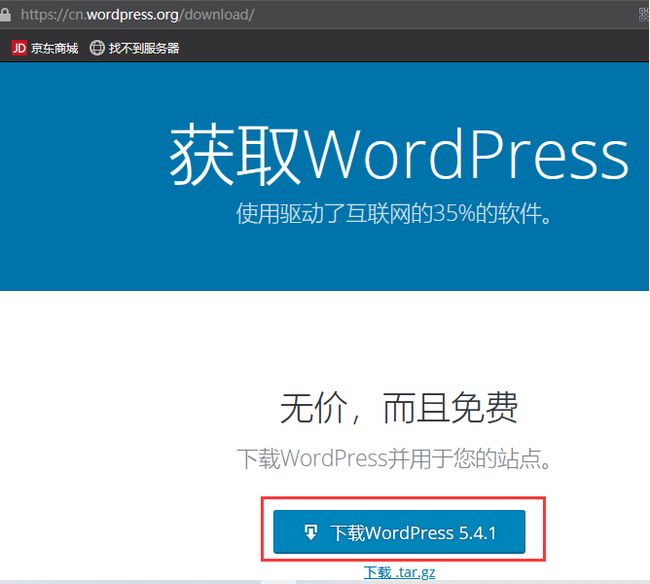
通过官方下载wordpress服务
https://cn.wordpress.org/download/
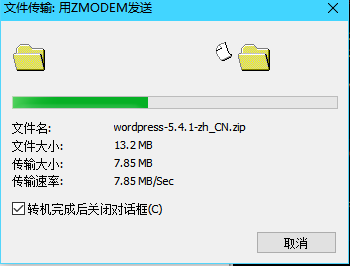
下载好之后再将wordpress上传到我们的centos7服务器中
由于是zip格式的压缩包,所以通过unzip解压
[11:47:13 root@a7 src]#unzip wordpress-5.4.1-zh_CN.zip
进入wordpress文件,然后拷贝php文件,并移动到nginx的html文件下
[11:47:55 root@a7 src]#cd wordpress/
[11:47:55 root@a7 wordpress]#cp wp-config-sample.php wp-config.php
[11:48:05 root@a7 wordpress]#cd ..
[11:53:02 root@a7 src]#mv wordpress/ /apps/nginx/html/
编辑wordpress调用数据配置文件
[11:57:24 root@a7 src]#vim /apps/nginx/html/wordpress/wp-config.php
* 您可以不使用网站,您需要手动复制这个文件,
* 并重命名为“wp-config.php”,然后填入相关信息。
*
* 本文件包含以下配置选项:
*
* * MySQL设置
* * 密钥
* * 数据库表名前缀
* * ABSPATH
*
* @link https://codex.wordpress.org/z...:%E7%BC%96%E8%BE%91_wp-config.php
*
* @package WordPress
*/
// ** MySQL 设置 - 具体信息来自您正在使用的主机 ** //
/** WordPress数据库的名称 */
define( 'DB_NAME', 'ZGY' );
/** MySQL数据库用户名 */
define( 'DB_USER', 'zgy' );
/** MySQL数据库密码 */
define( 'DB_PASSWORD', '12345' );
/** MySQL主机 */
define( 'DB_HOST', '127.0.0.1' );
/** 创建数据表时默认的文字编码 */
define( 'DB_CHARSET', 'utf8' );
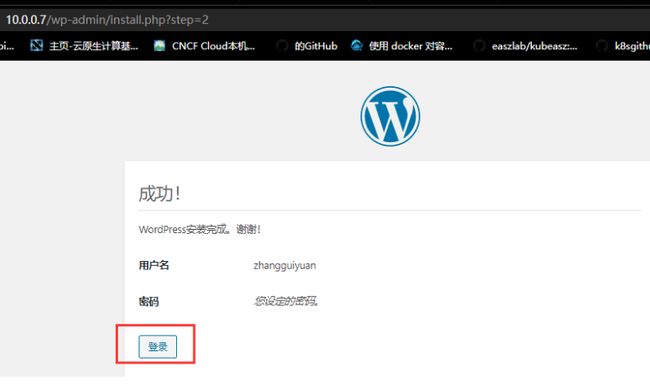
浏览器访问测试wordpress已经搭好
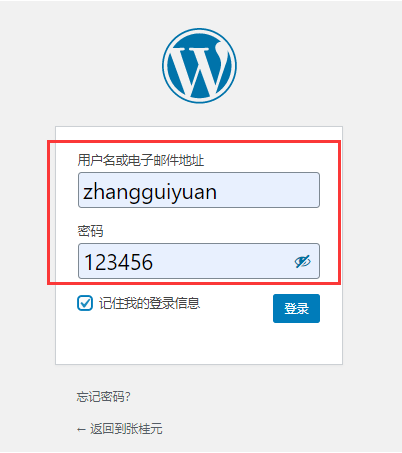
登录wordpress
输入账户密码
登录成功
本作品采用 [知识共享署名-相同方式共享 4.0 国际许可协议]
