Tensorflow2.0之DeepDream(深度梦境)
文章目录
- DeepDream
- 代码实现
- 1、导入需要的库
- 2、下载并导入图像
- 3、导入InceptionV3模型
- 4、改变模型输出为要提取特征的层
- 查看InceptionV3模型的层
- 选出要提取特征的层
- 改变模型输出
- 5、定义损失函数
- 6、定义一次梯度上升
- 初始化优化器
- 梯度上升过程
- 7、训练模型
- 图像标准化
- 定义训练函数
- 进行训练
- 8、八度(Octave)
- 9、平铺计算(tiled computation)
- 随机移动
- 定义一次梯度上升
- 定义训练函数
- 训练模型,展示结果
DeepDream
DeepDream是一个实验,它将通过神经网络学习到的模式可视化。
它通过通过网络转发图像,然后计算图像相对于特定层的激活的梯度来实现。然后对图像进行修改以增加这些激活,增强网络所看到的模式,并产生一个类似于梦境的图像。
代码实现
1、导入需要的库
import tensorflow as tf
import numpy as np
import matplotlib as mpl
import IPython.display as display
import PIL.Image
from tensorflow.keras.preprocessing import image
2、下载并导入图像
# Download an image and read it into a NumPy array.
def download(url, max_dim=None):
    name = url.split('/')[-1]
    image_path = tf.keras.utils.get_file(name, origin=url)
    img = PIL.Image.open(image_path)
    if max_dim:
        img.thumbnail((max_dim, max_dim))
    return np.array(img)

# Display an image
def show(img):
    display.display(PIL.Image.fromarray(np.array(img)))


# Downsizing the image makes it easier to work with.
original_img = download(url, max_dim=500)
show(original_img)
display.display(display.HTML('Image cc-by: Von.grzanka'))

其中img.thumbnail((max_dim, max_dim)) 用来将图片进行缩放,如图片原尺寸为(800, 1000, 3),如果max_dim=500,那么得到的图片尺寸变成(400, 500, 3)。
3、导入InceptionV3模型
base_model = tf.keras.applications.InceptionV3(include_top=False, weights='imagenet')
此处迁移学习可参考:Tensorflow2.0之tf.keras.applacations迁移学习。
4、改变模型输出为要提取特征的层
查看InceptionV3模型的层
for layer in base_model.layers:
    print(layer.name)
选出要提取特征的层
# Maximize the activations of these layers
names = ['mixed3', 'mixed5']
layers = [base_model.get_layer(name).output for name in names]
改变模型输出
# Create the feature extraction model
dream_model = tf.keras.Model(inputs=base_model.input, outputs=layers)
5、定义损失函数
损失是所选层中激活值的总和。在每一层我们都会对损失标准化,因此来自较大层的贡献不会超过较小层。通常,损失是你希望通过梯度下降来最小化的变量。但在DeepDream中,我们要通过梯度上升最大化这个损失。
def calc_loss(img, model):
    # Pass forward the image through the model to retrieve the activations.
    # Converts the image into a batch of size 1.
    img_batch = tf.expand_dims(img, axis=0)
    layer_activations = model(img_batch)
    if len(layer_activations) == 1:
        layer_activations = [layer_activations]

    losses = []
    for act in layer_activations:
        loss = tf.math.reduce_mean(act)
        losses.append(loss)

    return  tf.reduce_sum(losses)
6、定义一次梯度上升
计算完所选层的损失后,剩下的就是计算相对于图像的梯度,并将其添加到原始图像中。
初始化优化器
opt = tf.optimizers.Adam(0.01)
梯度上升过程
def train_step(img, step_size):
    with tf.GradientTape() as tape:
        # `GradientTape` only watches `tf.Variable`s by default
#         tape.watch(tf.constant(img))
        # This needs gradients relative to `img`
        img = tf.Variable(img)
        loss = calc_loss(img, dream_model)

    # Calculate the gradient of the loss with respect to the pixels of the input image.
    gradients = tape.gradient(loss, img)

    # Normalize the gradients.
    gradients /= tf.math.reduce_std(gradients) + 1e-8

    # In gradient ascent, the "loss" is maximized so that the input image increasingly "excites" the layers.
    # You can update the image by directly adding the gradients (because they're the same shape!)

    opt.apply_gradients([(-gradients, img)])  # 梯度更新
    # img = img + gradients*step_size
    # opt.apply_gradients(zip([-gradients], [img]))
    img = tf.clip_by_value(img, -1, 1)

    return loss, img
在梯度更新这里有三种方法可以用。
7、训练模型
图像标准化
因为在训练过程中要绘制图像,但在上一步中我们将得到的图像像素值限制在[-1, 1]中了,所以在这里我们需要规定一个函数,使得到的图片像素在[0, 255]之间。
# Normalize an image
def deprocess(img):
    img = 255*(img + 1.0)/2.0
    return tf.cast(img, tf.uint8)
定义训练函数
def run_deep_dream_simple(img, steps=100, step_size=0.01):
    # Convert from uint8 to the range expected by the model.
    img = tf.keras.applications.inception_v3.preprocess_input(img)
    img = tf.convert_to_tensor(img)
    step_size = tf.convert_to_tensor(step_size)

    for step in range(steps):
        loss, img = train_step(img, tf.constant(step_size))
        if step % 2 == 0:
            display.clear_output(wait=True)
            show(deprocess(img))
            print ("Step {}, loss {}".format(step, loss))

    result = deprocess(img)
    display.clear_output(wait=True)
    show(result)

    return result
进行训练
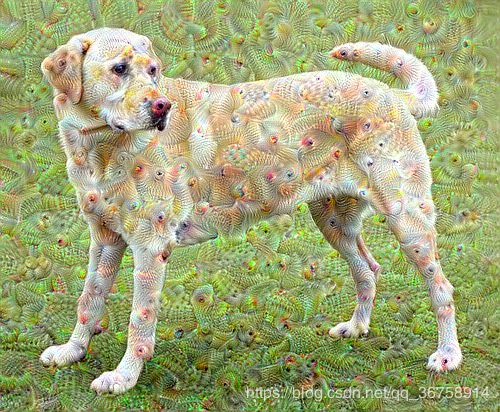
dream_img = run_deep_dream_simple(img=original_img,
                                  steps=100, step_size=0.01)
8、八度(Octave)
训练结果还不错,但是这里有几个问题:
- 输出有噪声。
- 图像分辨率低。
- 这些模式看起来都是在同一粒度上发生的。
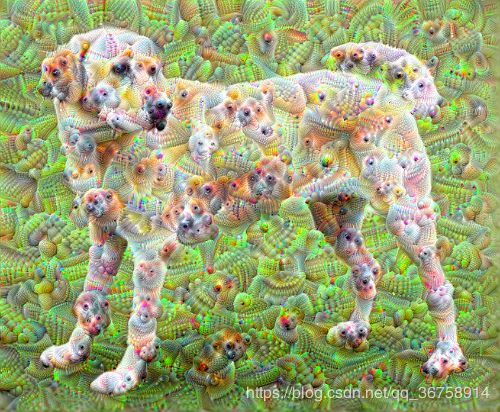
解决所有这些问题的一种方法是在不同尺度上应用梯度上升。这将允许在小尺度上生成的图案可以合并到更大尺度上的图案中,并用额外的细节填充。
要做到这一点,我们可以执行之前的梯度上升方法,然后增加图像的大小(这被称为一个八度),并重复这个过程。
OCTAVE_SCALE = 1.30

img = tf.constant(np.array(original_img))
base_shape = tf.shape(img)[:-1]
float_base_shape = tf.cast(base_shape, tf.float32)

for n in range(-2, 3):
    new_shape = tf.cast(float_base_shape*(OCTAVE_SCALE**n), tf.int32)

    img = tf.image.resize(img, new_shape).numpy()

    img = run_deep_dream_simple(img=img, steps=50, step_size=0.01)

display.clear_output(wait=True)
img = tf.image.resize(img, base_shape)
img = tf.image.convert_image_dtype(img/255.0, dtype=tf.uint8)
show(img)
9、平铺计算(tiled computation)
需要考虑的一件事是,随着图像尺寸的增加,执行梯度计算所需的时间和内存也会随之增加。上一个部分的八度不会对非常大的图像起作用。
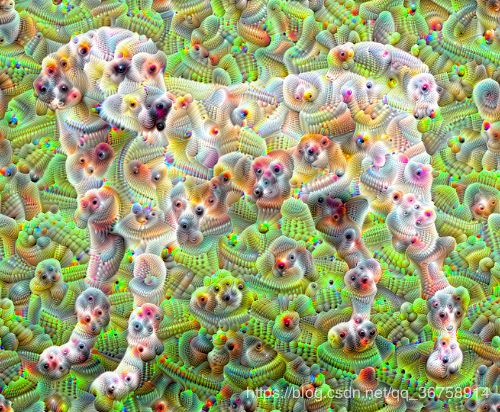
若要避免此问题,可以将图像分割为多个矩形碎片并计算每个碎片的梯度。我们称此方法为平铺计算。
在每次平铺计算之前对图像应用随机移动可防止平铺接缝出现。
随机移动
def random_roll(img, maxroll):
    # Randomly shift the image to avoid tiled boundaries.
    shift = tf.random.uniform(shape=[2], minval=-maxroll, maxval=maxroll, dtype=tf.int32)
    shift_down, shift_right = shift[0],shift[1]
    img_rolled = tf.roll(tf.roll(img, shift_right, axis=1), shift_down, axis=0)
    return shift_down, shift_right, img_rolled
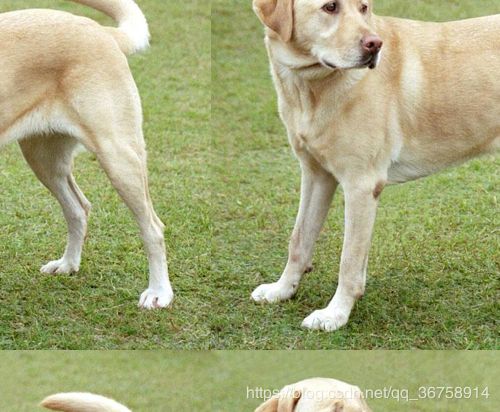
随机移动的效果如下:
shift_down, shift_right, img_rolled = random_roll(np.array(original_img), 512)
show(img_rolled)
定义一次梯度上升
def train_step(img, tile_size=512):
	img = tf.Variable(img)
    shift_down, shift_right, img_rolled = random_roll(img, tile_size)

    # Initialize the image gradients to zero.
    gradients = tf.zeros_like(img_rolled)

    # Skip the last tile, unless there's only one tile.
    xs = tf.range(0, img_rolled.shape[0], tile_size)[:-1]
    if not tf.cast(len(xs), bool):
        xs = tf.constant([0])
    ys = tf.range(0, img_rolled.shape[1], tile_size)[:-1]
    if not tf.cast(len(ys), bool):
        ys = tf.constant([0])

    for x in xs:
        for y in ys:
            # Calculate the gradients for this tile.
            with tf.GradientTape() as tape:
                # This needs gradients relative to `img_rolled`.
                # `GradientTape` only watches `tf.Variable`s by default.
                tape.watch(img_rolled)

                # Extract a tile out of the image.
                img_tile = img_rolled[x:x+tile_size, y:y+tile_size]
                loss = calc_loss(img_tile, dream_model)

            # Update the image gradients for this tile.
            gradients = gradients + tape.gradient(loss, img_rolled)

    # Undo the random shift applied to the image and its gradients.
    gradients = tf.roll(tf.roll(gradients, -shift_right, axis=1), -shift_down, axis=0)

    # Normalize the gradients.
    gradients /= tf.math.reduce_std(gradients) + 1e-8

    opt.apply_gradients([(-gradients, img)])
    # opt.apply_gradients(zip([-gradients], [img]))
	# img = img + gradients*0.01
    img = tf.clip_by_value(img, -1, 1)

    return gradients
同样地,这里也有三种定义梯度更新的方法,但注意,使用 opt.apply_gradients([(-gradients, img)]) 或 opt.apply_gradients(zip([-gradients], [img])) 时,一定要在前面先将图片转成变量,即 img = tf.Variable(img);使用 img = img + gradients*0.01 更新梯度时就不需要先将图片转成变量了。
其中:
    # Skip the last tile, unless there's only one tile.
    xs = tf.range(0, img_rolled.shape[0], tile_size)[:-1]
    if not tf.cast(len(xs), bool):
        xs = tf.constant([0])
    ys = tf.range(0, img_rolled.shape[1], tile_size)[:-1]
    if not tf.cast(len(ys), bool):
        ys = tf.constant([0])
用来将图片的长宽分段,从而能在下面的操作中对图片的每一部分单独(矩形碎片)进行梯度计算。
定义训练函数
def run_deep_dream_with_octaves(img, steps_per_octave=100, step_size=0.01,
                                octaves=range(-2,3), octave_scale=1.3):
    base_shape = tf.shape(img)
    img = tf.keras.preprocessing.image.img_to_array(img)
    img = tf.keras.applications.inception_v3.preprocess_input(img)
    img = tf.convert_to_tensor(img)

    for octave in octaves:
        # Scale the image based on the octave
        new_size = tf.cast(tf.convert_to_tensor(base_shape[:-1]), tf.float32)*(octave_scale**octave)
        img = tf.image.resize(img, tf.cast(new_size, tf.int32))

        for step in range(steps_per_octave):
            gradients = train_step(img)

            if step % 10 == 0:
                display.clear_output(wait=True)
                show(deprocess(img))
                print ("Octave {}, Step {}".format(octave, step))

    result = deprocess(img)
    return result
训练模型,展示结果
img = run_deep_dream_with_octaves(img=original_img, step_size=0.01)

display.clear_output(wait=True)
img = tf.image.resize(img, base_shape)
img = tf.image.convert_image_dtype(img/255.0, dtype=tf.uint8)
show(img)


