python练习笔记(4)-制作地图
Mapping Tools地图映射工具
geopandas provides a high-level interface to the matplotlib library for making maps. Mapping shapes is as easy as using the plot() method on a GeoSeries or GeoDataFrame.
geopandas为matplotlib库提供了一个用于制作地图的高级接口。 映射形状就像在GeoSeries或GeoDataFrame上使用plot()方法一样简单。
Loading some example data:加载一些示例数据:
In [1]: world = geopandas.read_file(geopandas.datasets.get_path('naturalearth_lowres'))

In [2]: cities = geopandas.read_file(geopandas.datasets.get_path('naturalearth_cities'))
We can now plot those GeoDataFrames:我们现在可以绘制那些地理数据要素了
# Examine country GeoDataFrame
In [3]: world.head()
Out[3]:
      pop_est                        ...                                                                   geometry
0  28400000.0                        ...                          POLYGON ((61.21081709172574 35.65007233330923,...
1  12799293.0                        ...                          (POLYGON ((16.32652835456705 -5.87747039146621...
2   3639453.0                        ...                          POLYGON ((20.59024743010491 41.85540416113361,...
3   4798491.0                        ...                          POLYGON ((51.57951867046327 24.24549713795111,...
4  40913584.0                        ...                          (POLYGON ((-65.50000000000003 -55.199999999999...

[5 rows x 6 columns]

# Basic plot, random colors
In [4]: world.plot();
Note that in general, any options one can pass to pyplot in matplotlib (or style options that work for lines) can be passed to the plot() method.
请注意,通常,可以将任何可以传递给matplotlib中的pyplot的选项(或适用于行的样式选项)传递给plot()方法。
Choropleth Maps彩色地图
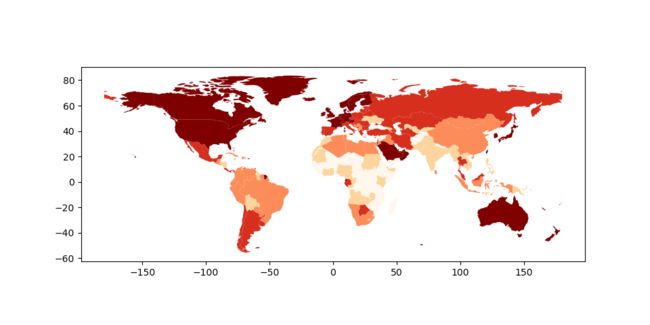
geopandas makes it easy to create Choropleth maps (maps where the color of each shape is based on the value of an associated variable). Simply use the plot command with the column argument set to the column whose values you want used to assign colors.
geopandas可以轻松创建Choropleth地图(每个形状的颜色基于相关变量的值的地图)。 只需使用plot命令,并将列参数设置为要用于指定颜色值的列。
# Plot by GDP per capta
In [5]: world = world[(world.pop_est>0) & (world.name!="Antarctica")]

In [6]: world['gdp_per_cap'] = world.gdp_md_est / world.pop_est

In [7]: world.plot(column='gdp_per_cap');
Choosing colors选择颜色
One can also modify the colors used by plot with the cmap option (for a full list of colormaps, see the matplotlib website):
也可以使用cmap选项修改plot使用的颜色(有关colormaps的完整列表,请参阅matplotlib网站):
In [8]: world.plot(column='gdp_per_cap', cmap='OrRd');The way color maps are scaled can also be manipulated with the scheme option (if you have pysal installed, which can be accomplished via conda install pysal). The scheme option can be set to ‘equal_interval’, ‘quantiles’ or ‘percentiles’. See the PySAL documentation for further details about these map classification schemes.
缩放颜色贴图的方式也可以使用scheme选项进行操作(如果安装了pysal,可以通过conda install pysal完成)。 scheme选项可以设置为'equal_interval','quantiles'或'percentiles'。 有关这些地图分类方案的更多详细信息,请参阅PySAL文档。
In [9]: world.plot(column='gdp_per_cap', cmap='OrRd', scheme='quantiles');Maps with Layers带图层的地图
There are two strategies for making a map with multiple layers – one more succinct, and one that is a little more flexible.
制作具有多个图层的地图有两种策略 - 一种更简洁,另一种更灵活。
Before combining maps, however, remember to always ensure they share a common CRS (so they will align).
但是,在组合地图之前,请记住始终确保它们共享一个共同的CRS(因此它们将对齐)。
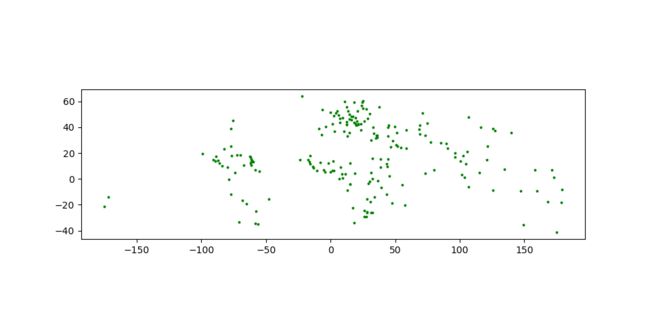
# Look at capitals
# Note use of standard `pyplot` line style options
In [10]: cities.plot(marker='*', color='green', markersize=5);

# Check crs
In [11]: cities = cities.to_crs(world.crs)

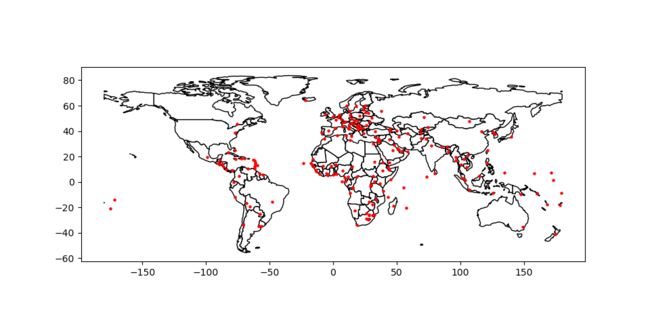
# Now we can overlay over country outlines
# And yes, there are lots of island capitals
# apparently in the middle of the ocean!
Method 1
In [12]: base = world.plot(color='white', edgecolor='black')
In [13]: cities.plot(ax=base, marker='o', color='red', markersize=5);Method 2: Using matplotlib objects
In [14]: import matplotlib.pyplot as plt

In [15]: fig, ax = plt.subplots()

# set aspect to equal. This is done automatically
# when using *geopandas* plot on it's own, but not when
# working with pyplot directly.
In [16]: ax.set_aspect('equal')

In [17]: world.plot(ax=ax, color='white', edgecolor='black')
Out[17]:

In [18]: cities.plot(ax=ax, marker='o', color='red', markersize=5)
Out[18]:

In [19]: plt.show();
Other Resources
Links to jupyter Notebooks for different mapping tasks:


