Qt学习笔记#9:画一条带箭头的线
文章目录
- 前言
- 方法1:常规实现
- 1. 画一条没有箭头的线
- 2. 在这条线的基础上画上箭头
- 方法2:利用QPainterPath实现
- 总结
- 完整代码
前言
带箭头的线,在很多地方都会用到,以致于一开始我认为Qt会提供这样一个类。。。没想到的是Qt不仅没有提供相关的类,自己实现的时候还颇为复杂。。
其实我比较不理解。。为什么Qt不提供一个带箭头的线的类呢。。为什么为什么呢?这个应该不少人会用到吧。。。
废话不多说,马上开始。
方法1:常规实现
带箭头的线,简单来讲就是一条线加上一个三角形,我们可以通过自定义一个继承自QGraphicsLineItem的类,并重写他的paint()方法来实现:
1. 画一条没有箭头的线
class MyWidget(QGraphicsView):
    def __init__(self):
        super(MyWidget, self).__init__()
        self.setFixedSize(300, 300)
        self.setSceneRect(0, 0, 250, 250)
        self.scene = QGraphicsScene()
        self.setScene(self.scene)
        self.scene.addItem(MyArrow())


class MyArrow(QGraphicsLineItem):
    def __init__(self):
        super(MyArrow, self).__init__()
        self.source = QPointF(0, 250)
        self.dest = QPointF(120, 120)
        self.line = QLineF(self.source, self.dest)
        self.line.setLength(self.line.length() - 20)

    def paint(self, QPainter, QStyleOptionGraphicsItem, QWidget_widget=None):
        # setPen
        pen = QPen()
        pen.setWidth(5)
        pen.setJoinStyle(Qt.MiterJoin) #让箭头变尖
        QPainter.setPen(pen)

		# draw line
        QPainter.drawLine(self.line)

if __name__ == '__main__':
    import sys

    app = QApplication(sys.argv)
    w = MyWidget()
    w.show()
    sys.exit(app.exec_())
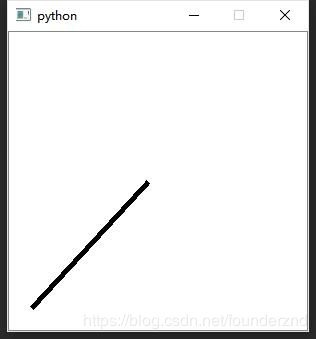
效果如图:
2. 在这条线的基础上画上箭头
首先利用QLineF().unitVector()函数得到它的单位向量,并将它移到原线的终点位置,注意这里的偏移量。
	v = self.line.unitVector()
    v.setLength(20) # 改变单位向量的大小,实际就是改变箭头长度
    v.translate(QPointF(self.line.dx(), self.line.dy()))
这时候我们就得到这样一条线:
然后我们利用normalVector()函数得到他的法向量,然后再利用normalVector()得到法向量的反方向的向量。
        n = v.normalVector() # 法向量
        n.setLength(n.length() * 0.5) # 这里设定箭头的宽度
        n2 = n.normalVector().normalVector() # 两次法向量运算以后,就得到一个反向的法向量
然后我们取得 3 个向量的终点 为箭头的三个端点,并以这三点为顶点画出三角形
        p1 = v.p2()
        p2 = n.p2()
        p3 = n2.p2()
        QPainter.drawPolygon(p1, p2, p3)
至此,箭头就算完成了!
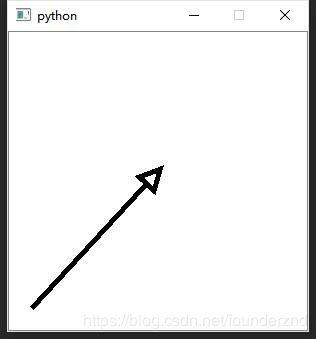
如果你喜欢,你还可以填充箭头
        brush = QBrush()
        brush.setColor(Qt.black)
        brush.setStyle(Qt.SolidPattern)
        QPainter.setBrush(brush)
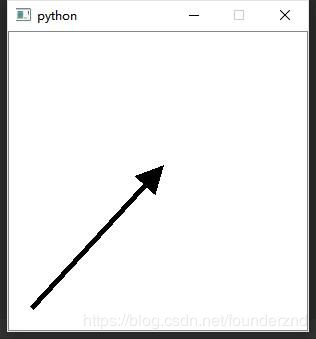
最后完成如下:
方法2:利用QPainterPath实现
QPainterPath其实是一个容器,他可以包含一个或者多个不同的绘画步骤,通过这些步骤组成较为复杂的图案,然后使用QPainter.drawPath()将这些图案一次性画出来。
实现的方式和普通方法的区别在于:
普通方法分两步画出图形,先画线,再画箭头
        QPainter.drawLine(self.line)
        QPainter.drawPolygon(p1, p2, p3)
而利用QPainterPath,则是先将整个绘制过程设置好,然后一次性画出整个path
        arrow = QPolygonF([p1, p2, p3, p1])
        path = QPainterPath()
        path.moveTo(self.source) # 移动到线原点
	    path.lineTo(self.dest) # 添加线的路径
        path.addPolygon(arrow) # 添加箭头路径

        QPainter.drawPath(path) # 画出整个路径
总结
- 箭头相当于是这条线的额外部分,如果你对线的端点很敏感的话,要注意实际的长度 = 线原长 + 箭头的长度。
- 三角形算是最简单的图形了,并没有完全发挥QPainterPath的威力,事实上,你可以画朵花儿在线上。
完整代码
# coding:utf-8

from PyQt4.QtCore import *
from PyQt4.QtGui import *


class MyWidget(QGraphicsView):
    def __init__(self):
        super(MyWidget, self).__init__()
        self.setFixedSize(300, 300)
        self.setSceneRect(0, 0, 250, 250)
        self.scene = QGraphicsScene()
        self.setScene(self.scene)
        self.scene.addItem(MyArrow())


class MyArrow(QGraphicsLineItem):
    def __init__(self):
        super(MyArrow, self).__init__()
        self.source = QPointF(0, 250)
        self.dest = QPointF(120, 120)
        self.line = QLineF(self.source, self.dest)
        self.line.setLength(self.line.length() - 20)

    def paint(self, QPainter, QStyleOptionGraphicsItem, QWidget_widget=None):
        # setPen
        pen = QPen()
        pen.setWidth(5)
        pen.setJoinStyle(Qt.MiterJoin)
        QPainter.setPen(pen)

        # setBrush
        brush = QBrush()
        brush.setColor(Qt.black)
        brush.setStyle(Qt.SolidPattern)
        QPainter.setBrush(brush)

        v = self.line.unitVector()
        v.setLength(20)
        v.translate(QPointF(self.line.dx(), self.line.dy()))

        n = v.normalVector()
        n.setLength(n.length() * 0.5)
        n2 = n.normalVector().normalVector()

        p1 = v.p2()
        p2 = n.p2()
        p3 = n2.p2()

		# 方法1
        QPainter.drawLine(self.line)
        QPainter.drawPolygon(p1, p2, p3)

		# 方法2
        # arrow = QPolygonF([p1, p2, p3, p1])
        # path = QPainterPath()
        # path.moveTo(self.source)
        # path.lineTo(self.dest)
        # path.addPolygon(arrow)
        # QPainter.drawPath(path)


if __name__ == '__main__':
    import sys

    app = QApplication(sys.argv)
    w = MyWidget()
    w.show()
    sys.exit(app.exec_())


