Ceph集群部署实战
建议系统内核升级到4.x,不然容易出各种问题,不要给自己找不必要的麻烦。 参考文章:Centos7 内核编译升级到指定的版本
https://blog.csdn.net/happyfreeangel/article/details/85088706
[root@ceph-admin ceph-ansible-3.1.7]# more hosts
[admins]
10.20.4.10
[osds]
10.20.4.21
10.20.4.22
10.20.4.23
[rgws]
10.20.4.11
10.20.4.12
10.20.4.13
[mds]
10.20.4.31
[clients]
10.20.4.51
[rbdmirrors]
10.20.4.51
[mons]
10.20.4.1
10.20.4.2
10.20.4.3
[mgrs]
10.20.4.1
10.20.4.2
10.20.4.3
[agents]
10.20.4.51
1.自动创建虚拟机 (OK)
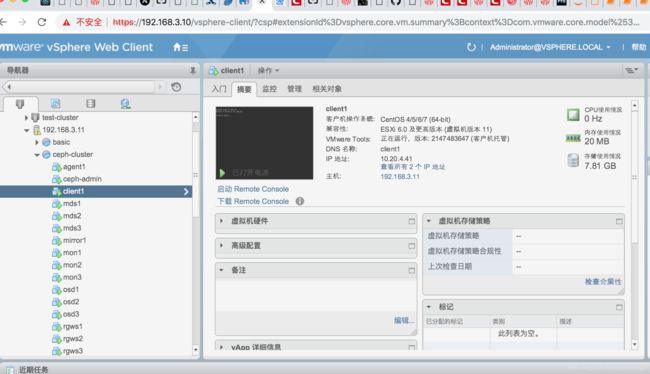
我是用vmware Esxi 做实验的,全场采用自动化创建虚拟机。

1.1 确保虚拟机有2个磁盘 一个是系统本身的,来自虚拟机模版, 默认是/dev/sda,
另外是/dev/sdb
/dev/sdc
为了实验,我创建了/dev/sdb 我是都在osd 主机上创建的,每个创建500GB 也就是 /dev/sdb 容量500GB .
这个可以通过ansible 自动化完成.
2.设置免密码登陆. 详细请参考文章:
   #下面这个操作会创建{{ceph_username}}帐号,下面的group, owner 等创建文件夹时会用到.
- name: "安装不同主机间用户{{hostconfig['hadoop_config']['the_ceph_username']}}之间免密码登陆 passwordless-ssh-login"
  include_role:
    name: passwordless-ssh-login
  vars:
    user_host_list: "{{passwordless_host_list}}"
    username: "root"
    password: "{{ceph_salt_password}}"
    sudo_privilege: False
    auto_generate_etc_host_list: True
    debug_mode: False

 #下面这个操作会创建{{ceph_username}}帐号,下面的group, owner 等创建文件夹时会用到.
- name: "安装不同主机间用户{{hostconfig['hadoop_config']['the_ceph_username']}}之间免密码登陆 passwordless-ssh-login"
  include_role:
    name: passwordless-ssh-login
  vars:
    user_host_list: "{{passwordless_host_list}}"
    username: "{{ceph_username}}"
    password: "{{ceph_salt_password}}"
    sudo_privilege: True
    debug_mode: False
3.关闭所有yum repo 源头,设置yum 源头,请把docker-ce.repo 重命名一下,这个连接到国外,老卡住,容易导致安装失败.
- ceph-admin 安装ansible 安装虚拟环境
4.1 确保你的虚拟机已经有了python
4.2 安装虚拟机环境 virtual-env
pip install virtualenv
virtualenv -p python2 venv #可以指定python版本 python3
#python3 -m venv venv #如果你有安装python3的话,也可以这样操作.
5.切换到虚拟环境
source venv/bin/activate
- 在ceph-admin 虚拟机上 安装指定版本的ansible
6.1 切换目录 cd /home/ceph
6.2 用pip执行安装ansible #务必严格按照官方文档的要求来,ansible版本过新或旧都会有各种报错。 这里注意不要用yum install ansible
pip install ansible==2.4.2
或者用git 下载
#6.2 下载ceph-ansible 部署脚本
wget -c https://github.com/ceph/ceph-ansible/archive/v3.1.7.tar.gz
tar xf v3.1.7.tar.gz
cd ceph-ansible-3.1.7
或 git clone https://github.com/ceph/ceph-ansible.git
cd ceph-ansible
git checkout remotes/origin/stable-3.2 # 这里刚好没有3.1.7 版本。
#在虚拟环境里安装依赖包
pip install -r requirements.txt
- 准备好配置文件
cp group_vars/all.yml.sample group_vars/all.yml
cp group_vars/osds.yml.sample group_vars/osds.yml
cp site.yml.sample site.yml
vim group_vars/all.yml
[root@ceph-admin group_vars]# more all.yml
ceph_origin: repository
ceph_repository: community
ceph_mirror: http://mirrors.163.com/ceph
ceph_stable_key: http://mirrors.163.com/ceph/keys/release.asc
ceph_stable_release: luminous
ceph_stable_repo: “{{ ceph_mirror }}/rpm-{{ ceph_stable_release }}”
#fsid: 82D6CE06-6E92-4C2A-AB26-11FF63B7E67D ##通过uuidgen生成
fsid: 82d6ce06-6e92-4c2a-ab26-11ff63b7e67d ##通过uuidgen生成 建议改成小写的,大写的之前运行脚本有问题会报错.
generate_fsid: false
cephx: true
public_network: 10.20.0.0/16
cluster_network: 10.20.0.0/16
monitor_interface: ens160
ceph_conf_overrides:
global:
rbd_default_features: 7
auth cluster required: cephx
auth service required: cephx
auth client required: cephx
osd journal size: 2048
osd pool default size: 3
osd pool default min size: 1
mon_pg_warn_max_per_osd: 1024
osd pool default pg num: 128
osd pool default pgp num: 128
max open files: 131072
osd_deep_scrub_randomize_ratio: 0.01
mgr:
mgr modules: dashboard
mon:
mon_allow_pool_delete: true
client:
rbd_cache: true
rbd_cache_size: 335544320
rbd_cache_max_dirty: 134217728
rbd_cache_max_dirty_age: 10
osd:
osd mkfs type: xfs
# osd mount options xfs: “rw,noexec,nodev,noatime,nodiratime,nobarrier”
ms_bind_port_max: 7100
osd_client_message_size_cap: 2147483648
osd_crush_update_on_start: true
osd_deep_scrub_stride: 131072
osd_disk_threads: 4
osd_map_cache_bl_size: 128
osd_max_object_name_len: 256
osd_max_object_namespace_len: 64
osd_max_write_size: 1024
osd_op_threads: 8
osd_recovery_op_priority: 1
osd_recovery_max_active: 1
osd_recovery_max_single_start: 1
osd_recovery_max_chunk: 1048576
osd_recovery_threads: 1
osd_max_backfills: 4
osd_scrub_begin_hour: 23
osd_scrub_end_hour: 7

# bluestore block create: true
# bluestore block db size: 73014444032
# bluestore block db create: true
# bluestore block wal size: 107374182400
# bluestore block wal create: true
vim group_vars/osds.yml
devices:
- /dev/sdb
- /dev/vdd
- /dev/vde
osd_scenario: collocated
osd_objectstore: bluestore
#osd_scenario: non-collocated
#osd_objectstore: bluestore
#devices:
- /dev/sdc
- /dev/sdd
- /dev/sde
#dedicated_devices:
- /dev/sdf
- /dev/sdf
- /dev/sdf
#bluestore_wal_devices:
- /dev/sdg
- /dev/sdg
- /dev/sdg
#monitor_address: 192.168.66.125
注释不需要的组件
vim site.yml
Defines deployment design and assigns role to server groups
- hosts:
- mons
- agents
- osds
- mdss
- rgws
- nfss
- restapis
- rbdmirrors
- clients
- mgrs
- iscsigws
- iscsi-gws # for backward compatibility only!
[root@ceph-admin group_vars]# more osds.yml
devices:
- /dev/sdb
osd_scenario: collocated
osd_objectstore: bluestore
#osd_scenario: non-collocated
#osd_objectstore: bluestore
#devices:
- /dev/sdc
- /dev/sdd
- /dev/sde
#dedicated_devices:
- /dev/sdf
- /dev/sdf
- /dev/sdf
#bluestore_wal_devices:
- /dev/sdg
- /dev/sdg
- /dev/sdg
#monitor_address: 192.168.66.125
注释不需要的组件
vim site.yml
Defines deployment design and assigns role to server groups
- hosts:
- mons
- agents
- osds
- mdss
- rgws
- nfss
- restapis
- rbdmirrors
- clients
- mgrs
- iscsigws
- iscsi-gws # for backward compatibility only!
客户端卸载pip中安装的urllib3,不然会失败
pip freeze|grep urllib3
pip uninstall urllib3
ansible-playbook -i hosts site.yml
至此ceph部署完成,登陆ceph节点检查状态。
清空集群
如果部署过程中出现报错,建议先清空集群 再进行部署操作
cp infrastructure-playbooks/purge-cluster.yml purge-cluster.yml # 必须copy到项目根目录下
ansible-playbook -i hosts purge-cluster.yml
创建客户端访问环境:
[root@mon1 ~]# ceph auth get-or-create client.rbd mon ‘allow r’ osd ‘allow class-read object_prefix rbd_children,allow rwx pool=rbd’
[client.rbd]
key = AQAMyxxc1zSRBRAAhp8HTqmXXky8azntPF7gdQ==
[root@mon1 ~]#
[root@mon1 ~]# ceph auth get-or-create client.rbd | ssh ceph@client1 sudo tee /etc/ceph/ceph.client.rbd.keyring
The authenticity of host ‘client1 (10.20.4.51)’ can’t be established.
ECDSA key fingerprint is SHA256:1Li21Z7NsbSmDsHubXT2R7tYFNM003JYfEuSuV8mSJ4.
ECDSA key fingerprint is MD5:b9:d0:23:5d:12:26:84:b9:76:a6:d6:7a:e9:9a:b0:46.
Are you sure you want to continue connecting (yes/no)? yes
Warning: Permanently added ‘client1,10.20.4.51’ (ECDSA) to the list of known hosts.
ceph@client1’s password:
[client.rbd]
key = AQAMyxxc1zSRBRAAhp8HTqmXXky8azntPF7gdQ==
[root@mon1 ~]#
#在client1 上操作
cat /etc/ceph/ceph.client.rbd.keyring >> /etc/ceph/keyring
Since we are not using the default user client.admin we
need to supply username that will connect to the Ceph cluster
ceph -s --name client.rbd