moco使用案例
Moco使用案例
最近学习了moco,以下是我学习moco时踩到的一些坑,提供大家参考,如发现有哪些不对地方也请指出来,让我进行改正,谢谢!
简介:
Moco解决了开发前端时没有后端支持,开发接口时依赖没有到位的尴尬场景。
特点:
- 只需要简单的配置request、response等即可满足要求,支持http、https、socket。可以说是非常的灵活性。
- 支持在request 中设置 Headers , Cookies , StatusCode等。
- 对GET、POST、PUT、DELETE等请求方式均支持,很适合web开发。
- 无需环境配置,有java环境即可。
- 修改配置后,立刻生效。只需要维护接口,也就是契约即可。
- 对可能用到的数据格式都支持,如json、text、xml、file等。
- 还能与其他工具集成,如Junit、Maven、Gradle等。
一、moco安装及启用
- moco jar包下载
- 访问: http://repo1.maven.org/maven2/com/github/dreamhead/moco-runner/0.12.0/ 点击下载“moco-runner-0.12.0-standalone.jar”
基础就不细讲了,可参考:https://blog.csdn.net/lt326030434/article/details/80339397
二、moco使用时的几种请求
2.1 get请求
- 不带参数的get请求
[
  {
    "description":"不带参数的get请求",
    "request":{
       "uri":"/findGetDemo",
      "method":"get"
    },
      "response":{
      "text":"Get requests without parameters"
    }
  }
]
访问方式例如:http://localhost:8088/findGetDemo
- 带参数的get参数请求
[
  {
     "description":"带参数的get请求,p1,p2分别的参数1,参数2,名称可随便起,个数		也可随便加",
     "request":{
      "uri":"/findGetDemoByParam",
      "method":"get",
      "queries":{
        "name":"hps",
        "password":"188199"
      }
    },
    "response":{
      "text":"Get request with parameters"
    }
  }
]
访问地址:http://localhost:8088/findGetDemoByParam?name=hps&password=188199
2.2、post请求
- 不带参数的post请求
[
  {
    "description":"post 请求",
    "request":{
      "uri":"/postDemo",
      "method":"post"
    },
    "response":{
      "text":"Post requests without parameters"
    }
  }
]
访问地址例如:http://localhost:8088/postDemo
- 带参数的post请求
[
  {
    "description":"带参数的post请求",
    "request":{
      "uri":"/postDemoByParam",
      "method":"post",
      "forms":{
        "name":"admin",
        "password":"199188"
      }
    },
    "response":{
      "text":"Post request with parameters"
    }
  }
]
访问地址:http://localhost:8088/postDemoByParam
2.3、发送请求时注意事项
- 这里请注意get请求时是“queries:”
"queries": {
	"name": "huhansan",
	"age": "18"
}
- 但是 post 请求时是用的 “forms:”
"forms":{
	"name":"huhansan",
	"sex":"man"
}
2.4、这里我给各位讲一个get访问拦截
在搭建moco时有可能碰到这种需求:禁止get访问,要求让post访问,如何实现这个需求?
在你的全局配置最前面里加上:
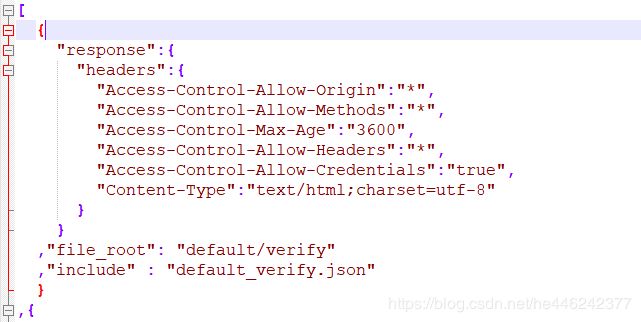
在访问接口时它会从上到下扫描你的全局配置,所以把他放到第一位,那么你就会首先进入这个default_verify.json 文件查找你的接口.
- default_verify.json配置:
[
  {
    "description": "过滤get提交,code【4010】"
    ,"request" : {
      "method" : "get"
    },
    "response" : {"file":"default_verify_4010.json"}
  }
]
此时如果是get请求那么他就把你的请求拦截了下来,此时会进入"default_verify_4010.json" 文件。
- default_verify_4010.json内容:
{
  "code":4010
  ,"msg":"提交格式错误【必须为post提交】"
}
这样他就拦截了你的get提交!并提示你必须为post提交!
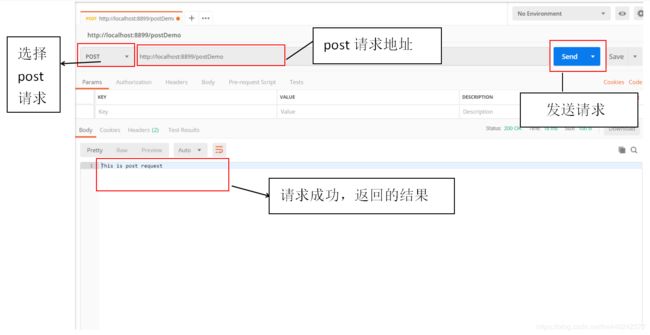
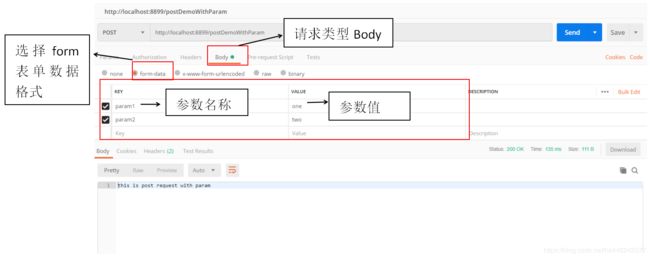
2.5、post接口的测试调用,借助的工具(postman:我使用的postman是客户端版本,postman是一个测试接口的工具)
2.5.1、访问无参post请求
2.5.2、访问有参post请求
三、moco的字段介绍
3.1、description:请求介绍
3.2、request:请求,里面可以填写的参数:
uri:请求地址
method:请求类型(get post)
cookies:带有cookies验证
headers:请求头,(例 “content-type”:“application/json”)
queries:填写请求参数,请求类型是get请求是时,使用该字段
Forms:填写请求参数,请求类型是post(类似form表单)请求是时,使用该字段
Json:填写请求参数,数据格式是json, get、post都可以使用
file:请求参数,封装在json文件时(文件地址)
3.3、response:响应
status:状态码
text:相应数据为文本数据
json:响应数据为json格式的数据
file:响应的数据是json文件(文件地址)
3.4、redirectTo:重定向(路径)
四、全局配置
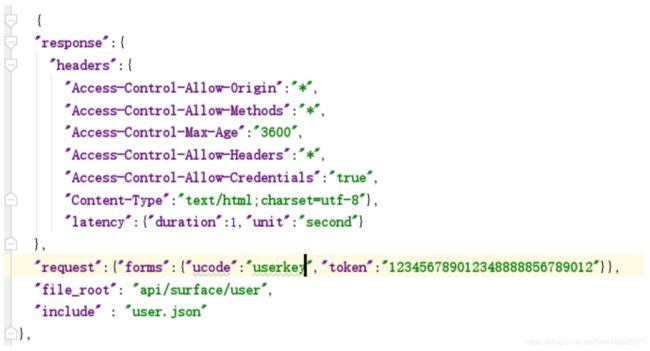
response:响应
headers:设置响应头:(设置跨域,跨域就指着协议,域名,端口不一致,出于安全考虑,跨域的资源之间是无法交互的)
-
“Access-Control-Allow-Origin”:"*",是HTML5中定义的一种解决资源跨域 的策略。
*表示该资源谁都可以用 -
“Access-Control-Allow-Methods”:"*", 意思是允许访问的方法,一般包 括:POST, GET, OPTIONS
-
“Access-Control-Max-Age”:“3600”, 用来指定本次预检请求的有效期, 单位为秒,在此期间不用发出另一条预检请求。
-
“Access-Control-Allow-Headers”:"*",用于 preflight request (预检请求) 中,列出了将会在正式请求的 Access-Control-Expose-Headers 字段中 出现的首部信息
-
“Access-Control-Allow-Credentials”:“true”, 响应头表示是否可以将对请 求的响应暴露给页面。返回true则可以,其他值均不可以。
-
“Content-Type”:“text/html;charset=utf-8” 来表示具体请求中的媒体类型 信息
text/html;charset=utf-8:设置页面内容是html编码 格式是utf-8 -
“latency”:{“duration”:1,“unit”:“second”}
设置响应延迟:延迟两秒
request:请求json文件中接口时必要的参数,类似于项目中的token
file_root:json文件路径(相对路径)
include:josn文件名称
五、总结使用全局配置时遇到的坑、以及配置异常提醒:
- moco jar包版本:
moco-runner-0.12.0-standalone.jar - 启动: java -jar moco-runner-0.12.0-standalone.jar start -p 8088 -g setting.json
5.1 注意
我们在setting.json中设置了全局配置所以在访问接口时他会先去找
“file_root”: “api/surface/user” 设置的json的文件相对路径,然后找到 “include” : "user.json"设置的json文件中查找你访问的接口路径.
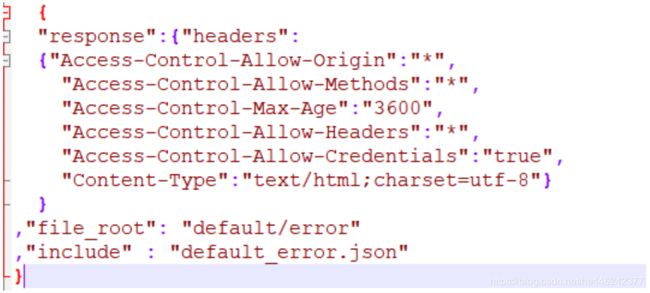
5.2 设置访问的接口不存在时的全局异常提醒
把这一段的全局配置加到你全局配置的最后,在上面我讲过在你访问接口时会从上到下扫描你的全局配置,当上面的配置都没有你访问的接口时就扫描到了你最后一个文件
- “default_error.json” 文件内容一下:
[
  {
    "description": "为所有未匹配的请求设置默认错误响应【2010】",
    "response" : {"file":"default_error_2010.json"}
  }
]
这样配置它是没有接口的,所以当你访问不到接口时它会走你的提醒!
“default_error_2010.json” json文件的内容是:
{
  "code":2010,
  "msg":"其他异常【default_error】"
}
