1 实验环境的搭建
1)安装开发工具
sudo apt install build-essential
sudo apt install qemu # install QEMU
sudo apt install libncurses5-dev bison flex libssl-dev libelf-dev
2)下载内核源码
sudo apt install axel
axel -n 20 https://mirrors.edge.kernel.org/pub/linux/kernel/v5.x/ linux-5.4.34.tar.xz
xz -d linux-5.4.34.tar.xz
tar -xvf linux-5.4.34.tar cd linux-5.4.34
3)配置内核选项
cd linux-5.4.34
make defconfig # Default configuration is based on 'x86_64_defconfig' make menuconfig
# 打开debug相关选项
Kernel hacking --->
      Compile-time checks and compiler options --->
            [*] Compile the kernel with debug info
            [*] Provide GDB scripts for kernel debugging [*] Kernel debugging
# 关闭KASLR,否则会导致打断点失败
Processor type and features ---->
      [] Randomize the address of the kernel image (KASLR)
make -j$(nproc) # nproc gives the number of CPU cores/threads available # 测试⼀下内核能不能正常加载运⾏,因为没有⽂件系统终会kernel panic qemu-system-x86_64 -kernel arch/x86/boot/bzImage # 此时应该不能正常运行
4)根文件系统的制作
axel -n 20 https://busybox.net/downloads/busybox-1.31.1.tar.bz2
tar -jxvf busybox-1.31.1.tar.bz2
cd busybox-1.31.1

make menuconfig
#记得要编译成静态链接,不⽤动态链接库。
Settings  --->
    [*] Build static binary (no shared libs)
#然后编译安装,默认会安装到源码⽬录下的 _install ⽬录中。
make -j$(nproc) && make install
5)制作根文件系统镜像
mkdir rootfs
cd rootfs
cp ../busybox-1.31.1/_install/* ./ -rf
mkdir dev proc sys home
sudo cp -a /dev/{null,console,tty,tty1,tty2,tty3,tty4} dev/
6)init脚本放到根文件系统目录下
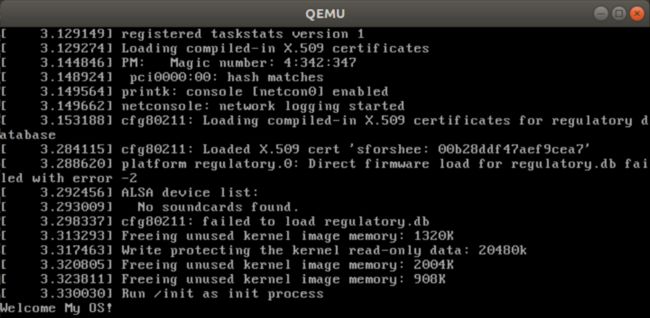
#!/bin/sh
mount -t proc none /proc
mount -t sysfs none /sys
echo "Welcome My OS!"
echo "-------------------"
cd home
/bin/sh
给init增加可执行权限
chmod +x init
7)启动qemu
#打包成内存根⽂件系统镜像
find . -print0 | cpio --null -ov --format=newc | gzip -9 > ../rootfs.cpio.gz
#测试挂载根⽂件系统,看内核启动完成后是否执⾏init脚本
qemu-system-x86_64 -kernel linux-5.4.34/arch/x86/boot/bzImage -initrd rootfs.cpio.gz
2 系统调用
我的学号后两位是34,在/linux-5.4.34/arch/x86/entry/syscalls/syscall_64.tbl中查到34对应的系统调用是pause

pause系统调用:
作用:使调用进程(线程)进入休眠状态(就是挂起);直到接收到信号且信号函数成功返回 pause函数才会返回
返回值:始终返回-1测试:
#include#include #include #include #include #include #include #include #include #include <string.h> #include #include #include // 实验说明: 执行程序的过程中按CTL + C不能是程序退出, 而是执行我们安装的信号处理函数 void sig_ctlc(int sig) // sighandler_t { printf("sig = %d: sig_ctlc func\n", sig); getchar(); printf("sig_ctlc return\n"); } int main(int argc, char **argv) { // 安装信号 if(SIG_ERR == signal(SIGINT, sig_ctlc)) perror("SIGINT install err\n"); // signal(SIGINT, SIG_IGN); // 忽略SIGINT信号 // signal(SIGINT, SIG_DFL); // 对于SIGINT信号,使用默认处理函数 printf("pause before\n"); // 1.当我们没有发送信号时pause会阻塞 // 2.当进程接收到到信号时不会立刻返回, 只有当信号处理函数返回时, pause才会返回-1. pause(); printf("pause after\n"); return 0; }
然后再qemu中执行pause,设置断点
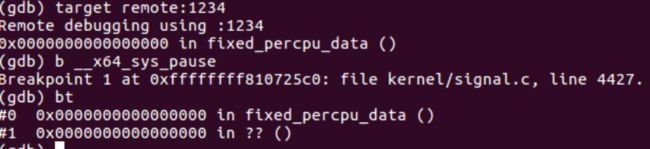
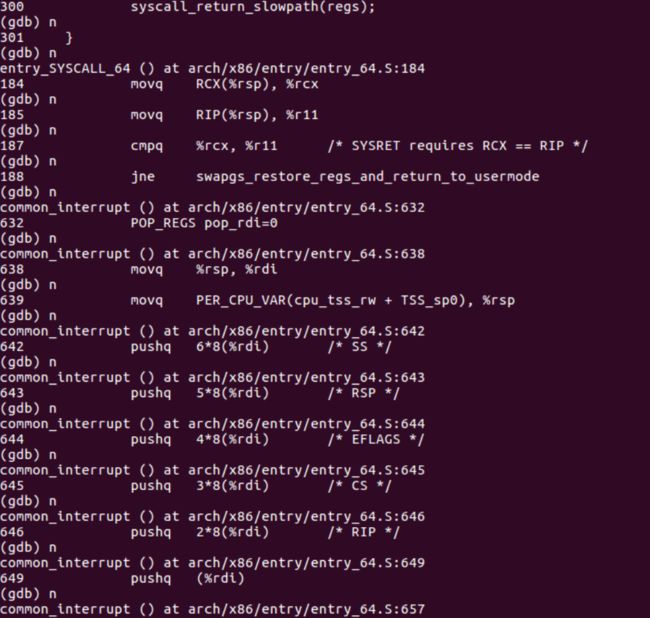
跟踪断点
总结:
Linux内核中⼤约定义了四五百个系统调⽤,这时内核如何知道⽤户态进程希望调⽤的是哪个系统调⽤呢?内核通过给每个系统调⽤⼀个编号来区分,即系统调⽤号。内核实现了很多不同的系统调⽤,⽤户态进程必须指明需要执⾏哪个系统调⽤,这需要使⽤EAX寄存器传递⼀个名为系统调⽤号的参数。除了系统调⽤号外,系统调⽤也可能需要传递参数,在32位x86体系结构下普通的函数调⽤是通过将参数压栈的⽅式传递的。系统调⽤从⽤户态切换到内核态,在⽤户态和内核态这两种执⾏模式下使⽤的是不同的堆栈,即进程的⽤户态堆栈和进程的内核态堆栈,传递参数⽅法⽆法通过参数压栈的⽅式,⽽是通过寄存器传递参数的⽅式。寄存器传递参数的个数是有限制的,⽽且每个参数的⻓度不能超过寄存器的⻓度,32位x86体系结构下寄存器的⻓度最⼤32位。除了EAX⽤于传递系统调⽤号外,参数按顺序赋值给EBX、ECX、EDX、ESI、EDI、EBP,参数的个数不能超过6个,即上述6个寄存器。如果超过6个就把某⼀个寄存器作为指针,指向内存,就可以通过内存来传递更多的参数。以上就是32位x86体系结构下系统调⽤的参数传递⽅式。
由于压栈的⽅式需要读写内存,函数调⽤速度较慢,64位x86体系结构下普通的函数调⽤和系统调⽤都是通过寄存器传递参数,RDI、RSI、RDX、RCX、R8、R9这6个寄存器⽤作函数/系统调⽤参数传递,依次对应第 1 参数到第 6 个参数。