Java方式配置SpringMVC
SpringMVC在Web开发中可以说是绝对的霸主,之前国内的Web开发框架可能还被Struts,Struts2占据。但现在,几乎所有的公司在做Web开发上,都会选择使用SpringMVC。
SpringMVC和Spring整合上可以说是无缝的,但很多的朋友可能和我一样,看着密密麻麻的XML配置文件,不知道该如何配置。好在Spring3的时代,给我们提供了更加便捷的配置方式,使用Java配置SpringMVC,我们一起来看看吧。
1. WebApplicationInitializer
首先是取代web.xml的配置。我们可以自定义一个类来实现WebApplicationInitializer接口,重写onStartup方法。
package com.hy.test1;

import javax.servlet.ServletContext;
import javax.servlet.ServletException;
import javax.servlet.ServletRegistration;

import org.springframework.web.WebApplicationInitializer;
import org.springframework.web.context.support.AnnotationConfigWebApplicationContext;
import org.springframework.web.servlet.DispatcherServlet;

public class WebConfig implements WebApplicationInitializer {

     @Override
     public void onStartup(ServletContext servletContext) throws ServletException {
          AnnotationConfigWebApplicationContext context = new AnnotationConfigWebApplicationContext();
          context.register(MvcConfig.class); // 注册配置类
          context.setServletContext(servletContext);

          ServletRegistration.Dynamic servlet = servletContext.addServlet("dispathcher", new DispatcherServlet(context)); // 加载springmvc的核心servlet
          servlet.addMapping("/"); // 设置servlet的请求路径
          servlet.setLoadOnStartup(1); // 立即加载,非第一次请求的时候再进行加载
     }
}
2. MvcConfig 进行SpringMVC配置
传统的SpringMVC需要创建一个springmvc.xml来配置视图解析器等,使用Java配置的方式,只需要创建一个类,标注@Configuration就表示这个类是一个配置类了。具体的配置如下:
package com.hy.test1;

import org.springframework.context.annotation.Bean;
import org.springframework.context.annotation.ComponentScan;
import org.springframework.context.annotation.Configuration;
import org.springframework.web.servlet.config.annotation.EnableWebMvc;
import org.springframework.web.servlet.view.InternalResourceViewResolver;
import org.springframework.web.servlet.view.JstlView;

@Configuration
@ComponentScan("com.hy.test1")
@EnableWebMvc // 启用springmvc
public class MvcConfig {

    // 配置视图解析器(这里使用的是jsp)
    @Bean
    public InternalResourceViewResolver viewResolver() {
        InternalResourceViewResolver resolver = new InternalResourceViewResolver();
        resolver.setPrefix("/WEB-INF/classes/pages/"); // 设置前缀
        resolver.setSuffix(".jsp"); // 设置后缀
        resolver.setViewClass(JstlView.class);
        return resolver;
    }

}
上面的这几行代码,就能够取代之前springmvc.xml里的大量的配置,是不是看起来很简单。
3. 创建Controller
实现一个测试的Controller和一个jsp(这一步和使用xml配置方式的相同)
package com.hy.test1;

import org.springframework.stereotype.Controller;
import org.springframework.web.bind.annotation.RequestMapping;

@Controller
public class MyController {

     @RequestMapping("/")
     public String index() {
          return "index";
     }

}
jsp
<%@ page language="java" contentType="text/html; charset=UTF-8"
    pageEncoding="UTF-8"%>


hello


     hello
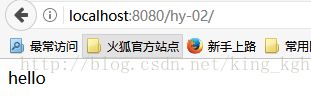
运行
注意问题:
1.我们把jsp放到了src/main/resources/pages/目录下,这个是SpringBoot的习惯配置。运行时目录是在/WEB-INF/classes/pages下。
同样的,我们的静态资源也会习惯放到src/main/resources下,那么这些静态的资源我们该如何访问呢?springmvc的静态资源的地址映射可以给我们提供帮助。这个时候我们就需要对springmvc进行配置,原来的时候要去xml配置文件中配置,现在使用Java的方式该如何进行配置呢?这里springmvc给我们提供了一个默认的配置类 WebMvcConfigurerAdapter,在我们的配置类中继承这个类就有了所有的默认配置,重写配置的方法就可以单独对某些我们需要的进行配置。代码如下:
package com.hy.test1;
import org.springframework.context.annotation.Bean;
import org.springframework.context.annotation.ComponentScan;
import org.springframework.context.annotation.Configuration;
import org.springframework.web.servlet.config.annotation.EnableWebMvc;
import org.springframework.web.servlet.view.InternalResourceViewResolver;
import org.springframework.web.servlet.view.JstlView;

@Configuration
@ComponentScan("com.hy.test1")
@EnableWebMvc // 启用springmvc
public class MvcConfig {

    // 配置视图解析器(这里使用的是jsp)
    @Bean
    public InternalResourceViewResolver viewResolver() {
        InternalResourceViewResolver resolver = new InternalResourceViewResolver();
        resolver.setPrefix("/WEB-INF/classes/pages/"); // 设置前缀
        resolver.setSuffix(".jsp"); // 设置后缀
        resolver.setViewClass(JstlView.class);
        return resolver;
    }

    /**
     * 静态资源映射
     */
    @Override
    public void addResourceHandlers(ResourceHandlerRegistry registry) {
        registry.addResourceHandler("/assets/**").addResourceLocations("classpath:/assets/"); // 把/assets下的静态资源映射的路径为/assets/
    }
}
2.这里仅仅配置了一个hello,那么我们的数据源的配置,其他的原来在spring的xml配置该如何配置呢?
对于bean的配置,比如数据源等,可以参考[001]一步一步学懂spring - 初识Java配置
对于事务的配置,可以参考[002]一步一步学懂spring - AOP和自定义注解
3.在配置数据源的时候,需要一些常量,不希望写死到Java配置中。可以参考:[003]一步一步学懂spring - Spring EL
4.项目是使用maven来进行管理的,下面贴一下pom.xml的配置,当然你可以把这些jar统一放到WEB-INF/lib目录下。
     4.0.0

     com.hy
     hy-02
     war
     1.0.0


              javax.servlet
              javax.servlet-api
              provided
              3.1.0


              javax.servlet.jsp
              jsp-api
              provided
              2.2


              javax.servlet
              jstl
              1.2


              org.springframework
              spring-webmvc
              4.2.6.RELEASE


              org.springframework
              spring-tx
              4.2.6.RELEASE


              junit
              junit
              4.12
              test


          hy-02


                   org.apache.maven.plugins
                   maven-compiler-plugin
                   3.1

                        1.8
                        1.8
                        UTF-8
SpringBoot方式创建Web应用
如果你觉得SpringMVC配置方式太过繁琐的话,还有一个更为简便的方式来创建Web应用,他可以让你不写一行配置实现创建Web服务,这个技术就是SpringBoot,目前越来越多的应用使用SpringBoot来搭建。
SpringBoot创建Web应用可以参考:https://blog.csdn.net/king_kgh/article/details/77884951
建议各位读者,如果你是初学Spring,不建议直接入门SpringBoot,因为它封装了大量的细节,容易让开发者出现会用,但不知道为什么的窘境。
