使用vmware Harbor搭建Private Registry
实验环境:
- 系统: centos7_x64
- docker 1.13.1
- docker-compose 1.20.1
- python 2.7.5
- 主机 harbor.test.com
- vmware harbor 1.4.0
一、搭建Private Registry 过程:
1. 准备环境:
a. docker以及docker-compose 安装请参考(https://blog.csdn.net/kozazyh/article/details/79764746)
b. 配置DNS(参考:dnsmasq 安装 )
增加域名指向:
address=/harbor-01.test.com/192.168.5.151
2. 下载(这里下载的离线安装包,包括所依赖的所有文件)
wget https://storage.googleapis.com/harbor-releases/release-1.4.0/harbor-offline-installer-v1.4.0.tgz
如果你网速比较慢,也可以去镜像站点下载:http://harbor.orientsoft.cn
tar xvf ./harbor-offline-installer-v1.4.0.tgz
cd harbor
3. 配置harbor:
a: 修改配置文件 ./harbor.cfg
#set hostname
hostname = harbor-01.test.com
#set ui_url_protocol
ui_url_protocol = https
#The path of secretkey storage
secretkey_path = /data
......
#The path of cert and key files for nginx, they are applied only the protocol is set to https
ssl_cert = /root/cert/harbor-01.test.com.crt
ssl_cert_key = /root/cert/harbor-01.test.com.key
创建存储目录 :
mkdir /datab: 制作自签名证书文件
参考:https://github.com/vmware/harbor/blob/v1.4.0/docs/configure_https.md
[root@harbor-01 ~]# mkdir /root/ca
[root@harbor-01 ~]# cd /root/ca/

1. Create your own CA certificate:

[root@harbor-01 cert]# openssl req \
>     -newkey rsa:4096 -nodes -sha256 -keyout ca.key \
>     -x509 -days 365 -out ca.crt
Generating a 4096 bit RSA private key
.........................................++
.............................................++
writing new private key to 'ca.key'
-----
You are about to be asked to enter information that will be incorporated
into your certificate request.
What you are about to enter is what is called a Distinguished Name or a DN.
There are quite a few fields but you can leave some blank
For some fields there will be a default value,
If you enter '.', the field will be left blank.
-----
Country Name (2 letter code) [XX]:CN
State or Province Name (full name) []:GUANGDONG
Locality Name (eg, city) [Default City]:SHENZHEN
Organization Name (eg, company) [Default Company Ltd]:IBM Ltd
Organizational Unit Name (eg, section) []:test.com
Common Name (eg, your name or your server's hostname) []:test.com
Email Address []:[email protected]
[root@harbor-01 cert]#

2. Generate a Certificate Signing Request:
If you use FQDN like reg.yourdomain.com to connect your registry host, then you must use reg.yourdomain.com as CN (Common Name):

[root@harbor-01 cert]# openssl req \
>     -newkey rsa:4096 -nodes -sha256 -keyout harbor-01.test.com.key \
>     -out harbor-01.test.com.csr
Generating a 4096 bit RSA private key
................++
...++
writing new private key to 'harbor-01.test.com.key'
-----
You are about to be asked to enter information that will be incorporated
into your certificate request.
What you are about to enter is what is called a Distinguished Name or a DN.
There are quite a few fields but you can leave some blank
For some fields there will be a default value,
If you enter '.', the field will be left blank.
-----
Country Name (2 letter code) [XX]:CN
State or Province Name (full name) []:GUANGDONG
Locality Name (eg, city) [Default City]:SHENZHEN
Organization Name (eg, company) [Default Company Ltd]:IBM Ltd
Organizational Unit Name (eg, section) []:harbor-01.test.com
Common Name (eg, your name or your server's hostname) []:harbor-01.test.com
Email Address []:[email protected]

Please enter the following 'extra' attributes
to be sent with your certificate request
A challenge password []: 回车
An optional company name []: 回车


3.Generate the certificate of your registry host:
If you're using FQDN like reg.yourdomain.com to connect your registry host, then run this command to generate the certificate of your registry host:

[root@harbor-01 cert]# openssl x509 -req -days 365 -in harbor-01.test.com.csr -CA ca.crt -CAkey ca.key -CAcreateserial -out harbor-01.test.com.crt
Signature ok
subject=/C=CN/ST=GUANGDONG/L=SHENZHEN/O=IBM Ltd/OU=harbor-01.test.com/CN=harbor-01.test.com/[email protected]

[root@harbor-01 ~]# mkdir /root/cert
[root@harbor-01 ca]# cp harbor-01.test.com.crt /root/cert/
[root@harbor-01 ca]# cp harbor-01.test.com.key /root/cert/
4. 安装:
[root@harbor-01 harbor]# ./install.sh

[Step 0]: checking installation environment ...

Note: docker version: 1.13.1

Note: docker-compose version: 1.20.1

[Step 1]: loading Harbor images ...
16faa95946a1: Loading layer [==================================================>] 29.46 MB/29.46 MB
Loaded image: vmware/notary-server-photon:v0.5.1-v1.4.0
8ece8dfcdd98: Loading layer [==================================================>] 28.24 MB/28.24 MB
Loaded image: vmware/notary-signer-photon:v0.5.1-v1.4.0
a7dd1a8afcaf: Loading layer [==================================================>] 396.7 MB/396.7 MB
kB/3.072 kB
Loaded image: vmware/harbor-db:v1.4.0
1cff102bbda2: Loading layer [==================================================>] 154.1 MB/154.1 MB
Loaded image: vmware/clair-photon:v2.0.1-v1.4.0
6534131f457c: Loading layer [==================================================>] 94.76 MB/94.76 MB
kB/6.656 kB
Loaded image: vmware/postgresql-photon:v1.4.0
5cd250d5a352: Loading layer [==================================================>] 23.24 MB/23.24 MB
Loaded image: vmware/harbor-adminserver:v1.4.0
c26c69706710: Loading layer [==================================================>] 23.24 MB/23.24 MB
Loaded image: vmware/harbor-ui:v1.4.0
dd4753242e59: Loading layer [==================================================>] 73.07 MB/73.07 MB
Loaded image: vmware/harbor-log:v1.4.0
b1056051f246: Loading layer [==================================================>] 23.24 MB/23.24 MB
Loaded image: vmware/harbor-jobservice:v1.4.0
7f58ce57cd5e: Loading layer [==================================================>] 4.805 MB/4.805 MB
Loaded image: vmware/nginx-photon:v1.4.0
4c8965978b77: Loading layer [==================================================>] 23.24 MB/23.24 MB
Loaded image: vmware/registry-photon:v2.6.2-v1.4.0
Loaded image: vmware/photon:1.0
Loaded image: vmware/mariadb-photon:v1.4.0
454c81edbd3b: Loading layer [==================================================>] 135.2 MB/135.2 MB
Loaded image: vmware/harbor-db-migrator:1.4


[Step 2]: preparing environment ...
Generated and saved secret to file: /data/secretkey
Generated configuration file: ./common/config/nginx/nginx.conf
Generated configuration file: ./common/config/adminserver/env
Generated configuration file: ./common/config/ui/env
Generated configuration file: ./common/config/registry/config.yml
Generated configuration file: ./common/config/db/env
Generated configuration file: ./common/config/jobservice/env
Generated configuration file: ./common/config/log/logrotate.conf
Generated configuration file: ./common/config/jobservice/app.conf
Generated configuration file: ./common/config/ui/app.conf
Generated certificate, key file: ./common/config/ui/private_key.pem, cert file: ./common/config/registry/root.crt
The configuration files are ready, please use docker-compose to start the service.


[Step 3]: checking existing instance of Harbor ...


[Step 4]: starting Harbor ...
Creating network "harbor_harbor" with the default driver
Creating harbor-log ... done
Creating harbor-adminserver ... done
Creating registry           ... done
Creating harbor-db          ... done
Creating harbor-ui          ... done
Creating nginx              ... done
Creating harbor-jobservice  ... done

✔ ----Harbor has been installed and started successfully.----

Now you should be able to visit the admin portal at https://harbor-01.test.com.
For more details, please visit https://github.com/vmware/harbor .
5. 检查运行状态:
[root@harbor-01 harbor]# docker-compose ps
       Name                     Command                  State                                    Ports
-------------------------------------------------------------------------------------------------------------------------------------
harbor-adminserver   /harbor/start.sh                 Up (healthy)
harbor-db            /usr/local/bin/docker-entr ...   Up (healthy)   3306/tcp
harbor-jobservice    /harbor/start.sh                 Up (healthy)
harbor-log           /bin/sh -c /usr/local/bin/ ...   Up (healthy)   127.0.0.1:1514->10514/tcp
harbor-ui            /harbor/start.sh                 Up (healthy)
nginx                nginx -g daemon off;             Up             0.0.0.0:443->443/tcp, 0.0.0.0:4443->4443/tcp, 0.0.0.0:80->80/tcp
registry             /entrypoint.sh serve /etc/ ...   Up (healthy)   5000/tcp
看到所有容器的状态都是Up (healthy) ,表示启动成功了,否则可以在/var/log/harbor/查看日志:
[root@harbor-01 harbor]# ls /var/log/harbor/ -l
总用量 3280
-rw-r-----. 1 10000 10000  227849 4月   5 01:49 adminserver.log
-rw-r-----. 1 10000 10000   43864 4月   5 01:38 jobservice.log
-rw-r-----. 1 10000 10000   61314 4月   5 01:48 mysql.log
-rw-r-----. 1 10000 10000  353865 4月   5 01:47 proxy.log
-rw-r-----. 1 10000 10000  802766 4月   5 01:49 registry.log
-rw-r-----. 1 10000 10000 1733345 4月   5 01:49 ui.log
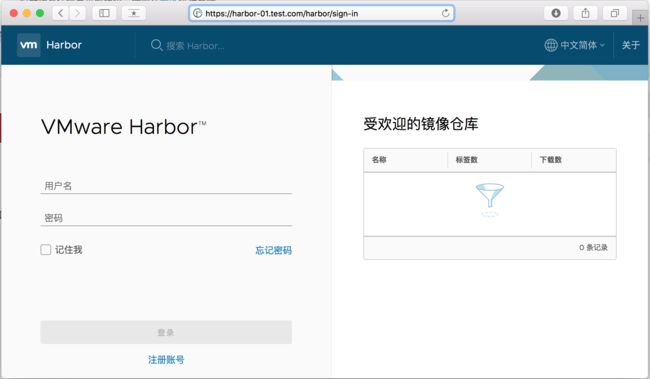
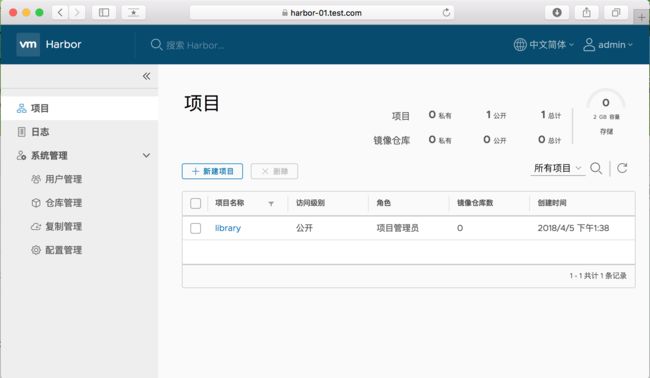
6. 在客户端访问harbor web界面
地址:https://harbor-01.test.com/
使用默认账号登陆:admin/Harbor12345
测试push image 到私有仓库:登陆:
[root@client ~]# docker login harbor-01.test.com
Username: admin
Password:
Error response from daemon: Get https://harbor-01.test.com/v1/users/: x509: certificate signed by unknown authority[root@client ~]# mkdir /etc/docker/certs.d/harbor-01.test.com -p
[root@client ~]# scp [email protected]:/root/ca/ca.crt /etc/docker/certs.d/harbor-01.test.com/
[email protected]'s password:
ca.crt 100% 2114 2.1KB/s 00:00 这样就可以成功登陆registry:
[root@client ~]# docker login harbor-01.test.com
Username: admin
Password:
Login Succeeded
测试上传image 到私有仓库:
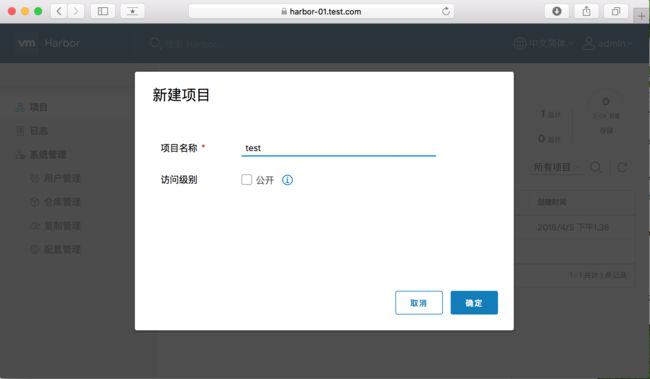
先在harbor UI上创建项目 test :
然后,psuh busybody
[root@client ~]# docker tag busybox:latest harbor-01.test.com/test/busybox:latest
[root@client ~]# docker push harbor-01.test.com/test/busybox:latest
The push refers to a repository [harbor-01.test.com/test/busybox]
3e596351c689: Mounted from library/busybox
latest: digest: sha256:fdd0a4b8982284cb82780ad69173a8ea8dfc3f24ba71a91459e9ec49852e2b3e size: 527
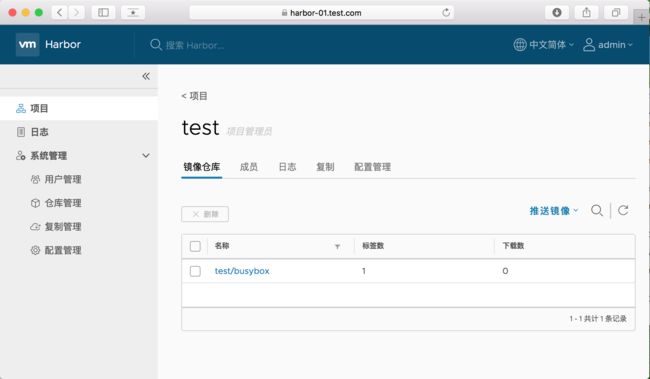
在UI上也可以看到上传的images:
项目地址:https://github.com/vmware/harbor
安装方法:https://github.com/vmware/harbor/blob/v1.4.0/docs/installation_guide.md


