在Unity中使用uGUI绘制自定义图形(饼状图 雷达图)
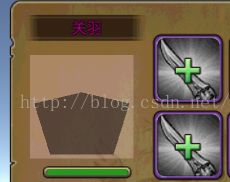
饼状图或者是雷达图是根据属性自动生成的自定义图形。这里展示了如何使用uGUI完成这一功能。
先附上我制作雷达图的控件的代码 UIPropWidget.cs
using UnityEngine;
using System.Collections.Generic;
using UnityEngine.UI;

/*
 *
 *          2 6
 *
 *   3                 7
 *
 *      0   1 5    4
 *
 *
 * 2 6位为属性0    3为属性1    0为属性2     4为属性3     7为属性4
*/

public class UIPropWidget : Graphic
{
    private enum AnimationStatus
    {
        NOT_START,
        ANIMATING,
        FINISH,
    }
    public List _maxPropVector;
    public List _testProp;
    public bool _withAnimation = true;

    private const int VERTEX_SIZE = 8;                  // 必须为4的倍数  通过绘制两个四边形组成一个五边形
    private const float ANIMATION_TIME = 0.8f;
    private const float MAX_PROP_VALUE = 100.0f;

    private List _propList = new List();
    private List _currentList = new List();

    private List _vertexList = new List();

    private bool _isStartAnimation = false;
    private bool _isAnimationFinish = false;
    private bool _isSetValue = false;

    private float _startTime = 0;
    private float _currentTime = 0;

    protected void Awake()
    {
        _isStartAnimation = false;
        _isAnimationFinish = false;
        _isSetValue = false;

        for (int i = 0; i < VERTEX_SIZE; ++i) {
            _propList.Add(Vector2.zero);
            _currentList.Add(Vector2.zero);
        }
    }

    // 设置五个属性值
    public void SetPropList(List list, bool withAnimation = false)
    {
        if (list.Count < 5) {
            Log.Error("必须提供5个属性");
            return;
        }

        // 给每个属性顶点赋值
        _propList[0] = (_maxPropVector[0] - Vector2.zero) * list[2] / MAX_PROP_VALUE;
        _propList[2] = (_maxPropVector[2] - Vector2.zero) * list[0] / MAX_PROP_VALUE;
        _propList[3] = (_maxPropVector[3] - Vector2.zero) * list[1] / MAX_PROP_VALUE;
        _propList[4] = (_maxPropVector[4] - Vector2.zero) * list[3] / MAX_PROP_VALUE;
        _propList[6] = (_maxPropVector[6] - Vector2.zero) * list[0] / MAX_PROP_VALUE;
        _propList[7] = (_maxPropVector[7] - Vector2.zero) * list[4] / MAX_PROP_VALUE;

        // 1 5值是一样的,根据0 4位置连线取中点获取
        _propList[1] = (_propList[0] + _propList[4]) / 2;
        _propList[5] = (_propList[0] + _propList[4]) / 2;

        _isSetValue = true;

        if (withAnimation) {
            PlayAnimation();
        } else {
            for (int i = 0; i < VERTEX_SIZE; ++i) {
                _currentList[i] = _propList[i];
            }
        }

        SetVerticesDirty();
    }

    // 开始播放动画
    public void PlayAnimation()
    {
        _isAnimationFinish = false;
        _isStartAnimation = true;
        _startTime = Time.time;
    }

    void Update()
    {
        if (_isAnimationFinish || !_isSetValue || !_isStartAnimation) {
            return;
        }

        // 动画播放完毕
        if (Time.time - _startTime >= ANIMATION_TIME) {
            for (int i = 0; i < VERTEX_SIZE; ++i) {
                _currentList[i] = _propList[i];
            }

            _isAnimationFinish = true;
            return;
        }

        // 更新当前动画的数据
        float percent = (Time.time - _startTime) / ANIMATION_TIME;
        for (int i = 0; i < VERTEX_SIZE; ++i) {
            _currentList[i] = _propList[i] * percent;
        }

        SetVerticesDirty();
    }

    private void UpdateVertex(List vbo, List list)
    {
        // 必须要保证填充的是4的倍数
        for (int i = 0; i < VERTEX_SIZE; ++i) {
            var vert = UIVertex.simpleVert;
            vert.color = color;
            if (i < list.Count) {
                vert.position = list[i];
            } else {
                vert.position = list[list.Count - 1];
            }
            vbo.Add(vert);
        }
    }

    protected override void OnFillVBO(List vbo)
    {
        // 尚未赋值,不用绘制
        if (!_isSetValue) {
            return;
        }

        UpdateVertex(vbo, _currentList);
    }
}
先要说明一下uGUI的渲染体系。 简单来说,就是一个CanvasRenderer进行绘制,所有的控件和可显示的元素都是Graphic。Graphic持有一个canvasRenderer,通过SetVertices设置顶点,最终完成绘制。 举例来说,Image控件就是一个Graphic,这个GameObject上面同时还有一个CanvasRenderer,两者结合起来最终把图片绘制完成。
设置的顶点格式是UIVertex,包含position、normal、color、uv0等属性。最关键的就是position,一般传一个点的坐标是相对于它自己的坐标系的像素坐标,不是全局坐标,也不是相对于父节点的坐标。举例来说,一张100*100的图片,锚点为(0.5,0.5),那么它的四个UIVertex的值分别为 (-50, -50) (-50, 50) (50, 50) (50, -50)。 无论如何移动它的位置或者改变屏幕分辨率,这几个值是不变的。除非改变Image的大小。
还有一个需要注意的是,SetVertices中设置的顶点数目必须是4的倍数,因为uGUI的绘制元素是Quad而不是三角形,所以我绘制一个五边形的雷达图的时候,需要8个顶点,通过两个四边形组合成一个五边形。
最后补充一些关于vertex设置的知识点。
一个控件的GameObject上面只允许有一个Graphic,所以不可能同时存在Image和Text。 我们自定义形状的控件可以通过两种方式来实现,一种是重载Graphic,这样这个控件就与Image等价,这里有两个比较重要的可以重载的函数 UpdateGeometry和OnFillVBO。如果看下uGUI的源代码可以发现,UpdateGeometry其实就是获取一个List
上面有提到BaseVertexEffect,这个就是另外一个可以修改顶点信息的地方,它是一个修饰的组件,以Text和Outline为例,Text是一个Graphic,在控件上面添加的Outline
就是一个BaseVertexEffect,Graphic在运行的时候会获取控件上面所有的BaseVertexEffect,然后设置顶点的时候依次调用。 我们可以实现一个自定义效果,继承自BaseVertexEffect,然后重载ModifyVertex函数进行顶点设置。
当这些知识点理清楚后,一个雷达图简直是小菜一碟。
更新5.2 api已修改,应该说是更加简化了,修改后的代码如下:
using UnityEngine;
using System.Collections.Generic;
using UnityEngine.UI;

/*
 *
 *          2 6
 *
 *   3                 7
 *
 *      0   1 5    4
 *
 *
 * 2 6位为属性0    3为属性1    0为属性2     4为属性3     7为属性4
*/

public class UIPropWidget : Graphic
{
    private enum AnimationStatus
    {
        NOT_START,
        ANIMATING,
        FINISH,
    }
    public List _maxPropVector;
    public bool _withAnimation = true;
    public const int MAX_PROP_COUNT = 5;
    private const float ANIMATION_TIME = 0.8f;
    private const float MAX_PROP_VALUE = 100.0f;

    private Vector2[] _propList = new Vector2[MAX_PROP_COUNT];
    private Vector2[] _currentList = new Vector2[MAX_PROP_COUNT];

    private bool _isStartAnimation = false;
    private bool _isAnimationFinish = false;
    private bool _isSetValue = false;

    private float _startTime = 0;
    private float _currentTime = 0;

    protected override void Awake()
    {
        base.Awake();

        _isStartAnimation = false;
        _isAnimationFinish = false;
        _isSetValue = false;
    }

    // 设置五个属性值
    public void SetPropList(List list, bool withAnimation = false)
    {
        if (list.Count < MAX_PROP_COUNT) {
            Log.Error("必须提供5个属性");
            return;
        }

        var r = GetPixelAdjustedRect();
        var v = new Vector4(r.x, r.y, r.x + r.width, r.y + r.height);
        // v.x,v.y为左下角的点   v.z,v.w为右上角的点
        _propList[0] = new Vector3(v.x * _maxPropVector[0].x, v.y * _maxPropVector[0].y) * list[0] / MAX_PROP_VALUE; // 1
        _propList[1] = new Vector3(v.z * _maxPropVector[1].x, v.y * _maxPropVector[1].y) * list[1] / MAX_PROP_VALUE; // 2
        _propList[2] = new Vector3(v.z * _maxPropVector[2].x, v.w * _maxPropVector[2].y) * list[2] / MAX_PROP_VALUE; // 3
        _propList[3] = new Vector3(v.x * _maxPropVector[3].x, v.w * _maxPropVector[3].y) * list[3] / MAX_PROP_VALUE; // 4
        _propList[4] = new Vector3(v.x * _maxPropVector[4].x, v.w * _maxPropVector[4].y) * list[4] / MAX_PROP_VALUE; // 5

        if (withAnimation) {
            PlayAnimation();
        } else {
            for (int i = 0; i < MAX_PROP_COUNT; ++i) {
                _currentList[i] = _propList[i];
            }
        }

        SetVerticesDirty();
    }

    // 开始播放动画
    public void PlayAnimation()
    {
        _isAnimationFinish = false;
        _isStartAnimation = true;
        _startTime = Time.time;
    }

    void Update()
    {
        if (_isAnimationFinish || !_isSetValue || !_isStartAnimation) {
            return;
        }

        // 动画播放完毕
        if (Time.time - _startTime >= ANIMATION_TIME) {
            for (int i = 0; i < MAX_PROP_COUNT; ++i) {
                _currentList[i] = _propList[i];
            }

            _isAnimationFinish = true;
            return;
        }

        // 更新当前动画的数据
        float percent = (Time.time - _startTime) / ANIMATION_TIME;
        for (int i = 0; i < MAX_PROP_COUNT; ++i) {
            _currentList[i] = _propList[i] * percent;
        }

        SetVerticesDirty();
    }

    protected override  void OnPopulateMesh(VertexHelper vh)
    {
        // 尚未赋值,不用绘制
        if (!_isSetValue) {
            return;
        }

        Color32 color32 = color;
        vh.Clear();
        vh.AddVert(new Vector3(0, 0), color32, new Vector2(0f, 0f)); // 0
        vh.AddVert(_currentList[0], color32, new Vector2(0f, 0f)); // 1
        vh.AddVert(_currentList[1], color32, new Vector2(0f, 1f)); // 2
        vh.AddVert(_currentList[2], color32, new Vector2(1f, 1f)); // 3
        vh.AddVert(_currentList[3], color32, new Vector2(1f, 0f)); // 4
        vh.AddVert(_currentList[4], color32, new Vector2(1f, 0f)); // 5

        vh.AddTriangle(0, 1, 2);
        vh.AddTriangle(0, 2, 3);
        vh.AddTriangle(0, 3, 4);
        vh.AddTriangle(0, 4, 5);
        vh.AddTriangle(0, 5, 1);
    }
}
重点在于绘制函数修改为OnPopulateMesh,使用VertexHelper来设置顶点,先设置所有的顶点,然后按照三角形或者者是四边形填充索引,学过dx或者opengl的这里应该非常耗理解
