openstack的安装
云计算概念


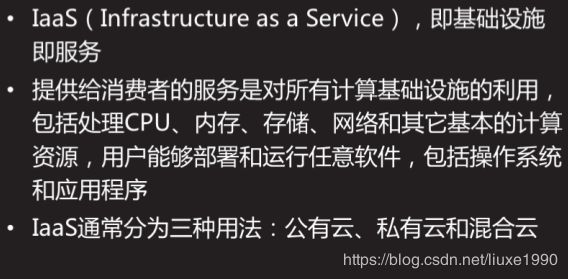
Openstack是一套IaaS解决方案,是一个开源的云计算管理平台
Openstack的安装
准备3台虚拟机
| 主机名 | 配置 |
|---|---|
| ops | eth0:192.168.8.10(vbr网桥) eth1:192.168.4.11 内存:6G |
| nova01 | eth0:192.168.8.11(vbr网桥) eth1:192.168.4.11 内存:6G |
| nova02 | eth0:192.168.8.12(vbr网桥) eth1:192.168.4.12 内存:6G |
1、配置/etc/hosts(3台虚拟机),彼此能相互ping通
[root@ops ~]# vim /etc/hosts
末尾添加
192.168.8.10 ops
192.168.8.11 nova01
192.168.8.12 nova02
2、配置yum源(配置真机192.168.8.254作为3台虚拟机的网络yum)
[root@room9pc01 ~]# cd /var/ftp
[root@room9pc01 ftp]# mount -l |column -t		//查看当前目录挂载情况
...
/RHEL7-extras.iso  on  /var/ftp/extras             type  iso9660          (ro,relatime)          [RHEL7EXTRAS]
/CentOS7-1708.iso  on  /var/ftp/system             type  iso9660          (ro,relatime)          [CentOS          7  x86_64]
/RHEL7OSP-10.iso   on  /var/ftp/HEL7OSP            type  iso9660          (ro,relatime)          [RHEL7OSP-10.0]
...

[root@room9pc01 ~]# ls /var/ftp/RHEL7OSP-10/		//查看yum源仓库目录
rhel-7-server-rhceph-2-osd-rpms
rhel-7-server-openstack-10-devtools-rpms
rhel-7-server-rhceph-2-tools-rpms
rhel-7-server-openstack-10-optools-rpms
rhel-7-server-rhscon-2-agent-rpms
rhel-7-server-openstack-10-rpms
rhel-7-server-rhscon-2-installer-rpms
rhel-7-server-openstack-10-tools-rpms
rhel-7-server-rhscon-2-main-rpms
rhel-7-server-rhceph-2-mon-rpms
[root@room9pc01 ~]# vim mkyum.sh		//创建生成yum仓库的脚本文件
#!/bin/bash
cd /var/ftp/HEL7OSP
for folder in *
do
    if [ -d $folder ];then
       cat <>/tmp/ops.repo
[$folder]
name=$folder
baseurl=ftp://192.168.8.254/HEL7OSP/$folder
enabled=1
gpgcheck=0
EOF
    fi
done
[root@room9pc01 ~]# chmod +x mkyum.sh
[root@room9pc01 ~]# ./mkyum.sh
[root@room9pc01 ~]# vim /tmp/ops.repo		//编辑生成的yum源,在末尾添加系统(system)yum源和扩展(extras)yum源
[rhel-7-server-openstack-10-devtools-rpms]
name=rhel-7-server-openstack-10-devtools-rpms
baseurl=ftp://192.168.8.254/HEL7OSP/rhel-7-server-openstack-10-devtools-rpms
enabled=1
gpgcheck=0
[rhel-7-server-openstack-10-optools-rpms]
name=rhel-7-server-openstack-10-optools-rpms
baseurl=ftp://192.168.8.254/HEL7OSP/rhel-7-server-openstack-10-optools-rpms
enabled=1
gpgcheck=0
[rhel-7-server-openstack-10-rpms]
name=rhel-7-server-openstack-10-rpms
baseurl=ftp://192.168.8.254/HEL7OSP/rhel-7-server-openstack-10-rpms
enabled=1
gpgcheck=0
[rhel-7-server-openstack-10-tools-rpms]
name=rhel-7-server-openstack-10-tools-rpms
baseurl=ftp://192.168.8.254/HEL7OSP/rhel-7-server-openstack-10-tools-rpms
enabled=1
gpgcheck=0
[rhel-7-server-rhceph-2-mon-rpms]
name=rhel-7-server-rhceph-2-mon-rpms
baseurl=ftp://192.168.8.254/HEL7OSP/rhel-7-server-rhceph-2-mon-rpms
enabled=1
gpgcheck=0
[rhel-7-server-rhceph-2-osd-rpms]
name=rhel-7-server-rhceph-2-osd-rpms
baseurl=ftp://192.168.8.254/HEL7OSP/rhel-7-server-rhceph-2-osd-rpms
enabled=1
gpgcheck=0
[rhel-7-server-rhceph-2-tools-rpms]
name=rhel-7-server-rhceph-2-tools-rpms
baseurl=ftp://192.168.8.254/HEL7OSP/rhel-7-server-rhceph-2-tools-rpms
enabled=1
gpgcheck=0
[rhel-7-server-rhscon-2-agent-rpms]
name=rhel-7-server-rhscon-2-agent-rpms
baseurl=ftp://192.168.8.254/HEL7OSP/rhel-7-server-rhscon-2-agent-rpms
enabled=1
gpgcheck=0
[rhel-7-server-rhscon-2-installer-rpms]
name=rhel-7-server-rhscon-2-installer-rpms
baseurl=ftp://192.168.8.254/HEL7OSP/rhel-7-server-rhscon-2-installer-rpms
enabled=1
gpgcheck=0
[rhel-7-server-rhscon-2-main-rpms]
name=rhel-7-server-rhscon-2-main-rpms
baseurl=ftp://192.168.8.254/HEL7OSP/rhel-7-server-rhscon-2-main-rpms
enabled=1
gpgcheck=0

[system]
name=system
baseurl=ftp://192.168.8.254/system
enabled=1
gpgcheck=0

[extras]
name=extras
baseurl=ftp://192.168.8.254/extras
enabled=1
gpgcheck=0

[root@room9pc01 ~]# for i in 10 11 12;  \
do scp /tmp/ops.repo 192.168.8.$i:/etc/yum.repos.d/;  \
done		//将yum文件拷贝至3台虚拟机
3、配置DNS和NTP服务器(NTP服务器不能与openstack共用主机)
(1)3台虚拟机配置DNS解析
[root@ops ~]# vim /etc/resolv.conf		//配置DNS解析(以ops主机为例)
; generated by /usr/sbin/dhclient-script
nameserver 192.168.8.254
(2)将真机(192.168.8.254)作为NTP服务器
[root@room9pc01 ~]# vim /etc/chrony.conf
server ntp1.aliyun.com iburst
[root@room9pc01 ~]# systemctl restart chronyd
[root@room9pc01 ~]# chronyc sources -v		//查看时间同步情况(最后一行为*表示时间同步配置成功)
210 Number of sources = 1

  .-- Source mode  '^' = server, '=' = peer, '#' = local clock.
 / .- Source state '*' = current synced, '+' = combined , '-' = not combined,
| /   '?' = unreachable, 'x' = time may be in error, '~' = time too variable.
||                                                 .- xxxx [ yyyy ] +/- zzzz
||      Reachability register (octal) -.           |  xxxx = adjusted offset,
||      Log2(Polling interval) --.      |          |  yyyy = measured offset,
||                                \     |          |  zzzz = estimated error.
||                                 |    |           \
MS Name/IP address         Stratum Poll Reach LastRx Last sample
===============================================================================
^* 120.25.115.20                 2   6   377    54   +489us[+2225us] +/- 4184us
(3)3台虚拟机配置NTP时间同步
[root@ops ~]# vim /etc/chrony.conf
server 192.168.8.254 iburst
[root@ops ~]# systemctl restart chronyd
[root@ops ~]# chronyc sources -v
210 Number of sources = 1

  .-- Source mode  '^' = server, '=' = peer, '#' = local clock.
 / .- Source state '*' = current synced, '+' = combined , '-' = not combined,
| /   '?' = unreachable, 'x' = time may be in error, '~' = time too variable.
||                                                 .- xxxx [ yyyy ] +/- zzzz
||      Reachability register (octal) -.           |  xxxx = adjusted offset,
||      Log2(Polling interval) --.      |          |  yyyy = measured offset,
||                                \     |          |  zzzz = estimated error.
||                                 |    |           \
MS Name/IP address         Stratum Poll Reach LastRx Last sample
===============================================================================
^* gateway                       3   6   377    53   -315us[ -435us] +/- 3813us
4、安装依赖包
[root@ops ~]# yum -y install qemu-kvm \		//以ops主机为例
libvirt-daemon libvirt-client \
libvirt-daemon-driver-qemu python-setuptools
[root@ops ~]# yum -y install openstack-packstack		//只在ops主机上操作
5、创建应答文件(ops主机)
[root@ops ~]# packstack --gen-answer-file=answer.ini
Packstack changed given value  to required value /root/.ssh/id_rsa.pub
[root@ops ~]# ls
answer.ini
[root@ops ~]# wc -l answer.ini
1317 answer.ini
[root@ops ~]# vim answer.ini
42 CONFIG_SWIFT_INSTALL=n```
75 CONFIG_NTP_SERVERS=192.168.8.254
95 CONFIG_CONTROLLER_HOST=192.168.8.10
98 CONFIG_COMPUTE_HOSTS=192.168.8.11,192.168.8.12		//nova计算服务节点
102 CONFIG_NETWORK_HOSTS=192.168.8.10,192.168.8.11,192.168.8.12		//openstack网络服务节点
139 CONFIG_STORAGE_HOST=192.168.8.11,192.168.8.12		//指定存储服务器
333 CONFIG_KEYSTONE_ADMIN_PW=a		//设置默认管理员密码
840 CONFIG_NEUTRON_ML2_TYPE_DRIVERS=flat,vxlan		//虚拟机之间通信的运营商网络(xvlan:多vlan技术)
876 CONFIG_NEUTRON_ML2_VXLAN_GROUP=239.1.1.5		//主播地址
910 CONFIG_NEUTRON_OVS_BRIDGE_MAPPINGS=physnet1:br-ex		//定义虚拟交换机名称
921 CONFIG_NEUTRON_OVS_BRIDGE_IFACES=br-ex:eth0  //设置转发虚拟交换机数据包的物理网卡
936 CONFIG_NEUTRON_OVS_TUNNEL_IF=eth1		//设置内网通讯网卡
1179 CONFIG_PROVISION_DEMO=n
6、安装openstack
[root@ops ~]# packstack --answer-file=answer.ini		//使用应答文件安装openstack(安装时间较长,一般30分钟左右)
...
 **** Installation completed successfully ******		//出现该提示表示安装成功
...
7、验证ovs配置
[root@ops ~]# ovs-vsctl show
Bridge br-ex
        Controller "tcp:127.0.0.1:6633"
            is_connected: true
        fail_mode: secure
        Port br-ex
            Interface br-ex
                type: internal
        Port "eth0"
            Interface "eth0"
 ...


