Android Studio开发生成自己的SDK核心Jar包文件
作为Android开发者我们用过很多SDK,比如友盟、微博、支付宝、Mob等等。当我们饶有兴趣的想研究一下这些SDK源码的时候发现,都是a、b、d一些字母,看得你都烦躁了,其实只是它们的研发人员对代码进行了混淆。代码混淆其实是一种自我保护的方式,可以有效防止自己的核心业务模块被轻而易举破解。今天我们要讲的就是发布自己的SDK,所以代码混淆也是本文的一个重点,现在我们开始一步步进行说明(本文生成jar文件不包含res资源文件):
1、首先开发环境说明
- Android Studio
- JDK 1.8
2、新建项目工程
选择第一种 Add No Activity,点击Finish即可
2、建立自己包名和功能类
3、配置build文件
①、项目中的build.gradle
    dependencies {
        classpath 'com.android.tools.build:gradle:2.3.3'

        // NOTE: Do not place your application dependencies here; they belong
        // in the individual module build.gradle files
    }
注意:'com.android.tools.build:gradle:2.3.3'用2.3.3版本
②、app modle中的build.gradle
先将 apply plugin: 'com.android.application'修改一下,因为本文要生成的是可供别人是使用的SDK,所有改为library,即修改为apply plugin: 'com.android.library'
由于我们这次要生成的SDK是没有界面的纯业务代码,不需要dependencies
故将build.gradle中的dependencies删除,然后增加task clearJar、task makeJar和makeJar.dependsOn具体如下:
apply plugin: 'com.android.library'

android {
    compileSdkVersion 26
    buildToolsVersion "26.0.2"

    defaultConfig {
        minSdkVersion 18
        targetSdkVersion 26
    }
    buildTypes {
        release {
            //开启混淆代码
            minifyEnabled true
            proguardFiles getDefaultProguardFile('proguard-android.txt'), 'proguard-rules.pro'
        }
    }
}

task clearJar(type: Delete) {
    //这行表示如果你已经打过一次包了,再进行打包则把原来的包删掉
    delete 'build/libs/MySDK-1.0.0.jar'
}

task makeJar(type: Copy) {
    from('build/intermediates/bundles/default/') //这行表示要打包的文件的路径,根据下面的内容,其实是该路径下的classes.jar
    into('build/libs/')  //这行表示打包完毕后包的生成路径,也就是生成的包存在哪
    include('classes.jar')  //看到这行,如果你对分包有了解的话,你就可以看出来这行它只是将一些类打包了
    rename('classes.jar', 'MySDK-1.0.0.jar')
}

makeJar.dependsOn(clearJar, build)
比较详细的说明已经写出,这里说一下 minifyEnabled 为true就是开启代码混淆,混淆文件proguard-rules.pro如下:
# 表示混淆时不使用大小写混合类名
-dontusemixedcaseclassnames
# 表示不跳过library中的非public的类
-dontskipnonpubliclibraryclasses
# 打印混淆的详细信息
-verbose

# Optimization is turned off by default. Dex does not like code run
# through the ProGuard optimize and preverify steps (and performs some
# of these optimizations on its own).
-dontoptimize
# 表示不进行校验,这个校验作用 在java平台上的
-dontpreverify
# Note that if you want to enable optimization, you cannot just
# include optimization flags in your own project configuration file;
# instead you will need to point to the
# "proguard-android-optimize.txt" file instead of this one from your
# project.properties file.

-keepattributes *Annotation*
-keep public class com.google.vending.licensing.ILicensingService
-keep public class com.android.vending.licensing.ILicensingService

# For native methods, see http://proguard.sourceforge.net/manual/examples.html#native
-keepclasseswithmembernames class * {
    native ;
}

# keep setters in Views so that animations can still work.
# see http://proguard.sourceforge.net/manual/examples.html#beans
-keepclassmembers public class * extends android.view.View {
   void set*(***);
   *** get*();
}

# We want to keep methods in Activity that could be used in the XML attribute onClick
-keepclassmembers class * extends android.app.Activity {
   public void *(android.view.View);
}

# For enumeration classes, see http://proguard.sourceforge.net/manual/examples.html#enumerations
-keepclassmembers enum * {
    public static **[] values();
    public static ** valueOf(java.lang.String);
}

-keepclassmembers class * implements android.os.Parcelable {
  public static final android.os.Parcelable$Creator CREATOR;
}

-keepclassmembers class **.R$* {
    public static ;
}

# The support library contains references to newer platform versions.
# Don't warn about those in case this app is linking against an older
# platform version.  We know about them, and they are safe.
-dontwarn android.support.**

# Understand the @Keep support annotation.
-keep class android.support.annotation.Keep

-keep @android.support.annotation.Keep class * {*;}

-keepclasseswithmembers class * {
    @android.support.annotation.Keep ;
}

-keepclasseswithmembers class * {
    @android.support.annotation.Keep ;
}

-keepclasseswithmembers class * {
    @android.support.annotation.Keep (...);
}


#忽略警告
-ignorewarnings
#保证是独立的jar,没有任何项目引用,如果不写就会认为我们所有的代码是无用的,从而把所有的代码压缩掉,导出一个空的jar
-dontshrink
#保护泛型
-keepattributes Signature

#以下都是对外提供调用的类要忽略,不能混淆
-dontwarn com.aliwh.mysdk.bean.ComBean
-keep public class com.aliwh.mysdk.bean.ComBean { *; }

-dontwarn com.aliwh.mysdk.serialport.SerialPortInstance
-keep public class com.aliwh.mysdk.serialport.SerialPortInstance { *; }

-dontwarn com.aliwh.mysdk.impl.OnDispRecDataListener
-keep public interface com.aliwh.mysdk.impl.OnDispRecDataListener { *; }

-dontwarn com.aliwh.mysdk.serialport.SerialPortOpt
-keep public class com.aliwh.mysdk.serialport.SerialPortOpt { *; }

-dontwarn com.aliwh.mysdk.api.ControlAPI
-keep public class com.aliwh.mysdk.api.ControlAPI { *; }

-dontwarn com.aliwh.mysdk.Constants
-keep public class com.aliwh.mysdk.Constants { *; }
要注意那些忽略混淆的类文件,设置完这些之后点击右上角的Sysnc Now编译
报错了,是的你没看错,真的报错了,看报错原因可以很快明白错误所在,我们将applicationId "com.aliwh.mysdk"删除去掉
点击右上角的Try Again编译,编译通过了。
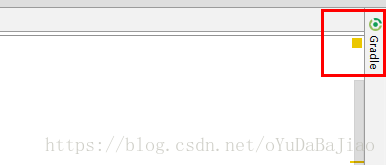
现在我们打开Android Studio编译器右上角的Gradle
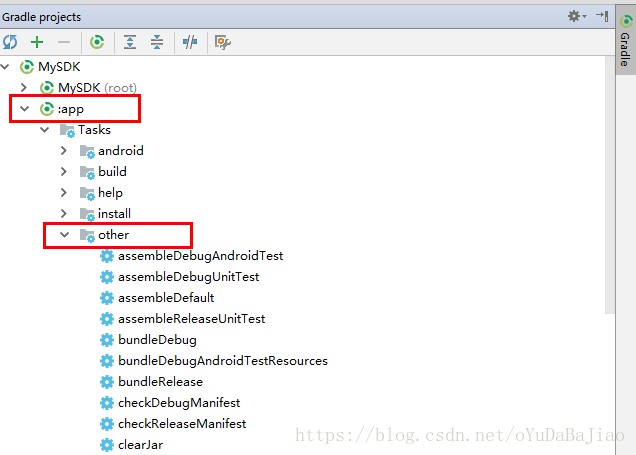
找到app 再找到other
在other中找到makeJar然后双击makeJar
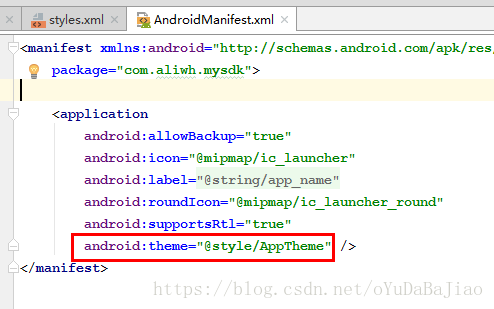
又报错了,不要急 这个错误很好解决,只不过是因为我们将dependencies中的依赖都删除了,所以找不到报错,我们只要将value文件夹中的style.xml删除同时将AndroidManifest.xml中android:theme="@style/AppTheme"删除即可
处理完成上面的错误之后,继续双击makeJar
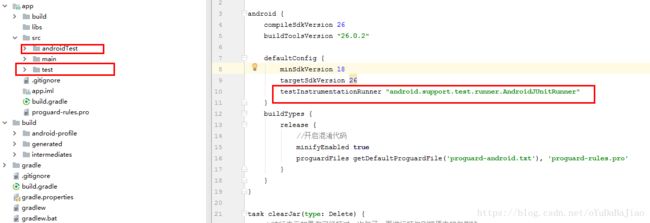
错误又来啦,是不是要崩溃了,其实还是一个问题还是dependencies中的依赖都删除了,导致项目原本自带的测试代码编译过不了,所以我们再讲项目中自带的测试部分删除
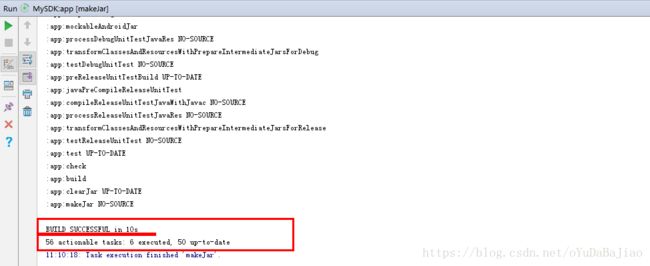
处理完成上面的错误之后,继续双击makeJar,这回就结束了没有错误了,编译通过了!
是不是感觉很艰辛,其实没有关键在于删除了dependencies中的依赖,当然如果你不删除也是可以的,那就不会有这么多的错我要处理了,但是留着这些没有的依赖,会让生成的jar文件更大。
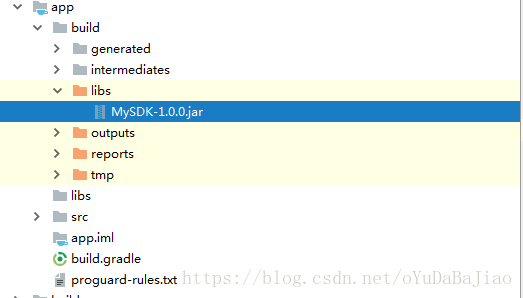
我们去看看 生成的jar文件在哪吧
这个 jar就是可用的,可以压缩包软件解压打开,发现混淆成功了!


