测试四种人脸检测方法(opencv,dlib,openpose,cnn)的戴口罩识别效果测试,终于找到了大佬发布的开箱即用的方法!
最近尝试做一个人脸检测控制机器人来测体温,记录一下过程,做戴口罩人脸识别下拉直接看第四个就行:
1、首先使用了opencv-ython试了一下人脸检测,参考https://blog.csdn.net/qq_32892383/article/details/90732916
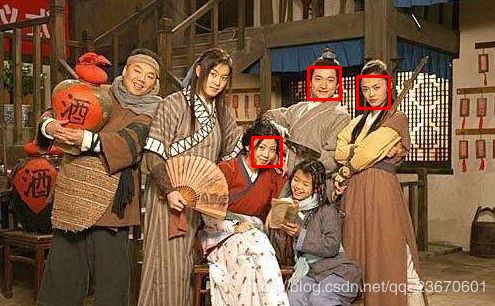
先跑了一下固定图片的,效果堪忧啊

代码:
# -*- coding: utf-8 -*-
import c2
import lgging

# 设置日志
logging.basicConfig(level = logging.INFO, format='%(asctime)s - %(levelname)s: %(message)s')
logger = logging.getLogger(__name__)

# 待检测的图片路径
ImagePath = '1.jpg'

# 读取图片
logger.info('Reading image...')
image = cv2.imread(ImagePath)
# 把图片转换为灰度模式
gray = cv2.cvtColor(image, cv2.COLOR_BGR2GRAY)

# 探测图片中的人脸
logger.info('Detect faces...')
# 获取训练好的人脸的参数数据,进行人脸检测
face_cascade = cv2.CascadeClassifier(r'./haarcascade_frontalface_default.xml')
faces = face_cascade.detectMultiScale(gray,scaleFactor=1.15,minNeighbors=5,minSize=(3, 3))

search_info = "Find %d face."%len(faces) if len(faces) <= 1 else "Find %d faces."%len(faces)
logger.info(search_info)

# 绘制人脸的矩形区域(红色边框)
for (x, y, w, h) in faces:
    cv2.rectangle(image, (x,y), (x+w,y+h), (0,0,255), 2)

# 显示图片
cv2.imshow('Find faces!', image)
cv2.waitKey(0)
ros环境下接收电脑摄像头的图像话题的实时检测代码:
# -*- coding: utf-8 -*-
#opencv固定图片检测
#2020.2.13
#by跃动的风
import cv2
import logging
import rospy
import roslib
from sensor_msgs.msg import Image
from geometry_msgs.msg import Pose
from cv_bridge import CvBridge,CvBridgeError

def ImageCB(data):
    bridge = CvBridge()
    image = bridge.imgmsg_to_cv2(data,"bgr8")
    # 把图片转换为灰度模式
    gray = cv2.cvtColor(image, cv2.COLOR_BGR2GRAY)

    # 探测图片中的人脸
    #logger.info('Detect faces...')
    # 获取训练好的人脸的参数数据,进行人脸检测
    face_cascade = cv2.CascadeClassifier(r'./haarcascade_frontalface_default.xml')
    faces = face_cascade.detectMultiScale(gray,scaleFactor=1.15,minNeighbors=5,minSize=(3, 3))

    search_info = "Find %d face."%len(faces) if len(faces) <= 1 else "Find %d faces."%len(faces)
    rospy.loginfo(search_info)

    # 绘制人脸的矩形区域(红色边框)
    for (x, y, w, h) in faces:
        cv2.rectangle(image, (x,y), (x+w,y+h), (0,0,255), 2)

    cv2.imshow('Find faces!', image)
    cv2.waitKey(1)
##ROS Node
if __name__ == '__main__':
    #face_cascade = cv2.CascadeClassifier(r'./haarcascade_frontalface_default.xml')
    try:
        rospy.init_node('face_detect', anonymous=True)
        rospy.loginfo('face_detect start...')
        pub = rospy.Publisher('/face_detection', Image, queue_size = 10)
        pub_face_coo = rospy.Publisher('/face_coo', Pose, queue_size = 3)
        rospy.Subscriber('/usb_cam/image_raw',Image, ImageCB)
        rospy.spin()
    except:
    	pass
2,使用dlib检测
参考https://blog.csdn.net/Nirvana_6174/article/details/89599136
效果尚可,但是不能检测戴口罩的人脸
静态图片检测代码
import dlib
import numpy as np
import cv2

def rect_to_bb(rect): # 获得人脸矩形的坐标信息
    x = rect.left()
    y = rect.top()
    w = rect.right() - x
    h = rect.bottom() - y
    return (x, y, w, h)

def resize(image, width=1200):  # 将待检测的image进行resize
    r = width * 1.0 / image.shape[1]
    dim = (width, int(image.shape[0] * r))
    resized = cv2.resize(image, dim, interpolation=cv2.INTER_AREA)
    return resized

def detect():
    image_file = "1.jpg"
    detector = dlib.get_frontal_face_detector()
    image = cv2.imread(image_file)
    image = resize(image, width=1200)
    gray = cv2.cvtColor(image, cv2.COLOR_BGR2GRAY)
    rects = detector(gray, 1)
    for (i, rect) in enumerate(rects):
        (x, y, w, h) = rect_to_bb(rect)
        cv2.rectangle(image, (x, y), (x + w, y + h), (0, 255, 0), 2)
        cv2.putText(image, "Face: {}".format(i + 1), (x - 10, y - 10), cv2.FONT_HERSHEY_SIMPLEX, 0.5, (0, 255, 0), 2)

    cv2.imshow("Output", image)
    cv2.waitKey(1)

if __name__ == "__main__":
    while 1:
        detect()
        if cv2.waitKey(1) & 0xFF == ord("q"):
             break
3,使用openpose检测
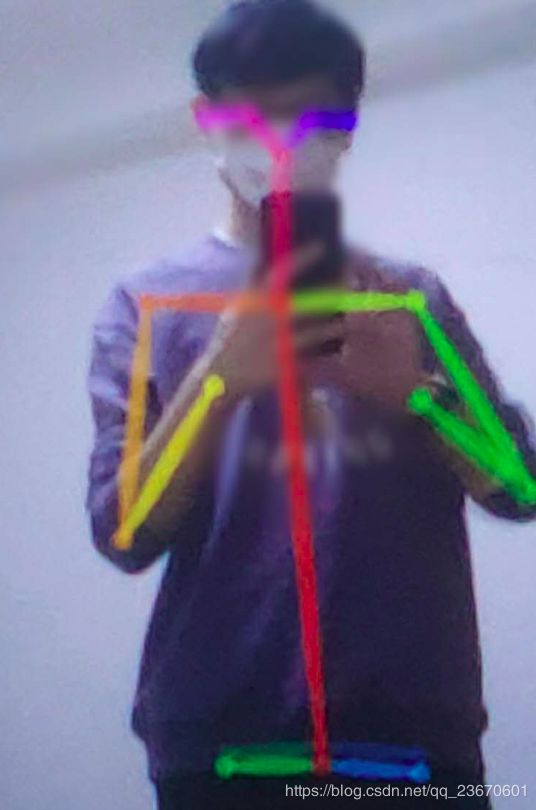
效果极佳,就是环境配置很费劲。放一张效果图,检测戴口罩的毫无压力:

具体安装方法见另一篇文章https://blog.csdn.net/qq_23670601/article/details/104345718。
缺点是依赖太多,且在i7 7700HQ cpu下测试速度是0.1fps,gtx1060 gpu下测试速度为4.9fps.
2020-3月更新
4、发现有一位大佬公布了一个CNN模型和代码,开箱即用,终于解决了openpose的复杂依赖以及速度太慢的问题。地址如下:
https://github.com/ShiqiYu/libfacedetection
下载之后解压,新建文件夹build,之后在buid目录下
cmake ..
make
就可以用了。
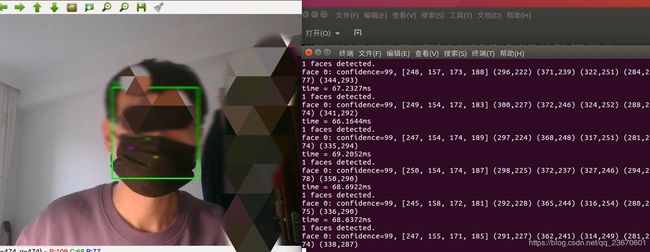
使用摄像头测试一下:
./detect-camera-demo 0
