Linux 下 vscode 断点调试
一、环境搭建
1.下载 vscode
2.安装 gcc 和 g++
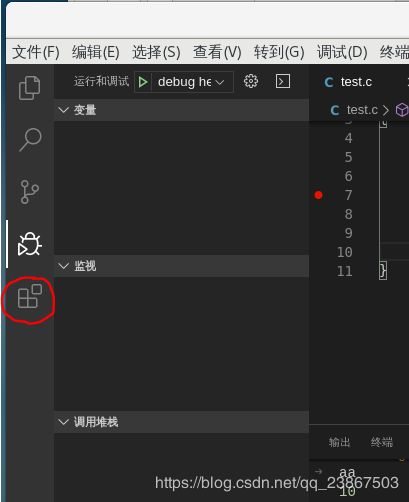
3.然后在 vscode 的 Extensions 下安装以下插件:

C/C++、Code Runner、C/C++ Snippets、EPITECH C/C++ Headers、File Templates、GBKtoUTF8 GBK、Include Autocomplete。
其中 C/C++ 和 Code Runner 必须要装。
此时,已经可以断点了。接下简单介绍已下怎么断点调试。
二、断点调试介绍
1.创建 test.c 文件
内容如下:
#include
main(int argc, char const *argv[])
{
    int aa;
    printf("hello word \n");
    scanf("%d",&aa);
    return 0;
}
2.创建 launch.json 文件
直接按 F5,弹出以下画面:

选择 C++(GDB/LLDB)

然后选择默认配置。
这时候就会生成 launch.json 文件:
{
    // 使用 IntelliSense 了解相关属性。
    // 悬停以查看现有属性的描述。
    // 欲了解更多信息,请访问: https://go.microsoft.com/fwlink/?linkid=830387
    "version": "0.2.0",
    "configurations": [
        {
            "name": "(gdb) 启动",
            "type": "cppdbg",
            "request": "launch",
            "program": "输入程序名称,例如 ${workspaceFolder}/a.out",
            "args": [],
            "stopAtEntry": false,
            "cwd": "${workspaceFolder}",
            "environment": [],
            "externalConsole": false,
            "MIMode": "gdb",
            "setupCommands": [
                {
                    "description": "为 gdb 启用整齐打印",
                    "text": "-enable-pretty-printing",
                    "ignoreFailures": true
                }
            ]
        }
    ]
}
3.创建 task.json 文件
到目前位置其实是可以调试了,但是要想在线断点调试就必须要在编译的时候加上 -g 选项,所以这里还要加上一个编译操作。
修改 launch.json 成以下内容:
{
    // 使用 IntelliSense 了解相关属性。
    // 悬停以查看现有属性的描述。
    // 欲了解更多信息,请访问: https://go.microsoft.com/fwlink/?linkid=830387
    "version": "0.2.0",
    "configurations": [
        {
            "name": "debug hello world",
            "type": "cppdbg",
            "request": "launch",
            "program": "${workspaceFolder}/test.out",
            "args": [],
            "stopAtEntry": false,
            "cwd": "${workspaceFolder}",
            "environment": [],
            "externalConsole": false,
            "MIMode": "gdb",
            "setupCommands": [
                {
                    "description": "为 gdb 启用整齐打印",
                    "text": "-enable-pretty-printing",
                    "ignoreFailures": true
                }
            ],
            "preLaunchTask": "build"
        }
    ]
}
最重要的是加了 “preLaunchTask”: “build” 这一行,从字面意思上就可以看出来,在执行 launch.json 之前要执行一个 build 操作,这个build 操作相对应的是即将生成的 task.json 文件中的内容相对应。
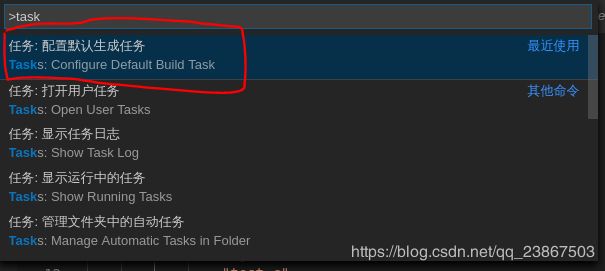
使用快捷键 Ctrl+Shift+p:

选中第一个,然后再选中默认,即可生成 tasks.json 文件,修改 task.json 的内容:
{
    // See https://go.microsoft.com/fwlink/?LinkId=733558
    // for the documentation about the tasks.json format
    "version": "2.0.0",
    "tasks": [
        {
            "label": "build",
            "type": "shell",
            "command": "g++",
            "args": [
                "-g",
                "test.c",
                "-o",
                "test.out"
            ],
        }
    ]
}
其中 “label”: “build” 要和 launch.json 中的 preLaunchTask 对应上,其参数都可以从字面意思上看出来,不再介绍。
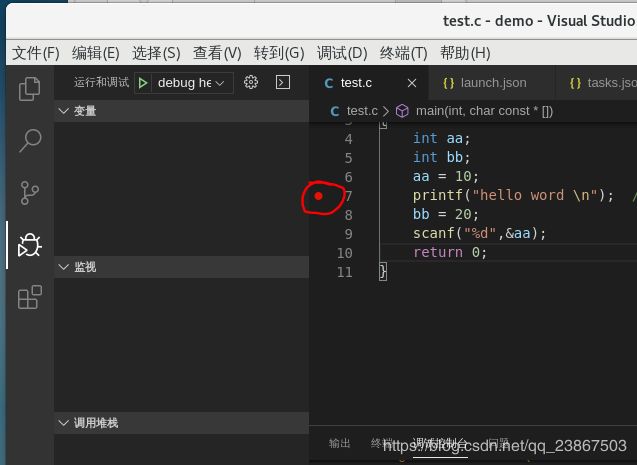
到这里就可以断点调试了,在 vscode 打开文档的左侧添加断点

其实 windows 和 linux 搭建 vscode 的方式差不多,一步步对应上即可。