Google免费云环境Colaboratory使用教程
Colaboratory是Google的一个免费的深度学习云端环境,提供免费的GPU和TPU,除了需要科学上网,用起来还是非常舒服的。
Colab地址:点击前往
基本使用
进入Google云端硬盘,右键 → \rightarrow →更多 → \rightarrow →关联更多应用 搜索Colaboratory并添加,添加完成后,右键选择Colaboratory就可以创建一个新的notebook。
Colab的用法和Jupyter notebook一样,可以直接执行Python代码,也可以通过!+command执行linux命令。
执行Python代码:
import numpy as np
a = np.random.random((3, 3))
print(a)
print("sum: ", np.sum(a))

[[0.24678976 0.47023166 0.00604048]
 [0.81917307 0.9650736  0.9974302 ]
 [0.88696709 0.92203368 0.31132943]]
sum:  5.625068960056541
使用命令查看Ubuntu的版本:
!lsb_release -a

No LSB modules are available.
Distributor ID:	Ubuntu
Description:	Ubuntu 18.04.2 LTS
Release:	    18.04
Codename:	    bionic
连接Google云端硬盘
执行下面代码,点击输出链接,登陆Google账号,获取授权码,粘贴到输入框中,链接到云端硬盘,硬盘挂载在/content/drive下。
# Load the Drive helper and mount
from google.colab import drive
# This will prompt for authorization.
drive.mount('/content/drive')
使用ls命令查看云端硬盘中的文件:
!ls "/content/drive/My Drive"

 Cifar10
'Colab Notebooks'
 CornerNet
 deep-learning-keras-tensorflow
 keras_Realtime_Multi-Person_Pose_Estimation-master
 MCM
 pose-residual-network-pytorch
也可以展开侧边栏查看文件:
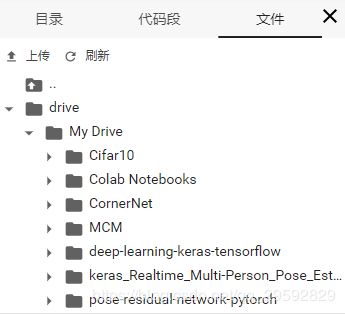
查看配置
点击 代码执行程序 → \rightarrow →更改运行时类型 → \rightarrow →硬件加速器 选择GPU。
执行:
from tensorflow.python.client import device_lib
device_lib.list_local_devices()

[name: "/device:CPU:0"
 device_type: "CPU"
 memory_limit: 268435456
 locality {
 }
 incarnation: 677841662562579601, name: "/device:XLA_CPU:0"
 device_type: "XLA_CPU"
 memory_limit: 17179869184
 locality {
 }
 incarnation: 9258589908592365980
 physical_device_desc: "device: XLA_CPU device", name: "/device:XLA_GPU:0"
 device_type: "XLA_GPU"
 memory_limit: 17179869184
 locality {
 }
 incarnation: 10896633435725669876
 physical_device_desc: "device: XLA_GPU device", name: "/device:GPU:0"
 device_type: "GPU"
 memory_limit: 14800692839
 locality {
   bus_id: 1
   links {
   }
 }
 incarnation: 711525362527462258
 physical_device_desc: "device: 0, name: Tesla T4, pci bus id: 0000:00:04.0, compute capability: 7.5"]
用nvidia命令查看显卡使用情况:
!nvidia-smi

Sun May  5 11:51:49 2019
+-----------------------------------------------------------------------------+
| NVIDIA-SMI 418.56       Driver Version: 410.79       CUDA Version: 10.0     |
|-------------------------------+----------------------+----------------------+
| GPU  Name        Persistence-M| Bus-Id        Disp.A | Volatile Uncorr. ECC |
| Fan  Temp  Perf  Pwr:Usage/Cap|         Memory-Usage | GPU-Util  Compute M. |
|===============================+======================+======================|
|   0  Tesla T4            Off  | 00000000:00:04.0 Off |                    0 |
| N/A   71C    P0    31W /  70W |    221MiB / 15079MiB |      0%      Default |
+-------------------------------+----------------------+----------------------+

+-----------------------------------------------------------------------------+
| Processes:                                                       GPU Memory |
|  GPU       PID   Type   Process name                             Usage      |
|=============================================================================|
+-----------------------------------------------------------------------------+
一个示例
为了操作方便,先将路径换成云端硬盘的路径:
import os
os.chdir('/content/drive/My Drive/')
执行mnist_train:
!python test_code/mnist_train.py

step 0, training accuracy 0.171875
step 900, training accuracy 0.96875
step 1900, training accuracy 1
step 3900, training accuracy 0.984375
step 4900, training accuracy 1
测试结果:
!python test_code/mnist_test.py

accuracy is:  0.9778
完整教程代码:点击前往
总结
Colab对想搞深度学习没有好卡的人是一个非常好的工具,环境配置简单,自带tensorflow,还可以安装其他的深度学习的框架,还可以直接从github导入,虽然每次最多只能连续用12小时,但对于学习来说已经非常够用了。更重要的一点,对于动辄几百上千的GPU云服务器,colab是免费的!