Demo:(XSLC项目,未上线)
参考文档: http://dev.umeng.com/push/ios/integration
开通友盟的消息推送服务
-
添加应用并上传证书


因为本项目的开发证书我已经申请过了,当时没有勾选推送的服务,现在直接选证书进去编辑.创建两种证书即可,下面演示如何创建开发环境下的证书
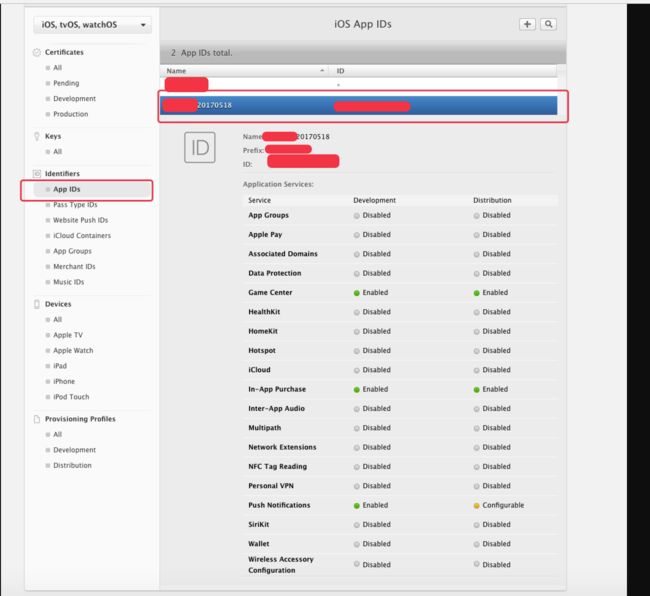

文件名为:aps_development.cer的是推送证书

双击开发证书,会打开钥匙串

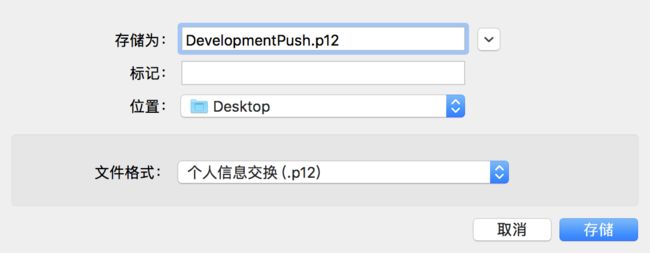
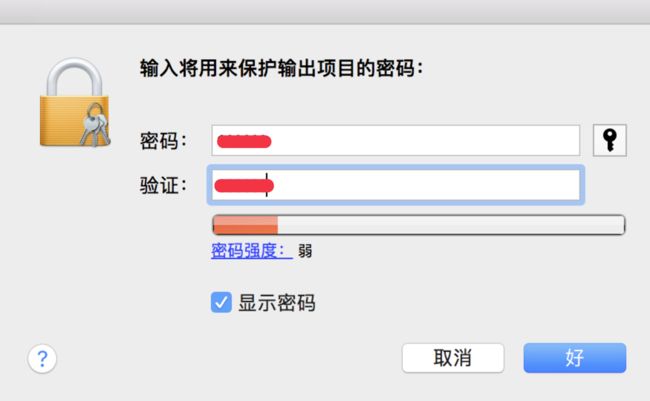
照样创建生产的推送证书即可
然后你会发现,推送证书的两个证书都是可用的了

-
配置向导

集成推送
注意:友盟推送不支持pod
-
手动导入SDK

打开推送开关
点击项目---->TARGET---->Capabilities,将这里的Push Notification的开关打开

代码部分
-
实现基本推送
AppDelegate中
//友盟推送
#import "UMessage.h"
#import
实现协议
AppDelegate中的didFinishLaunchingWithOptions中
   //友盟推送
    [UMessage startWithAppkey:@"你的key" launchOptions:launchOptions];
    //注册通知,如果要使用category的自定义策略,可以参考demo中的代码。
    [UMessage registerForRemoteNotifications];
    //打开日志,方便调试
    [UMessage setLogEnabled:YES];
    //iOS10必须加下面这段代码。
    UNUserNotificationCenter *center = [UNUserNotificationCenter currentNotificationCenter];
    center.delegate=self;
    UNAuthorizationOptions types10=UNAuthorizationOptionBadge|  UNAuthorizationOptionAlert|UNAuthorizationOptionSound;
    [center requestAuthorizationWithOptions:types10     completionHandler:^(BOOL granted, NSError * _Nullable error)
     {
        if (granted)
        {
            //点击允许
            //这里可以添加一些自己的逻辑
        }
        else
        {
            //点击不允许
            //这里可以添加一些自己的逻辑
        }
    }];
此时项目还没有上线,没有上线的话需要我们手动一个一个的添加测试设备,需要获取这个设备的token
//现在是线下环境,用这个来获取用户token
- (void)application:(UIApplication *)application didRegisterForRemoteNotificationsWithDeviceToken:(NSData *)deviceToken
{
    NSLog(@"%@",[[[[deviceToken description] stringByReplacingOccurrencesOfString: @"<" withString: @""]
                  stringByReplacingOccurrencesOfString: @">" withString: @""]
                 stringByReplacingOccurrencesOfString: @" " withString: @""]);
}
以上代码,已经实现了基本的推送
此时
APP在前台显示时收不到推送
APP在后台挂起时弹出推送,点击打开APP,APP外部的未读数量在进入APP后消失
APP被杀死时弹出推送,点击打开APP,APP外部的未读数量在进入APP后消失
-
实现页面跳转,分三种状态:APP未启动时,APP在前台(任何界面),APP在后台
以下代码,实现了下面内容
APP未启动时
在前台首页时
在前台二级页面时
在后台时
均可以推送,点击顶部或下拉屏幕上的推送进入相应的页面,
APP上均显示未读消息数
点击顶部或下拉屏幕上的推送,或是点击APP进入应用,再退出应用,APP外的未读消息数均会消失
但是有以下几个问题:
1.不管什么时候来推送,顶部或下拉屏幕上都会显示,同时APP外面有未读消息数,但是点击APP直接进入不会跳入相应的页面
2.当在在前台首页时或在前台二级页面来推送时,会同时显示顶部的推送和页面内的Alert提示框,如果我顶部的推送和Alert提示框均点击了,则会push两次推送界面,这个叠加了
代码如下
### (AppDelegate.h中)
@property (nonatomic,strong) NSDictionary* userInfo;

### (AppDelegate.m中)
import "UMessage.h"
import
import "YCFPushController.h"
@interface AppDelegate ()
@end

//pragma mark - 应用程序准备开始运行
- (BOOL)application:(UIApplication *)application didFinishLaunchingWithOptions:(NSDictionary *)launchOptions
{
    //友盟推送
    [UMessage startWithAppkey:@"591eada875ca35626f000812" launchOptions:launchOptions];
    //注册通知,如果要使用category的自定义策略,可以参考demo中的代码。
    [UMessage registerForRemoteNotifications];
    //打开日志,方便调试
    [UMessage setLogEnabled:YES];
    //iOS10必须加下面这段代码。
    UNUserNotificationCenter *center = [UNUserNotificationCenter currentNotificationCenter];
    center.delegate=self;
    UNAuthorizationOptions types10=UNAuthorizationOptionBadge|  UNAuthorizationOptionAlert|UNAuthorizationOptionSound;
    [center requestAuthorizationWithOptions:types10     completionHandler:^(BOOL granted, NSError * _Nullable error)
     {
        if (granted)
        {
            //点击允许
            //这里可以添加一些自己的逻辑
        }
        else
        {
            //点击不允许
            //这里可以添加一些自己的逻辑
        }
    }];


    ###1.APP未启动时添加下面代码,其实不添加下面这段代码,APP未启动时也能收到推送
    NSDictionary* userInfo = [launchOptions objectForKey:UIApplicationLaunchOptionsRemoteNotificationKey];
    if(userInfo)
    {
        NSLog(@"未启动时有消息,保存");
        self.userInfo = userInfo;//[userInfo copy]
    }

}

###2.iOS10以下,APP在前台(任何界面)和APP在后台均在下面方法中实现
- (void)application:(UIApplication *)application didReceiveRemoteNotification:(NSDictionary *)userInfo
{
    _userInfo = userInfo;
    //关闭友盟自带的弹出框
    [UMessage setAutoAlert:YES];
    //收到远程通知
    [UMessage didReceiveRemoteNotification:userInfo];
    if ([UIApplication sharedApplication].applicationState == UIApplicationStateActive)
    {
         NSLog(@"APP内,不知道要干嘛");
        UIAlertView *alertView = [[UIAlertView alloc] initWithTitle:@"标题"
                                                            message:@"Test On ApplicationStateActive"
                                                           delegate:self
                                                  cancelButtonTitle:@"不去"
                                                  otherButtonTitles:@"去看看",nil];
        [alertView show];
    }
    else
    {
        NSLog(@"APP外,直接跳转");
    }
}

###3.iOS10,APP在前台(任何界面)在下面方法中实现
-(void)userNotificationCenter:(UNUserNotificationCenter *)center willPresentNotification:(UNNotification *)notification withCompletionHandler:(void (^)(UNNotificationPresentationOptions))completionHandler
{
    NSDictionary * userInfo = notification.request.content.userInfo;
    _userInfo = userInfo;
    if([notification.request.trigger isKindOfClass:[UNPushNotificationTrigger class]])
    {
        //自定义弹出框
        UIAlertView *alertView = [[UIAlertView alloc] initWithTitle:@"标题"
                                                            message:@"接收到了推送消息"
                                                           delegate:self
                                                  cancelButtonTitle:@"不去"
                                                  otherButtonTitles:@"去看看",nil];
        [alertView show];
        //关闭友盟自带的弹出框
        [UMessage setAutoAlert:NO];
        [UMessage didReceiveRemoteNotification:userInfo];
    }
    else
    {
        //应用处于前台时的本地推送接受
    }
    //当应用处于前台时提示设置,需要哪个可以设置哪一个
    completionHandler(UNNotificationPresentationOptionSound|UNNotificationPresentationOptionBadge|UNNotificationPresentationOptionAlert);
}

###4.iOS10,APP在后台在下面方法中实现
-(void)userNotificationCenter:(UNUserNotificationCenter *)center didReceiveNotificationResponse:(UNNotificationResponse *)response withCompletionHandler:(void (^)())completionHandler
{
    NSDictionary * userInfo = response.notification.request.content.userInfo;
    _userInfo = userInfo;
    if([response.notification.request.trigger isKindOfClass:[UNPushNotificationTrigger class]])
    {
        //应用处于后台时的远程推送接受
        [UMessage didReceiveRemoteNotification:userInfo];
    }
    else
    {
        //应用处于后台时的本地推送接受
    }
    [self didGetPushNotifi];
}

//alertView代理方法
-(void)alertView:(UIAlertView *)alertView clickedButtonAtIndex:(NSInteger)buttonIndex
{
    //点击去看看
    if (buttonIndex==1)
    {
       [self didGetPushNotifi];
    }
}

//其他
-(void)didGetPushNotifi
{
    //友盟推送,跳转到指定页面,处理程序已启动(在后台或者程序内)
    NSString *pushName = [[_userInfo objectForKey:@"aps"] objectForKey:@"url"];
    if(![pushName isNotBlank])
    {
        NSLog(@"无,不操作");
    }
    else
    {
        [self getPushInfo:_userInfo];
    }
}

-(void)getPushInfo:(NSDictionary *)userInfo
{
    NSLog(@"userInfo是什么%@,跳转至其他界面",userInfo);
    NSString *url = userInfo[@"aps"][@"url"];
    YCFPushController *controller = [[YCFPushController alloc] initWithURL:url];
    [((YCFMainController *)self.window.rootViewController).selectedViewController  pushViewController:controller animated:YES];
}
推送
进入后台
消息列表的消息是发送给线上用户的
测试模式的消息是让未上线的项目使用的,没有全选中所有安装项目的设备的入口,只能一个一个的添加

