基于k8s搭建Jenkins Slave
创建pv与pvc
- 创建数据持久化目录
mkdir /data/jenkins-data
echo "/data/jenkins-data  192.168.0.0/20(rw,sync,all_squash)" >> /etc/export
systemctl restart nfs
- 创建PV与PVC
apiVersion: v1
kind: Namespace
metadata:
  name: kube-ops
---
apiVersion: v1
kind: PersistentVolume
metadata:
  name: opspv
spec:
  capacity:
    storage: 20Gi
  accessModes:
  - ReadWriteMany
  persistentVolumeReclaimPolicy: Delete
  nfs:
    server: 192.168.0.9
    path: /data/jenkins-data
---
kind: PersistentVolumeClaim
apiVersion: v1
metadata:
  name: opspvc
  namespace: kube-ops
spec:
  accessModes:
    - ReadWriteMany
  resources:
    requests:
      storage: 20Gi
- 检查
kubectl apply -f jenkins_data.yml
kubectl get pvc -n kube-ops
====================================分割线====================================
NAME     STATUS   VOLUME   CAPACITY   ACCESS MODES   STORAGECLASS   AGE
opspvc   Bound    opspv    20Gi       RWX                           8d
创建RBAC
apiVersion: v1
kind: ServiceAccount
metadata:
  name: jenkins2
  namespace: kube-ops

---

kind: ClusterRole
apiVersion: rbac.authorization.k8s.io/v1beta1
metadata:
  name: jenkins2
rules:
  - apiGroups: ["extensions", "apps"]
    resources: ["deployments"]
    verbs: ["create", "delete", "get", "list", "watch", "patch", "update","apply"]
  - apiGroups: [""]
    resources: ["services"]
    verbs: ["create", "delete", "get", "list", "watch", "patch", "update","apply"]
  - apiGroups: [""]
    resources: ["pods"]
    verbs: ["create","delete","get","list","patch","update","watch","apply"]
  - apiGroups: [""]
    resources: ["pods/exec"]
    verbs: ["create","delete","get","list","patch","update","watch","apply"]
  - apiGroups: [""]
    resources: ["pods/log"]
    verbs: ["get","list","watch","apply"]
  - apiGroups: [""]
    resources: ["secrets"]
    verbs: ["get"]

---
apiVersion: rbac.authorization.k8s.io/v1beta1
kind: ClusterRoleBinding
metadata:
  name: jenkins2
roleRef:
  apiGroup: rbac.authorization.k8s.io
  kind: ClusterRole
  name: jenkins2
subjects:
  - kind: ServiceAccount
    name: jenkins2
    namespace: kube-ops
创建Deployment
apiVersion: apps/v1
kind: Deployment
metadata:
  name: jenkins2
  namespace: kube-ops
spec:
  selector:
    matchLabels:
      app: jenkins2
  replicas: 1
  template:
    metadata:
      labels:
        app: jenkins2
    spec:
      terminationGracePeriodSeconds: 10
      serviceAccountName: jenkins2
      containers:
      - name: jenkins
        image: registry.cn-qingdao.aliyuncs.com/ycteam/jenkins:lts
        imagePullPolicy: IfNotPresent
        ports:
        - containerPort: 8080
          name: web
          protocol: TCP
        - containerPort: 50000
          name: agent
          protocol: TCP
       // resources:    #此处是限制pod资源
       //   limits:
       //     cpu: 1000m
       //     memory: 1Gi
       //   requests:
       //     cpu: 500m
       //     memory: 512Mi
        volumeMounts:
        - name: jenkinshome
          subPath: jenkins2
          mountPath: /var/jenkins_home
      securityContext:
        fsGroup: 1000
      volumes:
      - name: jenkinshome
        persistentVolumeClaim:
          claimName: opspvc
kubectl apply -f jenkins-dep.yml
- 检查
kubectl get pod -n kube-ops
====================================分割线====================================
NAME                        READY   STATUS    RESTARTS   AGE
jenkins2-5b8bfd788d-456sw   1/1     Running   0          7d8h
创建Services提供Web页面访问
apiVersion: v1
kind: Service
metadata:
  name: jenkins2
  namespace: kube-ops
  labels:
    app: jenkins2
spec:
  selector:
    app: jenkins2
  type: NodePort
  ports:
  - name: web
    port: 8080
    targetPort: web
    nodePort: 30002
  - name: agent
    port: 50000
    targetPort: agent
kubectl apply -f jenkins-svc.yml
- 检查
kubectl get svc -n kube-ops
====================================分割线====================================
NAME       TYPE       CLUSTER-IP     EXTERNAL-IP   PORT(S)                          AGE
jenkins2   NodePort   172.18.28.13   <none>        8080:30002/TCP,50000:31785/TCP   9d
通过IP:30002访问Jenkins Web页面
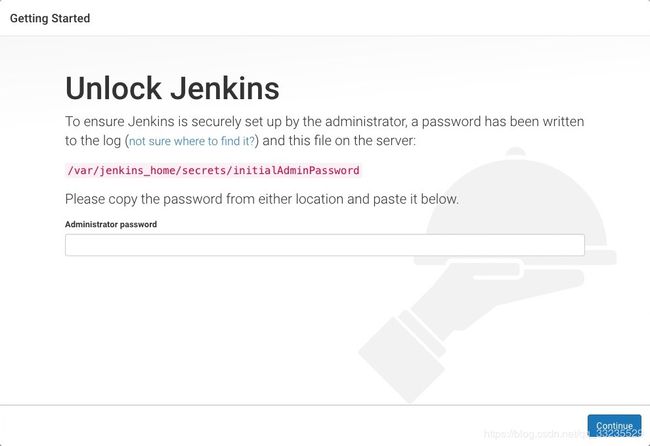 初始化的密码我们可以在 jenkins 的容器的日志中进行查看,也可以直接在 nfs 的共享数据目录中查看
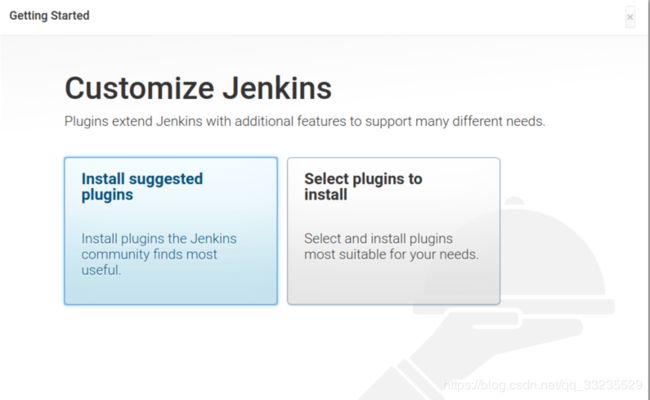
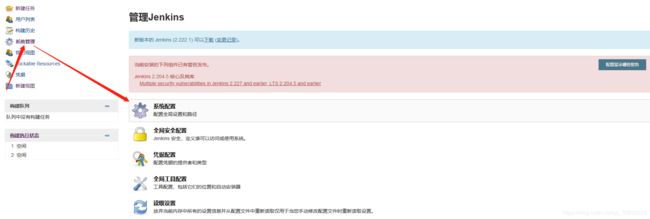
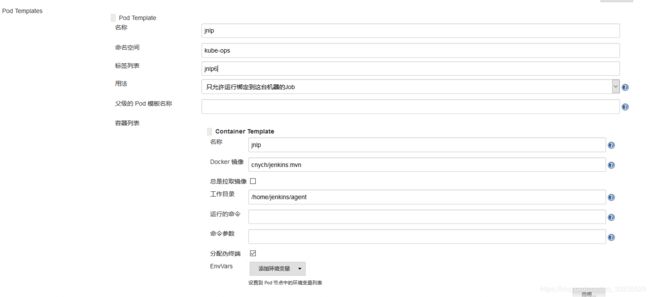
配置Slave
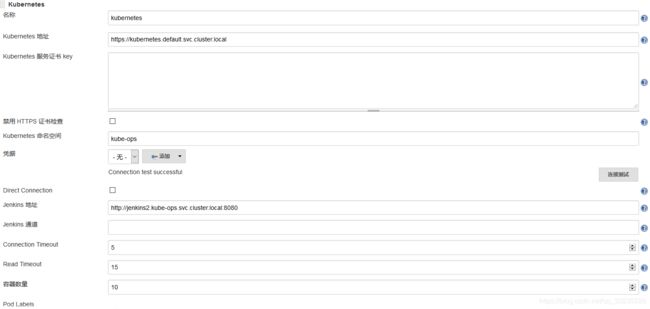 注意namespace必须是kube-ops,kubernetes地址:https://kubernetes.default.svc.cluster.local,jenkins地址:http://jenkins2.kube-ops.svc.cluster.local:8080,这个地址是k8s内部通信地址,其命名规则为:${svcname}.${namespace}.svc.cluster.local
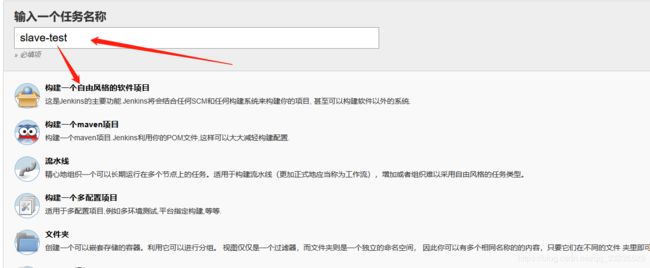
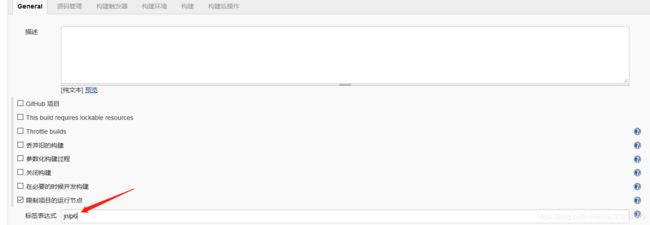
测试
echo "测试 Kubernetes 动态生成 jenkins slave"
echo "==============docker in docker==========="
docker info
echo "===============kubectl==============="
kubectl get pods -n kube-ops


