gitlab安装
一.Jenkins+Github的环境集成
Jenkins+Github的持续集成环境跳转
A.Gitlab社区版的安装应用
a.Gitlab与GitHub的区别
- GitHub 分布式在线代码托管仓库,个人版本可直接在线免费试用,企业版本收费且需要服务器安装(可开源在公网上)
- Gitlab 分布式在线代码仓库托管软件,分社区免费版本与企业收费版本,都需要服务器安装
b.Gitlab主要服务构成
- Nginx 静态Web服务器(处理https的静态资源访问请求)
- Gitlab-workhorse 轻量级的反向代理服务器(处理较大的文件上传下载,例如git push等命令操作)
- Gitlab-shell 用于处理Git的常用命令和修改ssh公钥列表
- …
c.centos7下gitlab安装前的准备工作
- # systemctl status firewalld (关闭防火墙)
- # systemctl disable firewalld (禁用防火墙)
- 关闭SELINUX并重启系统
[root@bogon var]# vim /etc/sysconfig/selinux
...
SELINUX=disabled
...

[root@bogon var]# reboot
d.安装Gitlab组件
[root@bogon ~]# yum -y install curl policycoreutils openssh-server openssh-clients postfx
e.配置YUM仓库
[root@bogon ~]# curl -sS https://packages.gitlab.com/install/repositories/gitlab/gitlab-ce/script.rpm.sh | sudo bash
f.启动postfix邮件服务(可选)
[root@bogon ~]# systemctl start postfix && systemctl enable postfix
也可访问https://packages.gitlab.com/gitlab/gitlab-ce/packages/el/7/gitlab-ce-11.9.6-ce.0.el7.x86_64.rpm下载
使用yum localinstall /路径/gitlab-ce-**.x86_64.rpm 安装
g.安装Gitlab-ce社区版本
[root@bogon ~]# yum install -y gitlab-ce
B.创建本地证书并加载该证书
创建ssl目录
[root@bogon opt]# mkdir -p /etc/gitlab/ssl

创建本地私有秘钥
[root@bogon opt]# openssl genrsa -out "/etc/gitlab/ssl/gitlab.example.com.key"  2048
Generating RSA private key, 2048 bit long modulus
......................................+++
.............................................+++
e is 65537 (0x10001)

创建私有csr证书
[root@bogon opt]# openssl req -new -key "/etc/gitlab/ssl/gitlab.example.com.key"  -out "/etc/gitlab/ssl/gitlab.example.com.csr"
...
There are quite a few fields but you can leave some blank
For some fields there will be a default value,
If you enter '.', the field will be left blank.
-----
Country Name (2 letter code) [XX]:cn  #进入安装向导
State or Province Name (full name) []:bj
Locality Name (eg, city) [Default City]:bj
Organization Name (eg, company) [Default Company Ltd]: #输入空格,然后回车
Organizational Unit Name (eg, section) []: #输入空格,然后回车
Common Name (eg, your name or your server's hostname) []:gitlab.example.com
Email Address []:[email protected]	#输入邮箱

Please enter the following 'extra' attributes
to be sent with your certificate request
A challenge password []:123456	#输入密码
An optional company name []:#直接回车

查看证书
[root@bogon ssl]# ll /etc/gitlab/ssl/
total 8
-rw-r--r-- 1 root root 1066 Apr  6 18:20 gitlab.example.com.csr
-rw-r--r-- 1 root root 1679 Apr  6 18:14 gitlab.example.com.key

接下来利用私有密钥和私有证书创建CRT签署证书
[root@bogon ssl]# openssl x509 -req -days 365 -in "/etc/gitlab/ssl/gitlab.example.com.csr" -signkey "/etc/gitlab/ssl/gitlab.example.com.key" -out "/etc/gitlab/ssl/gitlab.example.com.crt"
Signature ok
subject=/C=cn/ST=bj/L=bj/O= /OU= /CN=gitlab.example.com/emailAddress=[email protected]
Getting Private key
[root@bogon ssl]# ls
gitlab.example.com.crt  gitlab.example.com.csr  gitlab.example.com.key

利用openssl命令输出pem证书
[root@bogon ssl]# openssl dhparam -out /etc/gitlab/ssl/dhparam.pem 2048
[root@bogon ssl]# ls
dhparam.pem  gitlab.example.com.crt  gitlab.example.com.csr  gitlab.example.com.key

更改证书权限
[root@bogon ssl]#  chmod 600 /etc/gitlab/ssl/*
[root@bogon ssl]# ll /etc/gitlab/ssl/
total 16
-rw------- 1 root root  424 Apr  6 18:30 dhparam.pem
-rw------- 1 root root 1265 Apr  6 18:27 gitlab.example.com.crt
-rw------- 1 root root 1066 Apr  6 18:20 gitlab.example.com.csr
-rw------- 1 root root 1679 Apr  6 18:14 gitlab.example.com.key
C.配置Gitlab
[root@bogon ssl]# cp /etc/gitlab/gitlab.rb{,.bak}
[root@bogon ssl]# vim /etc/gitlab/gitlab.rb
1.
将此行: external_url 'http://gitlab.example.com'
改为: external_url 'https://gitlab.example.com'

2.
将此行: # nginx['redirect_http_to_https'] = false
改为(并去掉注释): nginx['redirect_http_to_https'] = true

3.
将此2行:
# nginx['ssl_certificate'] = "/etc/gitlab/ssl/#{node['fqdn']}.crt"
# nginx['ssl_certificate_key'] = "/etc/gitlab/ssl/#{node['fqdn']}.key"
改为:
# nginx['ssl_certificate'] = "/etc/gitlab/ssl/gitlab.example.com.crt"
# nginx['ssl_certificate_key'] = "/etc/gitlab/ssl/gitlab.example.com.key"

4.
将此行: # nginx['ssl_dhparam'] = nil # Path to dhparams.pem, eg. /etc/gitlab/ssl/dhparams.pem
改为: # nginx['ssl_dhparam'] = /etc/gitlab/ssl/dhparam.pem # Path to dhparams.pem, eg. /etc/gitlab/ssl/dhparams.pem
D.初始化gitlab相关服务配置与Nginx配置
[root@bogon ssl]# gitlab-ctl reconfigure
.........
Running handlers:
Running handlers complete
Chef Client finished, 473/1268 resources updated in 06 minutes 49 seconds
gitlab Reconfigured!    #到此处说明安装完成

[root@bogon ssl]# cp /var/opt/gitlab/nginx/conf/gitlab-http.conf{,.bak}
[root@bogon ssl]# vim /var/opt/gitlab/nginx/conf/gitlab-http.conf

在此行下:  server_name gitlab.example.com;
添加: rewrite ^(.*)$ https://$host$1 permanent;

重启使加载配置
[root@bogon ssl]# gitlab-ctl restart
- 在宿主机win10系统下的C:\Windows\System32\drivers\etc\hosts文件中添加如下内容
192.168.244.130 gitlab.example.com
说明:192.168.244.130 (安装git服务器的物理机IP) - 使用宿主机win10下的chrome浏览器访问 gitlab.example.com
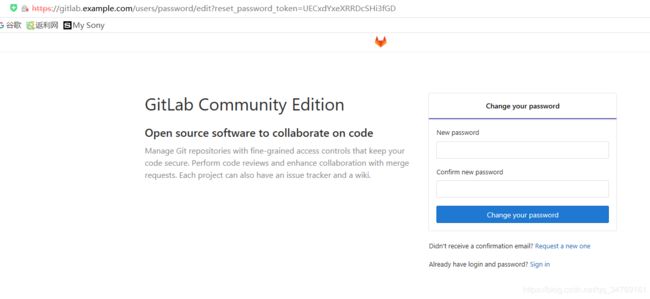
- 首次访问需要更改登录密码,默认用户名为root用户

转载自:https://www.cnblogs.com/zd520pyx1314/p/10210727.html