springMVC上传文件,使用MultipartHttpServletRequest、MultipartFile进行文件上传
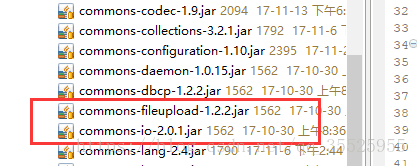
这里使用apache的开源jar包完成上传功能,使用jar包分别是:common-fileupload.jar和common-io.jar
先编写上传文件帮助类,如果需要区分文件类型,可以将文件后缀截取进行判断;
springmvc-mvc.xml配置,这里主要配置springmvc解析器CommonsMultipartResolver等等,这里主要是配置文件上传解析器,下面是配置文件代码:
text/html;charset=UTF-8
编写文件上传帮助类
注意:文件上传时,会有上传多个文件的功能,所以文件上传帮助类方法可以写成返回 List 集合,
这样就可以基本满足单个和多个文件上传使用,不多说了,上代码:
/**
 * 上传文件帮助类
 *
 * @author ajie
 *
 */
public class FileUploadUtil {
	// 使用日志工厂获取日志对象
	private static Log log = LogFactory.getLog(FileUploadUtil.class);

	/**
	 * 批量上传文件
	 *
	 * @param request
	 * @param response
	 * @param username
	 *            用户名; 用于区分用户上传的图片
	 * @param moduleName
	 *            模块名称; 用于区分该图片是位于那个模块进行上传
	 * @return
	 * @throws FileNotFoundException
	 */
	public static List uploadFile(HttpServletRequest request, String username,
			String moduleName) throws FileNotFoundException {

		// 创建list集合,用于接收上传文件的路径
		List filePathList = new ArrayList();

		// 拼接文件上传位置,这里使用Tomcat服务器,将文件上传到webapps中,和项目同目录,files将用于保存上传的文件,将上传的文件于项目分开
		String strPath = ",webapps,files," + moduleName + "," + username;

		// 解析出文件存放路径位置
		String filepath = System.getProperty("catalina.base") + strPath.replace(',', File.separatorChar);

		log.debug("文件上传路劲位置-------->>>>>>>>>>>>" + filepath);

		// 转换request,解析出request中的文件
		MultipartHttpServletRequest multipartRequest = (MultipartHttpServletRequest) request;

		// 获取文件map集合
		Map fileMap = multipartRequest.getFileMap();

		String fileName = null;

		// 循环遍历,取出单个文件
		for (Map.Entry entity : fileMap.entrySet()) {

			// 获取单个文件
			MultipartFile mf = entity.getValue();

			// 获得原始文件名
			fileName = mf.getOriginalFilename();

			// 截取文件类型; 这里可以根据文件类型进行判断
			String fileType = fileName.substring(fileName.lastIndexOf('.'));

			try {
				// 截取上传的文件名称
				String newFileName = fileName.substring(0, fileName.lastIndexOf('.'));

				log.debug("上传来的文件名称------->>>>>>>>>" + newFileName);

				// 拼接上传文件位置
				String newfilePath = filepath + File.separatorChar + newFileName + fileType;

				log.debug("拼接好的文件路径地址------------->>>>>>>>" + newfilePath);

				// 重新组装文件路径,用于保存在list集合中
				String filepathUrl = "files" + File.separatorChar + moduleName + File.separatorChar + username
						+ File.separatorChar + newFileName + fileType;

				log.debug("文件位置---------------->>>>>>>>>>" + filepathUrl);

				// 创建文件存放路径实例
				File dest = new File(filepath);

				// 判断文件夹不存在就创建
				if (!dest.exists()) {
					dest.mkdirs();
				}

				// 创建文件实例
				File uploadFile = new File(newfilePath);

				// 判断文件已经存在,则删除该文件
				if (uploadFile.exists()) {
					uploadFile.delete();
				}

				log.debug("start upload file-------------->>>>>>> " + fileName);

				// 利于spring中的FileCopyUtils.copy()将文件复制
				FileCopyUtils.copy(mf.getBytes(), uploadFile);

				// 将文件路径存入list集合中
				filePathList.add(filepathUrl);

			} catch (IOException e) {
				// TODO Auto-generated catch block
				e.printStackTrace();

				log.error("upload failed. filename: " + fileName+"---->>>error message ----->>>>> "+ e.getMessage());

				return null;
			}
		}

		return filePathList;
	}
}
编写文件上传controller控制器
	/**
	 * 单个、批量文件上传
	 *
	 * @param request
	 * @param response
	 * @param session
	 * @param module
	 *            获取传入的模块名称
	 * @return
	 */
	@RequestMapping(value = "/secure/upload-file/{module}", method = RequestMethod.POST, produces = "application/json;charset=UTF-8")
	public String uploadFiles(Model model,HttpServletRequest request, HttpSession session,
			@PathVariable("module") String module) {

		// 获取session中保存的用户信息
		User user = (User) session.getAttribute("user");

		// 创建list集合用于获取文件上传返回路径名
		List list = new ArrayList();

		try {

			// 获取上传完文件返回的路径,判断module模块名称是否为空,如果为空则给default作为文件夹名
			list = FileUploadUtil.uploadFile(request, user.getUsername(),
					(module == null || module.length() == 0) ? "default" : module);
			// model属性也行
			model.addAttribute("fileUrlList", list);

		} catch (Exception e) {
			// TODO: handle exception
			e.printStackTrace();
			LOG.error("上传文件发生错误=》》" + e.getMessage());

		}
		// 转发到uploadTest.jsp页面
		return "uploadTest";
	}

	/**
	 * 跳转至文件上传页面
	 *
	 * @return
	 */
	@RequestMapping(value = "/common/upload-page", method = RequestMethod.GET)
	public String uploadTestPage() {

		return "uploadTest";
	}
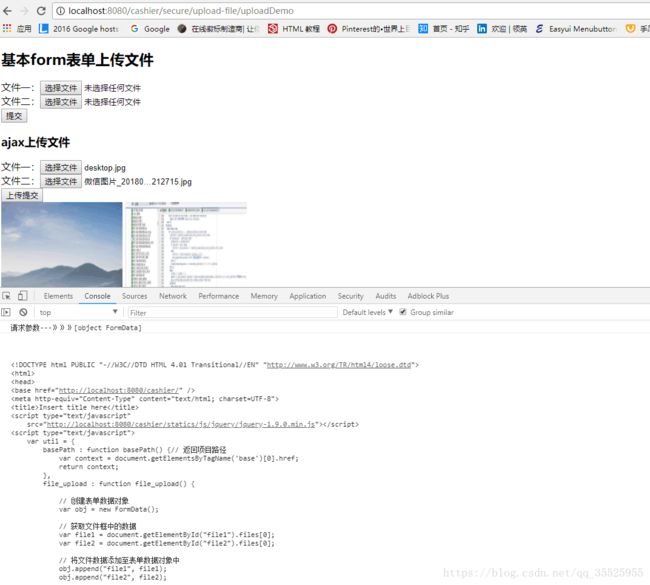
编写文件上传uploadTest.jsp页面
这里使用两种方式上传图片,ajax上传用户体验更好,可以给出相应的提示给用户
<%@ page language="java" contentType="text/html; charset=UTF-8"
pageEncoding="UTF-8"%>
<%@ taglib uri="http://java.sun.com/jsp/jstl/core" prefix="c"%>
<%
String path = request.getContextPath();
String basePath = request.getScheme() + "://" + request.getServerName() + ":" + request.getServerPort()
+ path + "/";
%>
Insert title here
ajax上传文件
文件一:
文件二:

ajax方式可以自己更改,根据使用情况修改,控制器这里为了方便查看效果,所以返回的是jsp页面,
实际使用情况为返回数据,给予前台上传文件后的提示,将图片即时显示在页面上
运行效果如下:
form表单上传文件效果图----》》》》
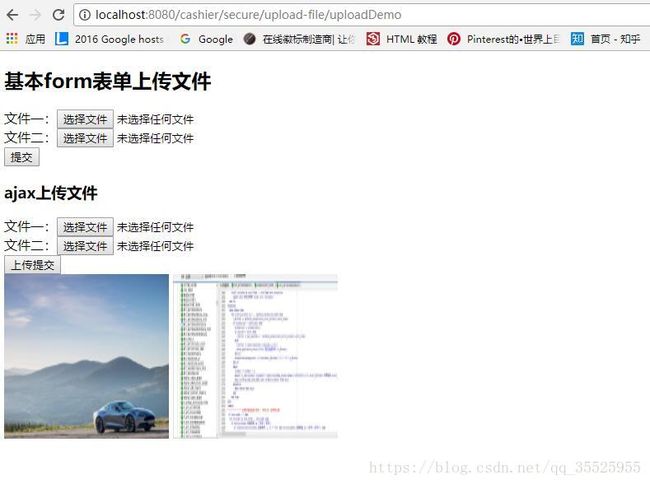
ajax上传文件效果图,这里可以看见console浏览器控制台输出的数据-------》》》》》
SpringMVC 上传文件就总结到这里,有问题可以询问qq:1119047192,如果你有更好的方式,可以一起讨论,希望
可以帮助到大家