Spring boot + Spring Security 多种登录认证方式配置(一)
一、前言
最近项目上用到Spring Security作为权限认证,项目是Spring boot项目,刚开始只用到本地数据库账号密码登录一种认证方式,后来需求修改,客户有个第三方接口提供登录,为了方便用户,修改为同时支持两种登录方式,在网上多番查找资料,加上看了源码后终于弄出来了,也对Spring Security认证有了更深入的了解,鉴于网上对于多种登录认证方式的资料都不是太完整齐全,所以有了这篇,一来作为记录、二来自己也梳理一下知识点,废话到此为止。
二、单认证方式
在说多种认证方式之前,咱们先简单过下单认证方式是如何配置的,也说下Spring Security的各个配置类的作用。
1、UsernamePasswordAuthenticationFilter
Spring Security 默认认证过滤器,处于拦截器链当中,继承AbstractAuthenticationProcessingFilter,咱们看一下源码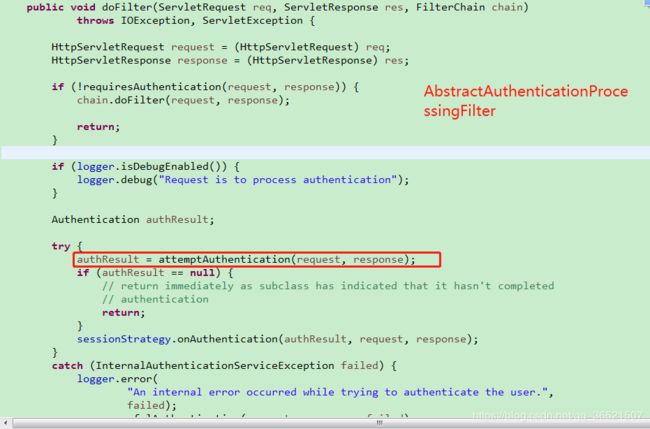
可以看出里面构造方法指定了默认拦截地址 /login,attemptAuthentication是父类AbstractAuthenticationProcessingFilter抽象方法的实现方法,在父类中doFilter方法里调用,可以看到方法实现是从request里取得用户名密码,最后构建成UsernamePasswordAuthenticationToken,然后调用AuthenticationManager的 authenticate 方法作为参数传进去进行认证。
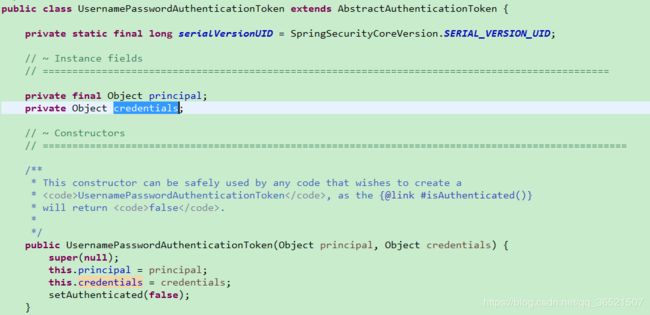
2、UsernamePasswordAuthenticationToken
UsernamePasswordAuthenticationToken没什么好讲的,在其实就是对认证参数用户名密码的封装,当然后续登录成功之后会作为用户认证信息的封装。
3、AuthenticationManager
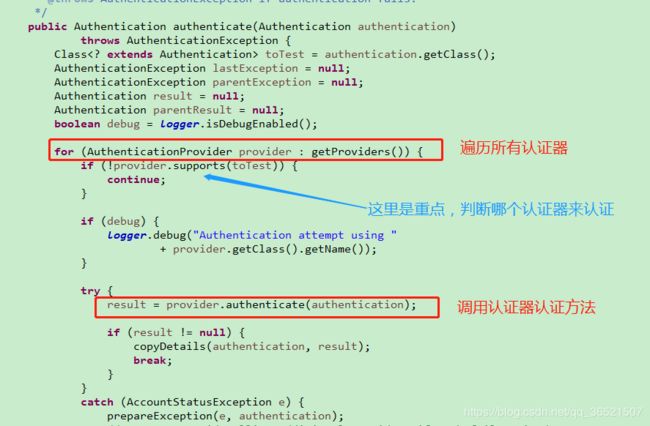
authenticationManager是AbstractAuthenticationProcessingFilter的一个成员变量,从上面可以看出,这个参数是必须赋值的,采用默认的过滤器认证,spring security会默认给一个实现类ProviderManager,看下代码
从源码看到,管理器会遍历所有注册的认证器集合,调用每个认证器的authenticate认证,此时会有疑惑,如果多个登录方式,肯定会有多个认证器,每次都遍历认证所有的认证器是否不太合理?关键在于以下这个判断代码
这个 toTest 参数就是过滤器传进来的 UsernamePasswordAuthenticationToken
Class toTest = authentication.getClass();

if (!provider.supports(toTest)) {
     continue;
}
会调用每个认证器的supports方法,只有此方法返回true,才会执行认证,(由此想到如果自定义认证器,此方法一定要重写),此方法如何实现,咱们看一下此方法的默认实现,会判断
  public boolean supports(Class authentication) {
        return (UsernamePasswordAuthenticationToken.class
                .isAssignableFrom(authentication));
  }
由此看出,参数必须为 UsernamePasswordAuthenticationToken 类或者其子类的字节码,此参数又是由UsernamePasswordAuthenticationFilter 里传过来的
由此得知,每个过滤器都需要一个AbstractAuthenticationToken的子类绑定
4、AuthenticationProvider
这个是重点配置,具体认证方法都是在这里实现的,因此我们要自定义我们的认证方法,都需要实现这个接口,这个接口只有两个方法,authenticate用来认证,supports 用来决定启用条件
![]()
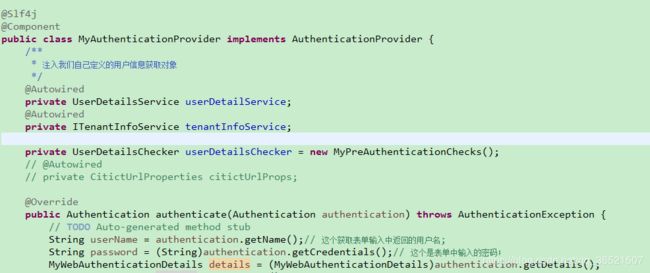
具体实现方法根据自己的业务需要,一般是查询数据库,对比密码,看下我的实现类,如下
一般我们会注入一个自定义的UserDetailService实现类,重写 loadUserByUsername,具体根据用户名查询用户信息,认证成功将用户信息包装成 Authentication 返回
5、AuthenticationSuccessHandler、AuthenticationFailureHandler
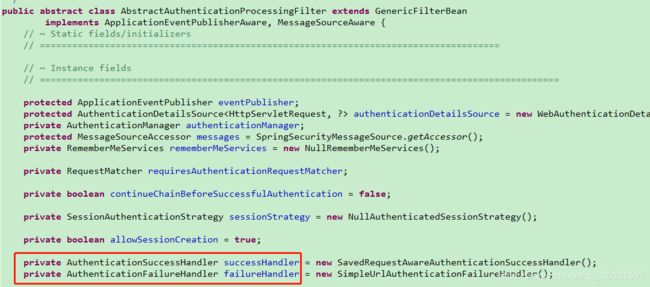
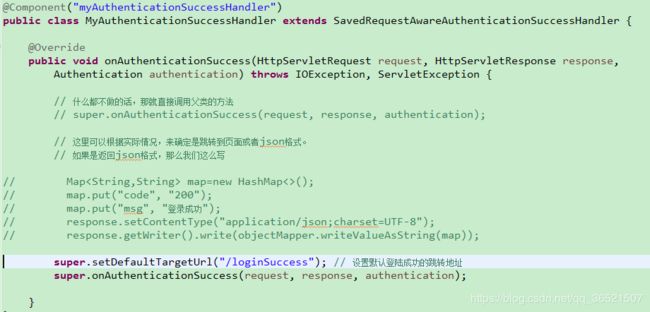
看过滤器源码,认证结束后,会根据认证成功或失败,分别调用两个成功失败处理器
successHandler.onAuthenticationSuccess(request, response, authResult);
failureHandler.onAuthenticationFailure(request, response, failed);
因此,我们可以自定义这两个处理器,来自己处理认证成功失败
6、配置文件
最后,咱们来看下Spring Security的配置文件
@Configuration
@Slf4j
@EnableWebSecurity
public class SecurityConfig extends WebSecurityConfigurerAdapter {

    @Autowired
    private MyAuthenticationProvider defaultProvider;  //默认本地用户名密码登录AuthenticationProvider
    @Autowired
    private AuthenticationSuccessHandler myAuthenticationSuccessHandler;
    @Autowired
    private AuthenticationFailureHandler myAuthenticationFailHander;
    @Autowired
    private AuthenticationDetailsSource myAuthenticationDetailsSource;
    @Autowired
    private ValidateCodeFilter validateCodeFilter;


    @Override
    protected void configure(HttpSecurity http) throws Exception {
       //super.configure(http);
       http.cors();
       http.csrf().disable();

       http.addFilterBefore(validateCodeFilter, AbstractPreAuthenticatedProcessingFilter.class);


       http.formLogin().loginPage("/toLogin")
           .loginProcessingUrl("/doLogin")
           .failureUrl("/loginError")
           .authenticationDetailsSource(myAuthenticationDetailsSource)
           .successHandler(myAuthenticationSuccessHandler)
           .failureHandler(myAuthenticationFailHander)
           .permitAll()  //表单登录,permitAll()表示这个不需要验证 登录页面,登录失败页面
           .and()
           .logout().permitAll().invalidateHttpSession(true)
           .deleteCookies("JSESSIONID").logoutSuccessHandler(logoutSuccessHandler())
           .and()
           .authorizeRequests()
           .antMatchers("/swagger-ui.html","/webjars/**","/v2/**","/swagger-resources/**","/favicon.ico","/css/**","/common/**","/js/**","/images/**",
               "/captcha.jpg","/login","/doLogin","/doCitictLogin","/loginError","/getAllTenant","/sessionExpired","/sessionInvalid","/code/*").permitAll()
           .anyRequest().authenticated()
           .and()
           .sessionManagement().invalidSessionUrl("/sessionInvalid")
           .maximumSessions(10)
           // 当达到最大值时,是否保留已经登录的用户
           .maxSessionsPreventsLogin(false)
           // 当达到最大值时,旧用户被踢出后的操作
           //.expiredSessionStrategy(customExpiredSessionStrategy());
           //在上一句过期策略里配置
           .expiredUrl("/sessionExpired");
    }


     @Override
     protected void configure(AuthenticationManagerBuilder auth) throws Exception{

         //注册认证处理器
         auth.authenticationProvider(defaultProvider);

     }

     @Override
     @Bean
     public AuthenticationManager authenticationManagerBean() throws Exception {
         return super.authenticationManagerBean();
     }

    @Bean
     public LogoutSuccessHandler logoutSuccessHandler() { //登出处理
         return new LogoutSuccessHandler() {
             @Override
             public void onLogoutSuccess(HttpServletRequest httpServletRequest, HttpServletResponse httpServletResponse, Authentication authentication) throws IOException, ServletException {
                 try {
                     UserInfo user = (UserInfo) authentication.getPrincipal();
                     log.info("USER : " + user.getUsername() + " LOGOUT SUCCESS !  ");
                 } catch (Exception e) {
                     log.info("LOGOUT EXCEPTION , e : " + e.getMessage());
                 }
                 httpServletResponse.sendRedirect("/toLogin");
             }
         };
     }

     @Bean
     public SessionInformationExpiredStrategy customExpiredSessionStrategy() {

         return new SessionInformationExpiredStrategy() {

            private RedirectStrategy redirectStrategy = new DefaultRedirectStrategy();

            @Override
            public void onExpiredSessionDetected(SessionInformationExpiredEvent event) throws IOException, ServletException {

                // 如果是跳转html页面,url代表跳转的地址
                redirectStrategy.sendRedirect(event.getRequest(), event.getResponse(), "/sessionExpired");

            }
        };
     }

     @Bean("sessionStrategy")
     public SessionStrategy sessionStrategy() {
         SessionStrategy sessionStrategy = new HttpSessionSessionStrategy();
         return sessionStrategy;
     }
   }
三、总结
最后我们总结一下配置流程,要实现一个登录认证,首先要自定义一个过滤器 AbstractAuthenticationProcessingFilter,注入一个认证管理器 AuthenticationManager,然后需要绑定一个AbstractAuthenticationToken,注册一个认证处理器 AuthenticationProvider,如果使用默认认证过滤器,则只需要自定义认证处理器进行认证即可.
下一篇,我们将进入正题,说下多种登录方式的配置。

