Python——pygame图像处理
文章目录
- 一. 单个像素
- 1.连接多个点
- 2.玩一个小花样:
- 二. 图像
- 1.打开一个图像
- 2. 让图像动起来
- 3. 动画
- 4. 一直移到最右边:
- 5. 一维反弹
- 6.在2-D空间中反弹
- 7. 让图像翻转
- 三. 小练习
一. 单个像素
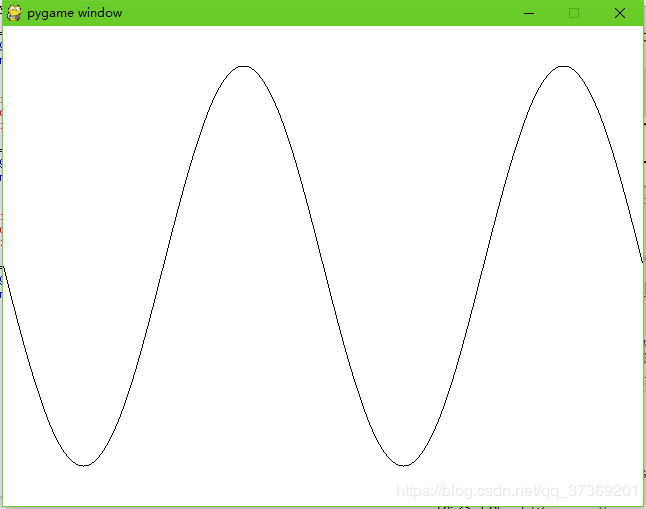
有时我们并不想画一个圆或矩形,而是希望画单个的点或像素。比如画一条正弦曲线。
import pygame,sys,math
pygame.init()
screen = pygame.display.set_mode([640,480])
screen.fill([255,255,255])
for x in range(0,640):
    y = int(math.sin(x/640.0 * 4 * math.pi) * 200 + 240)
    pygame.draw.rect(screen, [0,0,0], [x,y,1,1], 1)
pygame.display.flip()

running = True
while running:
    for event in pygame.event.get():
        if event.type == pygame.QUIT:
            running = False
pygame.quit()
图中每个点都是宽和高均为1像素的矩形。注意我们使用的线宽为1,而不是零。如果线宽为0,什么都不会显示,因为这样的矩形没有中间部分可以填充。

1.连接多个点
仔细看上图,会发现这个正弦曲线并不是连续的,中间存在空格。我们画的是单个的点,而不是线。
下边要尝试用一天短线把各点连接起来。Pygame有一个画线的方法,另外还有一种方法可以在一系列点之间画线。这个方法就是pygame.draw.lines( ),它需要5个参数:
- 画线的表面
- 颜色
- 是否要形状闭合。若不希望闭合,这个参数是False,闭合参数为True
- 要连接的点的列表
- 线宽
所以正弦曲线例子中。pygame.draw.lines( )的方法是这样的:
pygame.draw.lines(screen, [0,0,0], False, plotPoints, 1)
整个程序的代码:
import pygame,sys,math
pygame.init()
screen = pygame.display.set_mode([640,480])
screen.fill([255,255,255])
plotPoints = []
for x in range(0,640):
    y = int(math.sin(x/640.0 * 4 * math.pi) * 200 + 240)
    plotPoints.append([x,y])
pygame.draw.lines(screen, [0,0,0], False, plotPoints, 1)
pygame.display.flip()

running = True
while running:
    for event in pygame.event.get():
        if event.type == pygame.QUIT:
            running = False
pygame.quit()
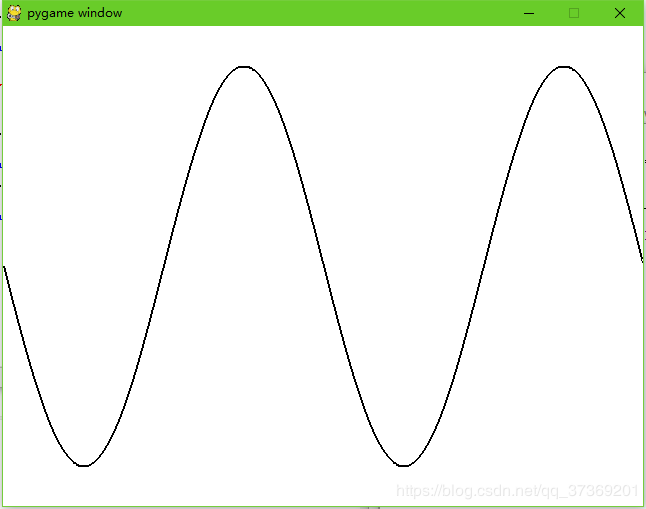
把线宽加宽为2试试,效果更好:
2.玩一个小花样:
import pygame,sys
pygame.init()

dots = [[221,432],[225,331],[133,342],[141,310],
        [51,230],[74,217],[58,153],[114,164],
        [123,135],[176,190],[159,77],[193,93],
        [230,28],[267,93],[301,77],[284,190],
        [327,135],[336,164],[402,153],[386,217],
        [409,230],[319,310],[327,342],[233,331],
        [237,432]]

screen = pygame.display.set_mode([640,480])
screen.fill([255,255,255])
pygame.draw.lines(screen,[255,0,0],True,dots,5)
pygame.display.flip()

running = True
while running:
    for event in pygame.event.get():
        if event.type == pygame.QUIT:
            running = False
pygame.quit()

二. 图像
在屏幕上画图形、线和单个像素只是制作图形的一种方法。有时我们还可以用从别处得来的图片,在Pygame中,使用图形最简单的方法就是利用image函数。
1.打开一个图像
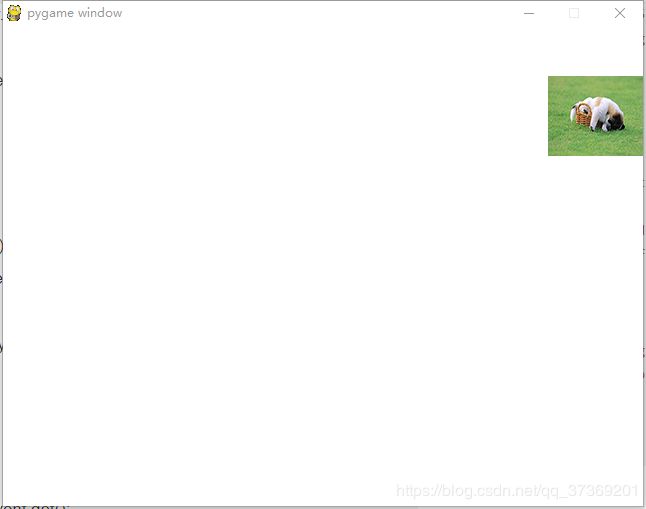
首先把图片(我的是“timg”)放到程序下的文件夹中,键入:
import pygame,sys
pygame.init()
screen = pygame.display.set_mode([640,480])
screen.fill([255,255,255])
my_dog = pygame.image.load("timg.jpg")
screen.blit(my_dog,[50,50])
pygame.display.flip()


running = True
while running:
    for event in pygame.event.get():
        if event.type == pygame.QUIT:
            running = False
pygame.quit()

上例第5行中,pygame.image.load( )函数从硬盘加载一个图像,并创建一个名为my_dog的对象。my_dog对象是一个表面。不过我们看不到这个表面,它只在内存中。我们唯一能看到的是显示表面,名为screen。而第六行把my_dog表面复制到screen表面上。然后通过display.flip( )调用使它可见。
2. 让图像动起来
图像移动,其实就是把图像(像素组)从一个地方移动到另一个地方。
先试试左右移动。先向右移动100像素,还需要加上一个延时,以便看到动画发生。
import pygame,sys
pygame.init()
screen = pygame.display.set_mode([640,480])
screen.fill([255,255,255])
my_dog = pygame.image.load("timg.jpg")
screen.blit(my_dog,[50,50])
pygame.display.flip()
pygame.time.delay(2000)
screen.blit(my_dog,[150,50])
pygame.display.flip()

running = True
while running:
    for event in pygame.event.get():
        if event.type == pygame.QUIT:
            running = False
pygame.quit()

我们确实做到把图像右移但是第一个仍然存在,我们下一步就是要把原图擦掉。
3. 动画
计算机上的图形不像黑板上画的画,很容易就擦掉。要想“擦掉”某个东西,实际上要做的是把它“盖住”。我们的背景色是白色,那我们就必须用白色覆盖原来的小狗。
代码如下:
import pygame,sys
pygame.init()
screen = pygame.display.set_mode([640,480])
screen.fill([255,255,255])
my_dog = pygame.image.load("timg.jpg")
screen.blit(my_dog,[50,50])
pygame.display.flip()
pygame.time.delay(2000)
screen.blit(my_dog,[150,50])
pygame.draw.rect(screen,[255,255,255],[50,50,90,90],0)
pygame.display.flip()

running = True
while running:
    for event in pygame.event.get():
        if event.type == pygame.QUIT:
            running = False
pygame.quit()

4. 一直移到最右边:
import pygame,sys
pygame.init()
screen = pygame.display.set_mode([640,480])
screen.fill([255,255,255])
my_dog = pygame.image.load("timg.jpg")
x = 50
y = 50
screen.blit(my_dog,[x,y])
pygame.display.flip()
for looper in range(1,100):
    pygame.draw.rect(screen,[255,255,255],[x,y,90,90],0)
    x = x + 5
    screen.blit(my_dog,[x,y])
    pygame.display.flip()

running = True
while running:
    for event in pygame.event.get():
        if event.type == pygame.QUIT:
            running = False
pygame.quit()
如果增加x,也就是让小狗一直往右移,会怎么样呢?即换为:
for looper in range(1,200):
最后发现小狗消失了!因为我们打开的窗口x = 640就到头了。
5. 一维反弹
如果我们想让小狗在窗口的边界反弹,就要知道它什么时候“碰到”窗口边界,然后让它朝反方向移动。如果想让它一直来回移动,就要在窗口左右两边都做同样的处理。
在左边界很容易,只要检查小狗的位置是不是等于0(或者某个很小的数)。
在右边界,就要查看小狗是不是在窗口的右边界上。不过小狗的边界是按它的左边界,而不是右边界设置的,所以必须减去小狗的宽度。
程序如下:
import pygame,sys
pygame.init()
screen = pygame.display.set_mode([640,480])
screen.fill([255,255,255])
my_dog = pygame.image.load("timg.jpg")
x = 50
y = 50
x_speed = 10

running = True
while running:
    for event in pygame.event.get():
        if event.type == pygame.QUIT:
            running = False

    pygame.time.delay(20)
    pygame.draw.rect(screen,[255,255,255],[x,y,150,100],0)  #检查小狗是否在窗口边界
    x = x + x_speed #方向反转
    if x > screen.get_width() - 100 or x < 0:
        x_speed = - x_speed

    screen.blit(my_dog,[x,y])
    pygame.display.flip()

pygame.quit()
6.在2-D空间中反弹
很简单,只需要在x的基础上加上y坐标:
import pygame,sys
pygame.init()
screen = pygame.display.set_mode([640,480])
screen.fill([255,255,255])
my_dog = pygame.image.load("timg.jpg")
x = 50
y = 50
x_speed = 10
y_speed = 10

running = True
while running:
    for event in pygame.event.get():
        if event.type == pygame.QUIT:
            running = False

    pygame.time.delay(20)
    pygame.draw.rect(screen,[255,255,255],[x,y,100,80],0)
    x = x + x_speed
    y = y + y_speed
    if x > screen.get_width() - 100 or x < 0:
        x_speed = - x_speed
    if y > screen.get_height() - 80 or y < 0:
        y_speed = - y_speed

    screen.blit(my_dog,[x,y])
    pygame.display.flip()

pygame.quit()
7. 让图像翻转
不让小狗在屏幕边界反弹,而是让它翻转。这表示,小狗在右边界消失时,又会在左边界重新出现。先看水平方向的情况:
import pygame,sys
pygame.init()
screen = pygame.display.set_mode([640,480])
screen.fill([255,255,255])
my_dog = pygame.image.load("timg.jpg")
x = 50
y = 50
x_speed = 5

running = True
while running:
    for event in pygame.event.get():
        if event.type == pygame.QUIT:
            running = False

    pygame.time.delay(20)
    pygame.draw.rect(screen,[255,255,255],[x,y,100,80],0)
    x = x + x_speed

    if x > screen.get_width():
        x = 0

    screen.blit(my_dog,[x,y])
    pygame.display.flip()

pygame.quit()
但这是它是突然“闪入”到左边,强迫症看着特别不舒服,修改程序为“滑入”试试:
import pygame,sys
pygame.init()
screen = pygame.display.set_mode([640,480])
screen.fill([255,255,255])
my_dog = pygame.image.load("timg.jpg")
x = 50
y = 50
x_speed = 5

running = True
while running:
    for event in pygame.event.get():
        if event.type == pygame.QUIT:
            running = False

    pygame.time.delay(20)
    pygame.draw.rect(screen,[255,255,255],[x,y,100,80],0)
    x = x + x_speed

    if x > screen.get_width():
        x = -100

    screen.blit(my_dog,[x,y])
    pygame.display.flip()

pygame.quit()
三. 小练习
利用Pygame画直线、弧、椭圆和多边形试试。
可以使用pygame的帮助系统,键入:
>>> help()
help> pygame.draw
可以看到各个函数的具体用法:
aaline(...)
    aaline(Surface, color, startpos, endpos, blend=1) -> Rect
    draw fine antialiased lines
#画细反锯齿线

aalines(...)
    aalines(Surface, color, closed, pointlist, blend=1) -> Rect
    draw a connected sequence of antialiased lines
#绘制一个连接的反走样序列

arc(...)
    arc(Surface, color, Rect, start_angle, stop_angle, width=1) -> Rect
    draw a partial section of an ellipse
#绘制椭圆的部分截面,即弧线

circle(...)
    circle(Surface, color, pos, radius, width=0) -> Rect
    draw a circle around a point
#绕点画圆

ellipse(...)
    ellipse(Surface, color, Rect, width=0) -> Rect
    draw a round shape inside a rectangle
#在矩形内画圆形状

line(...)
    line(Surface, color, start_pos, end_pos, width=1) -> Rect
    draw a straight line segment
#画直线线段

lines(...)
    lines(Surface, color, closed, pointlist, width=1) -> Rect
    draw multiple contiguous line segments
#绘制多个相邻线段

polygon(...)
    polygon(Surface, color, pointlist, width=0) -> Rect
    draw a shape with any number of sides
#用任意数量的边画一个形状

rect(...)
    rect(Surface, color, Rect, width=0) -> Rect
    draw a rectangle shape
 #绘制矩形形状
下边试着写一个程序:
import pygame,sys
pygame.init()
screen = pygame.display.set_mode([640,480])
screen.fill([250,120,0])
pygame.draw.arc(screen,[255,255,0],pygame.rect.Rect(43,368,277,235),-6.25,0,15)
pygame.draw.rect(screen,[128,64,0],pygame.rect.Rect(391,349,76,132))
pygame.draw.line(screen,[0,255,0],(268,259),(438,84),25)
pygame.draw.line(screen,[0,255,0],(578,259),(438,84),25)
pygame.draw.circle(screen,[0,0,255],[452,409],11,2)
pygame.draw.polygon(screen,[0,0,255],[(39,39),(44,139),
       (59,136),(60,102),(92,102),(94,131),(107,141),
       (111,50),(97,50),(93,86),(60,82),(58,38)],5)
pygame.draw.circle(screen,[0,0,255],[153,60],15,5)
pygame.display.flip()

running = True
while running:
    for event in pygame.event.get():
        if event.type == pygame.QUIT:
            running = False
pygame.quit()
效果图如下:
