微服务鉴权-spring cloud Alibaba + Oauth2 + Zuul OAuth2 SSO + JWT
前言
本文主要介绍一个搭建的过程 笔者在基于《重新定义SpringCloud开发》这本书的zuul集成Oauth2的章节例子上扩展了一些东西出来 其中踩了不少的坑 过程也十分艰辛。。
背景:
在第一代微服务框架体系下 我们以前做过使用 Spring Session + Redis cluster 做过一个在线教育项目的用户的认证和登录 实践中发现了一些不足 :
流量过于集中 基于Spring Session的机制 spring 会将所有的HttpSession 动态代理成他自己的一套东西 然后存在定义的存储介质中 然后每次获取用户的session的时候 就代理HttpServletRequst对象 从存储介质中取出对应的session id的一个key 获取到我们定义的一个用户session的attribute。这样对于我们对于用户的session存储 获取 基本都是无感知的 十分方便 。而且 也符合微服务的服务其中一个定义 服务无状态 服务并不保存用户的状态信息 用户的状态信息都是集中式管理 , 但是呢 其实对于用户的状态存储 数据获取 都会导致去 redis中取数据 这导致了 流量的集中化 对于用户的登录信息 都要从redis 取 难免有些不优雅的感觉。
后来 在另一个数字货币交易市场的项目中 我们脱离了这种redis存储session的机制 ,直接使用JWT进行用户令牌授权 这样的好处在于 基于JWT 的特性 我们能够直接从jwt的token信息中 解密出用户的数据信息 然后 使得令牌在服务间进行传递 任何服务通过jwt提供的工具类 都能解密出用户的数据信息 很方便 也不存在一个 统一的用户数据得在一个中心化的地方才能解密出来。然后在zuul网关处 定义一个统一的filter进行认证就行。实现起来也不复杂 项目也正常的运行
其实这样对于一般的内部服务鉴权也足够了 开放一个网关 其他服务都通过内网访问 , 但是后来我们发现了另一个升级的需求 ,在这种交易所的项目类型中 难免会出现一些爬虫的用户 会使得你的项目变得要接收很多流量 其中有一部分是我们需要提供给合作机构的 一部分确实不授权用户 ,所以在这种业务场景下 做授权就势在必行了。参考了业界的一些设计,像QQ的开放平台,微信, 阿里云 都会有这种 appid appsecret这种东西 ,在业界的一套标准就是Oauth2.
正文
在参考了很多 博客 github的例子之后 总是离生产级别差一些东西 于是我在文中开头部分提到的主体上 进行了一些扩展。
整体架构也就是 : 有一个Auth-server 负责做jwt令牌的颁发 用户的认证 client的认证,gateway-server (不是spring cloud gateway 是Zuul) 负责做统一拦截接口去auth server 认证 和SSO 并检测令牌是否过期的功能 ,其他就是资源服务器 代表一些受保护的资源 ,注册中心是nacos 配置中心在nacos ,在eureka闭源,spring cloud 逐渐在去Netfix的环境下 nacos还是挺好用的 虽然目前还存在很多的不足 但是社区很活跃 也相信未来也会更好 。
依赖:
                org.springframework.cloud
                spring-cloud-alibaba-dependencies
                0.2.1.RELEASE
                pom
                import


                org.springframework.cloud
                spring-cloud-dependencies
                Finchley.RELEASE
                pom
                import


                org.springframework.boot
                spring-boot-starter-parent
                2.0.4.RELEASE
                pom
                import
            org.springframework.boot
            spring-boot-starter-web


                    org.springframework.boot
                    spring-boot-starter-tomcat


            org.springframework.boot
            spring-boot-starter-undertow


            org.springframework.boot
            spring-boot-starter-test
            test


            org.springframework.cloud
            spring-cloud-starter-alibaba-nacos-config


            org.springframework.cloud
            spring-cloud-starter-alibaba-nacos-discovery


            org.springframework.cloud
            spring-cloud-starter-alibaba-sentinel


            com.alibaba.csp
            sentinel-datasource-nacos


            org.springframework.cloud
            spring-cloud-starter-openfeign


            org.springframework.cloud
            spring-cloud-starter-oauth2


            org.springframework.cloud
            spring-cloud-starter-netflix-zuul


            org.springframework.cloud
            spring-cloud-starter-security
依赖中的sentinel在本文未涉及
auth server 目录结构
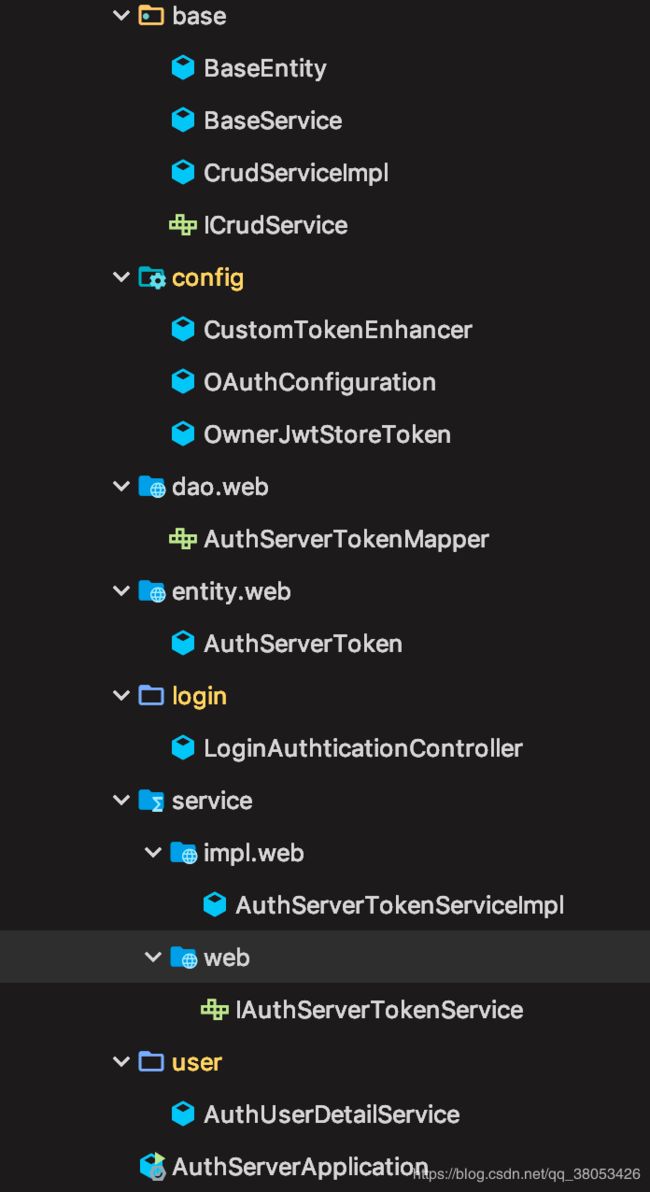 其中base 模块是mybatis plus的代码生成器的统一依赖父类 和本文关系不大 config包 包含了一些配置 dao entity 和名字一个意思 login模块 自定义的oauth2的登录相关代码 service 也是业务模块 对表的处理 user 模块就是对用户的身份信息进行验证的模块了
配置文件Bootstrap.yml
server:
  port: 7777
spring:
  application:
    name: auth-server
  cloud:
    nacos:
      config:
        # 服务配置的地址
        server-addr: ******:8848
        # 服务发现的地址
        prefix: auth
        file-extension: yml
      discovery:
        server-addr: *******:8848
  profiles:
    active: dev
  #配置前缀
  thymeleaf:
    prefix: classpath:/templates/
  #配置后缀
    suffix: .html
    mode: HTML5
    encoding: UTF-8
  #是否开启缓存
    cache: false
启动类: AuthServerApllication:
@SpringBootApplication
@EnableDiscoveryClient
@EnableFeignClients(basePackages = {
        "com.net5008.win"
})
@MapperScan("com.net5008.win.auth.dao")
public class AuthServerApplication extends WebSecurityConfigurerAdapter {

    public static void main(String[] args) {
        SpringApplication.run(AuthServerApplication.class,args);
    }

    @Bean(name = BeanIds.AUTHENTICATION_MANAGER)
    @Override
    public AuthenticationManager authenticationManagerBean() throws Exception {
        return super.authenticationManagerBean();
    }

    @Resource
    private AuthUserDetailService authUserDetailService;

    @Override
    protected void configure(AuthenticationManagerBuilder auth) throws Exception {
        auth
                /*.inMemoryAuthentication()
                .withUser("guest").password("guest").authorities("WRIGTH_READ")
                .and()
                .withUser("admin").password("admin").authorities("WRIGTH_READ", "WRIGTH_WRITE");*/
                .userDetailsService(authUserDetailService).passwordEncoder(passwordEncoder());

    }

    @Override
    protected void configure(HttpSecurity http) throws Exception {
        http.
                formLogin()
                .loginPage("/auth/toLogin")
                .loginProcessingUrl("/login")
                .and()
                .authorizeRequests()
                .antMatchers("/auth/toLogin","login",
                        "/client/**",
                        "/auth/**","/auth/authorize",
                        "/api/web/user/getUserByPhone",
                        "/api/web/user/create","oauth/**")
                .permitAll()
                .anyRequest()
                .authenticated()
                .and()
                .csrf()
                .disable();
    }

    /** 密码加密方式
     */
    @Bean
    public BCryptPasswordEncoder passwordEncoder(){
        return new BCryptPasswordEncoder();
    }

}
一些配置也放在这里了 还没来得及整理放开
其中需要注意一个地方:
@Override
protected void configure(HttpSecurity http) throws Exception {
    http.
            formLogin()
            .loginPage("/auth/toLogin")
            .loginProcessingUrl("/login")
            .and()
            .authorizeRequests()
            .antMatchers("/auth/toLogin","login",
                    "/client/**",
                    "/auth/**","/auth/authorize",
                    "/api/web/user/getUserByPhone",
                    "/api/web/user/create","oauth/**")
            .permitAll()
            .anyRequest()
            .authenticated()
            .and()
            .csrf()
            .disable();
}
这个方法里面的 loginPage 和 loginProcessingUrl 是自定义登录页面和自定义登录处理的url
这个地方一般来讲 loginProcessingUrl是不需要自定义处理的 走Oauth2自己带的这么个方法就行 一般都要自定义他这个登录页面 但是 在源码里有个奇怪的地方 我在一开始 只写了.loginPage("/auth/toLogin") 因为没想自定义登录处理的url ,但是登录处理居然不走原来的东西了
源码中的部分
loginProcessingUrl部分:
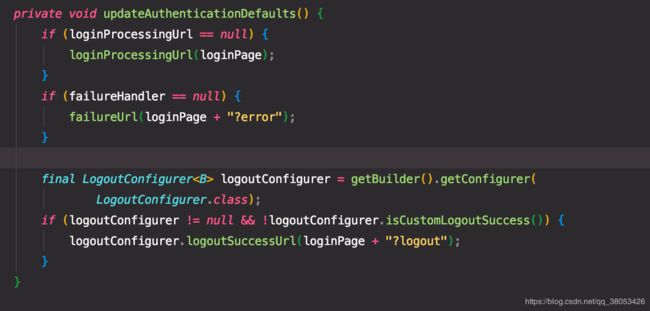
这个loginProcessingUrl会被
调用 。赋值称为loginPage的东西 所有这个地方就算是不自己定义 也需要把他原来的登录处理url写出来
loginProcessingUrl这个方法会被调用两次 第一次会被赋值成loginPage的设定值 第二次才是定义的processingurl的值 同学们可以通过断点看到这个现象
从调用loginProcessingUrl方法的地方查询 可以得知默认的值:
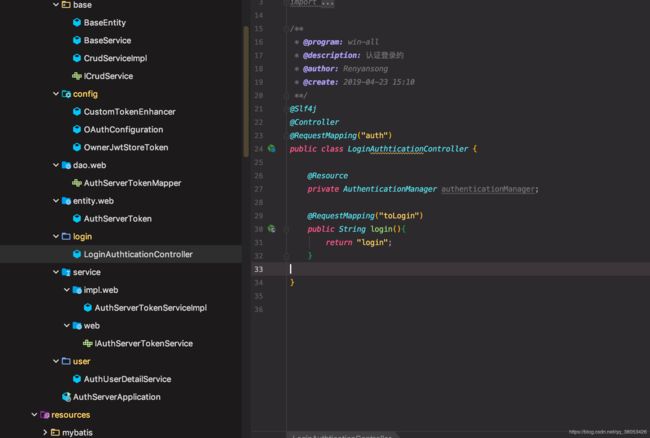
然后我自定义的页面方法:
就是一个普通的跳页面的视图方法 在生产层次的代码 这块应该是要返回一个json的 让各种端 自己去实现页面跳转
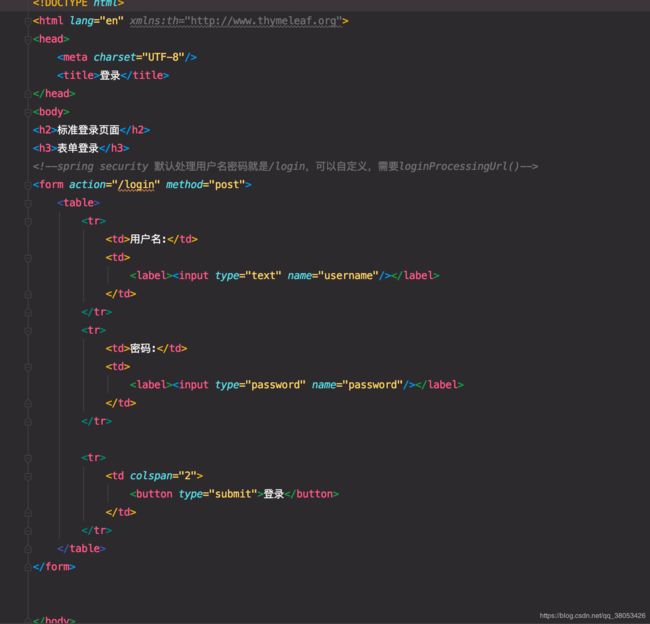
页面很简单的一个表单提交:
自定义登录这块就ok了 接下来看下OAuthConfiguration这个类的配置 比较核心的处理 包含对用户的授权 认证和令牌存储
import com.net5008.win.auth.user.AuthUserDetailService;
import org.springframework.context.annotation.Bean;
import org.springframework.context.annotation.Configuration;
import org.springframework.context.annotation.DependsOn;
import org.springframework.http.HttpMethod;
import org.springframework.security.authentication.AuthenticationManager;
import org.springframework.security.crypto.bcrypt.BCryptPasswordEncoder;
import org.springframework.security.oauth2.config.annotation.configurers.ClientDetailsServiceConfigurer;
import org.springframework.security.oauth2.config.annotation.web.configuration.AuthorizationServerConfigurerAdapter;
import org.springframework.security.oauth2.config.annotation.web.configuration.EnableAuthorizationServer;
import org.springframework.security.oauth2.config.annotation.web.configurers.AuthorizationServerEndpointsConfigurer;
import org.springframework.security.oauth2.provider.token.TokenEnhancer;
import org.springframework.security.oauth2.provider.token.TokenEnhancerChain;
import org.springframework.security.oauth2.provider.token.TokenStore;
import org.springframework.security.oauth2.provider.token.store.JwtAccessTokenConverter;
import org.springframework.security.oauth2.provider.token.store.JwtTokenStore;

import javax.annotation.Resource;
import java.util.Arrays;

/**
 * @program: win-all
 * @description: 认证服务的配置
 * @author: Renyansong
 * @create: 2019-04-22 21:03
 **/
@Configuration
@EnableAuthorizationServer
public class OAuthConfiguration extends AuthorizationServerConfigurerAdapter {

    @Resource
    private AuthenticationManager authenticationManager;

    @Resource
    private BCryptPasswordEncoder passwordEncoder;

    @Resource
    private AuthUserDetailService authUserDetailService;

    @Override
    public void configure(ClientDetailsServiceConfigurer clients) throws Exception {
        clients
                .inMemory()
                .withClient("zuul_server")
                // 启用密码模式后 必须对secret进行编码 不然会报错 Encoded password does not look like BCrypt
                .secret(passwordEncoder.encode("secret"))
                .scopes("WRIGTH", "read").autoApprove(true)
                .authorities("WRIGTH_READ", "WRIGTH_WRITE")
                .accessTokenValiditySeconds(60*3)
                .authorizedGrantTypes("implicit", "refresh_token", "password", "authorization_code");
    }

    @Override
    public void configure(AuthorizationServerEndpointsConfigurer endpoints) throws Exception {
        // 增加一些数据到jwt中
        TokenEnhancerChain tokenEnhancerChain = new TokenEnhancerChain();
        tokenEnhancerChain.setTokenEnhancers(
                Arrays.asList(tokenEnhancer(), jwtTokenConverter()));

        endpoints
                .tokenStore(jwtTokenStore())
                .tokenEnhancer(tokenEnhancerChain)
                .authenticationManager(authenticationManager).allowedTokenEndpointRequestMethods(HttpMethod.GET,HttpMethod.POST)
                .userDetailsService(authUserDetailService);
    }

    @Bean
    public TokenStore jwtTokenStore() {
        return new OwnerJwtStoreToken(jwtTokenConverter());
    }

    @Bean
    protected JwtAccessTokenConverter jwtTokenConverter() {
        JwtAccessTokenConverter converter = new JwtAccessTokenConverter();
        converter.setSigningKey("springcloud123");
        return converter;
    }

    @Bean
    public TokenEnhancer tokenEnhancer() {
        return new CustomTokenEnhancer();
    }

}
其中需要说明的一点 config(ClientDetailsServiceConfigurer) 这个方法 我对于client端的存储是在内存中 业务模式上 暂时不需要存在数据库 这里提供下对于数据库的存储方案
@Autowired
@Qualifier("dataSource")
private DataSource dataSource; // 需要注入数据源
@Override
public void configure(ClientDetailsServiceConfigurer clients) throws Exception {
// 添加授权用户
clients.jdbc(dataSource);
}
表结构
DROP TABLE IF EXISTS `ClientDetails`;
CREATE TABLE `ClientDetails` (
`appId` varchar(256) NOT NULL,
`resourceIds` varchar(256) DEFAULT NULL,
`appSecret` varchar(256) DEFAULT NULL,
`scope` varchar(256) DEFAULT NULL,
`grantTypes` varchar(256) DEFAULT NULL,
`redirectUrl` varchar(256) DEFAULT NULL,
`authorities` varchar(256) DEFAULT NULL,
`access_token_validity` int(11) DEFAULT NULL,
`refresh_token_validity` int(11) DEFAULT NULL,
`additionalInformation` varchar(4096) DEFAULT NULL,
`autoApproveScopes` varchar(256) DEFAULT NULL,
PRIMARY KEY (`appId`)
) ENGINE=InnoDB DEFAULT CHARSET=utf8;
这个表结构是官方提供的 要注意不要改变名字这些 应该是在底层代码中写死的
好了 接下里看一下这个jwt的存储方案
@Override
public void configure(AuthorizationServerEndpointsConfigurer endpoints) throws Exception {
    // 增加一些数据到jwt中
    TokenEnhancerChain tokenEnhancerChain = new TokenEnhancerChain();
    tokenEnhancerChain.setTokenEnhancers(
            Arrays.asList(tokenEnhancer(), jwtTokenConverter()));

    endpoints
            .tokenStore(jwtTokenStore())
            .tokenEnhancer(tokenEnhancerChain)
            .authenticationManager(authenticationManager).allowedTokenEndpointRequestMethods(HttpMethod.GET,HttpMethod.POST)
            .userDetailsService(authUserDetailService);
}

/*******************一般基础的就这下面两个方法 构造jwt 和 一个加密的签名 ****************/

@Bean
public TokenStore jwtTokenStore() {
    return new OwnerJwtStoreToken(jwtTokenConverter());
}

@Bean
protected JwtAccessTokenConverter jwtTokenConverter() {
    JwtAccessTokenConverter converter = new JwtAccessTokenConverter();
    converter.setSigningKey("springcloud123");
    return converter;
}
/*******************************************************************************/

// 对令牌进行扩展 一般令牌自己生成的策略中 除了一些时间 token 和业务相关的只有会用户登录的时候填写的用户名
@Bean
public TokenEnhancer tokenEnhancer() {
    return new CustomTokenEnhancer();
}
CustomerTokenEnhancer 方法对jwt生成的令牌数据进行扩展
public class CustomTokenEnhancer implements TokenEnhancer {

    @Override
    public OAuth2AccessToken enhance(OAuth2AccessToken accessToken, OAuth2Authentication authentication) {
        Map additionalInfo = new HashMap<>(2);
        Object principal = authentication.getUserAuthentication().getPrincipal();
        if (principal instanceof UserVo) {
            additionalInfo.put("userId", ((UserVo) principal).getId());
        }
        ((DefaultOAuth2AccessToken) accessToken).setAdditionalInformation(additionalInfo);
        return accessToken;
    }

}
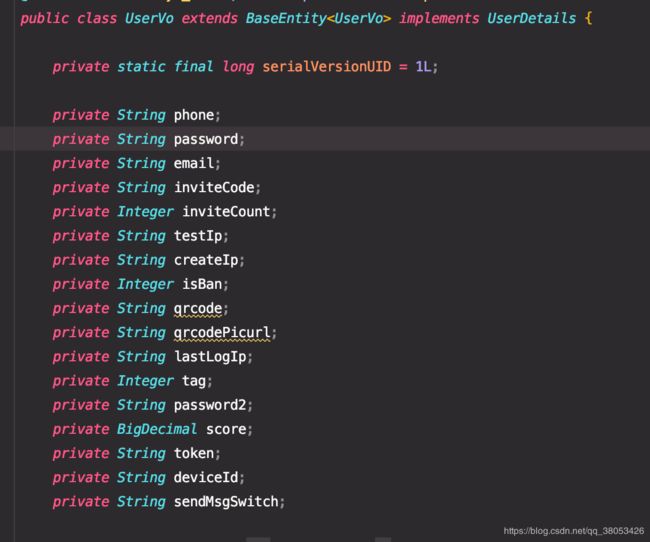
其中 UserVo是我自己的一个用户数据实体
如下:
父类的BaseEntity 就是id 创建时间的一些公用属性 业务关联性不大
UserDetails 这个比较重要 是spring security对于用户自定义 权限用户 提供的一个接口 我们要实现的Oauth2 实际上也是spring 提供的支持 等会会在后面的代码中看见这个类的使用
这样就完成了对令牌的扩展属性
接下来我们看一下对Jwt令牌的存储
@Bean
public TokenStore jwtTokenStore() {
    return new OwnerJwtStoreToken(jwtTokenConverter());
}
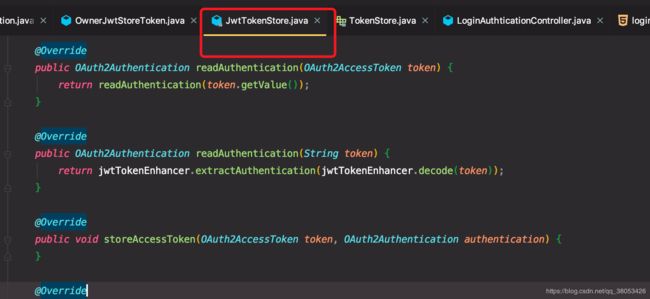
这个方法 TokenStore 是一个接口 这个接口
spring oauth2 的提供的一些实现
 其中JwtTokenStore并没有提供存储的方法 也就是我们如果使用jwt令牌 就不能用到spring oauth2的存储实现
下面是JwtTokenStore的源码
可以看见 JwtTokenStore 对于父类接口的storeAccessToken 是一个空实现
那么自然我们就能想到 去继承这个类 然后实现存储的方案
自定义扩展类
OwnerJwtStoreToken
@Component
public class OwnerJwtStoreToken extends JwtTokenStore {

    @Resource
    private IAuthServerTokenService authServerTokenService;

    /**
     * Create a JwtTokenStore with this token enhancer (should be shared with the DefaultTokenServices if used).
     *
     * @param jwtTokenEnhancer jwt构造链
     */
    public OwnerJwtStoreToken(JwtAccessTokenConverter jwtTokenEnhancer) {
        super(jwtTokenEnhancer);
    }

    @Override
    public void storeAccessToken(OAuth2AccessToken token, OAuth2Authentication authentication) {
        String value = token.getValue();
        Date expiration = token.getExpiration();
        Set scope =
                token.getScope();
        Authentication userAuthentication = authentication.getUserAuthentication();
        Object principal = userAuthentication.getPrincipal();
        AuthServerToken authServerToken = new AuthServerToken();
        authServerToken.setToken(value);
        authServerToken.setScope(scope.toString());
        authServerToken.setExpireTime(expiration);

        if (principal instanceof UserVo) {
            authServerToken.setUserId(Math.toIntExact(((UserVo) principal).getId()));
        }
        authServerToken.setRefreshToken(token.getRefreshToken().getValue());
        authServerToken.setCreateTime(new Date());
        authServerTokenService.save(authServerToken);
    }

    @Override
    public void storeRefreshToken(OAuth2RefreshToken refreshToken, OAuth2Authentication authentication) {
        System.out.println("==========store refresh token");
        System.out.println(refreshToken);
        System.out.println(authentication);

    }

}
其中注入的AuthTokenService 是我的一张存储表 基于mysql进行存储 这个地方你就可以自定义自己的业务实现 用什么存储都可以
好了 上述就是关于jwt的一些扩展
到此 我们的Auth - server 的一些自定义的东西就差不多了 暂时也没有发现还有什么需求需要扩展 希望有需求的同学可以提出来 一起探讨
接下来是Gateway-server(Zuul 。。我就不该取这个误导的名字)
zuul在此处的用处很大 需要做很多工作
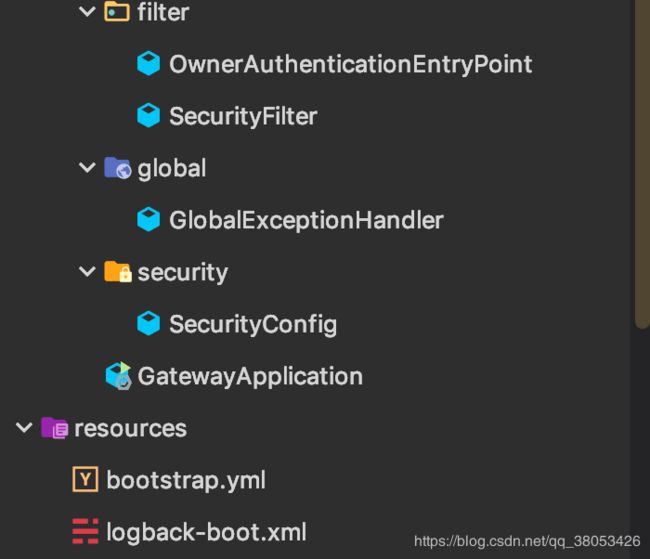
首先看下目录结构:
filter顾名思义就是一些自定义的过滤器 一会会看到
global 统一异常处理 和本文业务关系不大
security就是一些配置了
boostrap.yml 配置文件:
spring:
  cloud:
    nacos:
      config:
        # 服务配置的地址
        server-addr: *********:8848
        # 服务发现的地址
        prefix: gateway
        file-extension: yml
      discovery:
        server-addr: *********:8848
  profiles:
    active: dev
security:
  oauth2:
    client:
      access-token-uri: http://localhost:7777/oauth/token #令牌端点
      user-authorization-uri: http://localhost:7777/oauth/authorize #授权端点
      client-id: zuul_server #OAuth2客户端ID
      client-secret: secret #OAuth2客户端密钥
    resource:
      jwt:
         key-value: springcloud123 #使用对称加密方式,默认算法为HS256

zuul:
  ribbon:
    eager-load:
      enabled: true
  routes:
      user-server:
          path: /user-server/**
          serviceId: user-server
  # ignored-services: "*"
  sensitive-headers:
ribbon:
  ReadTimeout: 5000  # 单位毫秒数
  SocketTimeout: 5000
其中 security相关的配置就是定义了我们的认证中心的位置 自己clientId secret的东西
接下来看下启动类
@SpringBootApplication(exclude={DruidDataSourceAutoConfigure.class,
        DataSourceAutoConfiguration.class})
@EnableDiscoveryClient
@EnableZuulProxy
@EnableOAuth2Sso
public class GatewayApplication {
    public static void main(String[] args) {
        SpringApplication.run(GatewayApplication.class,args);
    }
}
@EnableOauth2Sso 这个注解很重要 是一个组合注解 但是在spring boot 2.1.X 就没有这个注解了 暂时还没有研究2.1 的替代品 小伙伴们要注意下版本问题
@Target({ElementType.TYPE})
@Retention(RetentionPolicy.RUNTIME)
@Documented
@EnableOAuth2Client
@EnableConfigurationProperties({OAuth2SsoProperties.class})
@Import({OAuth2SsoDefaultConfiguration.class, OAuth2SsoCustomConfiguration.class, ResourceServerTokenServicesConfiguration.class})
public @interface EnableOAuth2Sso {
}
这个注解包含了
@EnableOAuth2Client 这个注解 将我们的这个boot项目 变成一个oauth2的客户端
还有一个很重要的东西 OAuth2SsoProperties注解
@ConfigurationProperties(
    prefix = "security.oauth2.sso"
)
public class OAuth2SsoProperties {
    public static final String DEFAULT_LOGIN_PATH = "/login";
    private String loginPath = "/login";

    public OAuth2SsoProperties() {
    }

    public String getLoginPath() {
        return this.loginPath;
    }

    public void setLoginPath(String loginPath) {
        this.loginPath = loginPath;
    }
}
这个里面只有一个东西 就是定义了SSo的登录默认url 目前也不用自定义 而且 我还没找到他的具体实现在什么地方 希望知道这个的同学可以告知
在效果展示中 我们会看见这个login url是怎么使用的
接下来看一下 重要的security 配置
@Configuration
@Order(1000)
public class SecurityConfig extends ResourceServerConfigurerAdapter {

    @Override
    public void configure(HttpSecurity http) throws Exception {
        http
                .authorizeRequests()
                .anyRequest()
                .authenticated()
                .antMatchers("/login", "/client/**","/user-server/api/web/user/create","/eee")
                .permitAll()
                .and()
                .csrf()
                .disable()
        ;
    }

    @Override
    public void configure(ResourceServerSecurityConfigurer resources) throws Exception {
        resources
                .resourceId("WRIGTH")
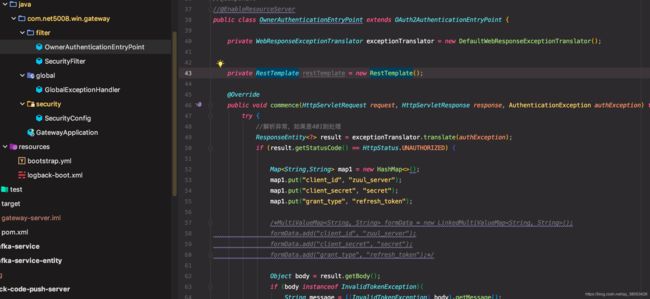
                .authenticationEntryPoint(new OwnerAuthenticationEntryPoint());
    }

    /*@Override
    public void configure(WebSecurity web) throws Exception {
        web.ignoring().antMatchers("/user-server/api/web/user/create","/eee");
    }*/
}
就是一般的spring security 的配置 放过哪一些url不需要在 auth server进行鉴权
这样的效果我先描述下 等下周补一下效果图 现在没有公司的环境 启动不了
首先用户通过网关来访问后面的资源服务器 网关会通过 security的配置 如果拦截到是一个需要进行auth 的url 那么就会 跳转到配置文件中 定义的Oauth的认证端点上去 然后进行我们在 auth server上定义的 登录页面 登录处理 然后成功后访问 Sso中心 也就是方才的Zuul中的默认登录url login .然后 zuul 会对服务进行一个路由处理 就到了后端资源服务器 ,一切看起来非常正常 看起来像完成了一样 但是仔细想想 jwt 令牌是怎么传递到后端资源服务的呢 zuul是在什么时候放置的令牌呢? 令牌过期了 又该怎么处理呢 ?
1. 令牌传播的原理 ;
我也是在一个偶然的时候发现的 我一直在想令牌的刷新机制 刷新了又怎么通知客户端 我想到在网关处来做定时任务 来统一刷新令牌 然后使用刷新的令牌来访问后端资源服务 但是有个问题就是 令牌到底是什么时候传播的 我又该怎么获取 替换呢
如下所示 我们在接受一个令牌的时候 令牌一定是在header中的 我们遍历这个header就可以看见 authcation这种东西了
System.out.println("--------------header--------------");
Enumeration heders = request.getHeaderNames();
Map map = new HashMap<>();
while (heders.hasMoreElements()){
    String key = (String)heders.nextElement();
    System.out.println(key+":"+request.getHeader(key));
    map.put(key,request.getHeader(key));
}
System.out.println(map);
System.out.println("------------hearder----------");
于是我写了一个zuul的过滤器 希望在过滤器中拦截到 token 然后进行刷新
如下所示:
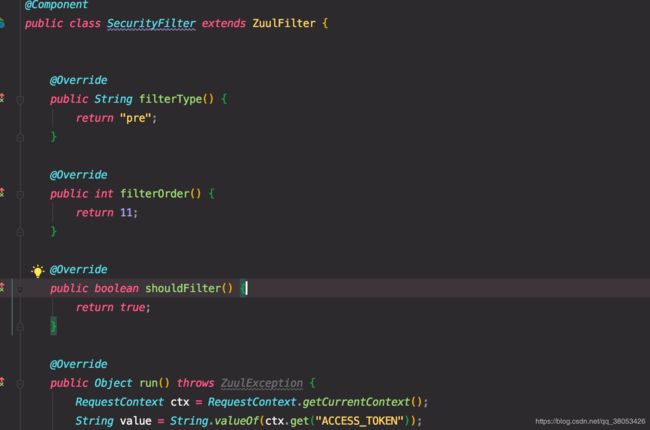 然后我在 run方法中 shouldFilter中都尝试 通过RequestContext获取request。 (RequestContext 是一个zuul过滤器中 传递数据的一个上下文 当然这种一个访问链路数据传递都是ThreadLocal )
我遍历这个request 发现没有 Auth这种东西 我尝试了pre route 各种过滤器 都没有发现令牌
后来 我偶然看见 ctx 的过滤器经过链路中 居然有 OAuth2TokenRelayFilter 这个过滤器实现 那么肯定是在这个地方获取的
源码:
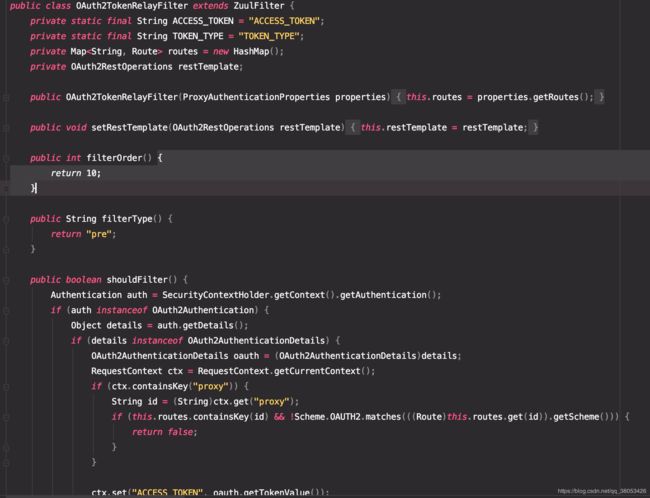 从最后我们能看见 他是放在ctx中的一个ACCESS_TOKEN字段 ,那么我们就能获取token了
但是他这个实现还是挺复杂的 有一些还没有用到的设计
这里可以扩展一下
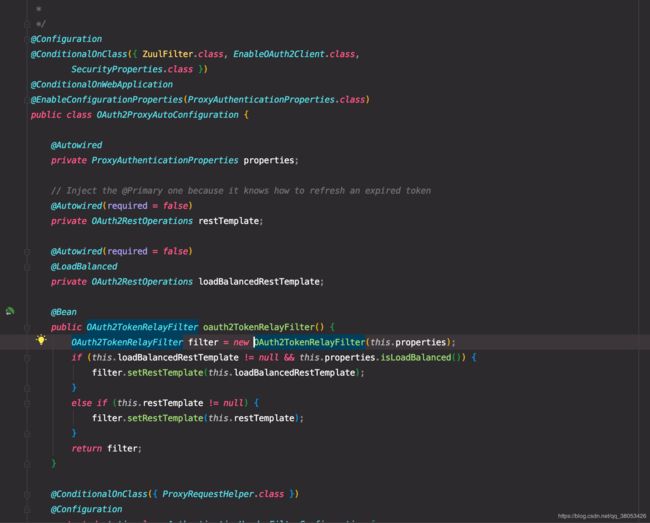 在这个类中 对刚才的过滤器进行了构造方法调用 然后读取配置 设置一个loadBalance的东西 可能考虑的是授权中心的负载均衡吧 我也是猜的
好 终于知道令牌是怎么放进header中了 我们只要设置一个过滤器 在这个提供的过滤器后面一个顺序执行 那么就能拿到token了
其实还有一个Oauth2实现的过滤器 排序在9 功能大体上就是根据设置 是否将token放在header的一个处理 有兴趣的同学可以看下
所以 最后贴上我的Zuul过滤器实现:
@Component
public class SecurityFilter extends ZuulFilter {


    @Override
    public String filterType() {
        return "pre";
    }

    @Override
    public int filterOrder() {
        return 11;
    }

    @Override
    public boolean shouldFilter() {
        return true;
    }

    @Override
    public Object run() throws ZuulException {
        RequestContext ctx = RequestContext.getCurrentContext();
        String value = String.valueOf(ctx.get("ACCESS_TOKEN"));
        Claims claims = null;
        try {
            claims = Jwts.parser().setSigningKey("springcloud123".getBytes())
                    .parseClaimsJws(value).getBody();
        } catch (ExpiredJwtException e) {
            e.printStackTrace();
            // 过期
            // 终止向下
            ctx.setSendZuulResponse(false);
            ctx.setResponseBody(JSONObject.toJSONString(ServiceResponse.creatByError(
                    ResponseCode.NEED_LOGIN.getCode(),ResponseCode.NEED_LOGIN.getDesc())));
            return null;
        }

        HttpServletRequest request = ctx.getRequest();
        System.out.println("--------------header--------------");
        Enumeration heders = request.getHeaderNames();
        Map map = new HashMap<>();
        while (heders.hasMoreElements()){
            String key = (String)heders.nextElement();
            System.out.println(key+":"+request.getHeader(key));
            map.put(key,request.getHeader(key));
        }
        System.out.println(map);
        System.out.println("------------hearder----------");
        return null;
    }


}
功能就是在发现令牌过期了 终止访问服务 返回一个需要登录的一个json给前端 去跳转页面
所以最后 令牌的刷新没有实现 把这个token的时间验证给弄出来了 其实对于前端业务访问 来讲 不怎么需要刷新令牌 让用户登录就行了 刷新了令牌也无法让访问端知道我刷新了令牌
实现比较复杂一些 感兴趣可以自行研究一下
下周补一下 过程图.....


