vue小项目实战
项目概念图
```
devWebpackConfig.plugins.push(new FriendlyErrorsPlugin({
compilationSuccessInfo: {
messages: [`Your application is running here: http://${config.dev.host}:${port}`],
},
onErrors: config.dev.notifyOnErrors
? utils.createNotifierCallback()
: undefined
```
案例说明
参考教程
https://www.jianshu.com/p/ec436222c608
一、 项目说明
ps:这个简单小项目只提供一个小小小的骨架,需要向“它”身上具体加多少“肉”,需要大家考虑好功能和布局后进行完善。
1.首先看下主页效果:如下图
主页分析:大体上分为上(header)、中(body或content)、下(footer)三部分,中间body部分是由若干个相同的li组成的“列表”,所以我们可将li定义为一个组件。
2.再来看下商品详情页:如下图
详情页分析:也分为上、中、下三部分。
清单
、 配置目录文件
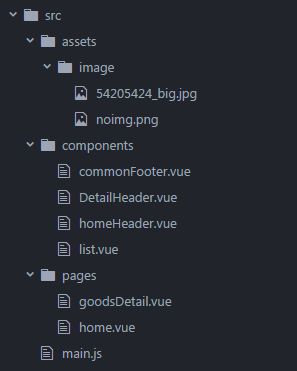
在src文件夹(也就是我们码农主要工作区)下,创建assets文件夹(用来保存项目所需图片)、components(存组件commonFooter.vue、DetailHeader.vue、homeHeader.vue、list.vue)、pages(存页面goodsDetail.vue、home.vue)和main.js文件。详情请看下图:
ps: 1.具体文件夹以及文件名称可根据自己项目进行“自拟”。 2.这里的每一个*.vue文件都是一个组件。
、配置相关接口
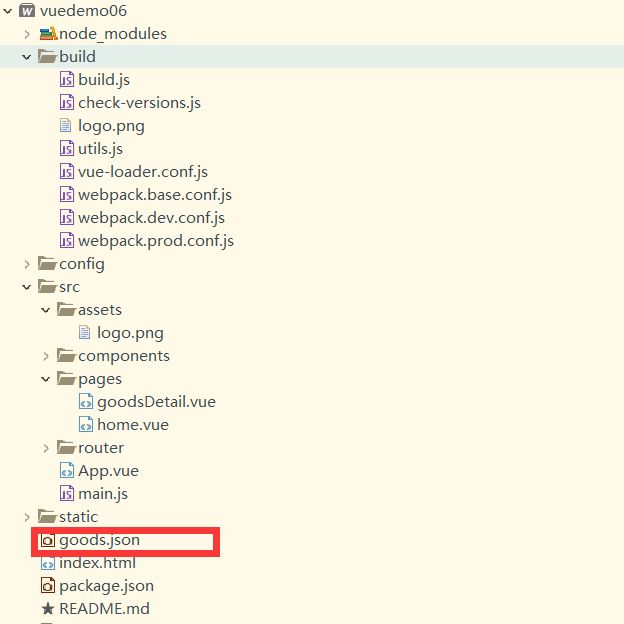
主页商品信息及图片, 是从服务器端返回的json数据,不可能所以商品都“写死”。故这里需要模拟后台建立了一个数据文件。在根目录下建立一个goods.json文件用来放“伪数据”,如下图:
注意json里不能带有注释和其他文字,不然会项目跑不起来,出错
{
"goods": [
{ "price": "69.9", "title": "德芙", "img": "http://m.360buyimg.com/babel/s211x211_jfs/t3688/270/776223567/128582/fa074fb3/58170f6dN6b9a12bf.jpg!q50.jpg.webp" },
{ "price": "63", "title": "费列罗", "img": "http://m.360buyimg.com/babel/s211x211_jfs/t613/100/1264998035/221234/1a29d51f/54c34525Nb4f6581c.jpg!q50.jpg.webp"},
{ "price": "29.9", "title": "大米", "img": "http://m.360buyimg.com/babel/s211x211_jfs/t1258/40/17387560/108696/aced445f/54e011deN3ae867ae.jpg!q50.jpg.webp"},
{ "price": "54.9", "title": "安慕希", "img": "http://m.360buyimg.com/babel/s211x211_jfs/t2734/15/680373407/215934/3abaa748/572057daNc09b5da7.jpg!q50.jpg.webp"},
{ "price": "58", "title": "金典", "img": "http://m.360buyimg.com/babel/s211x211_jfs/t2482/145/1424008556/91991/d62f5454/569f47a2N3f763060.jpg!q50.jpg.webp"},
{ "price": "60", "title": "味可滋", "img": "http://m.360buyimg.com/babel/s211x211_jfs/t2368/3/874563950/70786/7b5e8edd/563074c8N4d535db4.jpg!q50.jpg.webp" },
{ "price": "248.00", "title": "泸州老窖", "img": "http://m.360buyimg.com/babel/s211x211_jfs/t283/166/1424018055/189580/7c0792b7/543b4958N05fa2feb.jpg!q50.jpg.webp"},
{ "price": "328.8", "title": "剑南春", "img": "http://m.360buyimg.com/babel/s350x350_g15/M05/1A/0A/rBEhWlNeLAwIAAAAAAHyok3PZY0AAMl8gO8My0AAfK6307.jpg!q50.jpg.webp"},
{ "price": "49.00", "title": "蓝莓", "img": "http://m.360buyimg.com/babel/s211x211_jfs/t2332/148/2952098628/94387/e64654e2/56f8d76aNb088c2ab.jpg!q50.jpg.webp" },
{ "price": "68", "title": "芒果", "img": "http://m.360buyimg.com/n0/jfs/t3709/334/1378702984/206759/5c100ab5/58253588Naaa05c5c.jpg!q70.jpg"}
]
}
使用node中的express
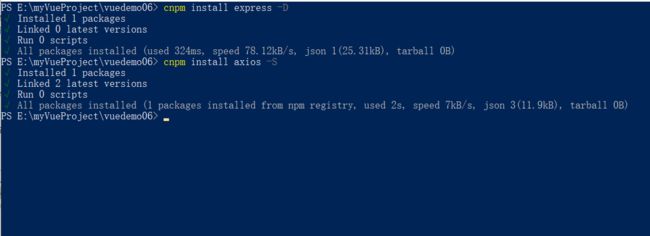
安装express和axios
在main.js里配置axios到原型链中
注意标记的那两行
```
import Vue from 'vue'
import App from './App'
import router from './router'
import axios from 'axios' //注意这行
Vue.prototype.$http = axios; //注意这行
Vue.config.productionTip = false
new Vue({
el: '#app',
router,
components: { App },
template: ''
})
```
在build>>webpack.dev.conf.js配置express并设置路由规则
如图:
代码如下:
'use strict'
const utils = require('./utils')
const webpack = require('webpack')
const config = require('../config')
const merge = require('webpack-merge')
const baseWebpackConfig = require('./webpack.base.conf')
const HtmlWebpackPlugin = require('html-webpack-plugin')
const FriendlyErrorsPlugin = require('friendly-errors-webpack-plugin')
const portfinder = require('portfinder')
/* datura_lj 增加express 20171126 */
const express = require('express')
const app = express()
var appData = require('../goods.json')/*加载本地数据文件*/
var goods = appData.goods
var apiRoutes = express.Router()
app.use('/api', apiRoutes)
/* 增加express end */
const devWebpackConfig = merge(baseWebpackConfig, {
module: {
rules: utils.styleLoaders({ sourceMap: config.dev.cssSourceMap, usePostCSS: true })
},
// cheap-module-eval-source-map is faster for development
devtool: config.dev.devtool,
// these devServer options should be customized in /config/index.js
devServer: {
clientLogLevel: 'warning',
historyApiFallback: true,
hot: true,
compress: true,
host: process.env.HOST || config.dev.host,
port: process.env.PORT || config.dev.port,
open: config.dev.autoOpenBrowser,
overlay: config.dev.errorOverlay ? {
warnings: false,
errors: true,
} : false,
publicPath: config.dev.assetsPublicPath,
proxy: config.dev.proxyTable,
quiet: true, // necessary for FriendlyErrorsPlugin
watchOptions: {
poll: config.dev.poll,
},
/* datura_lj 增加express 20171126 */
before(app) {
app.get('/api/goods', (req, res) => {
res.json({
code: 0,
data: goods
})
})
}
/* datura_lj 增加路由规则 end */
},
plugins: [
new webpack.DefinePlugin({
'process.env': require('../config/dev.env')
}),
new webpack.HotModuleReplacementPlugin(),
new webpack.NamedModulesPlugin(), // HMR shows correct file names in console on update.
new webpack.NoEmitOnErrorsPlugin(),
// https://github.com/ampedandwired/html-webpack-plugin
new HtmlWebpackPlugin({
filename: 'index.html',
template: 'index.html',
inject: true
}),
]
})
module.exports = new Promise((resolve, reject) => {
portfinder.basePort = process.env.PORT || config.dev.port
portfinder.getPort((err, port) => {
if (err) {
reject(err)
} else {
// publish the new Port, necessary for e2e tests
process.env.PORT = port
// add port to devServer config
devWebpackConfig.devServer.port = port
// Add FriendlyErrorsPlugin
devWebpackConfig.plugins.push(new FriendlyErrorsPlugin({
compilationSuccessInfo: {
messages: [`Your application is running here: http://${config.dev.host}:${port}`],
},
onErrors: config.dev.notifyOnErrors
? utils.createNotifierCallback()
: undefined
}))
resolve(devWebpackConfig)
}
})
})
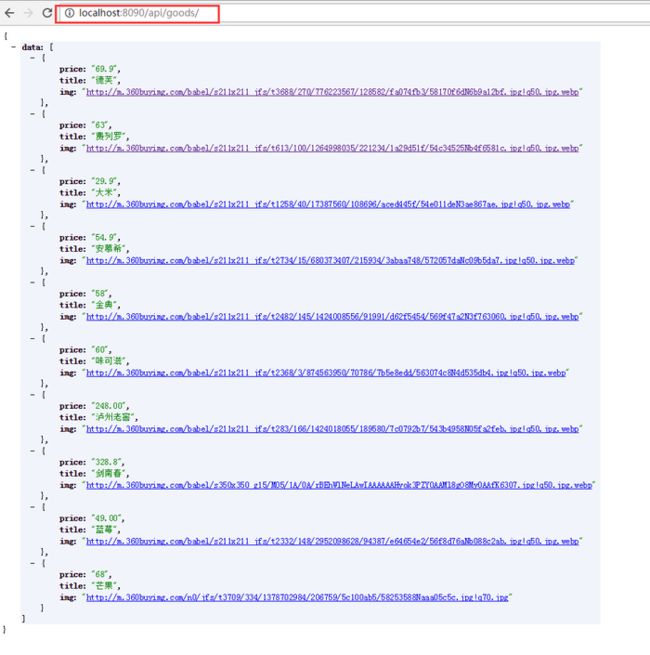
npm run dev 之后,测试是否该数据可用,在浏览器地址栏中输入:http://localhost:8080/api/goods ,在浏览器中展示出如下图数据,代码数据数取成功:
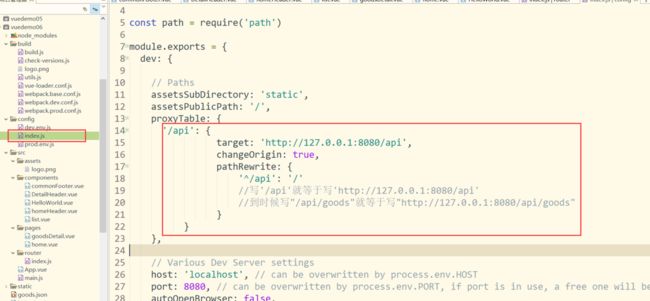
配置config/index.js:解决跨域问题
在proxTable对象里写:
proxyTable: {
'/api': {
target: 'http://127.0.0.1:8080/api',
changeOrigin: true,
pathRewrite: {
'^/api': '/'
//写'/api'就等于写'http://127.0.0.1:8080/api'
//到时候写"/api/goods"就等于写"http://127.0.0.1:8080/api/goods"
}
}
}
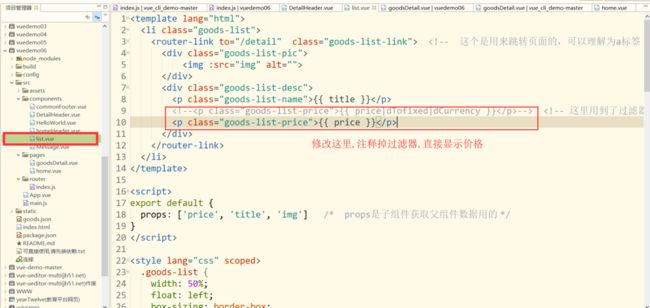
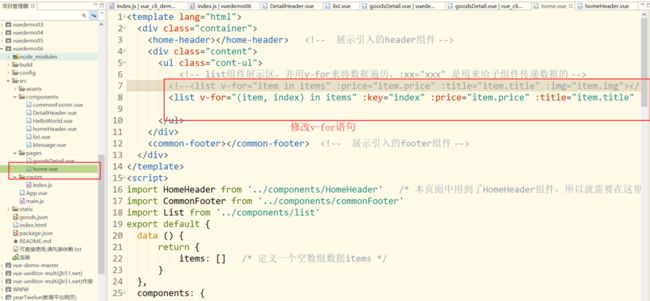
原来参考教程有些地方需要修改:
home.vue里的获取数据要改成这样才对:
2.修改list.vue里的价格显示那行代码
3.
在home.vue里修改组件 : v-for="(item, index) in items" :key="index" 这样就可以运行了
期待扩写功能:
可运行的代码
vue小项目实战.rar
运行后效果图

