项目实战 | Python爬虫+PythonWeb+百度AI:前后端实现一个简单的“智能菜谱”网站
文章目录
- 导语
- 项目目的
- 知识储备
- 实现环境
- 开始项目
- 一、Python爬虫
- 1.爬取目标
- 2.网页结构分析
- 3.代码结构分析
- 4.存入数据库
- 5.实现
- 二、人工智能
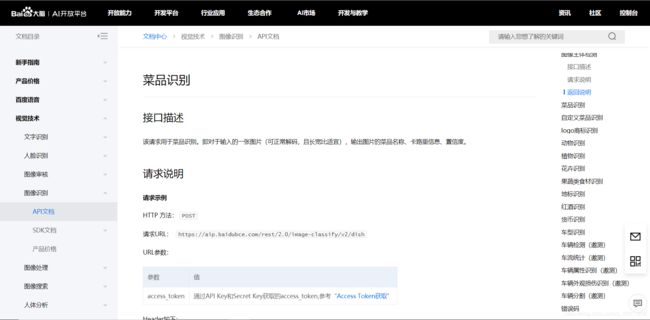
- 1.登录获取相关信息
- 2.查看帮助文档
- 3.应用到web中
- 三、Python Web
- 1.网站整体布局分析
- 2.路由和视图设计
- 3.读取数据库
- 4.实现
- 项目预览
- 项目收获
导语
这是大二的暑假专业实训内容,让我们在10天里用一种新语言python完成一个小项目,自己的收获还是蛮多的,因此想把这个项目完整写下来。
项目目的
建立一个“智能菜谱”网站,可以通过图片识别分析出图片中的菜品,可以查看其详细信息,还可给出该菜品的详细做法。菜品数据来源于爬虫所得数据。
知识储备
(包括但不仅限于以下内容)
1.Python爬虫:requests基本库知识、xpath和lxml解析库知识、http请求头、防盗链知识
2.PythonWeb:flask框架、html、js、css
3.数据库:sql语句,mysql相关操作
4.人工智能:百度AI开放平台
实现环境
1.IDE:Pycharm2019.1
2.Python:3.7.3
3.数据库:MySQL8.0、Navicat Premium 12
4.测试浏览器:Chrome、Edge
开始项目
一、Python爬虫
1.爬取目标
-
由于是做菜谱的,自然我们要爬取一个美食网站,此次我们选择的是家常菜谱大全_美食天下:https://home.meishichina.com/recipe-menu.html
-
目标页①如下:
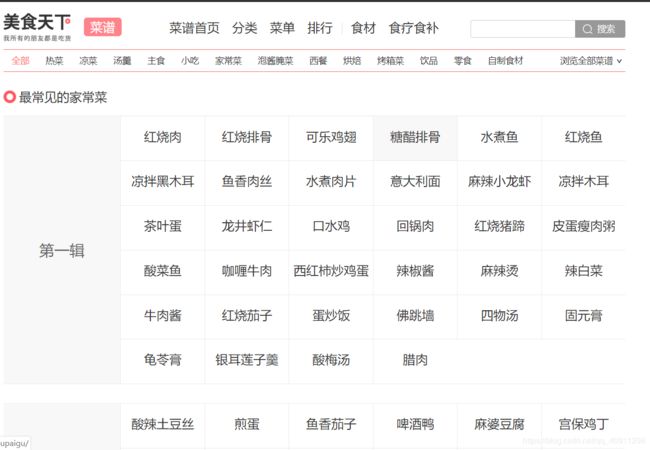
我们要爬取的是上面的所有菜,但这只是一个菜名,详细信息还要点击菜名进入详情页。
我们试着点击‘红烧肉’菜名进入目标页②。 -
目标页②如下:
可以看出进入目标页②,所展示的仍然是菜名列表,为了获得详情信息,我们还需点击一次菜名。
我们再试着点击上图倒数第二个菜进入目标页③。 -
目标页③如下:
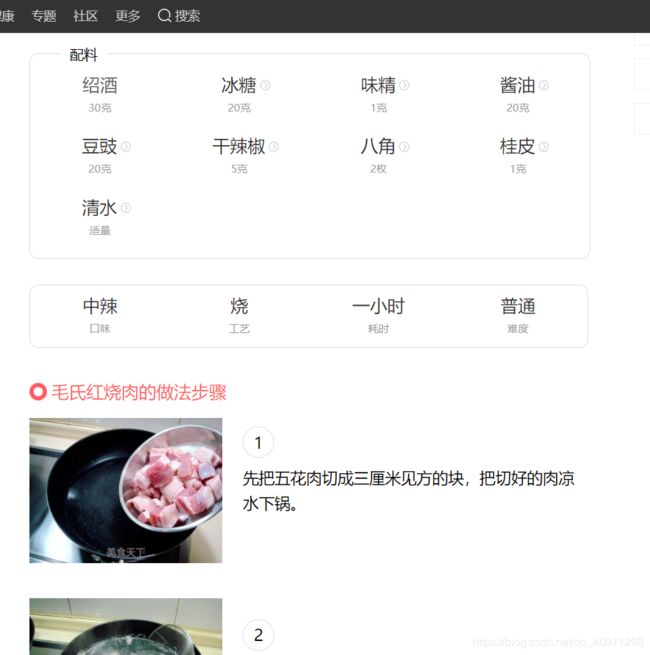
没错了,是我们最终要得到的东西!分析页面内容,我们可以爬取的东西有:
菜品图片、菜名、食材、做法、烹饪窍门 -
总结:
1)从上面分析可以看出,我们总共要跳转两次,解析三个页面。
2)跳转两次则要得到2个目标链接。
3)爬取的内容有:菜品图片、菜名、食材、做法、烹饪窍门
2.网页结构分析
我们可以用浏览器的开发者工具查看网页结构,在chrome浏览器里右键“检查”,或者直接F12即可进入。
-
目标页①(得到第一个目标链接):点击图中箭头所指按钮,可快速定位标签。
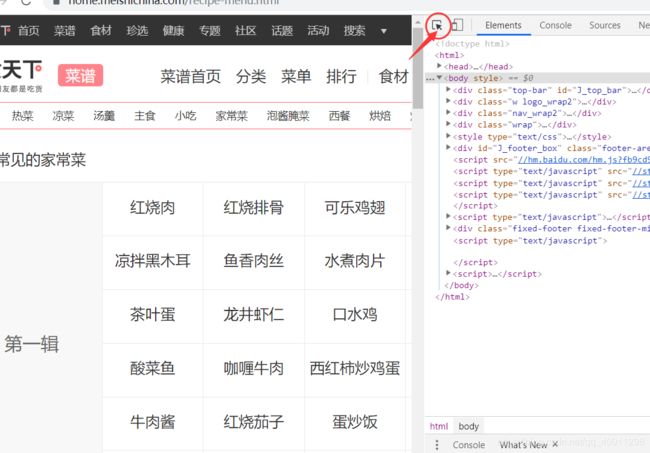
接下来,我们定位“红烧肉”所在标签位置:
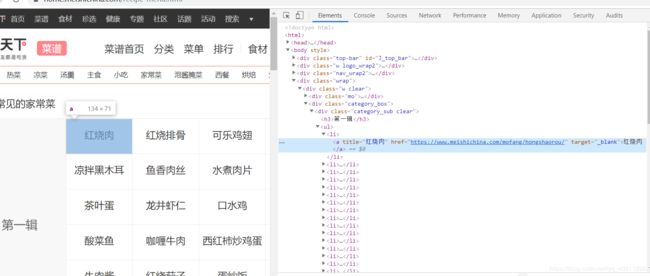
1)由此我们便可以清晰地看出“红烧肉”的目标链接所在位置。
2)用xpath路径语言表示即为:(以下写法可以更复杂或更简单)
(’//div[@class=“wrap”]//div[@class=“category_sub clear”]/ul/li/a/@href’)
3)当然这种写法不只获得“红烧肉”一个链接,它会得到图中所有的菜品链接。
4)这样我们就得到了第一个要跳转的目标链接。 -
目标页②(得到第二个目标链接):
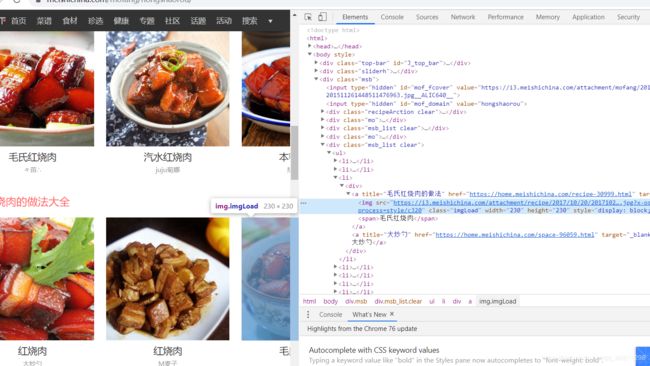
1)这里我们选的是“做法大全”中的菜系,由于只是一个简单的示范网站,因此可以不必爬取太多内容,因此这里我们只选择爬取其中的第2、3个菜(随便选的)。
2)这里说下怎么实现只选第2、3个菜:
a.首先可以看出目标链接位于li标签中,所以我们首先定位到div标签:xpath表示::(’//div[@class=“msb”]/div[@class=“msb_list clear”]/ul/li’)
b.a中返回的是所有的li节点的列表,我们只需用列表切片:list[1:3]便可以只选择第2、3个li标签节点
3)在第2)步的基础上再xpath得到目标链接(xpath后还可再次xpath):xpath表示:(‘div/a/@href’)
4)这样我们便可以得到第二个要跳转的目标链接了。 -
目标页③(得到菜品图、菜名、食材、做法、小窍门)
具体图解在这里就不贴了,跟上面的分析方法一样,这里只写一下xpath表示:(仅供参考,不一定完全相同)
1)菜品图:(’//div[@class=“recipDetail”]/div[@class=“recipe_De_imgBox”]/a/img/@src’)
2)菜名:(’//div[@class=“userTop clear”]/h1/a/text()’)
3)食材:(’//div[@class=“recipDetail”]/fieldset[@class=“particulars”]/div[@class=“recipeCategory_sub_R clear”]/ul/li//text()’)
4)做法:(’//div[@class=“recipDetail”]/div[@class=“recipeStep”]/ul/li/div[@class=“recipeStep_word”]/text()’)
5)小窍门:(’//div[@class=“recipDetail”]/div[@class=“recipeTip”]/text()’)
tips:这里xpath解析获得的内容并没有经过数据清洗、里面还可能参杂着诸多干扰字符,
如:"\n、\t、''、' ' ”等等,这会让我们对数据的使用造成麻烦。
因此,我们需要对爬取出来的数据进行过滤清洗,具体做法会在代码部分进行讲解。
3.代码结构分析
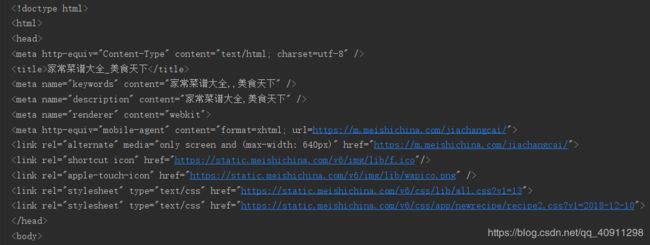
1.首先,我们需要一个函数来请求我们的目标链接,返回网页源码:
def get_page(url):
    try:
        headers = {
            'User-Agent': 'Mozilla/5.0 (Windows NT 10.0; Win64; x64) AppleWebKit/537.36'
                          ' (KHTML, like Gecko) Chrome/75.0.3770.142 Safari/537.36',
            'Referer': 'https://www.meishichina.com/'
        }
        response = requests.get(url, headers=headers)
        '''
        # 设置编码
        if response.encoding == 'ISO-8859-1':
            encodings = requests.utils.get_encodings_from_content(response.text)
            if encodings:
                encoding = encodings[0]
            else:
                encoding = response.apparent_encoding
        else:
            encoding = response.encoding
        response.encoding = encoding
        '''
        # 由于已经知道了网页的编码方式,故而不用上面的通用猜测编码方式,这样会加快速度
        response.encoding = 'utf-8'
        # 获取内容
        html = response.text
        if response.status_code == 200:
            return html
        return None
    except RequestException:
        return None
这里请求头需要加上“User-Agent”和“Referer“,不然有可能返回不到正确的内容。简要说明一下其作用:
User-Agent:可以使服务器识别客户使用的操作系统 及版本、 浏览器及版本等信息。 在做爬虫时加上此信息,可以伪装为浏览器;如果不加,很可能会被识别州为爬虫。
Referer:此内容用来标识这个请求是从哪个页面发过来的,服务器可以拿到这一信息并做相 应的处理,如做来源统计、防盗链处理等。
还有编码问题已在代码中注解。
我们试着运行此函数:
print(get_page('https://home.meishichina.com/recipe-menu.html'))
- 接下来便是设计解析网页的函数了:
1)解析目标页①:
def parse_mean_page(html):
    # 解析菜单页
    # mean = []
    html_tree = etree.HTML(html)
    html_path = html_tree.xpath('//div[@class="category_box"]/div[@class="category_sub clear"]/ul/li')
    for data in html_path:
        # title = (data.xpath('a/text()'))[0]
        href = (data.xpath('a/@href'))[0]
        yield href  # 用生成器
        # mean.append(href)

    # print(mean)
    # return mean  # 返回‘菜名1的链接’的列表:[href1, href2, ...]  # 数据太多,用生成器
最开始注释掉的部分是用列表来存储所有的目标链接,但这样数据太多的话会占用很大空间,最后是看到了生成器的知识,便把这个改为生成器来实现了。用yield可以极大地节约空间。
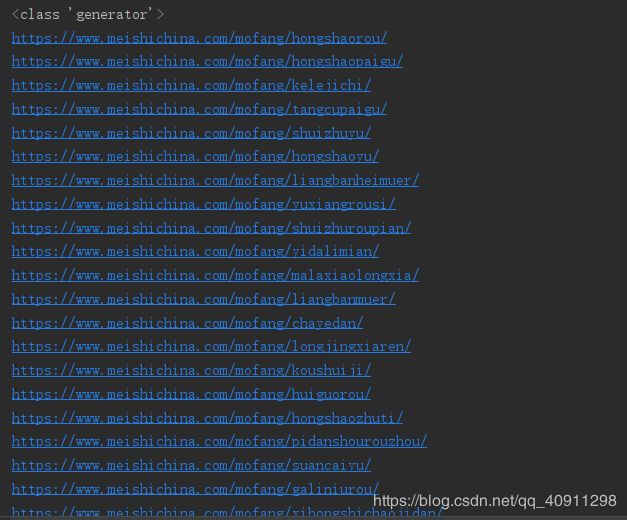
试着运行下:
gen = parse_mean_page(get_page('https://home.meishichina.com/recipe-menu.html'))
print(type(gen))
for data in gen:
	print(data)
def parse_method_page(html):
    # 解析一个菜名的不同做法页
    method = []
    html_tree = etree.HTML(html)
    html_path = html_tree.xpath('//div[@class="msb_list clear"][2]/ul/li')
    html_path_short = html_path[1:3]  # 同一道菜只选择两个做法
    for data in html_path_short:
        # method_title = (data.xpath('div/a/span/text()'))[0]
        method_href = (data.xpath('div/a/@href'))[0]
        # method_img = (data.xpath('div/a/img/@data-src'))[0]
        method.append(method_href)

    # print(method)
    return method  # 返回‘菜名2的链接’的列表:[href1, href2]
由于这里的列表中只有两个值,故而不需用生成器。
运行:
print(parse_method_page(get_page('https://www.meishichina.com/mofang/hongshaorou/')))
def parse_detail_page(html):
    # 解析一个菜的做法详情页
    detail = []
    html_tree = etree.HTML(html)

    # 图片:
    img_url = (html_tree.xpath('//div[@class="recipDetail"]/div[@class="recipe_De_imgBox"]/a/img/@src'))[0]

    # 菜名:
    detail_name = (html_tree.xpath('//div[@class="userTop clear"]/h1/a/text()'))[0]

    # 食材清单:
    material_list = html_tree.xpath('//div[@class="recipDetail"]/fieldset[@class="particulars"]')
    detail_material = []  # 存放主料、辅料、调料
    for material in material_list:
        each_material = ''.join(material.xpath('div[@class="recipeCategory_sub_R clear"]/ul/li//text()'))\
            .replace('\n\n\n', ' ').replace('\n', '')  # 根据规律格式化
        detail_material.append(each_material)
    new_material = '$$'.join(detail_material)  # 得到含有分隔符的字符串

    # 步骤:
    detail_step = html_tree.xpath('//div[@class="recipDetail"]/div[@class="recipeStep"]'
                                  '/ul/li/div[@class="recipeStep_word"]/text()')
    new_step = '$$'.join(detail_step)  # 得到含有分隔符的字符串
    # detail_step = detail_step.replace("\n\n\n\n\n", " ").replace("\n", "")

    # 小窍门:
    tips = (html_tree.xpath('//div[@class="recipDetail"]/div[@class="recipeTip"]/text()'))
    tips_list = []
    for tip in tips:
        new_tip = tip.strip()  # 删除空白符\n、\t、' '等,但会得到一个空字符串''
        tips_list.append(new_tip)
    new_list = filter(None, tips_list)  # 去掉列表中的空字符''和None
    # print(type(new_list))  #
    new_tips = '$$'.join(new_list)  # 得到含有分隔符的字符串

    # 整合:
    detail.append(img_url)
    detail.append(detail_name)
    detail.append(new_material)
    detail.append(new_step)
    detail.append(new_tips)

    return detail  # 返回[图片地址, 菜名2, 配料, 步骤, 小窍门]的列表
a.相关的数据清洗,代码中都有注释,这里说明一下注释中的"得到含有分隔符的字符串":
b.由于数据要存到数据库,数据库中只给列表中的每一项分配了一个字段,而有些项中却包含几段内容(比如“步骤”项就包括了好几段内容,存入数据库只能在一个字段中,这样以后取的时候也会整个就取出来了,无法达到分隔效果,这里为什么不给“步骤”中的每一项分配一个字段呢?因为其中的项目数目是不固定的,因此无法实现),靠一个字段无法分隔,因此便给分段的内容加了分隔符’$$’,这样后面取出来的时候可以利用split函数进行分隔,得到原本的分段内容,虽然很麻烦但我也只能想到这种方法了。
运行:
print(parse_detail_page(get_page('https://home.meishichina.com/recipe-30999.html')))
返回:
![]()
运行正常!
3.以上便是实现了对爬虫相关函数的设计。
4.存入数据库
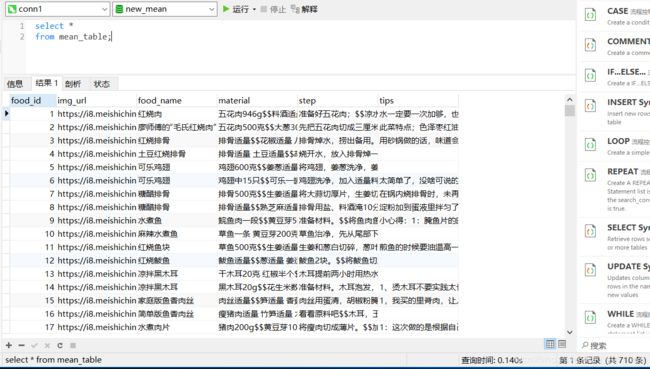
- 设计数据库(可以用navicat,更加方便快捷)
根据我们要得到的结果,可以分析出,我们要在数据库中设计6个字段:
(id,img_url, food_name, material, step, tips)
其中,id为自增字段 - 数据库操作
# import time
import pymysql

import spider  # 引入自己写的爬取菜品的相关函数模块

# 连接database
def connect():
	# 建立连接
    conn = pymysql.connect(host='127.0.0.1', port=3306, user='root', password='******', database='new_mean', charset='utf8')
    if conn:
        print("数据库连接成功!")
        return conn
    else:
        print("数据库连接失败!")
        return None


def insert_db(conn, detail_list):
	# 得到一个可以执行SQL语句的光标对象
    cursor = conn.cursor()
    sql = "INSERT INTO mean_table(img_url, food_name, material, step, tips) VALUES (%s, %s, %s, %s, %s);"
    try:
        # 执行SQL语句
        cursor.execute(sql, detail_list)
        # 提交事务
        conn.commit()
    except Exception as e:
        # 有异常,回滚事务
        conn.rollback()
    finally:
        cursor.close()


def close_db(conn):
    conn.close()
    print("数据库已关闭!")


def load():
    url = "https://home.meishichina.com/recipe-menu.html"
    mean_list_url = spider.parse_mean_page(spider.get_page(url))
    conn = connect()
    i = 0
    print("载入成功:")
    for data1 in mean_list_url:
        method_list = spider.parse_method_page(spider.get_page(data1))  # 获得一个菜的做法url列表
        for data2 in method_list:
            html = spider.get_page(data2)
            # 有时会遇到返回网页源码错误的问题,这里遇到了我们就忽略,继续下一次操作
            if html is None:
                continue
            detail_list = spider.parse_detail_page(html)  # 获得一个菜的详情界面
            # print(detail_list)
            insert_db(conn, detail_list)
            i += 1
            print("\r已插入:{0}个...".format(i), end='')
            # time.sleep(0.2)
    print()

    close_db(conn)
这样所有结果便存到数据库中了!
5.实现
具体代码已经上传到GitHub:智能菜谱
二、人工智能
tips:这一块实际没用到自己学的什么,就是用了百度的一个开放接口,但我还是会把详细过程记录下来
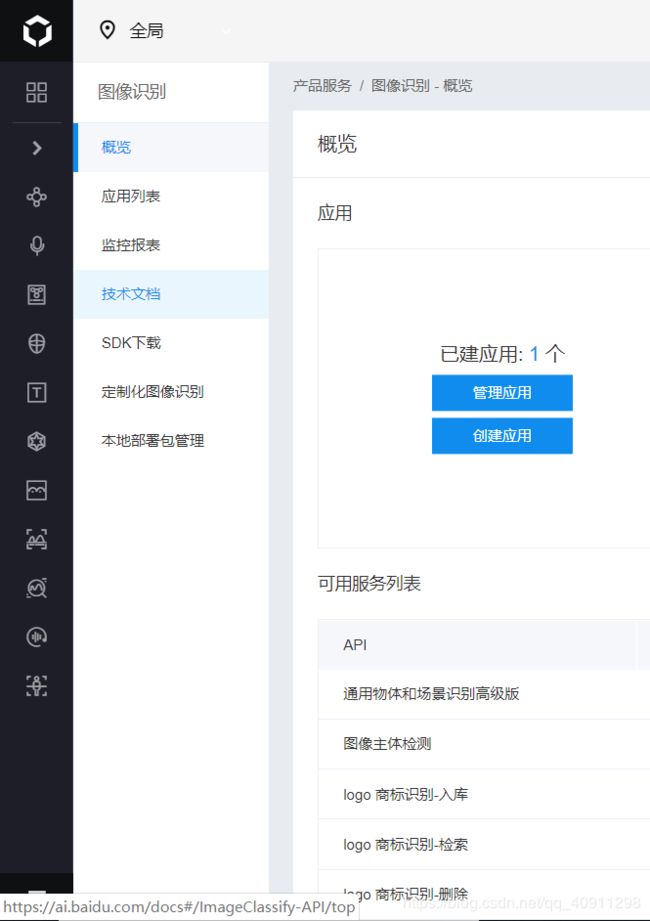
1.登录获取相关信息
- 首先登录百度AI开放平台:http://ai.baidu.com

2.点击右上方控制台登录,输入或注册自己的百度账号
3.登录之后选择左侧的图像识别分栏

4.点击创建应用即可
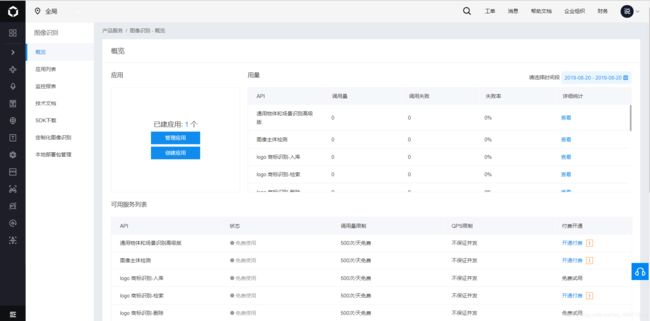
5.创建后便可以看到一系列信息,这些信息会在使用接口时用到

2.查看帮助文档
3.应用到web中
1.下载相应SDK:pip install baidu-aip
2.新建AipImageClassify:AipImageClassify是图像识别的Python SDK客户端,为使用图像识别的开发人员提供了一系列的交互方法。
from aip import AipImageClassify

""" 你的 APPID AK SK """
APP_ID = '你的 App ID'
API_KEY = '你的 Api Key'
SECRET_KEY = '你的 Secret Key'

client = AipImageClassify(APP_ID, API_KEY, SECRET_KEY)
3.设置可选参数:
""" 调用菜品识别 """
client.dishDetect(image);

""" 如果有可选参数 """
options = {}
options["top_num"] = 3
options["filter_threshold"] = "0.7"
options["baike_num"] = 5

""" 带参数调用菜品识别 """
client.dishDetect(image, options)
详细信息请参考:百度AI图像识别Python SDK文档
三、Python Web
1.网站整体布局分析
- 首页:有搜索栏、图片上传栏、图片url上传栏以及热门推荐栏
- 识别结果页:由图片上传或者图片url上传后跳转的页面,是百度AI分析识别出的结果页
- 菜品详情页:由搜索栏或者识别结果页跳转来的页面,展示最终菜品的详细信息
- 其他页面:多是特殊菜品或者热门推荐的菜品所单独设计的页面
2.路由和视图设计
知道了大致页面布局,接着便用flask框架来设计路由和视图:
- 首页:
a:前端主要代码:
index.html
b: 后端路由 :
@app.route('/', methods=['GET', 'POST'])
def index():
    food_name = []
    result_url = []
    calorie = []
    descriptions = []
    image_url = []
    if request.method == 'GET':
        return render_template('index.html')
    else:
        img = request.files.get('img')
        img_url = request.form.get('img_url')
        if not img:  # 没有上传图片则取url
            if not img_url:
                food = request.form.get('food')
                print("name", food)
                if not food:
                    return render_template('index.html', msg='请选择一种搜索方式!')
                return redirect(url_for("show", food_name=food))
            else:
                try:
                    img = ur.urlopen(img_url)
                except Exception:
                    return render_template('index.html', msg="请上传图片或URL地址!")

        # 图片信息上传到百度接口
        client = AipImageClassify(APP_ID, API_KEY, SECRET_KEY)
        options = {'top_num': 5, 'baike_num': 5}
        food_info = client.dishDetect(img.read(), options)
        print(food_info)

        for info in food_info['result']:
            if info['name'] == '非菜':
                return render_template('index.html', msg="未识别到菜品类!请重新上传!")
            else:
                food_name.append(info['name'])
            if 'description' in info['baike_info']:
                descriptions.append(info['baike_info']['description'])
            else:
                descriptions.append('暂无此信息')
            if info['has_calorie'] is True:
                calorie.append(info['calorie'])
            else:
                calorie.append('暂无此信息')
            if 'image_url' in info['baike_info']:
                image_url.append(info['baike_info']['image_url'])
            else:
                image_url.append('../static/image/暂无图片.jpg')
        name_length = len(food_name)

        for num in food_name:
            url = url_for("show", food_name=num)
            result_url.append(url)
        return render_template('search.html', result_url=result_url, calorie=calorie,  food_name=food_name,
                               descriptions=descriptions, name_length=name_length, image_url=image_url, img_url=img_url)
最后一句是跳转到search.html(识别结果页)页面:
search.html主要代码:
2.详情页:
a: 前端主要代码:
result.html
{% if results %}
{% for data in results %}
名字:{{ data[1] }}
 食材明细:
食材明细:
{% if data[2][0] %}
- 主料:{{ data[2][0] }}
{% endif %}
{% if data[2][1] %}
- 辅料:{{ data[2][1] }}
{% endif %}
{% if data[2][2] %}
- 配料:{{ data[2][2] }}
{% endif %}
做法:
{% for step in data[3] %}
- {{ step}}
{% endfor %}
{% if data[4][0]!='' %}
小贴士:
{% for tip in data[4] %}
{{ tip }}
{% endfor %}
{% endif %}
{% endfor %}
{% else %}
本站暂时没有此菜品,试试其他关键字吧!
{% endif %}
b: 后端路由:
@app.route('/result/')
def show(food_name):
    food_name = food_name
    conn = dboperation.connect()
    results = dboperation.search_db(conn, food_name)
    return render_template('result.html', food_name=food_name, results=results)
3.读取数据库
数据存到了数据库,自然要取出来,上面代码已经用到了数据库读入模板,相关操作都很简单,这里只贴一下主要代码:
dboperation.py
import pymysql


def connect():

    conn = pymysql.connect(host='127.0.0.1', port=3306, user='root', password='fff252852', database='new_mean', charset='utf8')
    # 得到一个可以执行SQL语句的光标对象
    if conn:
        print("数据库连接成功!")
        return conn
    else:
        print("数据库连接失败!")
        return None


def search_db(conn, name):

    cur = conn.cursor()
    sql = "SELECT * FROM mean_table WHERE food_name LIKE '%%%s%%'" % name

    try:
        cur.execute(sql)  # 执行sql语句
        results = cur.fetchall()  # 获取查询的所有记录
        result_list = []
        for data in results:
        # 数据读入格式化
            materials = data[3].split("$$")
            steps = data[4].split("$$")
            tips = data[5].split("$$")
            mean_tuple = (data[1], data[2], materials, steps, tips)
            result_list.append(mean_tuple)
        return result_list
        # 遍历结果
    except Exception as e:
        print("数据库执行失败!")
        raise e
    finally:
        cur.close()
        conn.close()
        print("数据库关闭成功!")
这里涉及到读取数据的格式化,也就是利用存入时的分隔符"$$"来分隔数据,让我们能在flask中更好的调用这些数据。
4.实现
具体代码后面会上传到GitHub。
项目预览
- 首页
- 搜索结果页
- 详情页
项目收获
所学到的知识:
- 熟悉了xpath爬虫页面解析
- 图片防盗链的解决
- 爬虫数据的清洗
- python yield的使用
- 熟悉了python 对字符串的相关操作
- 熟悉了对MySQL的相关操作
- flask框架中页面的设计
- flask中参数的传递、页面的跳转
- css的熟悉
