CentOS7安装docker-ce
前提设置:关闭防火墙和网络管理,还有关闭selinux安全设置
[root@localhost ~]# systemctl stop NetworkManager        #关闭网络管理
[root@localhost ~]# systemctl stop firewalld             #关闭防火墙
[root@localhost ~]# systemctl disable  NetworkManager    #关闭开机自动开启网络管理
[root@localhost ~]# systemctl disable  firewalld         #关闭开机自动开启防火墙
[root@localhost ~]# vi /etc/selinux/config               #编辑selinux安全设置为宽容模式
...  #省略内容
SELINUX=permissive
...  #省略内容

[root@localhost ~]# setenforce                           #设置临时关闭selinux安全
usage:  setenforce [ Enforcing | Permissive | 1 | 0 ]    # 1代表开启 | 0代表关闭
[root@localhost ~]# setenforce 0                         #设置临时关闭seliux安全
[root@localhost ~]# getenforce                           #查看seliux安全的状态
Permissive
根据官方文档:https://docs.docker.com/install/linux/docker-ce/centos/
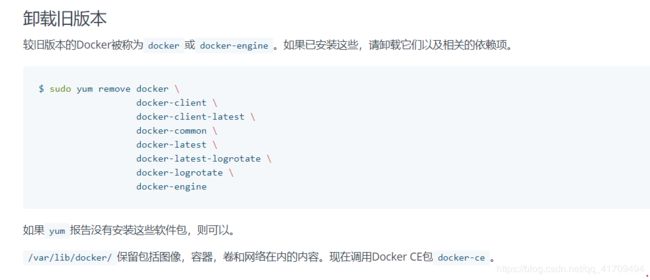
1.卸载旧的版本docker或docker-engine
[root@localhost ~]# yum remove docker \
                  docker-client \
                  docker-client-latest \
                  docker-common \
                  docker-latest \
                  docker-latest-logrotate \
                  docker-logrotate \
                  docker-engine
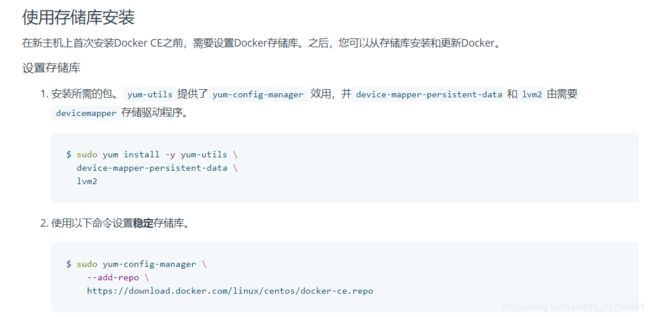
2.使用存储库安装, 由于官方存储库下载的比较慢,就使用清华大学镜像的存储库或者使用阿里云镜像的存储库
2-1.安装存储库所需要的依赖包
[root@localhost ~]# yum install -y yum-utils \
    device-mapper-persistent-data \
    lvm2
2-2.使用清华大学镜像存储库或者阿里云镜像存储库
[root@localhost ~]#  yum-config-manager --add-repo https://mirrors.tuna.tsinghua.edu.cn/docker-ce/linux/centos/docker-ce.repo

或者用阿里云镜像存储库
yum-config-manager --add-repo https://mirrors.aliyun.com/docker-ce/linux/centos/docker-ce.repo
3.使用CentOS7自带的yum包,用于安装docker所需要的依赖包
[root@localhost ~]# vi /etc/yum.repos.d/CentOS-Base.repo

[base]
name=CentOS-$releasever - Base
mirrorlist=http://mirrorlist.centos.org/?release=$releasever&arch=$basearch&repo=os&infra=$infra
gpgcheck=1
gpgkey=file:///etc/pki/rpm-gpg/RPM-GPG-KEY-CentOS-7

[updates]
name=CentOS-$releasever - Updates
mirrorlist=http://mirrorlist.centos.org/?release=$releasever&arch=$basearch&repo=updates&infra=$infra
gpgcheck=1
gpgkey=file:///etc/pki/rpm-gpg/RPM-GPG-KEY-CentOS-7

[extras]
name=CentOS-$releasever - Extras
mirrorlist=http://mirrorlist.centos.org/?release=$releasever&arch=$basearch&repo=extras&infra=$infra
gpgcheck=1
gpgkey=file:///etc/pki/rpm-gpg/RPM-GPG-KEY-CentOS-7

[centosplus]
name=CentOS-$releasever - Plus
mirrorlist=http://mirrorlist.centos.org/?release=$releasever&arch=$basearch&repo=centosplus&infra=$infra
gpgcheck=1
enabled=0
gpgkey=file:///etc/pki/rpm-gpg/RPM-GPG-KEY-CentOS-7
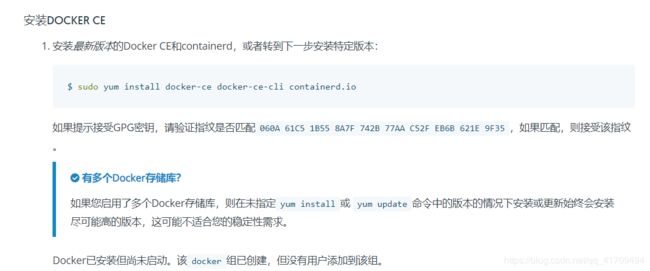
4.安装docker
[root@localhost ~]# yum install docker-ce docker-ce-cli containerd.io5.启动docker,并查看docker的版本
[root@localhost ~]# systemctl start docker       #启动docker

[root@localhost ~]# docker -v                    #查看docker版本
Docker version 18.09.7, build 2d0083d

[root@localhost ~]# docker info                  #查看docker详细信息
Containers: 0
 Running: 0
 Paused: 0
 Stopped: 0
Images: 0
Server Version: 18.09.7
Storage Driver: overlay2
 Backing Filesystem: xfs
 Supports d_type: true
 Native Overlay Diff: true
Logging Driver: json-file
Cgroup Driver: cgroupfs
Plugins:
 Volume: local
 Network: bridge host macvlan null overlay
 Log: awslogs fluentd gcplogs gelf journald json-file local logentries splunk syslog
Swarm: inactive
Runtimes: runc
Default Runtime: runc
Init Binary: docker-init
containerd version: 894b81a4b802e4eb2a91d1ce216b8817763c29fb
runc version: 425e105d5a03fabd737a126ad93d62a9eeede87f
init version: fec3683
Security Options:
 seccomp
  Profile: default
Kernel Version: 3.10.0-862.el7.x86_64
Operating System: CentOS Linux 7 (Core)
OSType: linux
Architecture: x86_64
CPUs: 4
Total Memory: 3.685GiB
Name: localhost
ID: IVDD:BQR4:ASMV:YC4O:HSAI:35B4:DC7J:66H4:WPIV:OA27:GJE7:QS2Y
Docker Root Dir: /var/lib/docker
Debug Mode (client): false
Debug Mode (server): false
Registry: https://index.docker.io/v1/
Labels:
Experimental: false
Insecure Registries:
 127.0.0.0/8
Live Restore Enabled: false
Product License: Community Engine
6.使用腾讯云提供的国内镜像源, 加速访问 Docker Hub,参考腾讯云实验手册:https://cloud.tencent.com/developer/labs/lab/10054
6-1.旧版的docker使用镜像加速器
[root@localhost ~]# echo "OPTIONS='--registry-mirror=https://mirror.ccs.tencentyun.com'" >> /etc/sysconfig/docker

[root@localhost ~]# systemctl daemon-reload                #重新加载
6-2.新版的docker使用镜像加速器,参考菜鸟:https://www.runoob.com/docker/centos-docker-install.html
[root@localhost ~]# vi /etc/docker/daemon.json               #编辑镜像加速器

{
   "registry-mirrors": ["https://registry.docker-cn.com"]
}

[root@localhost ~]# systemctl restart docker                #配置后重启服务
6-3.参考DaoCloud的镜像加速器:https://www.daocloud.io/mirror#accelerator-doc
curl -sSL https://get.daocloud.io/daotools/set_mirror.sh | sh -s http://f1361db2.m.daocloud.io7.启动路由转发,参考官方文档:https://docs.docker.com/network/bridge/
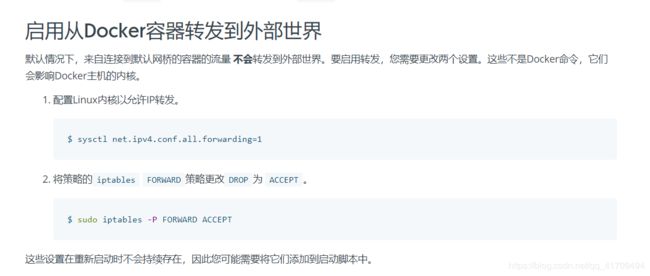
7-1.临时设置启动路由转发
[root@localhost ~]# sysctl net.ipv4.conf.all.forwarding=1
net.ipv4.conf.all.forwarding = 1
[root@localhost ~]# iptables -P FORWARD ACCEPT                #关闭了防火墙就不用设置策略
7-2.永久设置启动路由转发
[root@localhost ~]# vi /etc/sysctl.conf
...
net.ipv4.ip_forward = 1
net.ipv4.conf.all.forwarding=1                    #在最后添加

[root@localhost ~]# sysctl -p                     #启动加载参数
net.ipv4.conf.all.forwarding = 1
8. 测实安装docker
[root@localhost ~]# docker run hello-world
Unable to find image 'hello-world:latest' locally
latest: Pulling from library/hello-world
1b930d010525: Already exists
Digest: sha256:41a65640635299bab090f783209c1e3a3f11934cf7756b09cb2f1e02147c6ed8
Status: Downloaded newer image for hello-world:latest

Hello from Docker!
This message shows that your installation appears to be working correctly.
...

[root@localhost ~]# docker images                    #查看镜像
REPOSITORY          TAG                 IMAGE ID            CREATED             SIZE
hello-world         latest              fce289e99eb9        6 months ago        1.84kB

[root@localhost ~]# docker ps -a                     #查看所有容器
CONTAINER ID        IMAGE               COMMAND             CREATED             STATUS                      PORTS               NAMES
33c9caf11103        hello-world         "/hello"            18 minutes ago      Exited (0) 18 minutes ago                       recursing_ishizaka

[root@localhost ~]# docker ps -aq                    #指定查看容器的ID
33c9caf11103

[root@localhost ~]# docker logs 33c9caf11103         #查看容器的标准输出(内容)

Hello from Docker!
This message shows that your installation appears to be working correctly.
...


