SpringBoot基础-SpringBoot和MybatisPlus框架整合
文章目录
- SpringBoot
- 一 SpringBoot入门
- 1.简介
- 2.微服务
- 3 Hello World
- 3.1环境准备
- 3.1.1开发环境
- 3.1.2导入依赖
- 4 编写程序
- 5 运行程序
- 6Hello World分析
- 6.1 pom文件
- 6.1.1 父项目
- 6.1.2 启动器
- 7 使用Spring Initializer快速创建Spring Boot项目
- 7.1、IDEA:使用 Spring Initializer快速创建项目
- 7.2、STS使用 Spring Starter Project快速创建项目
- 二、配置文件
- 1、配置文件
- 2、YAML语法:
- 2.1、基本语法
- 2.2、值的写法
- 字面量:普通的值(数字,字符串,布尔)
- 对象、Map(属性和值)(键值对):
- 数组(List、Set):
- 3、配置文件值注入
- 3.1、properties配置文件在idea中默认utf-8可能会乱码
- 3.2、@Value获取值和@ConfigurationProperties获取值比较
- 3.3、配置文件注入值数据校验
- 4 @PropertySource&@ImportResource&@Bean
- 4、配置文件占位符
- 4.1、随机数
- 4.2、占位符获取之前配置的值,如果没有可以是用:指定默认值
- 5 多profile文件
- 5.1、多Profile文件
- 5.2、yml支持多文档块方式
- 5.3、激活指定profile
- 6、配置文件加载位置
- 7、外部配置加载顺序
- 8、自动配置原理
- 8.1、**自动配置原理:**
- 8.2、细节
- 1、@Conditional派生注解(Spring注解版原生的@Conditional作用)
- 三、日志
- 3.1、日志框架
- 3.2、SLF4j使用
- 3.2.1、如何在系统中使用SLF4j https://www.slf4j.org
- 3.2.2、遗留问题
- 3.3、SpringBoot日志关系
- 3.4、日志使用;
- 3.4.1、默认配置
- 3.4.2、指定配置
- 3.5、切换日志框架
- 四、Web开发
- 4.1、简介
- 4.2、SpringBoot对静态资源的映射规则;
- 4.3、模板引擎
- 4.3.1、引入thymeleaf;
- 4.3.2、Thymeleaf使用
- 4.3.3、语法规则
- 4.4、SpringMVC自动配置
- 4.4.1. Spring MVC auto-configuration
- 4.4.2、扩展SpringMVC
- 4.4.3、全面接管SpringMVC;
- 4.5、如何修改SpringBoot的默认配置
- 4.6 整合mybatis框架
- 1.首先创建SpringBoot项目
- 2.配置web环境
- 3.导入相关依赖
- 4.配置数据源
- 5.配置application.properties
- 6.配置Mapper接口扫描
- 7.项目结构
- 8.测试结果
SpringBoot
一 SpringBoot入门
1.简介
简化Spring应用开发的一个框架;
整个Spring技术栈的一个大整合;
J2EE开发的一站式解决方案;
2.微服务
微服务:架构风格(服务微化)
一个应用应该是一组小型服务;可以通过HTTP的方式进行互通;
单体应用:ALL IN ONE
微服务:每一个功能元素最终都是一个可独立替换和独立升级的软件单元;
详细参照微服务文档
3 Hello World
3.1环境准备
3.1.1开发环境
jdk:1.8

maven:3.x

IDE:IDEA
3.1.2导入依赖
<parent>
        <groupId>org.springframework.bootgroupId>
        <artifactId>spring-boot-starter-parentartifactId>
        <version>2.0.5.RELEASEversion>
    parent>

    <dependencies>
        <dependency>
            <groupId>org.springframework.bootgroupId>
            <artifactId>spring-boot-starter-webartifactId>
        dependency>
    dependencies>

    <properties>
        <java.version>1.8java.version>
    properties>


    <build>
        <plugins>

            <plugin>
                <groupId>org.springframework.bootgroupId>
                <artifactId>spring-boot-maven-pluginartifactId>
            plugin>
        plugins>
    build>
4 编写程序
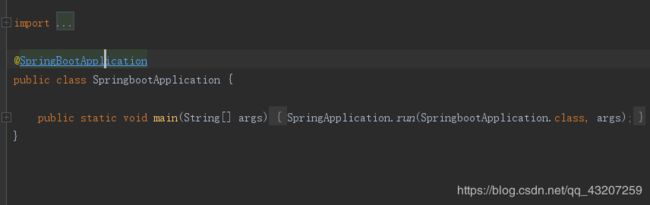
我们首先编写一个SpringBoot启动类,需要加上@SpringBootApplication注解。当启动springboot时@SpringBootApplication注解会去**自动扫描当前目录和其子目录**,如果controller层不在子目录则扫描不到。所以将其配置到子目录中。
@SpringBootApplication
public class Helloworld {
    public static void main(String[] args) {
        //启动Spring应用
        SpringApplication.run(Helloworld.class,args);
    }
}
编写controller
package com.dream.controller;

import org.springframework.stereotype.Controller;
import org.springframework.web.bind.annotation.RequestMapping;
import org.springframework.web.bind.annotation.ResponseBody;

@Controller
public class Hello {
    @RequestMapping("/hello")
    @ResponseBody
    public String hello(){
        return "hello";
    }
}
5 运行程序
通过主程序启动,系统会输出一下日志
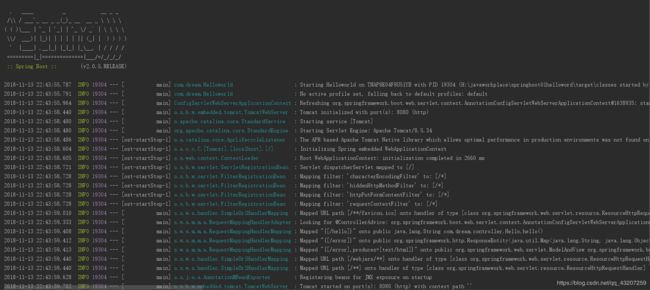
表示启动成功,默认通过http://localhost:8080访问
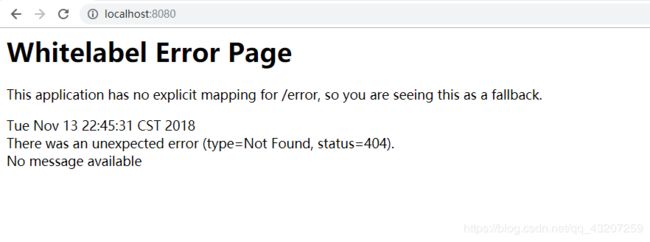
看到此界面表示SpringBoot的嵌入tomcat启动成功,然后我们访问我们映射的Controller地址
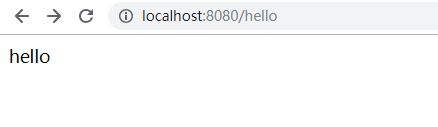
Hello Demo完成
6Hello World分析
6.1 pom文件
6.1.1 父项目
父依赖

        org.springframework.boot
        spring-boot-starter-parent
        2.0.5.RELEASE
点进去看可以发现
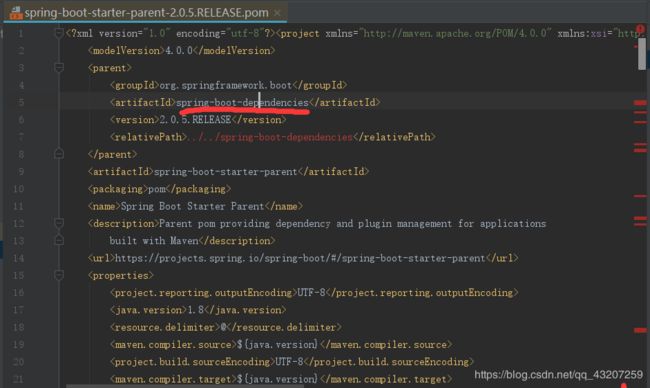
其还有父依赖,继续跟进
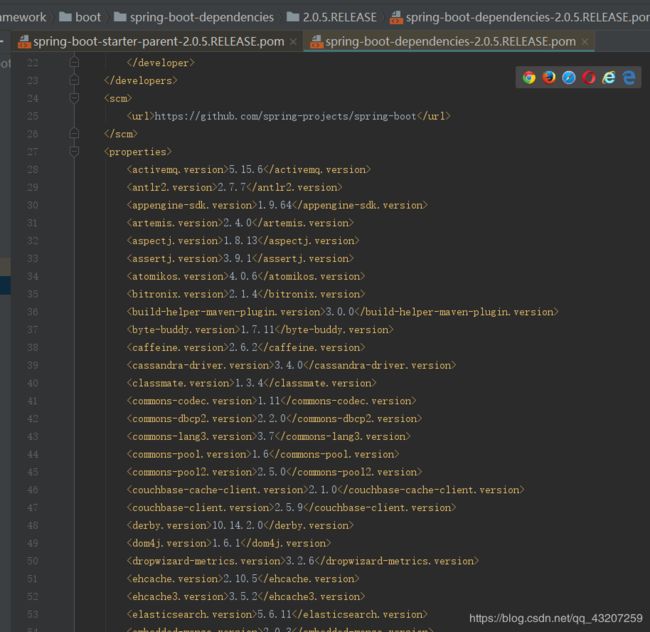
这个依赖对常用的一些工具进行了版本控制
6.1.2 启动器
在pom文件中还导出了一个依赖
 <dependencies>
        <dependency>
            <groupId>org.springframework.bootgroupId>
            <artifactId>spring-boot-starter-webartifactId>
        dependency>
    dependencies>
根据springboot官方文档的介绍,不同的启动器,对应着不同的应用环境,当我们导入某一启动器,其就会帮我们配置好相关的依赖
例如 spring-boot-starter-web启动器,为我们添加了web相关的依赖
<project xsi:schemaLocation="http://maven.apache.org/POM/4.0.0 http://maven.apache.org/xsd/maven-4.0.0.xsd" xmlns="http://maven.apache.org/POM/4.0.0"
    xmlns:xsi="http://www.w3.org/2001/XMLSchema-instance">
  <modelVersion>4.0.0modelVersion>
  <parent>
    <groupId>org.springframework.bootgroupId>
    <artifactId>spring-boot-startersartifactId>
    <version>2.0.5.RELEASEversion>
  parent>
  <groupId>org.springframework.bootgroupId>
  <artifactId>spring-boot-starter-webartifactId>
  <version>2.0.5.RELEASEversion>
  <name>Spring Boot Web Startername>
  <description>Starter for building web, including RESTful, applications using Spring
		MVC. Uses Tomcat as the default embedded containerdescription>
  <url>https://projects.spring.io/spring-boot/#/spring-boot-parent/spring-boot-starters/spring-boot-starter-weburl>
  <organization>
    <name>Pivotal Software, Inc.name>
    <url>https://spring.iourl>
  organization>
  <licenses>
    <license>
      <name>Apache License, Version 2.0name>
      <url>http://www.apache.org/licenses/LICENSE-2.0url>
    license>
  licenses>
  <developers>
    <developer>
      <name>Pivotalname>
      <email>[email protected]email>
      <organization>Pivotal Software, Inc.organization>
      <organizationUrl>http://www.spring.ioorganizationUrl>
    developer>
  developers>
  <scm>
    <connection>scm:git:git://github.com/spring-projects/spring-boot.git/spring-boot-starters/spring-boot-starter-webconnection>
    <developerConnection>scm:git:ssh://[email protected]/spring-projects/spring-boot.git/spring-boot-starters/spring-boot-starter-webdeveloperConnection>
    <url>http://github.com/spring-projects/spring-boot/spring-boot-starters/spring-boot-starter-weburl>
  scm>
  <issueManagement>
    <system>Githubsystem>
    <url>https://github.com/spring-projects/spring-boot/issuesurl>
  issueManagement>
  <dependencies>
    <dependency>
      <groupId>org.springframework.bootgroupId>
      <artifactId>spring-boot-starterartifactId>
      <version>2.0.5.RELEASEversion>
      <scope>compilescope>
    dependency>
    <dependency>
      <groupId>org.springframework.bootgroupId>
      <artifactId>spring-boot-starter-jsonartifactId>
      <version>2.0.5.RELEASEversion>
      <scope>compilescope>
    dependency>
    <dependency>
      <groupId>org.springframework.bootgroupId>
      <artifactId>spring-boot-starter-tomcatartifactId>
      <version>2.0.5.RELEASEversion>
      <scope>compilescope>
    dependency>
    <dependency>
      <groupId>org.hibernate.validatorgroupId>
      <artifactId>hibernate-validatorartifactId>
      <version>6.0.12.Finalversion>
      <scope>compilescope>
    dependency>
    <dependency>
      <groupId>org.springframeworkgroupId>
      <artifactId>spring-webartifactId>
      <version>5.0.9.RELEASEversion>
      <scope>compilescope>
    dependency>
    <dependency>
      <groupId>org.springframeworkgroupId>
      <artifactId>spring-webmvcartifactId>
      <version>5.0.9.RELEASEversion>
      <scope>compilescope>
    dependency>
  dependencies>
project>
7 使用Spring Initializer快速创建Spring Boot项目
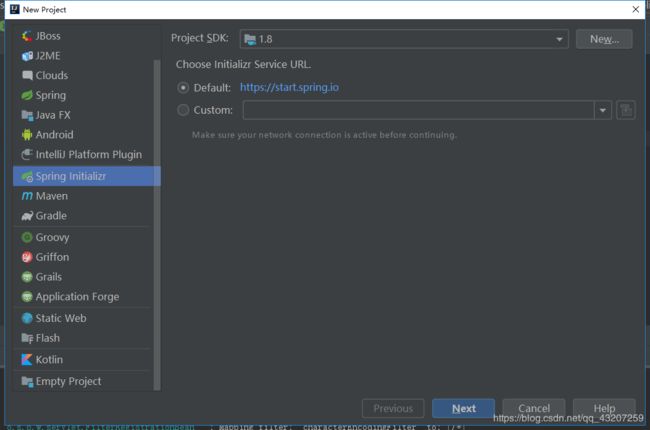
7.1、IDEA:使用 Spring Initializer快速创建项目
IDE都支持使用Spring的项目创建向导快速创建一个Spring Boot项目;
选择我们需要的模块;向导会联网创建Spring Boot项目;
默认生成的Spring Boot项目;
- 主程序已经生成好了,我们只需要我们自己的逻辑
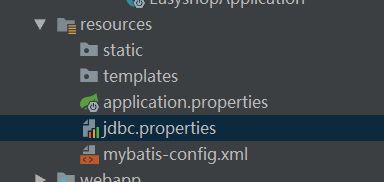
- resources文件夹中目录结构
- static:保存所有的静态资源; js css images;
- templates:保存所有的模板页面;(Spring Boot默认jar包使用嵌入式的Tomcat,默认不支持JSP页面);可以使用模板引擎(freemarker、thymeleaf);
- application.properties:Spring Boot应用的配置文件;可以修改一些默认设置;
7.2、STS使用 Spring Starter Project快速创建项目
二、配置文件
1、配置文件
SpringBoot使用一个全局的配置文件,配置文件名是固定的;
•application.properties
•application.yml
配置文件的作用:修改SpringBoot自动配置的默认值;SpringBoot在底层都给我们自动配置好;
YAML(YAML Ain’t Markup Language)
YAML  A Markup Language:是一个标记语言

YAML   isn't Markup Language:不是一个标记语言;
标记语言:
以前的配置文件;大多都使用的是 xxxx.xml文件;
YAML:以数据为中心,比json、xml等更适合做配置文件;
YAML:配置例子
server:
  port: 8081
XML:
<server>
	<port>8081port>
server>
2、YAML语法:
2.1、基本语法
k:(空格)v:表示一对键值对(空格必须有);
以空格的缩进来控制层级关系;只要是左对齐的一列数据,都是同一个层级的
server:
    port: 8081
    path: /hello
属性和值也是大小写敏感;
2.2、值的写法
字面量:普通的值(数字,字符串,布尔)
k: v:字面直接来写;

	字符串默认不用加上单引号或者双引号;

	"":双引号;不会转义字符串里面的特殊字符;特殊字符会作为本身想表示的意思

			name:   "zhangsan \n lisi":输出;zhangsan 换行  lisi

	'':单引号;会转义特殊字符,特殊字符最终只是一个普通的字符串数据

			name:   ‘zhangsan \n lisi’:输出;zhangsan \n  lisi
对象、Map(属性和值)(键值对):
k: v:在下一行来写对象的属性和值的关系;注意缩进

	对象还是k: v的方式
friends:
		lastName: zhangsan
		age: 20
行内写法:
friends: {lastName: zhangsan,age: 18}
数组(List、Set):
用- 值表示数组中的一个元素
pets:
 - cat
 - dog
 - pig
行内写法
pets: [cat,dog,pig]
3、配置文件值注入
配置文件
person:
    lastName: hello
    age: 18
    boss: false
    birth: 2017/12/12
    maps: {k1: v1,k2: 12}
    lists:
      - lisi
      - zhaoliu
    dog:
      name: 小狗
      age: 12
javaBean:
/**
 * 将配置文件中配置的每一个属性的值,映射到这个组件中
 * @ConfigurationProperties:告诉SpringBoot将本类中的所有属性和配置文件中相关的配置进行绑定;
 *      prefix = "person":配置文件中哪个下面的所有属性进行一一映射
 *
 * 只有这个组件是容器中的组件,才能容器提供的@ConfigurationProperties功能;
 *
 */
@Component
@ConfigurationProperties(prefix = "person")
public class Person {

    private String lastName;
    private Integer age;
    private Boolean boss;
    private Date birth;

    private Map<String,Object> maps;
    private List<Object> lists;
    private Dog dog;
我们可以导入配置文件处理器,以后编写配置就有提示了
		<dependency>
			<groupId>org.springframework.bootgroupId>
			<artifactId>spring-boot-configuration-processorartifactId>
			<optional>trueoptional>
		dependency>
3.1、properties配置文件在idea中默认utf-8可能会乱码
调整
3.2、@Value获取值和@ConfigurationProperties获取值比较
| @ConfigurationProperties | @Value | |
|---|---|---|
| 功能 | 批量注入配置文件中的属性 | 一个个指定 |
| 松散绑定(松散语法) | 支持 | 不支持 |
| SpEL | 不支持 | 支持 |
| JSR303数据校验 | 支持 | 不支持 |
| 复杂类型封装 | 支持 | 不支持 |
配置文件yml还是properties他们都能获取到值;
如果说,我们只是在某个业务逻辑中需要获取一下配置文件中的某项值,使用@Value;
如果说,我们专门编写了一个javaBean来和配置文件进行映射,我们就直接使用@ConfigurationProperties;
3.3、配置文件注入值数据校验
@Component
@ConfigurationProperties(prefix = "person")
@Validated
public class Person {
/**
*
*
//lastName必须是邮箱格式
@Email
//@Value("${person.last-name}")
private String lastName;
//@Value("#{11*2}")
private Integer age;
//@Value("true")
private Boolean boss;
private Date birth;
private Map<String,Object> maps;
private List<Object> lists;
private Dog dog;
4 @PropertySource&@ImportResource&@Bean
@PropertySource:加载指定的配置文件;
/**
* 将配置文件中配置的每一个属性的值,映射到这个组件中
* @ConfigurationProperties:告诉SpringBoot将本类中的所有属性和配置文件中相关的配置进行绑定;
* prefix = "person":配置文件中哪个下面的所有属性进行一一映射
*
* 只有这个组件是容器中的组件,才能容器提供的@ConfigurationProperties功能;
* @ConfigurationProperties(prefix = "person")默认从全局配置文件中获取值;
*
*/
@PropertySource(value = {"classpath:person.properties"})
@Component
@ConfigurationProperties(prefix = "person")
//@Validated
public class Person {
/**
*
*
//lastName必须是邮箱格式
// @Email
//@Value("${person.last-name}")
private String lastName;
//@Value("#{11*2}")
private Integer age;
//@Value("true")
private Boolean boss;
@ImportResource:导入Spring的配置文件,让配置文件里面的内容生效;
Spring Boot里面没有Spring的配置文件,我们自己编写的配置文件,也不能自动识别;
想让Spring的配置文件生效,加载进来;@ImportResource标注在一个配置类上
@ImportResource(locations = {"classpath:beans.xml"})
导入Spring的配置文件让其生效
不来编写Spring的配置文件
<beans xmlns="http://www.springframework.org/schema/beans"
       xmlns:xsi="http://www.w3.org/2001/XMLSchema-instance"
       xsi:schemaLocation="http://www.springframework.org/schema/beans http://www.springframework.org/schema/beans/spring-beans.xsd">


    <bean id="helloService" class="com.atguigu.springboot.service.HelloService">bean>
beans>
SpringBoot推荐给容器中添加组件的方式;推荐使用全注解的方式
1、配置类**@Configuration**------>Spring配置文件
2、使用**@Bean**给容器中添加组件
/**
* @Configuration:指明当前类是一个配置类;就是来替代之前的Spring配置文件
*
* 在配置文件中用4、配置文件占位符
4.1、随机数
${random.value}、${random.int}、${random.long}
${random.int(10)}、${random.int[1024,65536]}
4.2、占位符获取之前配置的值,如果没有可以是用:指定默认值
person.last-name=张三${random.uuid}
person.age=${random.int}
person.birth=2017/12/15
person.boss=false
person.maps.k1=v1
person.maps.k2=14
person.lists=a,b,c
person.dog.name=${person.hello:hello}_dog
person.dog.age=15
5 多profile文件
5.1、多Profile文件
我们在主配置文件编写的时候,文件名可以是 application-{profile}.properties/yml
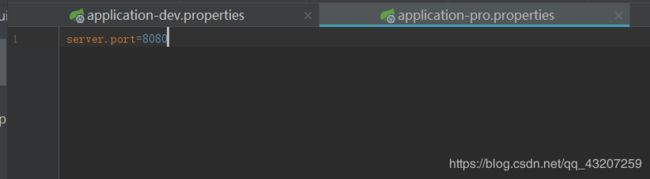
默认使用application.properties的配置;
如果想激活其他环境,我们可以在application.properties中配置激活指令
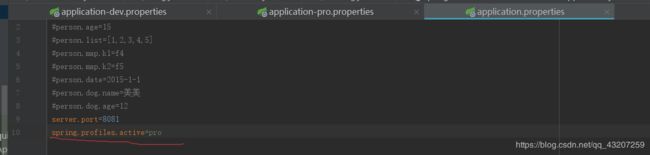
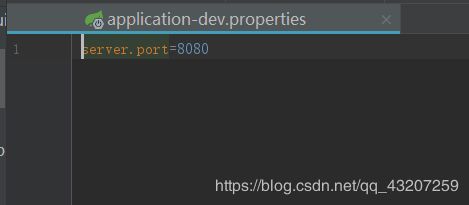
此时启动的环境就是application-pro中的环境
5.2、yml支持多文档块方式
server:
   port: 80

spring:
  profiles:
    active: dev
---
server:
  port: 81
spring:
  profiles: dev
---
  server:
    port: 8083
  spring:
    profiles: ac

5.3、激活指定profile
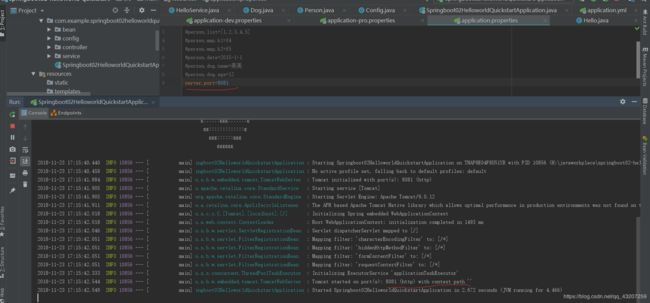
1、在配置文件中指定 spring.profiles.active=dev
2、命令行:
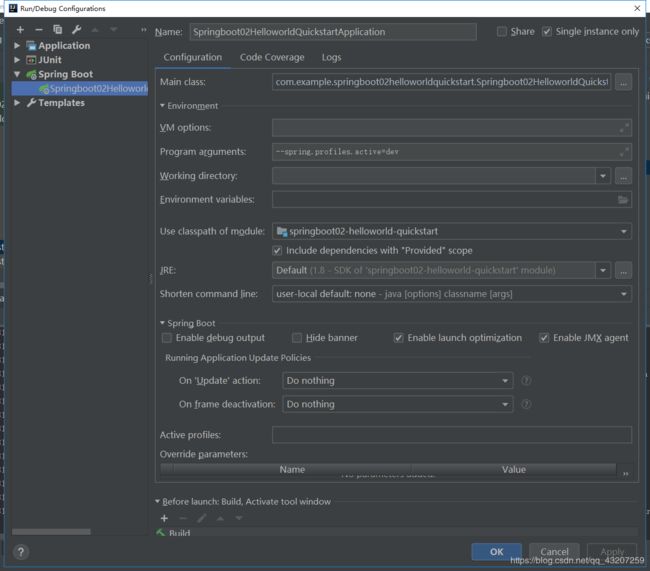
java -jar spring-boot-02-config-0.0.1-SNAPSHOT.jar --spring.profiles.active=dev;

可以直接在测试的时候,配置传入命令行参数
3、虚拟机参数;
-Dspring.profiles.active=dev
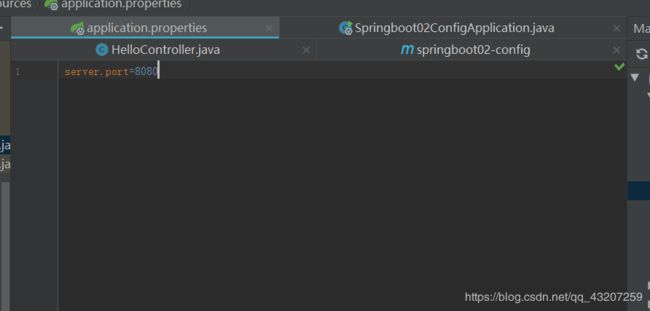
6、配置文件加载位置
springboot 启动会扫描以下位置的application.properties或者application.yml文件作为Spring boot的默认配置文件
–file:./config/
–file:./
–classpath:/config/
–classpath:/
优先级由高到底,高优先级的配置会覆盖低优先级的配置;
SpringBoot会从这四个位置全部加载主配置文件;互补配置;
我们还可以通过spring.config.location来改变默认的配置文件位置
项目打包好以后,我们可以使用命令行参数的形式,启动项目的时候来指定配置文件的新位置;指定配置文件和默认加载的这些配置文件共同起作用形成互补配置;
java -jar spring-boot-02-config-02-0.0.1-SNAPSHOT.jar --spring.config.location=G:/application.properties
Controller:

此时外部配置文件位置:
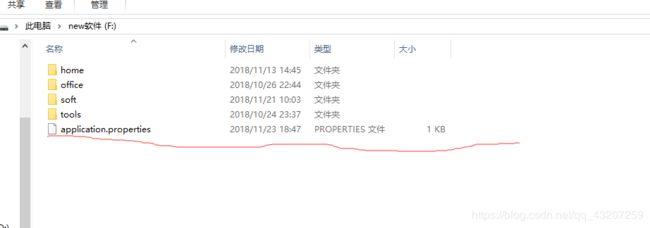
配置文件内容:
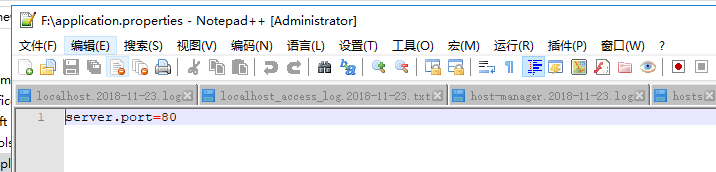
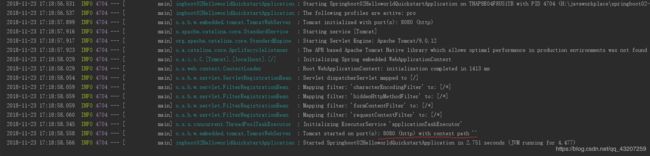
将项目导出jar包,执行jar包并加入参数,此时外部得配置文件就已经配置进项目中了,端口变成了80

7、外部配置加载顺序
SpringBoot也可以从以下位置加载配置; 优先级从高到低;高优先级的配置覆盖低优先级的配置,所有的配置会形成互补配置
1.命令行参数
所有的配置都可以在命令行上进行指定
java -jar spring-boot-02-config-02-0.0.1-SNAPSHOT.jar --server.port=8087 --server.context-path=/abc
多个配置用空格分开; --配置项=值
2.来自java:comp/env的JNDI属性
3.Java系统属性(System.getProperties())
4.操作系统环境变量
5.RandomValuePropertySource配置的random.*属性值
由jar包外向jar包内进行寻找;
优先加载带profile
6.jar包外部的application-{profile}.properties或application.yml(带spring.profile)配置文件
7.jar包内部的application-{profile}.properties或application.yml(带spring.profile)配置文件
再来加载不带profile
8.jar包外部的application.properties或application.yml(不带spring.profile)配置文件
9.jar包内部的application.properties或application.yml(不带spring.profile)配置文件
10.@Configuration注解类上的@PropertySource
11.通过SpringApplication.setDefaultProperties指定的默认属性
所有支持的配置加载来源;
[参考官方文档](
8、自动配置原理
配置文件到底能写什么?怎么写?自动配置原理;
配置文件能配置的属性参照
8.1、自动配置原理:
1)、SpringBoot启动的时候加载主配置类,开启了自动配置功能 @EnableAutoConfiguration
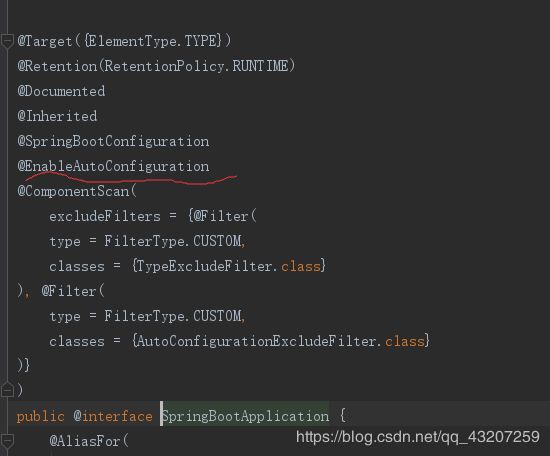
2)、@EnableAutoConfiguration 作用:
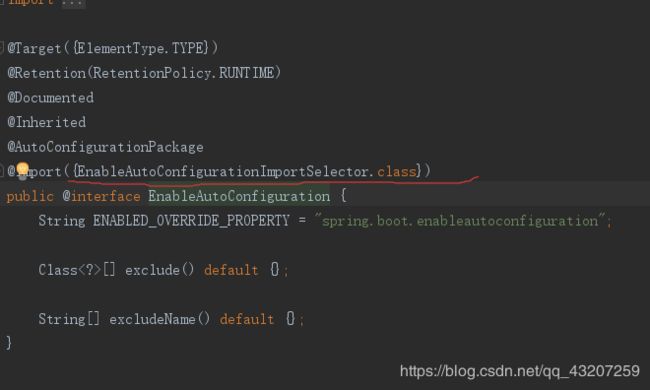
-
利用EnableAutoConfigurationImportSelector给容器中导入一些组件?
-
可以查看selectImports()方法的内容;
-
List configurations = getCandidateConfigurations(annotationMetadata, attributes);获取候选的配置
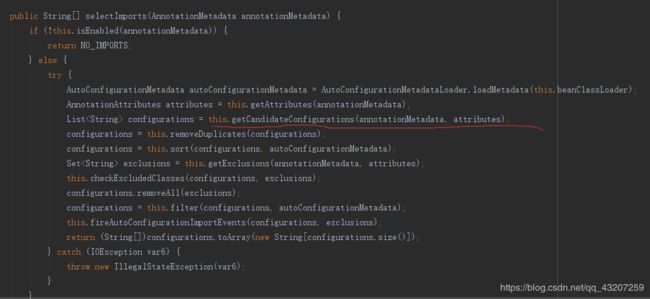
-
SpringFactoriesLoader.loadFactoryNames()
扫描所有jar包类路径下  META-INF/spring.factories
把扫描到的这些文件的内容包装成properties对象
从properties中获取到EnableAutoConfiguration.class类(类名)对应的值,然后把他们添加在容器中
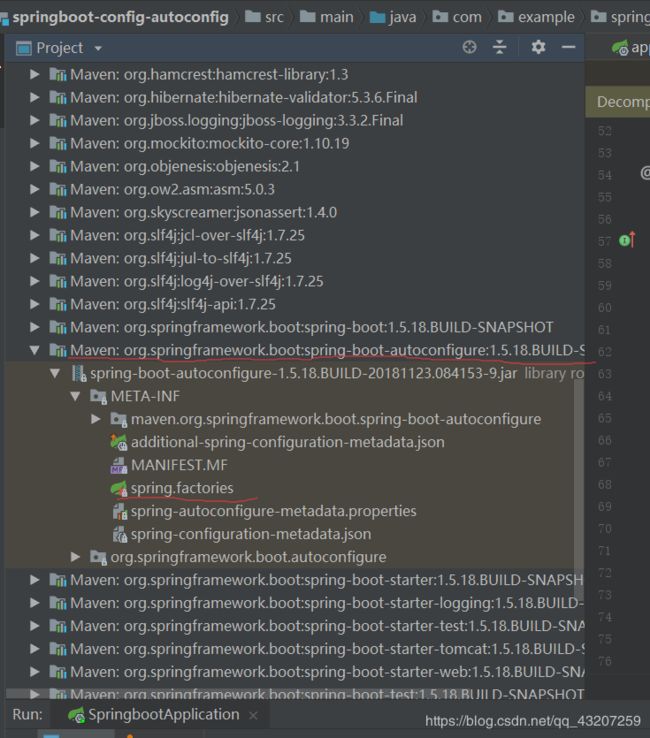
将 类路径下 META-INF/spring.factories 里面配置的所有EnableAutoConfiguration的值加入到了容器中;
# Auto Configure
org.springframework.boot.autoconfigure.EnableAutoConfiguration=\
org.springframework.boot.autoconfigure.admin.SpringApplicationAdminJmxAutoConfiguration,\
org.springframework.boot.autoconfigure.aop.AopAutoConfiguration,\
org.springframework.boot.autoconfigure.amqp.RabbitAutoConfiguration,\
org.springframework.boot.autoconfigure.batch.BatchAutoConfiguration,\
org.springframework.boot.autoconfigure.cache.CacheAutoConfiguration,\
org.springframework.boot.autoconfigure.cassandra.CassandraAutoConfiguration,\
org.springframework.boot.autoconfigure.cloud.CloudAutoConfiguration,\
org.springframework.boot.autoconfigure.context.ConfigurationPropertiesAutoConfiguration,\
org.springframework.boot.autoconfigure.context.MessageSourceAutoConfiguration,\
org.springframework.boot.autoconfigure.context.PropertyPlaceholderAutoConfiguration,\
org.springframework.boot.autoconfigure.couchbase.CouchbaseAutoConfiguration,\
org.springframework.boot.autoconfigure.dao.PersistenceExceptionTranslationAutoConfiguration,\
org.springframework.boot.autoconfigure.data.cassandra.CassandraDataAutoConfiguration,\
org.springframework.boot.autoconfigure.data.cassandra.CassandraRepositoriesAutoConfiguration,\
org.springframework.boot.autoconfigure.data.couchbase.CouchbaseDataAutoConfiguration,\
org.springframework.boot.autoconfigure.data.couchbase.CouchbaseRepositoriesAutoConfiguration,\
org.springframework.boot.autoconfigure.data.elasticsearch.ElasticsearchAutoConfiguration,\
org.springframework.boot.autoconfigure.data.elasticsearch.ElasticsearchDataAutoConfiguration,\
org.springframework.boot.autoconfigure.data.elasticsearch.ElasticsearchRepositoriesAutoConfiguration,\
org.springframework.boot.autoconfigure.data.jpa.JpaRepositoriesAutoConfiguration,\
org.springframework.boot.autoconfigure.data.ldap.LdapDataAutoConfiguration,\
org.springframework.boot.autoconfigure.data.ldap.LdapRepositoriesAutoConfiguration,\
org.springframework.boot.autoconfigure.data.mongo.MongoDataAutoConfiguration,\
org.springframework.boot.autoconfigure.data.mongo.MongoRepositoriesAutoConfiguration,\
org.springframework.boot.autoconfigure.data.neo4j.Neo4jDataAutoConfiguration,\
org.springframework.boot.autoconfigure.data.neo4j.Neo4jRepositoriesAutoConfiguration,\
org.springframework.boot.autoconfigure.data.solr.SolrRepositoriesAutoConfiguration,\
org.springframework.boot.autoconfigure.data.redis.RedisAutoConfiguration,\
org.springframework.boot.autoconfigure.data.redis.RedisRepositoriesAutoConfiguration,\
org.springframework.boot.autoconfigure.data.rest.RepositoryRestMvcAutoConfiguration,\
org.springframework.boot.autoconfigure.data.web.SpringDataWebAutoConfiguration,\
org.springframework.boot.autoconfigure.elasticsearch.jest.JestAutoConfiguration,\
org.springframework.boot.autoconfigure.freemarker.FreeMarkerAutoConfiguration,\
org.springframework.boot.autoconfigure.gson.GsonAutoConfiguration,\
org.springframework.boot.autoconfigure.h2.H2ConsoleAutoConfiguration,\
org.springframework.boot.autoconfigure.hateoas.HypermediaAutoConfiguration,\
org.springframework.boot.autoconfigure.hazelcast.HazelcastAutoConfiguration,\
org.springframework.boot.autoconfigure.hazelcast.HazelcastJpaDependencyAutoConfiguration,\
org.springframework.boot.autoconfigure.info.ProjectInfoAutoConfiguration,\
org.springframework.boot.autoconfigure.integration.IntegrationAutoConfiguration,\
org.springframework.boot.autoconfigure.jackson.JacksonAutoConfiguration,\
org.springframework.boot.autoconfigure.jdbc.DataSourceAutoConfiguration,\
org.springframework.boot.autoconfigure.jdbc.JdbcTemplateAutoConfiguration,\
org.springframework.boot.autoconfigure.jdbc.JndiDataSourceAutoConfiguration,\
org.springframework.boot.autoconfigure.jdbc.XADataSourceAutoConfiguration,\
org.springframework.boot.autoconfigure.jdbc.DataSourceTransactionManagerAutoConfiguration,\
org.springframework.boot.autoconfigure.jms.JmsAutoConfiguration,\
org.springframework.boot.autoconfigure.jmx.JmxAutoConfiguration,\
org.springframework.boot.autoconfigure.jms.JndiConnectionFactoryAutoConfiguration,\
org.springframework.boot.autoconfigure.jms.activemq.ActiveMQAutoConfiguration,\
org.springframework.boot.autoconfigure.jms.artemis.ArtemisAutoConfiguration,\
org.springframework.boot.autoconfigure.flyway.FlywayAutoConfiguration,\
org.springframework.boot.autoconfigure.groovy.template.GroovyTemplateAutoConfiguration,\
org.springframework.boot.autoconfigure.jersey.JerseyAutoConfiguration,\
org.springframework.boot.autoconfigure.jooq.JooqAutoConfiguration,\
org.springframework.boot.autoconfigure.kafka.KafkaAutoConfiguration,\
org.springframework.boot.autoconfigure.ldap.embedded.EmbeddedLdapAutoConfiguration,\
org.springframework.boot.autoconfigure.ldap.LdapAutoConfiguration,\
org.springframework.boot.autoconfigure.liquibase.LiquibaseAutoConfiguration,\
org.springframework.boot.autoconfigure.mail.MailSenderAutoConfiguration,\
org.springframework.boot.autoconfigure.mail.MailSenderValidatorAutoConfiguration,\
org.springframework.boot.autoconfigure.mobile.DeviceResolverAutoConfiguration,\
org.springframework.boot.autoconfigure.mobile.DeviceDelegatingViewResolverAutoConfiguration,\
org.springframework.boot.autoconfigure.mobile.SitePreferenceAutoConfiguration,\
org.springframework.boot.autoconfigure.mongo.embedded.EmbeddedMongoAutoConfiguration,\
org.springframework.boot.autoconfigure.mongo.MongoAutoConfiguration,\
org.springframework.boot.autoconfigure.mustache.MustacheAutoConfiguration,\
org.springframework.boot.autoconfigure.orm.jpa.HibernateJpaAutoConfiguration,\
org.springframework.boot.autoconfigure.reactor.ReactorAutoConfiguration,\
org.springframework.boot.autoconfigure.security.SecurityAutoConfiguration,\
org.springframework.boot.autoconfigure.security.SecurityFilterAutoConfiguration,\
org.springframework.boot.autoconfigure.security.FallbackWebSecurityAutoConfiguration,\
org.springframework.boot.autoconfigure.security.oauth2.OAuth2AutoConfiguration,\
org.springframework.boot.autoconfigure.sendgrid.SendGridAutoConfiguration,\
org.springframework.boot.autoconfigure.session.SessionAutoConfiguration,\
org.springframework.boot.autoconfigure.social.SocialWebAutoConfiguration,\
org.springframework.boot.autoconfigure.social.FacebookAutoConfiguration,\
org.springframework.boot.autoconfigure.social.LinkedInAutoConfiguration,\
org.springframework.boot.autoconfigure.social.TwitterAutoConfiguration,\
org.springframework.boot.autoconfigure.solr.SolrAutoConfiguration,\
org.springframework.boot.autoconfigure.thymeleaf.ThymeleafAutoConfiguration,\
org.springframework.boot.autoconfigure.transaction.TransactionAutoConfiguration,\
org.springframework.boot.autoconfigure.transaction.jta.JtaAutoConfiguration,\
org.springframework.boot.autoconfigure.validation.ValidationAutoConfiguration,\
org.springframework.boot.autoconfigure.web.DispatcherServletAutoConfiguration,\
org.springframework.boot.autoconfigure.web.EmbeddedServletContainerAutoConfiguration,\
org.springframework.boot.autoconfigure.web.ErrorMvcAutoConfiguration,\
org.springframework.boot.autoconfigure.web.HttpEncodingAutoConfiguration,\
org.springframework.boot.autoconfigure.web.HttpMessageConvertersAutoConfiguration,\
org.springframework.boot.autoconfigure.web.MultipartAutoConfiguration,\
org.springframework.boot.autoconfigure.web.ServerPropertiesAutoConfiguration,\
org.springframework.boot.autoconfigure.web.WebClientAutoConfiguration,\
org.springframework.boot.autoconfigure.web.WebMvcAutoConfiguration,\
org.springframework.boot.autoconfigure.websocket.WebSocketAutoConfiguration,\
org.springframework.boot.autoconfigure.websocket.WebSocketMessagingAutoConfiguration,\
org.springframework.boot.autoconfigure.webservices.WebServicesAutoConfiguration
每一个这样的 xxxAutoConfiguration类都是容器中的一个组件,都加入到容器中;用他们来做自动配置;
3)、每一个自动配置类进行自动配置功能;
4)、以**HttpEncodingAutoConfiguration(Http编码自动配置)**为例解释自动配置原理;
@Configuration   //表示这是一个配置类,以前编写的配置文件一样,也可以给容器中添加组件
@EnableConfigurationProperties(HttpEncodingProperties.class)  //启动指定类的ConfigurationProperties功能;将配置文件中对应的值和HttpEncodingProperties绑定起来;并把HttpEncodingProperties加入到ioc容器中

@ConditionalOnWebApplication //Spring底层@Conditional注解(Spring注解版),根据不同的条件,如果满足指定的条件,整个配置类里面的配置就会生效;    判断当前应用是否是web应用,如果是,当前配置类生效

@ConditionalOnClass(CharacterEncodingFilter.class)  //判断当前项目有没有这个类CharacterEncodingFilter;SpringMVC中进行乱码解决的过滤器;

@ConditionalOnProperty(prefix = "spring.http.encoding", value = "enabled", matchIfMissing = true)  //判断配置文件中是否存在某个配置  spring.http.encoding.enabled;如果不存在,判断也是成立的
//即使我们配置文件中不配置pring.http.encoding.enabled=true,也是默认生效的;
public class HttpEncodingAutoConfiguration {

  	//他已经和SpringBoot的配置文件映射了
  	private final HttpEncodingProperties properties;

   //只有一个有参构造器的情况下,参数的值就会从容器中拿
  	public HttpEncodingAutoConfiguration(HttpEncodingProperties properties) {
		this.properties = properties;
	}

    @Bean   //给容器中添加一个组件,这个组件的某些值需要从properties中获取
	@ConditionalOnMissingBean(CharacterEncodingFilter.class) //判断容器没有这个组件?
	public CharacterEncodingFilter characterEncodingFilter() {
		CharacterEncodingFilter filter = new OrderedCharacterEncodingFilter();
		filter.setEncoding(this.properties.getCharset().name());
		filter.setForceRequestEncoding(this.properties.shouldForce(Type.REQUEST));
		filter.setForceResponseEncoding(this.properties.shouldForce(Type.RESPONSE));
		return filter;
	}
根据当前不同的条件判断,决定这个配置类是否生效?
一但这个配置类生效;这个配置类就会给容器中添加各种组件;这些组件的属性是从对应的properties类中获取的,这些类里面的每一个属性又是和配置文件绑定的;
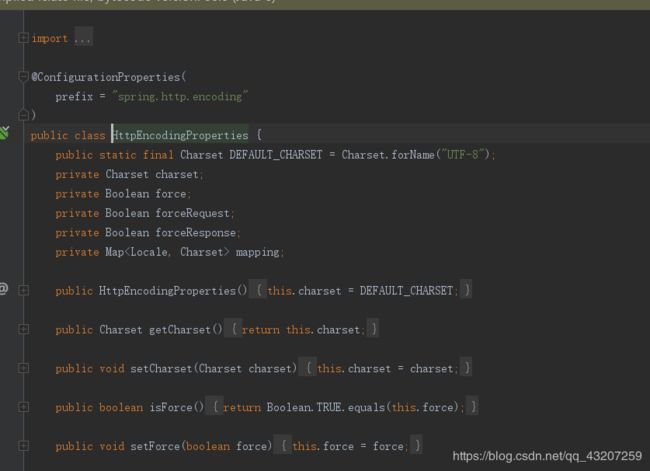
5)、所有在配置文件中能配置的属性都是在xxxxProperties类中封装者‘;配置文件能配置什么就可以参照某个功能对应的这个属性类
@ConfigurationProperties(prefix = "spring.http.encoding")  //从配置文件中获取指定的值和bean的属性进行绑定
public class HttpEncodingProperties {

   public static final Charset DEFAULT_CHARSET = Charset.forName("UTF-8");
精髓:
1)、SpringBoot启动会加载大量的自动配置类
2)、我们看我们需要的功能有没有SpringBoot默认写好的自动配置类;
3)、我们再来看这个自动配置类中到底配置了哪些组件;(只要我们要用的组件有,我们就不需要再来配置了)
4)、给容器中自动配置类添加组件的时候,会从properties类中获取某些属性。我们就可以在配置文件中指定这些属性的值;
xxxxAutoConfigurartion:自动配置类;
给容器中添加组件
xxxxProperties:封装配置文件中相关属性;
8.2、细节
1、@Conditional派生注解(Spring注解版原生的@Conditional作用)
作用:必须是@Conditional指定的条件成立,才给容器中添加组件,配置配里面的所有内容才生效;
| @Conditional扩展注解 | 作用(判断是否满足当前指定条件) |
|---|---|
| @ConditionalOnJava | 系统的java版本是否符合要求 |
| @ConditionalOnBean | 容器中存在指定Bean; |
| @ConditionalOnMissingBean | 容器中不存在指定Bean; |
| @ConditionalOnExpression | 满足SpEL表达式指定 |
| @ConditionalOnClass | 系统中有指定的类 |
| @ConditionalOnMissingClass | 系统中没有指定的类 |
| @ConditionalOnSingleCandidate | 容器中只有一个指定的Bean,或者这个Bean是首选Bean |
| @ConditionalOnProperty | 系统中指定的属性是否有指定的值 |
| @ConditionalOnResource | 类路径下是否存在指定资源文件 |
| @ConditionalOnWebApplication | 当前是web环境 |
| @ConditionalOnNotWebApplication | 当前不是web环境 |
| @ConditionalOnJndi | JNDI存在指定项 |
自动配置类必须在一定的条件下才能生效;
我们怎么知道哪些自动配置类生效;
我们可以通过启用 debug=true属性;来让控制台打印自动配置报告,这样我们就可以很方便的知道哪些自动配置类生效;
=========================
AUTO-CONFIGURATION REPORT
=========================


Positive matches:(自动配置类启用的)
-----------------

   DispatcherServletAutoConfiguration matched:
      - @ConditionalOnClass found required class 'org.springframework.web.servlet.DispatcherServlet'; @ConditionalOnMissingClass did not find unwanted class (OnClassCondition)
      - @ConditionalOnWebApplication (required) found StandardServletEnvironment (OnWebApplicationCondition)


Negative matches:(没有启动,没有匹配成功的自动配置类)
-----------------

   ActiveMQAutoConfiguration:
      Did not match:
         - @ConditionalOnClass did not find required classes 'javax.jms.ConnectionFactory', 'org.apache.activemq.ActiveMQConnectionFactory' (OnClassCondition)

   AopAutoConfiguration:
      Did not match:
         - @ConditionalOnClass did not find required classes 'org.aspectj.lang.annotation.Aspect', 'org.aspectj.lang.reflect.Advice' (OnClassCondition)
三、日志
3.1、日志框架
小张;开发一个大型系统;
	1、System.out.println("");将关键数据打印在控制台;去掉?写在一个文件?

	2、框架来记录系统的一些运行时信息;日志框架 ;  zhanglogging.jar;

	3、高大上的几个功能?异步模式?自动归档?xxxx?  zhanglogging-good.jar?

	4、将以前框架卸下来?换上新的框架,重新修改之前相关的API;zhanglogging-prefect.jar;

	5、JDBC---数据库驱动;

		写了一个统一的接口层;日志门面(日志的一个抽象层);logging-abstract.jar;

		给项目中导入具体的日志实现就行了;我们之前的日志框架都是实现的抽象层;
市面上的日志框架;
JUL、JCL、Jboss-logging、logback、log4j、log4j2、slf4j…
| 日志门面 (日志的抽象层) | 日志实现 |
|---|---|
| Log4j JUL(java.util.logging) Log4j2 Logback |
左边选一个门面(抽象层)、右边来选一个实现;
日志门面: SLF4J;
日志实现:Logback;
SpringBoot:底层是Spring框架,Spring框架默认是用JCL;‘
**==SpringBoot选用 SLF4j和logback;==**
3.2、SLF4j使用
3.2.1、如何在系统中使用SLF4j https://www.slf4j.org
以后开发的时候,日志记录方法的调用,不应该来直接调用日志的实现类,而是调用日志抽象层里面的方法;
给系统里面导入slf4j的jar和 logback的实现jar
import org.slf4j.Logger;
import org.slf4j.LoggerFactory;

public class HelloWorld {
  public static void main(String[] args) {
    Logger logger = LoggerFactory.getLogger(HelloWorld.class);
    logger.info("Hello World");
  }
}
图示;
每一个日志的实现框架都有自己的配置文件。使用slf4j以后,配置文件还是做成日志实现框架自己本身的配置文件;
3.2.2、遗留问题
a(slf4j+logback): Spring(commons-logging)、Hibernate(jboss-logging)、MyBatis、xxxx
统一日志记录,即使是别的框架和我一起统一使用slf4j进行输出?
如何让系统中所有的日志都统一到slf4j;
1、将系统中其他日志框架先排除出去;
2、用中间包来替换原有的日志框架;
3、我们导入slf4j其他的实现
3.3、SpringBoot日志关系
		<dependency>
			<groupId>org.springframework.bootgroupId>
			<artifactId>spring-boot-starterartifactId>
		dependency>
SpringBoot使用它来做日志功能;
	<dependency>
			<groupId>org.springframework.bootgroupId>
			<artifactId>spring-boot-starter-loggingartifactId>
		dependency>
底层依赖关系
总结:
1)、SpringBoot底层也是使用slf4j+logback的方式进行日志记录

2)、SpringBoot也把其他的日志都替换成了slf4j;

3)、中间替换包?
@SuppressWarnings("rawtypes")
public abstract class LogFactory {

    static String UNSUPPORTED_OPERATION_IN_JCL_OVER_SLF4J = "http://www.slf4j.org/codes.html#unsupported_operation_in_jcl_over_slf4j";

    static LogFactory logFactory = new SLF4JLogFactory();
4)、如果我们要引入其他框架?一定要把这个框架的默认日志依赖移除掉?

		Spring框架用的是commons-logging;
		<dependency>
			<groupId>org.springframeworkgroupId>
			<artifactId>spring-coreartifactId>
			<exclusions>
				<exclusion>
					<groupId>commons-logginggroupId>
					<artifactId>commons-loggingartifactId>
				exclusion>
			exclusions>
		dependency>
SpringBoot能自动适配所有的日志,而且底层使用slf4j+logback的方式记录日志,引入其他框架的时候,只需要把这个框架依赖的日志框架排除掉即可;
3.4、日志使用;
3.4.1、默认配置
SpringBoot默认帮我们配置好了日志;
	//记录器
	Logger logger = LoggerFactory.getLogger(getClass());
	@Test
	public void contextLoads() {
		//System.out.println();

		//日志的级别;
		//由低到高   trace
		//可以调整输出的日志级别;日志就只会在这个级别以以后的高级别生效
		logger.trace("这是trace日志...");
		logger.debug("这是debug日志...");
		//SpringBoot默认给我们使用的是info级别的,没有指定级别的就用SpringBoot默认规定的级别;root级别
		logger.info("这是info日志...");
		logger.warn("这是warn日志...");
		logger.error("这是error日志...");


	}
    日志输出格式:
		%d表示日期时间,
		%thread表示线程名,
		%-5level:级别从左显示5个字符宽度
		%logger{50} 表示logger名字最长50个字符,否则按照句点分割。
		%msg:日志消息,
		%n是换行符
    -->
    %d{yyyy-MM-dd HH:mm:ss.SSS} [%thread] %-5level %logger{50} - %msg%n
SpringBoot修改日志的默认配置
logging.level.com.atguigu=trace


#logging.path=
# 不指定路径在当前项目下生成springboot.log日志
# 可以指定完整的路径;
#logging.file=G:/springboot.log

# 在当前磁盘的根路径下创建spring文件夹和里面的log文件夹;使用 spring.log 作为默认文件
logging.path=/spring/log

#  在控制台输出的日志的格式
logging.pattern.console=%d{yyyy-MM-dd} [%thread] %-5level %logger{50} - %msg%n
# 指定文件中日志输出的格式
logging.pattern.file=%d{yyyy-MM-dd} === [%thread] === %-5level === %logger{50} ==== %msg%n
| logging.file | logging.path | Example | Description |
|---|---|---|---|
| (none) | (none) | 只在控制台输出 | |
| 指定文件名 | (none) | my.log | 输出日志到my.log文件 |
| (none) | 指定目录 | /var/log | 输出到指定目录的 spring.log 文件中 |
3.4.2、指定配置
给类路径下放上每个日志框架自己的配置文件即可;SpringBoot就不使用他默认配置的了
| Logging System | Customization |
|---|---|
| Logback | logback-spring.xml, logback-spring.groovy, logback.xml or logback.groovy |
| Log4j2 | log4j2-spring.xml or log4j2.xml |
| JDK (Java Util Logging) | logging.properties |
logback.xml:直接就被日志框架识别了;
logback-spring.xml:日志框架就不直接加载日志的配置项,由SpringBoot解析日志配置,可以使用SpringBoot的高级Profile功能
<springProfile name="staging">

  	可以指定某段配置只在某个环境下生效
springProfile>
如:
<appender name="stdout" class="ch.qos.logback.core.ConsoleAppender">

        <layout class="ch.qos.logback.classic.PatternLayout">
            <springProfile name="dev">
                <pattern>%d{yyyy-MM-dd HH:mm:ss.SSS} ----> [%thread] ---> %-5level %logger{50} - %msg%npattern>
            springProfile>
            <springProfile name="!dev">
                <pattern>%d{yyyy-MM-dd HH:mm:ss.SSS} ==== [%thread] ==== %-5level %logger{50} - %msg%npattern>
            springProfile>
        layout>
    appender>
如果使用logback.xml作为日志配置文件,还要使用profile功能,会有以下错误
no applicable action for [springProfile]
3.5、切换日志框架
可以按照slf4j的日志适配图,进行相关的切换;
slf4j+log4j的方式;
<dependency>
  <groupId>org.springframework.bootgroupId>
  <artifactId>spring-boot-starter-webartifactId>
  <exclusions>
    <exclusion>
      <artifactId>logback-classicartifactId>
      <groupId>ch.qos.logbackgroupId>
    exclusion>
    <exclusion>
      <artifactId>log4j-over-slf4jartifactId>
      <groupId>org.slf4jgroupId>
    exclusion>
  exclusions>
dependency>

<dependency>
  <groupId>org.slf4jgroupId>
  <artifactId>slf4j-log4j12artifactId>
dependency>
切换为log4j2
   <dependency>
            <groupId>org.springframework.bootgroupId>
            <artifactId>spring-boot-starter-webartifactId>
            <exclusions>
                <exclusion>
                    <artifactId>spring-boot-starter-loggingartifactId>
                    <groupId>org.springframework.bootgroupId>
                exclusion>
            exclusions>
        dependency>

<dependency>
  <groupId>org.springframework.bootgroupId>
  <artifactId>spring-boot-starter-log4j2artifactId>
dependency>
四、Web开发
4.1、简介
使用SpringBoot;
1)、创建SpringBoot应用,选中我们需要的模块;
2)、SpringBoot已经默认将这些场景配置好了,只需要在配置文件中指定少量配置就可以运行起来
3)、自己编写业务代码;
自动配置原理?
这个场景SpringBoot帮我们配置了什么?能不能修改?能修改哪些配置?能不能扩展?xxx
xxxxAutoConfiguration:帮我们给容器中自动配置组件;
xxxxProperties:配置类来封装配置文件的内容;
4.2、SpringBoot对静态资源的映射规则;
@ConfigurationProperties(prefix = "spring.resources", ignoreUnknownFields = false)
public class ResourceProperties implements ResourceLoaderAware {
  //可以设置和静态资源有关的参数,缓存时间等
	WebMvcAuotConfiguration:
		@Override
		public void addResourceHandlers(ResourceHandlerRegistry registry) {
			if (!this.resourceProperties.isAddMappings()) {
				logger.debug("Default resource handling disabled");
				return;
			}
			Integer cachePeriod = this.resourceProperties.getCachePeriod();
			if (!registry.hasMappingForPattern("/webjars/**")) {
				customizeResourceHandlerRegistration(
						registry.addResourceHandler("/webjars/**")
								.addResourceLocations(
										"classpath:/META-INF/resources/webjars/")
						.setCachePeriod(cachePeriod));
			}
			String staticPathPattern = this.mvcProperties.getStaticPathPattern();
          	//静态资源文件夹映射
			if (!registry.hasMappingForPattern(staticPathPattern)) {
				customizeResourceHandlerRegistration(
						registry.addResourceHandler(staticPathPattern)
								.addResourceLocations(
										this.resourceProperties.getStaticLocations())
						.setCachePeriod(cachePeriod));
			}
		}

        //配置欢迎页映射
		@Bean
		public WelcomePageHandlerMapping welcomePageHandlerMapping(
				ResourceProperties resourceProperties) {
			return new WelcomePageHandlerMapping(resourceProperties.getWelcomePage(),
					this.mvcProperties.getStaticPathPattern());
		}

       //配置喜欢的图标
		@Configuration
		@ConditionalOnProperty(value = "spring.mvc.favicon.enabled", matchIfMissing = true)
		public static class FaviconConfiguration {

			private final ResourceProperties resourceProperties;

			public FaviconConfiguration(ResourceProperties resourceProperties) {
				this.resourceProperties = resourceProperties;
			}

			@Bean
			public SimpleUrlHandlerMapping faviconHandlerMapping() {
				SimpleUrlHandlerMapping mapping = new SimpleUrlHandlerMapping();
				mapping.setOrder(Ordered.HIGHEST_PRECEDENCE + 1);
              	//所有  **/favicon.ico
				mapping.setUrlMap(Collections.singletonMap("**/favicon.ico",
						faviconRequestHandler()));
				return mapping;
			}

			@Bean
			public ResourceHttpRequestHandler faviconRequestHandler() {
				ResourceHttpRequestHandler requestHandler = new ResourceHttpRequestHandler();
				requestHandler
						.setLocations(this.resourceProperties.getFaviconLocations());
				return requestHandler;
			}

		}
1)、所有 /webjars/** ,都去 classpath:/META-INF/resources/webjars/ 找资源;
webjars:以jar包的方式引入静态资源;
http://www.webjars.org/
localhost:8080/webjars/jquery/3.3.1/jquery.js
在访问的时候只需要写webjars下面资源的名称即可
		<dependency>
			<groupId>org.webjarsgroupId>
			<artifactId>jqueryartifactId>
			<version>3.3.1version>
		dependency>
2)、"/**" 访问当前项目的任何资源,都去(静态资源的文件夹)找映射
"classpath:/META-INF/resources/",
"classpath:/resources/",
"classpath:/static/",
"classpath:/public/"
"/":当前项目的根路径
localhost:8080/abc === 去静态资源文件夹里面找abc
3)、欢迎页; 静态资源文件夹下的所有index.html页面;被"/**"映射;
localhost:8080/ 找index页面
4)、所有的 **/favicon.ico 都是在静态资源文件下找;
4.3、模板引擎
JSP、Velocity、Freemarker、Thymeleaf
SpringBoot推荐的Thymeleaf;
语法更简单,功能更强大;
4.3.1、引入thymeleaf;
		<dependency>
			<groupId>org.springframework.bootgroupId>
			<artifactId>spring-boot-starter-thymeleafartifactId>
          	2.1.6
		dependency>
切换thymeleaf版本
<properties>
		<thymeleaf.version>3.0.9.RELEASEthymeleaf.version>


		<thymeleaf-layout-dialect.version>2.2.2thymeleaf-layout-dialect.version>
  properties>
4.3.2、Thymeleaf使用
@ConfigurationProperties(prefix = "spring.thymeleaf")
public class ThymeleafProperties {

	private static final Charset DEFAULT_ENCODING = Charset.forName("UTF-8");

	private static final MimeType DEFAULT_CONTENT_TYPE = MimeType.valueOf("text/html");

	public static final String DEFAULT_PREFIX = "classpath:/templates/";

	public static final String DEFAULT_SUFFIX = ".html";
  	//
只要我们把HTML页面放在classpath:/templates/,thymeleaf就能自动渲染;
使用:
1、导入thymeleaf的名称空间
<html lang="en" xmlns:th="http://www.thymeleaf.org">
2、使用thymeleaf语法;
<html lang="en" xmlns:th="http://www.thymeleaf.org">
<head>
    <meta charset="UTF-8">
    <title>Titletitle>
head>
<body>
    <h1>成功!h1>

    <div th:text="${hello}">这是显示欢迎信息div>
body>
html>
4.3.3、语法规则
1)、th:text;改变当前元素里面的文本内容;
th:任意html属性;来替换原生属性的值
2)、表达式?
Simple expressions:(表达式语法)
    Variable Expressions: ${...}:获取变量值;OGNL;
    		1)、获取对象的属性、调用方法
    		2)、使用内置的基本对象:
    			#ctx : the context object.
    			#vars: the context variables.
                #locale : the context locale.
                #request : (only in Web Contexts) the HttpServletRequest object.
                #response : (only in Web Contexts) the HttpServletResponse object.
                #session : (only in Web Contexts) the HttpSession object.
                #servletContext : (only in Web Contexts) the ServletContext object.

                ${session.foo}
            3)、内置的一些工具对象:
#execInfo : information about the template being processed.
#messages : methods for obtaining externalized messages inside variables expressions, in the same way as they would be obtained using #{…} syntax.
#uris : methods for escaping parts of URLs/URIs
#conversions : methods for executing the configured conversion service (if any).
#dates : methods for java.util.Date objects: formatting, component extraction, etc.
#calendars : analogous to #dates , but for java.util.Calendar objects.
#numbers : methods for formatting numeric objects.
#strings : methods for String objects: contains, startsWith, prepending/appending, etc.
#objects : methods for objects in general.
#bools : methods for boolean evaluation.
#arrays : methods for arrays.
#lists : methods for lists.
#sets : methods for sets.
#maps : methods for maps.
#aggregates : methods for creating aggregates on arrays or collections.
#ids : methods for dealing with id attributes that might be repeated (for example, as a result of an iteration).

    Selection Variable Expressions: *{...}:选择表达式:和${}在功能上是一样;
    	补充:配合 th:object="${session.user}:

    Name: Sebastian.
    Surname: Pepper.
    Nationality: Saturn.


    Message Expressions: #{...}:获取国际化内容
    Link URL Expressions: @{...}:定义URL;
    		@{/order/process(execId=${execId},execType='FAST')}
    Fragment Expressions: ~{...}:片段引用表达式
    		...

Literals(字面量)
      Text literals: 'one text' , 'Another one!' ,…
      Number literals: 0 , 34 , 3.0 , 12.3 ,…
      Boolean literals: true , false
      Null literal: null
      Literal tokens: one , sometext , main ,…
Text operations:(文本操作)
    String concatenation: +
    Literal substitutions: |The name is ${name}|
Arithmetic operations:(数学运算)
    Binary operators: + , - , * , / , %
    Minus sign (unary operator): -
Boolean operations:(布尔运算)
    Binary operators: and , or
    Boolean negation (unary operator): ! , not
Comparisons and equality:(比较运算)
    Comparators: > , < , >= , <= ( gt , lt , ge , le )
    Equality operators: == , != ( eq , ne )
Conditional operators:条件运算(三元运算符)
    If-then: (if) ? (then)
    If-then-else: (if) ? (then) : (else)
    Default: (value) ?: (defaultvalue)
Special tokens:
    No-Operation: _
4.4、SpringMVC自动配置
https://docs.spring.io/spring-boot/docs/1.5.10.RELEASE/reference/htmlsingle/#boot-features-developing-web-applications
4.4.1. Spring MVC auto-configuration
Spring Boot 自动配置好了SpringMVC
以下是SpringBoot对SpringMVC的默认配置:(WebMvcAutoConfiguration)
-
Inclusion of
ContentNegotiatingViewResolverandBeanNameViewResolverbeans.- 自动配置了ViewResolver(视图解析器:根据方法的返回值得到视图对象(View),视图对象决定如何渲染(转发?重定向?))
- ContentNegotiatingViewResolver:组合所有的视图解析器的;
- 如何定制:我们可以自己给容器中添加一个视图解析器;自动的将其组合进来;
-
Support for serving static resources, including support for WebJars (see below).静态资源文件夹路径,webjars
-
Static
index.htmlsupport. 静态首页访问 -
Custom
Faviconsupport (see below). favicon.ico
-
自动注册了 of
Converter,GenericConverter,Formatterbeans.- Converter:转换器; public String hello(User user):类型转换使用Converter
Formatter格式化器; 2017.12.17===Date;
		@Bean
		@ConditionalOnProperty(prefix = "spring.mvc", name = "date-format")//在文件中配置日期格式化的规则
		public Formatter<Date> dateFormatter() {
			return new DateFormatter(this.mvcProperties.getDateFormat());//日期格式化组件
		}
==自己添加的格式化器转换器,我们只需要放在容器中即可==
-
Support for
HttpMessageConverters(see below).-
HttpMessageConverter:SpringMVC用来转换Http请求和响应的;User—Json;
-
HttpMessageConverters是从容器中确定;获取所有的HttpMessageConverter;自己给容器中添加HttpMessageConverter,只需要将自己的组件注册容器中(@Bean,@Component)
-
-
Automatic registration of
MessageCodesResolver(see below).定义错误代码生成规则 -
Automatic use of a
ConfigurableWebBindingInitializerbean (see below).我们可以配置一个ConfigurableWebBindingInitializer来替换默认的;(添加到容器)
初始化WebDataBinder;
请求数据=====JavaBean;
org.springframework.boot.autoconfigure.web:web的所有自动场景;
If you want to keep Spring Boot MVC features, and you just want to add additional MVC configuration (interceptors, formatters, view controllers etc.) you can add your own @Configuration class of type WebMvcConfigurerAdapter, but without @EnableWebMvc. If you wish to provide custom instances of RequestMappingHandlerMapping, RequestMappingHandlerAdapter or ExceptionHandlerExceptionResolver you can declare a WebMvcRegistrationsAdapter instance providing such components.
If you want to take complete control of Spring MVC, you can add your own @Configuration annotated with @EnableWebMvc.
4.4.2、扩展SpringMVC
    <mvc:view-controller path="/hello" view-name="success"/>
    <mvc:interceptors>
        <mvc:interceptor>
            <mvc:mapping path="/hello"/>
            <bean>bean>
        mvc:interceptor>
    mvc:interceptors>
编写一个配置类(@Configuration),是WebMvcConfigurerAdapter类型;不能标注@EnableWebMvc;
既保留了所有的自动配置,也能用我们扩展的配置;
//使用WebMvcConfigurerAdapter可以来扩展SpringMVC的功能
@Configuration
public class MyMvcConfig extends WebMvcConfigurerAdapter {

    @Override
    public void addViewControllers(ViewControllerRegistry registry) {
       // super.addViewControllers(registry);
        //浏览器发送 /atguigu 请求来到 success
        registry.addViewController("/atguigu").setViewName("success");
    }
}
原理:
1)、WebMvcAutoConfiguration是SpringMVC的自动配置类
2)、在做其他自动配置时会导入;@Import(EnableWebMvcConfiguration.class)
    @Configuration
	public static class EnableWebMvcConfiguration extends DelegatingWebMvcConfiguration {
      private final WebMvcConfigurerComposite configurers = new WebMvcConfigurerComposite();

	 //从容器中获取所有的WebMvcConfigurer
      @Autowired(required = false)
      public void setConfigurers(List<WebMvcConfigurer> configurers) {
          if (!CollectionUtils.isEmpty(configurers)) {
              this.configurers.addWebMvcConfigurers(configurers);
            	//一个参考实现;将所有的WebMvcConfigurer相关配置都来一起调用;
            	@Override
             // public void addViewControllers(ViewControllerRegistry registry) {
              //    for (WebMvcConfigurer delegate : this.delegates) {
               //       delegate.addViewControllers(registry);
               //   }
              }
          }
	}
3)、容器中所有的WebMvcConfigurer都会一起起作用;

4)、我们的配置类也会被调用;

效果:SpringMVC的自动配置和我们的扩展配置都会起作用;
4.4.3、全面接管SpringMVC;
SpringBoot对SpringMVC的自动配置不需要了,所有都是我们自己配置;所有的SpringMVC的自动配置都失效了
我们需要在配置类中添加@EnableWebMvc即可;
//使用WebMvcConfigurerAdapter可以来扩展SpringMVC的功能
@EnableWebMvc
@Configuration
public class MyMvcConfig extends WebMvcConfigurerAdapter {

    @Override
    public void addViewControllers(ViewControllerRegistry registry) {
       // super.addViewControllers(registry);
        //浏览器发送 /atguigu 请求来到 success
        registry.addViewController("/atguigu").setViewName("success");
    }
}
原理:
为什么@EnableWebMvc自动配置就失效了;
1)@EnableWebMvc的核心
@Import(DelegatingWebMvcConfiguration.class)
public @interface EnableWebMvc {
2)、
@Configuration
public class DelegatingWebMvcConfiguration extends WebMvcConfigurationSupport {
3)、
@Configuration
@ConditionalOnWebApplication
@ConditionalOnClass({ Servlet.class, DispatcherServlet.class,
		WebMvcConfigurerAdapter.class })
//容器中没有这个组件的时候,这个自动配置类才生效
@ConditionalOnMissingBean(WebMvcConfigurationSupport.class)
@AutoConfigureOrder(Ordered.HIGHEST_PRECEDENCE + 10)
@AutoConfigureAfter({ DispatcherServletAutoConfiguration.class,
		ValidationAutoConfiguration.class })
public class WebMvcAutoConfiguration {
4)、@EnableWebMvc将WebMvcConfigurationSupport组件导入进来;
5)、导入的WebMvcConfigurationSupport只是SpringMVC最基本的功能;
4.5、如何修改SpringBoot的默认配置
模式:
1)、SpringBoot在自动配置很多组件的时候,先看容器中有没有用户自己配置的(@Bean、@Component)如果有就用用户配置的,如果没有,才自动配置;如果有些组件可以有多个(ViewResolver)将用户配置的和自己默认的组合起来;

2)、在SpringBoot中会有非常多的xxxConfigurer帮助我们进行扩展配置

3)、在SpringBoot中会有很多的xxxCustomizer帮助我们进行定制配置
4.6 整合mybatis框架
1.首先创建SpringBoot项目
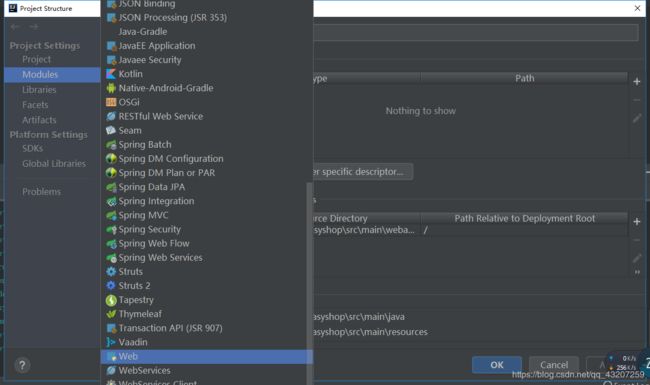
2.配置web环境
3.导入相关依赖
<project xmlns="http://maven.apache.org/POM/4.0.0" xmlns:xsi="http://www.w3.org/2001/XMLSchema-instance"
         xsi:schemaLocation="http://maven.apache.org/POM/4.0.0 http://maven.apache.org/xsd/maven-4.0.0.xsd">
    <modelVersion>4.0.0modelVersion>

    <groupId>com.easyshopgroupId>
    <artifactId>easyshopartifactId>
    <version>0.0.1-SNAPSHOTversion>
    <packaging>warpackaging>

    <name>easyshopname>
    <description>Demo project for Spring Bootdescription>

    <parent>
        <groupId>org.springframework.bootgroupId>
        <artifactId>spring-boot-starter-parentartifactId>
        <version>2.1.0.RELEASEversion>
        <relativePath/>
    parent>

    <properties>
        <project.build.sourceEncoding>UTF-8project.build.sourceEncoding>
        <project.reporting.outputEncoding>UTF-8project.reporting.outputEncoding>
        <java.version>1.8java.version>
    properties>
    <dependencies>

        <dependency>
            <groupId>org.springframework.bootgroupId>
            <artifactId>spring-boot-starter-webartifactId>
        dependency>

        <dependency>
            <groupId>org.springframework.bootgroupId>
            <artifactId>spring-boot-starter-tomcatartifactId>
            <scope>providedscope>
        dependency>
        <dependency>
            <groupId>org.springframework.bootgroupId>
            <artifactId>spring-boot-starter-testartifactId>
            <scope>testscope>
        dependency>

        <dependency>
            <groupId>org.springframeworkgroupId>
            <artifactId>spring-jdbcartifactId>
        dependency>

        <dependency>
            <groupId>org.springframeworkgroupId>
            <artifactId>spring-aspectsartifactId>
        dependency>

        <dependency>
            <groupId>org.springframework.bootgroupId>
            <artifactId>spring-boot-starter-jdbcartifactId>
        dependency>

        <dependency>
            <groupId>com.alibabagroupId>
            <artifactId>druidartifactId>
            <version>1.1.10version>
        dependency>

        <dependency>
            <groupId>com.baomidougroupId>
            <artifactId>mybatis-plus-boot-starterartifactId>
            <version>2.3.3version>
        dependency>


        <dependency>
            <groupId>jstlgroupId>
            <artifactId>jstlartifactId>
            <version>1.2version>
        dependency>

        <dependency>
            <groupId>mysqlgroupId>
            <artifactId>mysql-connector-javaartifactId>
            <version>5.1.38version>
        dependency>


        <dependency>
            <groupId>commons-logginggroupId>
            <artifactId>commons-loggingartifactId>
            <version>1.2version>
        dependency>

        <dependency>
            <groupId>cglibgroupId>
            <artifactId>cglib-nodepartifactId>
            <version>2.1_3version>
        dependency>


        <dependency>
            <groupId>org.apache.tomcat.embedgroupId>
            <artifactId>tomcat-embed-jasperartifactId>
            <scope>providedscope>
        dependency>

    dependencies>

    <build>
        <plugins>
            <plugin>
                <groupId>org.springframework.bootgroupId>
                <artifactId>spring-boot-maven-pluginartifactId>
            plugin>
        plugins>
    build>


project>
4.配置数据源
user=root
password=as501226107A.
driver=com.mysql.jdbc.Driver
url=jdbc:mysql://127.0.0.1:3306/didadb?useUnicode=true&characterEncoding=utf-8
配置数据源配置类
package com.dragon.config;

import com.alibaba.druid.pool.DruidDataSource;
import org.springframework.beans.factory.annotation.Value;
import org.springframework.boot.SpringBootConfiguration;
import org.springframework.context.annotation.Bean;
import org.springframework.context.annotation.PropertySource;

@SpringBootConfiguration
@PropertySource(value = {"jdbc.properties"})
public class DatasourceConfig {
    @Value("${user}")
    private String username;
    @Value("${driver}")
    private String driverClass;
    @Value("${url}")
    private String url;
    @Value("${password}")
    private String pass;
    @Bean
    public DruidDataSource dataSource(){
        DruidDataSource ds=new DruidDataSource();
        ds.setDriverClassName(driverClass);
        ds.setUrl(url);
        ds.setUsername(username);
        ds.setPassword(pass);
        return ds;
    }
}
5.配置application.properties
server.port=80
#配置mybatis类别名
mybatis-plus.type-aliases-package=com.dragon.bean
#配置mybatismapper路径
mybatis-plus.mapper-locations=classpath:/com/dragon/mapper/*.xml
6.配置Mapper接口扫描
在SpringBoot启动类上加上@MapperScan注解,并指明mapper的路径

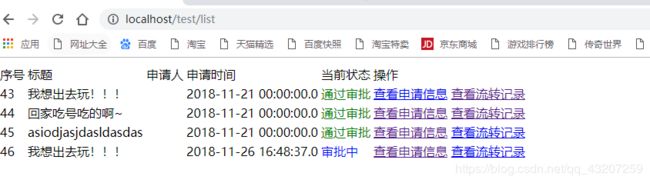
7.项目结构
@Controller
@RequestMapping("/test")
public class Test {
    @Autowired
    ApplyService as;
    @RequestMapping("/list")
    public String list(Model model){
        List<Apply> applies = as.selectList(null);
        model.addAttribute("applies",applies);
        return "/index.jsp";
    }
}


public interface ApplyService extends IService<Apply> {

}

@Service
public class ApplyServiceImpl extends ServiceImpl<ApplyMapper, Apply> implements ApplyService {

}


public interface ApplyMapper extends BaseMapper<Apply> {

}
ApplyMapper.xml
<mapper namespace="com.dragon.mapper.ApplyMapper">


    <resultMap id="BaseResultMap" type="com.dragon.bean.Apply">
        <id column="id" property="id" />
        <result column="startdate" property="startdate" />
        <result column="enddate" property="enddate" />
        <result column="days" property="days" />
        <result column="type" property="type" />
        <result column="excute_id" property="excuteId" />
        <result column="apply_id" property="applyId" />
        <result column="status" property="status" />
        <result column="remark" property="remark" />
        <result column="applydate" property="applydate" />
    resultMap>


    <sql id="Base_Column_List">
        id, startdate, enddate, days, type, excute_id, apply_id, status, remark, applydate
    sql>

mapper>
8.测试结果