面向深度学习的图像数据增强综述A survey on Image Data Augmentation for Deep Learning
论文笔记:A survey on Image Data Augmentation for Deep Learning
摘要:
深度学习在计算机视觉任务许多方面都表现得非常好。然而,这些网络严重依赖大数据以避免过度传输,不幸的是,许多应用领域无法访问大数据,如医学图像分析。这项调查的重点是数据扩充,一种解决有限数据问题的数据空间解决方案。数据增强这一技术,可以提高训练数据集的大小和质量,从而可以使用它们构建更好的深度学习模型。这篇论文讨论的图像增强算法包括几何变换、颜色空间增强、核函数、混合图像、随机删除、特征空间增强、对抗训练、生成对抗网络、神经风格转换和元学习等。并且介绍了基于gans的增强方法的应用。除了增广技术外,本文还将简要讨论数据增广的其他特性,如测试时间增广、分辨率影响等。
图像数据增强技术
*Data Augmentations based on basic image manipulations
-
Geometric transformations 几何变换
-
Flipping 翻转
-
Color space 色彩空间
-
Cropping 裁剪
-
Rotation 旋转
-
Translation 平移
-
Noise injection 噪声
-
Color space transformations 色彩空间转换
Geometric transformations 几何变换
图像的几何变换又称为图像空间变换,它将一幅图像中的坐标位置映射到另一幅图像中的新生位置。几何变换不改变图像的像素值,只是在图像平面上进行像素的重新安排。一个几何变换需要两部分运算,首先是空间变换所需的运算,如平移、镜像、缩放、旋转、仿射等,需要用它来表示输出图像和输入图像之间的像素映射关系;此外,还需要灰度差值算法,因为这种变换关系进行计算出的输出图像的像素很可能被映射到非整数坐标上。
Flipping 翻转
对于图像而言,水平翻转比垂直翻转更常见。
Color space 色彩空间
数字图像数据通常被编码为一个维度的张量(height×width×color channels)。在颜色通道空间中执行增强,这是非常常见的数据增强方法。非常简单的图像增强包括隔离单色通道,如R、G或B,或者是对其直方图进行改变。(用的比较多)
方法:调节亮度,对比度,饱和度,直方图均衡化,白平衡,clahe等Cropping 裁剪
改变图片center的大小。(对于商品识别,识别目标多的图片用的少)
Rotation 旋转
图像可以被旋转0-360°,顺时针,逆时针都可以,轻微旋转在1°-20°和-1°到-20°,注意,如果是有标签的数据,xml要跟着进行旋转。
Translation 平移
向左、向右、向上或向下移动图像可以是非常有用的转换,以避免数据中的位置偏移。
Noise injection 噪声
图片增加噪声提高模型的鲁棒性,常见的有高斯模糊,椒盐噪声,均值滤波等。
Color space transformations 色彩空间转换
将图像在rgb,hsv,lab等色彩空间之间相互转换。对于某些任务,颜色是非常重要的特征。
import tensorlayer as tl
image = tl.vis.read_image(r"2.jpg")

#缩放,缩小0.8倍
xx = tl.prepro.zoom(image, zoom_range=0.8)
#axis=1,水平翻转,axis=0,垂直翻转
xx = tl.prepro.flip_axis(image, axis=1, is_random=False)
# 调整亮度 gamma小于1,变亮,越小越亮
xx =tl.prepro.brightness(image, gamma=1.2, is_random=False)
#裁剪
xx=tl.prepro.crop(image, 400,400, is_random=False, row_index=0, col_index=1)
#调整亮度,饱和度,对比度
 xx=tl.prepro.illumination(image, gamma=0.7, contrast=1.0 , saturation=1, is_random=False)
#随机调整亮度,饱和度,对比度
xx = tl.prepro.illumination(image, gamma=(0.5, 5.0), contrast=(0.3, 1.0), saturation=(0.7, 1.0), is_random=True)
#平移
xx = tl.prepro.shift(xx, wrg=-0.1, hrg=0, is_random=False)
#噪声
xx=tl.prepro.drop(image, keep=0.5)
#色彩空间转化rgb->hsv
xx=tl.prepro.rgb_to_hsv(image)

tl.vis.save_image(xx, r"img_result.jpg")
#对图像文件夹里的图像随机高斯模糊
import cv2,os
import random
def blur_img(imgName):
    ori_img = cv2.imread(imgName)
    size= random.choice((9,11,13,17))#高斯核
    kernel_size = (size, size)
    image = cv2.GaussianBlur(ori_img, ksize=kernel_size, sigmaX=0, sigmaY=0)
    cv2.imwrite(imgName, image)
def random_blur(fileDir):
    pathDir = os.listdir(fileDir)
    filenumber = len(pathDir)
    rate = 0.7 # 自定义抽取图片的比例
    picknumber = int(filenumber * rate)
    sample = random.sample(pathDir, picknumber)
    count=0
    for name in sample:
        namepath=os.path.join(fileDir,name)
        blur_img(namepath)
        count+=1
        print(name+":"+str(count)+"/"+str(picknumber))
*Geometric versus photometric transformations
-
Kernel flters 滤波器
-
Mixing images 混合图像
-
Random erasing 随机擦除
Kernel flters 滤波器
核滤波是图像处理中一种非常流行的图像锐化和模糊处理技术。tese flter的工作原理是使用高斯模糊flter在图像上滑动n×n矩阵,这将导致图像更模糊,或者使用高对比度垂直或水平边缘filter,这将导致沿边缘的图像更清晰。直观地说,在测试过程中,为数据增强而模糊图像可能导致更高的运动模糊阻力。此外,锐化图像以增强数据可能会显示出有关感兴趣对象的更多细节。
Mixing images 混合图像
Random erasing 随机擦除
Random Erasing(也可以被视为add noise的一种)。该方法被证明在多个CNN架构和不同领域中可以提升模型的性能和应对遮挡的鲁棒性,并且与随机裁剪、随机水平翻转(还有正则化方法)具有一定的互补性,综合应用他们,可以取得更好的模型表现,尤其是对噪声和遮挡具有更好的鲁棒性。
该方法可以很容易嵌入到现今大部分CNN模型中用于训练具有更好泛化性能的模型。
import cv2 as cv
import numpy as np
#模糊
def blur_demo(image):
  dst = cv2.blur(image, (15, 1))
  cv2.imshow("blur_demo", dst)
#锐化
def sharpen_demo(image):
  kernel = np.array([[0, -1, 0], [-1, 5, -1], [0, -1, 0]], np.float32)
  dst = cv.filter2D(image, -1, kernel=kernel)
  cv.imshow("custom_blur_demo", dst)
src = cv2.imread("3.jpg")
cv2.namedWindow("input image", cv.WINDOW_AUTOSIZE)
cv2.imshow("input image", src)
blur_demo(src)
cv2.waitKey(0)
cv2.destroyAllWindows()
#图像融合
import cv2
import numpy as np
import PIL.Image as Image
# 统一图像大小
im= cv2.imread(r"1.jpg")
obj= cv2.imread(r"2.jpg")
w=int(im.shape[0])
h=int(im.shape[1])
obj=cv2.resize(obj,(h,w),interpolation=cv2.INTER_CUBIC)
# 生成全白的mask
mask = 255 * np.ones(obj.shape, obj.dtype)
width, height, channels = im.shape
center = (height//2, width//2)
# cv2.NORMAL_CLONE代表融合的模式,可以比较 cv2.NORMAL_CLONE和cv2.MIXED_CLONE的差别
normal_clone = cv2.seamlessClone(obj, im, mask, center, cv2.NORMAL_CLONE)
mixed_clone = cv2.seamlessClone(obj, im, mask, center, cv2.MIXED_CLONE)
# Write results
cv2.imwrite(r"C:\Users\An\Desktop\imgtest\2normal-clone.jpg", normal_clone)
cv2.imwrite(r"C:\Users\An\Desktop\imgtest\2mixed-clone.jpg", mixed_clone)
#图像随机擦除
def transfrom(img,probability=1,sl=0.01, sh=0.03, r1=0.2, mean=(255,255,255)):
    if random.uniform(0, 1) > probability:
        return img
    area = img.shape[0] * img.shape[1]
    #面积
    target_area = random.uniform(sl, sh) * area
    #长宽比
    aspect_ratio = random.uniform(0.1,r1)
    h = int(round(math.sqrt(target_area * aspect_ratio)))
    w = int(round(math.sqrt(target_area /aspect_ratio)))
    if w < img.shape[1] and h < img.shape[0]:
        x1 = random.randint(0, img.shape[0] - h)
        y1 = random.randint(0, img.shape[1] - w)
        if img.shape[2] == 3:
            for i in range(x1,x1 + h):
                for j in range(y1,y1+w):
                    img[i,j,:]=mean

    return img
相关文献:
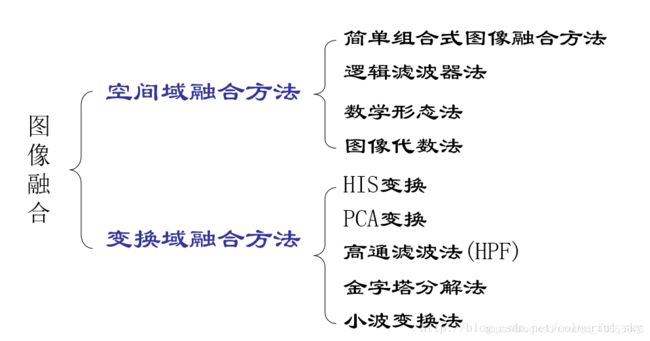
1.图像融合:
https://blog.csdn.net/colourful_sky/article/details/76560316
2.论文地址:https://www.researchgate.net/publication/334279066_A_survey_on_Image_Data_Augmentation_for_Deep_Learning
3.tensorlayer使用文档:
https://tensorlayercn.readthedocs.io/zh/latest/modules/prepro.html
4.随机擦除论文地址:
https://arxiv.org/pdf/1708.04896v2.pdf

