Nginx + Lua 搭建网站WAF防火墙
Nginx + Lua 搭建网站WAF防火墙
- 一、目的
- 二、前期环境准备
- (一)、更新下yum源
- (二)、编译安装Nginx
- (三)、端口放行
- (四)、验证安装
- (五)、lua编译安装
- 三、Nginx+Lua搭建WAF防火墙
- (一)、php环境配置
- (二)、克隆代码并将其移动到nginx/waf目录下
- (三)、进行必要配置
- (四)、验证
- 四、总结
一、目的
利用centos -7 和Nginx + Lua 搭建网站WAF防火墙可以防御SQL、XSS等攻击。
二、前期环境准备
(一)、更新下yum源
这边使用的是centos-7的系统,这边采用清华源
[root@wr ~]# mv /etc/yum.repos.d/CentOS-Base.repo /etc/yum.repos.d/CentOS-Base.repo.bak
[root@wr ~]# vi /etc/yum.repos.d/CentOS-Base.repo.repo

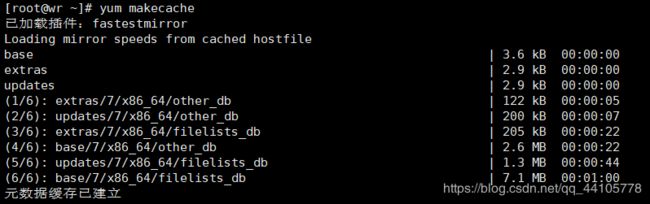
更新软件包缓存
[root@wr ~]# yum makecache
(二)、编译安装Nginx
先编译安装一下,后面说lua模块的时候再重新编译下就行了
下载相应的包:curl -o nginx.tar.gz http://nginx.org/download/nginx-1.16.0.tar.gz
解压:tar -zxvf nginx.tar.gz
进入到nginx-1.16.0目录(nginx 压缩目录),进行编译参数的配置
cd nginx-1.16.0
然后编译参数命令
./configure --prefix=/etc/nginx --sbin-path=/usr/sbin/nginx --modules-path=/usr/lib64/nginx/modules --conf-path=/etc/nginx/nginx.conf --error-log-path=/var/log/nginx/error.log --http-log-path=/var/log/nginx/access.log --pid-path=/var/run/nginx.pid --lock-path=/var/run/nginx.lock --http-client-body-temp-path=/var/cache/nginx/client_temp --http-proxy-temp-path=/var/cache/nginx/proxy_temp --http-fastcgi-temp-path=/var/cache/nginx/fastcgi_temp --http-uwsgi-temp-path=/var/cache/nginx/uwsgi_temp --http-scgi-temp-path=/var/cache/nginx/scgi_temp --user=nginx --group=nginx --with-compat --with-file-aio --with-threads --with-http_addition_module --with-http_auth_request_module --with-http_dav_module --with-http_flv_module --with-http_gunzip_module --with-http_gzip_static_module --with-http_mp4_module --with-http_random_index_module --with-http_realip_module --with-http_secure_link_module --with-http_slice_module --with-http_ssl_module --with-http_stub_status_module --with-http_sub_module --with-http_v2_module --with-mail --with-mail_ssl_module --with-stream --with-stream_realip_module --with-stream_ssl_module --with-stream_ssl_preread_module --with-cc-opt='-O2 -g -pipe -Wall -Wp,-D_FORTIFY_SOURCE=2 -fexceptions -fstack-protector-strong --param=ssp-buffer-size=4 -grecord-gcc-switches -m64 -mtune=generic -fPIC' --with-ld-opt='-Wl,-z,relro -Wl,-z,now -pie'
可以使用nginx -V来查看编译参数
最后进编译安装
make && make install
(三)、端口放行
因为我们要通过http访问,所以要方向80端口
开发80端口
[root@wr ~]# firewall-cmd --zone=public --add-port=80/tcp --permanent
使得新建的规则生效
[root@wr ~]# firewall-cmd --reload

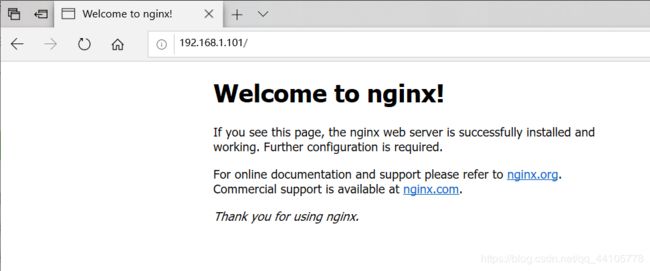
(四)、验证安装
设置开机启动nginx
[root@wr ~]# systemctl enable nginx
启动nginx
[root@wr ~]# systemctl start nginx
查看nginx是否启动
[root@wr ~]# ps -aux |grep nginx

在另一台机器上验证,成功安装
(五)、lua编译安装
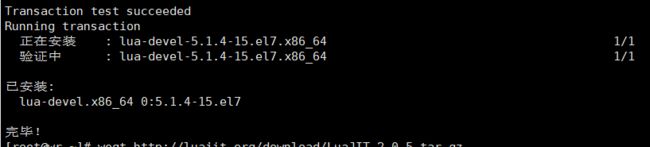
1、安装Lua库
[root@wr ~]# yum install lua lua-devel -y
2、安装下载Lua即使编辑器、
[root@wr ~]# wget http://luajit.org/download/LuaJIT-2.0.5.tar.gz
3、下载Nginx模块:ngx_devel_kit and lua-nginx-module
[root@wr ~]# wget https://github.com/simplresty/ngx_devel_kit/archive/v0.3.1.tar.gz
[root@wr ~]# wget https://github.com/openresty/lua-nginx-module/archive/v0.10.15.tar.gz

4、编译安装luajit并导入环境变量
解压
[root@wr ~]# tar -zxf v0.3.1.tar.gz
[root@wr ~]# tar -zxf v0.10.15.tar.gz
[root@wr ~]# tar -zxf LuaJIT-2.0.5.tar.gz

编译安装
[root@wr ~]# cd LuaJIT-2.0.5
[root@wr LuaJIT-2.0.5]# make install RREFTX=/usr/local/LuaJIT

发现报错,确实gcc命令,安装该命令,然后再次编译安装


导入环境变量
export LUAJIT_LIB=/usr/local/LuaJIT/lib
export LUAJIT_INC=/usr/local/LuaJIT/include/luajit-2.0

加载lua库到ld.so.conf文件
[root@wr ~]# echo "/usr/local/LuaJIT/lib" >> /etc/ld.so.conf
![]()
查看是否加载成功
[root@wr ~]# cat /etc/ld.so.conf

然后在nginx-1.60目录下执行一下命令,让动态函数加载到缓存中
[root@wr nginx-1.16.0]# ldconfig
5、配置nginx编译参数及重新编译安装nginx
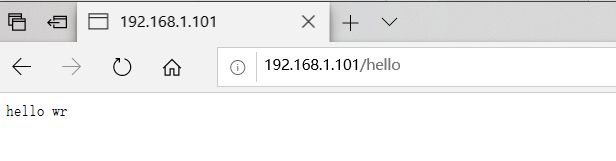
6、验证lua是否可以使用
在nginx.config的server节点下添加:
vi /etc/nginx/nginx.conf

然后使得配置命令生效
检查配置
nginx -t -c /etc/nginx/nginx.conf
配置生效
nginx -s reload -c /etc/nginx/nginx.conf
开始验证,如果出现404错误,重启centos即可解决问题
三、Nginx+Lua搭建WAF防火墙
这边使用开源的ngx_lua_waf来进行搭建
(一)、php环境配置
参考链接
安装php-fpm
yum install php-fpm
在nginx.conf的配置。只需要把loaction /php 里的注释符号去掉即可
还有一个问题就是fastCGI参数SCRIPT_FILENAME 是写死的。如果修改了root指令的值或者移动文件到别的目录,php-fpm会返回“No input file specified”错误,因为SCRIPT_FILENAME在配置中是写死的并没有随着$doucument_root变化而变化,我们可以修改SCRIPT_FILENAME配置如下:fastcgi_param SCRIPT_FILENAME $document_root$fastcgi_script_name;
在根目录下面。创建一个文件名为index.php文件,内容为
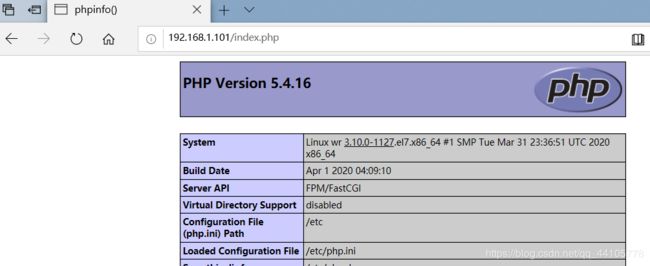
(二)、克隆代码并将其移动到nginx/waf目录下
[root@wr nginx-1.16.0]# git clone https://github.com/loveshell/ngx_lua_waf
[root@wr ngx_lua_waf]# mkdir /etc/nginx/waf
[root@wr ngx_lua_waf]# mv * /etc/nginx/waf/
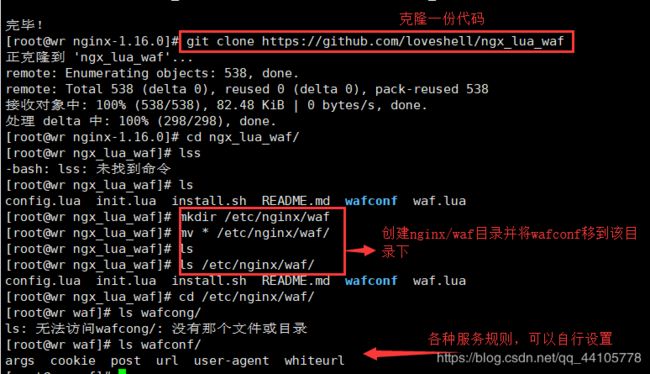
参数说明:
1、args里面的规则get参数进行过滤的
2、url是只在get请求url过滤的规则
3、post是只在post请求过滤的规则
4、whitelist是白名单,里面的url匹配到不做过滤
5、user-agent是对user-agent的过滤规则
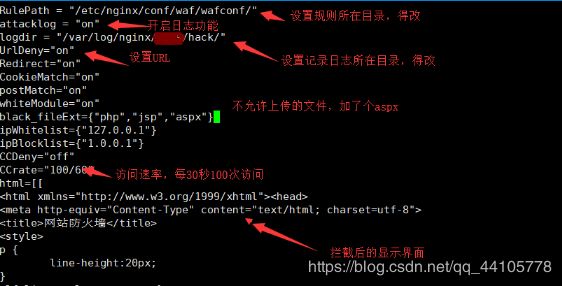
(三)、进行必要配置
[root@wr waf]# vi config.lua
如果有个目录不存在可以自己使用mkdir命令创建.,这边白名单加一个服务器本机的IP,然后规则存放目录应该是/etc/nginx/waf/wafconf。下图有误。
在nginx.config的http下添加如下内容
vi /etc/nginx/nginx.conf
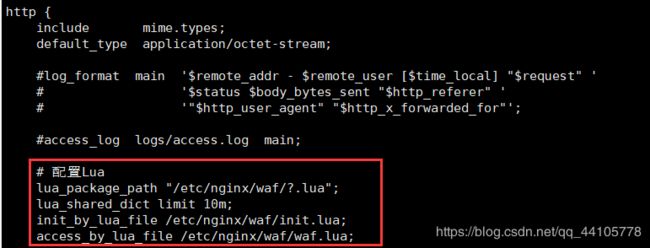
lua_package_path "/etc/nginx/waf/?.lua";
lua_shared_dict limit 10m;
init_by_lua_file /etc/nginx/waf/init.lua;
access_by_lua_file /etc/nginx/waf/waf.lua;
(四)、验证
添加一个在args中sql规则\sor\s+,然后
重启服务
[root@wr waf]# nginx -s reload -c /etc/nginx/nginx.conf
在根目录下创建一个名为test.php文档,内容为
xss防御
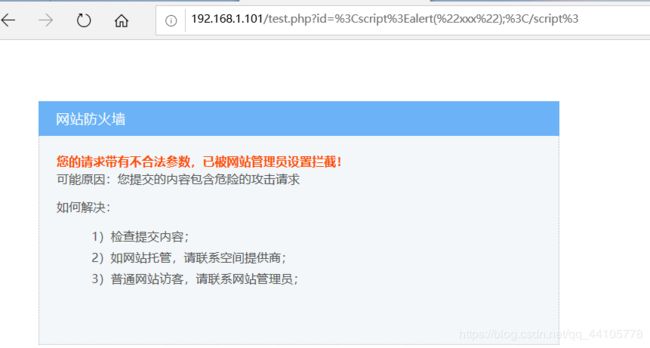
sql防御

四、总结
在centos 7系统下配置Nginx+lua基本上都需要编译安装和配置,会比较繁琐一下,不过在线安装容易出错。在配置防火墙规则的时候注意白名单和规则目录的配置,没配置好的话。很难找出问题。特别是白名单。