出识springcloud我们这里需要建立两个项目 来感受下微服务
一、配置服务
1. Spring Initializr. 用idea自带的 Spring Initializr. 建立第一个项目

2.加入依赖
xml version="1.0" encoding="UTF-8"?>
<project xmlns="http://maven.apache.org/POM/4.0.0" xmlns:xsi="http://www.w3.org/2001/XMLSchema-instance"
   xsi:schemaLocation="http://maven.apache.org/POM/4.0.0 https://maven.apache.org/xsd/maven-4.0.0.xsd">
   <modelVersion>4.0.0modelVersion>
   <parent>
      <groupId>org.springframework.bootgroupId>
      <artifactId>spring-boot-starter-parentartifactId>
      <version>2.3.1.RELEASEversion>
      <relativePath/>
   parent>
   <groupId>com.examplegroupId>
   <artifactId>demoartifactId>
   <version>0.0.1-SNAPSHOTversion>
   <name>demoname>
   <description>Demo project for Spring Bootdescription>

   <properties>
      <java.version>1.8java.version>
      <spring-cloud.version>Hoxton.SR5spring-cloud.version>
   properties>

   <dependencies>
      <dependency>
         <groupId>org.springframework.cloudgroupId>
         <artifactId>spring-cloud-config-serverartifactId>
      dependency>

      <dependency>
         <groupId>org.springframework.bootgroupId>
         <artifactId>spring-boot-starter-testartifactId>
         <scope>testscope>
         <exclusions>
            <exclusion>
               <groupId>org.junit.vintagegroupId>
               <artifactId>junit-vintage-engineartifactId>
            exclusion>
         exclusions>
      dependency>
   dependencies>

   <dependencyManagement>
      <dependencies>
         <dependency>
            <groupId>org.springframework.cloudgroupId>
            <artifactId>spring-cloud-dependenciesartifactId>
            <version>${spring-cloud.version}version>
            <type>pomtype>
            <scope>importscope>
         dependency>
      dependencies>
   dependencyManagement>

   <build>
      <plugins>
         <plugin>
            <groupId>org.springframework.bootgroupId>
            <artifactId>spring-boot-maven-pluginartifactId>
         plugin>
      plugins>
   build>

project>
3.修改application.properties文件 改个端口 不然后面启动两个项目端口冲突
server.port=8888
4.在你的git仓库中提交一个文件a-bootiful-client.properties 用以感受我们的springcloud项目与Git的结合使用
message = Hello world
文件中写上这个就行 便于等下测试
5。再次修改application.properties
spring.cloud.config.server.git.uri=https://gitee.com/你的仓库地址.git
#spring.cloud.config.server.git.searchPaths=config
#
spring.cloud.config.server.git.username=你的用户名

spring.cloud.config.server.git.password=你的密码

spring.application.name=a-bootiful-client#刚才上传的文件名
6.修改DemoApplication 加上@EnableConfigServer注解
package com.example.demo;

import org.springframework.boot.SpringApplication;
import org.springframework.boot.autoconfigure.SpringBootApplication;
import org.springframework.cloud.config.server.EnableConfigServer;

@EnableConfigServer
@SpringBootApplication
public class DemoApplication {

    public static void main(String[] args) {
        SpringApplication.run(DemoApplication.class, args);
    }

}
7.这个时候我们可以来建立第二项目啦
8.pom.xml
xml version="1.0" encoding="UTF-8"?>
<project xmlns="http://maven.apache.org/POM/4.0.0" xmlns:xsi="http://www.w3.org/2001/XMLSchema-instance"
    xsi:schemaLocation="http://maven.apache.org/POM/4.0.0 https://maven.apache.org/xsd/maven-4.0.0.xsd">
    <modelVersion>4.0.0modelVersion>
    <parent>
        <groupId>org.springframework.bootgroupId>
        <artifactId>spring-boot-starter-parentartifactId>
        <version>2.3.1.RELEASEversion>
        <relativePath/>
    parent>
    <groupId>com.examplegroupId>
    <artifactId>demoartifactId>
    <version>0.0.1-SNAPSHOTversion>
    <name>demoname>
    <description>Demo project for Spring Bootdescription>

    <properties>
        <java.version>1.8java.version>
        <spring-cloud.version>Hoxton.SR5spring-cloud.version>
    properties>

    <dependencies>
        <dependency>
            <groupId>org.springframework.bootgroupId>
            <artifactId>spring-boot-starter-actuatorartifactId>
        dependency>
        <dependency>
            <groupId>org.springframework.bootgroupId>
            <artifactId>spring-boot-starter-webartifactId>
        dependency>
        <dependency>
            <groupId>org.springframework.cloudgroupId>
            <artifactId>spring-cloud-starter-configartifactId>
        dependency>

        <dependency>
            <groupId>org.springframework.bootgroupId>
            <artifactId>spring-boot-starter-testartifactId>
            <scope>testscope>
            <exclusions>
                <exclusion>
                    <groupId>org.junit.vintagegroupId>
                    <artifactId>junit-vintage-engineartifactId>
                exclusion>
            exclusions>
        dependency>
    dependencies>

    <dependencyManagement>
        <dependencies>
            <dependency>
                <groupId>org.springframework.cloudgroupId>
                <artifactId>spring-cloud-dependenciesartifactId>
                <version>${spring-cloud.version}version>
                <type>pomtype>
                <scope>importscope>
            dependency>
        dependencies>
    dependencyManagement>

    <build>
        <plugins>
            <plugin>
                <groupId>org.springframework.bootgroupId>
                <artifactId>spring-boot-maven-pluginartifactId>
            plugin>
        plugins>
    build>

project>
9.org.springframework.cloud:spring-cloud-starter-config依赖 然后在properties里配置 就能保证 在不需要重启jvm的情况下 (当然还需要别的依赖和操作请看到最后)刷新配置
这里 我写在了bootstrap.properties文件里 你也可以写在application.properties或者application.yml里
spring.application.name=a-bootiful-client
# N.B. this is the default:
spring.cloud.config.uri=http://localhost:8888
启用/refresh 修改application.properties
management.endpoints.web.exposure.include=*
10.客户端可以通过使用传统的机制(如访问所述配置服务器的任何值@ConfigurationProperties或@Value("${…}")或通过Environment)
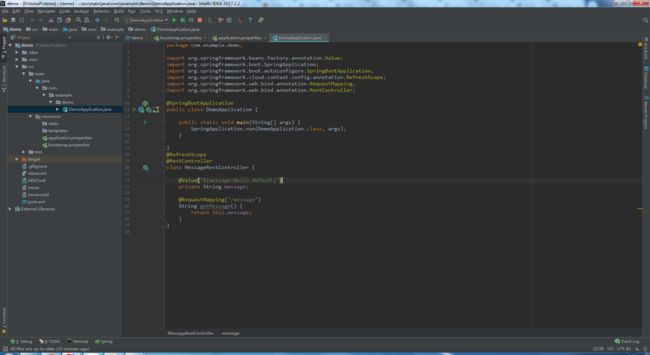
package com.example.demo;

import org.springframework.beans.factory.annotation.Value;
import org.springframework.boot.SpringApplication;
import org.springframework.boot.autoconfigure.SpringBootApplication;
import org.springframework.cloud.context.config.annotation.RefreshScope;
import org.springframework.web.bind.annotation.RequestMapping;
import org.springframework.web.bind.annotation.RestController;

@SpringBootApplication
public class DemoApplication {

    public static void main(String[] args) {
        SpringApplication.run(DemoApplication.class, args);
    }

}
@RefreshScope
@RestController
class MessageRestController {

    @Value("${message:Hello default}")
    private String message;

    @RequestMapping("/message")
    String getMessage() {
        return this.message;
    }
}
11.千辛万苦终于来到测试了
① http://localhost:8080/message 你会看见Hello world
②修改a-bootiful-client.properties(记得commit)的message 改为Hello spring 访问http://localhost:8888/a-bootiful-client/default你可以查看是否已经更改
③再点击http://localhost:8080/message这个你会发现依然是Hello world 字样what????不是说是无刷新获取的么????? 这个时候不要苦恼 继续进行第四步
④以post方式请求http://localhost:8080/actuator/refresh 然后再http://localhost:8080/message看看 是不是已经变成了Hello spring???? 那就对了
(这里是用的org.springframework.boot:spring-boot-starter-actuator 使用refresh以强制客户端刷新自身并提取新值)