配置虚链路
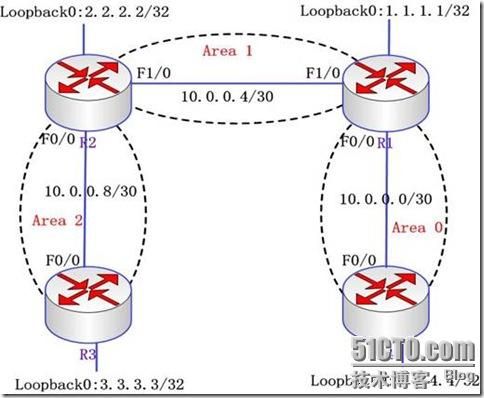
拓扑图
实现步骤
1.配置各路由器接口IP地址,配置OSPF协议,查看路由表
①配置R1
1)配置接口IP地址
R1(config)#interface e0/0
R1(config-if)#ip address 10.0.0.1 255.255.255.252
R1(config-if)#no shutdown
R1(config-if)#exit
R1(config)#interface e0/1
R1(config-if)#ip address 10.0.0.5 255.255.255.252
R1(config-if)#no shutdown
R1(config-if)#exit
R1(config)#interface loopback 0
R1(config-if)#ip address 1.1.1.1 255.255.255.255
R1(config-if)#no shutdown
R1(config-if)#exit
R1(config)#interface loopback 1
R1(config-if)#ip address 192.168.1.1 255.255.255.0
R1(config-if)#no shutdown
R1(config-if)#exit
2)配置路由
R1(config)#router ospf 1
R1(config-router)#router-id 1.1.1.1
R1(config-router)#network 10.0.0.1 0.0.0.0 area 0
R1(config-router)#network 10.0.0.5 0.0.0.0 area 1
R1(config-router)#network 1.1.1.1 0.0.0.0 area 0
R1(config-router)#network 192.168.1.0 0.0.0.255 area 0
②配置R2
1)配置接口IP地址
R2(config)#interface e0/0
R2(config-if)#ip address 10.0.0.9 255.255.255.252
R2(config-if)#no shutdown
R2(config-if)#exit
R2(config)#interface e0/1
R2(config-if)#ip address 10.0.0.6 255.255.255.252
R2(config-if)#no shutdown
R2(config-if)#exit
R2(config)#interface loopback 0
R2(config-if)#ip address 2.2.2.2 255.255.255.255
R2(config-if)#no shutdown
R2(config-if)#exit
R2(config)#interface loopback 1
R2(config-if)#ip address 192.168.2.1 255.255.255.0
R2(config-if)#no shutdown
R2(config-if)#exit
2)配置路由
R2(config)#router ospf 1
R2(config-router)#router-id 2.2.2.2
R2(config-router)#network 10.0.0.6 0.0.0.0 area 1
R2(config-router)#network 10.0.0.9 0.0.0.0 area 2
R2(config-router)#network 192.168.2.1 0.0.0.0 area 1
R2(config-router)#network 2.2.2.2 0.0.0.0 area 1
③配置R3
1)配置接口IP地址
R3(config)#interface e0/0
R3(config-if)#ip address 10.0.0.10 255.255.255.252
R3(config-if)#no shutdown
R3(config-if)#exit
R3(config)#interface loopback 0
R3(config-if)#ip address 3.3.3.3 255.255.255.255
R3(config-if)#no shutdown
R3(config-if)#exit
R3(config)#interface loopback 1
R3(config-if)#ip address 192.168.3.1 255.255.255.0
R3(config-if)#no shutdown
R3(config-if)#exit
2)配置路由
R3(config)#router ospf 1
R3(config-router)#router-id 3.3.3.3
R3(config-router)#network 10.0.0.10 0.0.0.0 area 2
R3(config-router)#network 3.3.3.3 0.0.0.0 area 2
R3(config-router)#network 192.168.3.1 0.0.0.0 area 2
④配置R4
1)配置接口IP地址
R4(config)#interface e0/0
R4(config-if)#ip address 10.0.0.2 255.255.255.252
R4(config-if)#no shutdown
R4(config-if)#exit
R4(config)#interface loopback 0
R4(config-if)#ip address 4.4.4.4 255.255.255.255
R4(config-if)#no shutdown
R4(config-if)#exit
R4(config)#interface loopback 1
R4(config-if)#ip address 192.168.4.1 255.255.255.0
R4(config-if)#no shutdown
R4(config-if)#exit
2)配置路由
R4(config)#router ospf 1
R4(config-router)#router-id 4.4.4.4
R4(config-router)#network 10.0.0.2 0.0.0.0 area 0
R4(config-router)#network 4.4.4.4 0.0.0.0 area 0
R4(config-router)#network 192.168.4.1 0.0.0.0 area 0
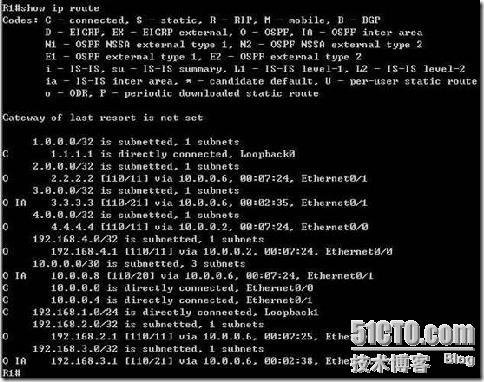
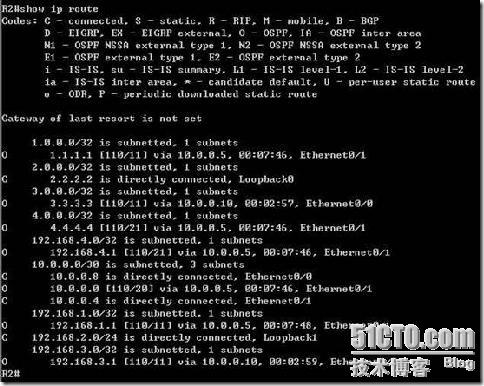
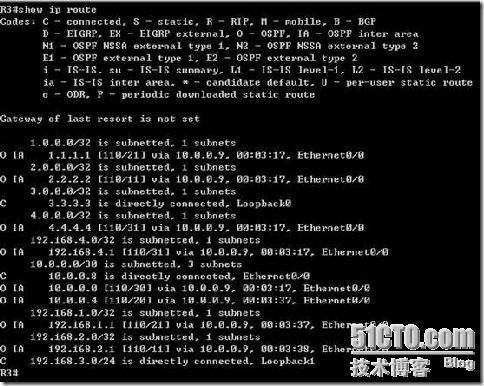
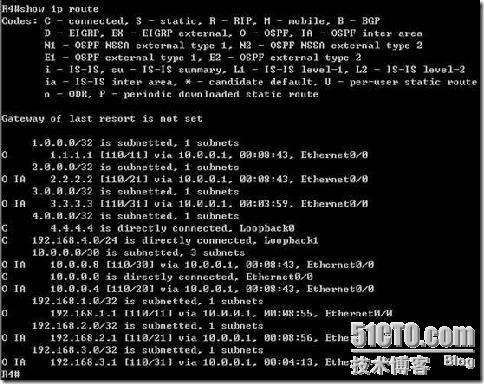
⑤查看各路由器的路由表
R1
R2
R3
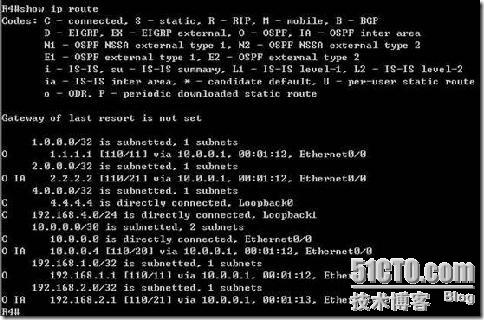
R4
⑥测试全网是否能够互通
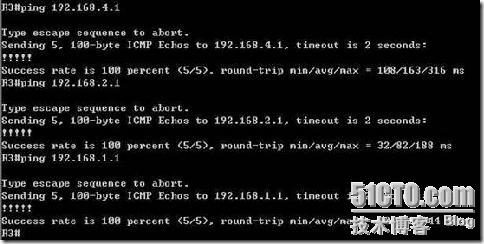
在R3上测试
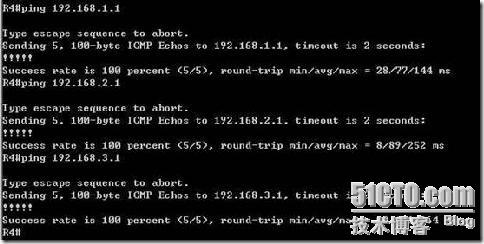
在R4上测试
可以看出Area 2不能与其他区域通信,因为未与骨干区域相连,而是与Area 1相连,为了使整个网络都能相互通信,可以配置虚链路(在Area 1的两个ABR上配置)来解决这个问题。
2.配置虚链路
①配置虚链路
在R1上配置
R1(config)#router ospf 1
R1(config-router)#area 1 virtual-link 2.2.2.2
在R2上配置
R2(config)#router ospf 1
R2(config-router)#area 1 virtual-link 1.1.1.1
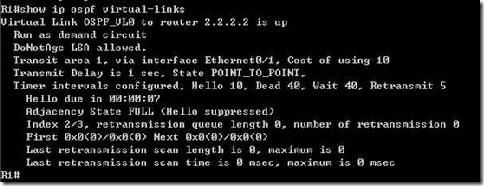
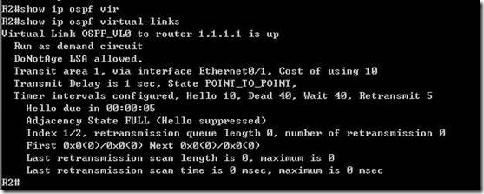
②查看虚链路状态(链路状态是否为up)
在R1上查看
在R2上查看
③查看各路由器路由表,看路由表的变化
R1
R2
R3
R4
3.测试全网通信情况
①在R3上测试
②在R4上测试
