Qt-实现截屏小工具
在实际的项目中,有时候需要我们对一些重要的信息进行截屏保存为图片的形式备用,前段时间在做项目的时候需要实现这个功能,当时是需求是按住PrintScreen键然后弹出预览对话框,最后选择保存或者打印图片。在使用MFC做的时候需要安装钩子,来捕获热键PrintScreen按下的过程,那么对于Qt不需要那么复杂,因为我们可以重写keyPressEvent(),来捕获自定义的按键来实现截屏功能。
对于本节的实现的截屏小功能是参照Qt文档进行进行实现的。
对于ScreenShoot.h如下:
#include
#include
#include
#include
#include
#include
#include
#include
#include
#include
#include
#include
#include
#include
#include
#include
#include
#include
#include
#include
#include
#include
#include
#include
#include
class ScreenShoot : public QWidget
{
    Q_OBJECT

public:
    ScreenShoot(QWidget *parent = 0);
    ~ScreenShoot();

protected:
    void resizeEvent(QResizeEvent *event);
    void keyPressEvent(QKeyEvent *event);
private slots:
      void newScreenshot();
      void saveScreenshot();
      void shootScreen();
      void updateCheckBox();
      void printerImage();
      void storeImageToPDF();
private:
    void updateScreenshotLabel();
    QPixmap originalPixmap;
    QLabel *screenshotLabel;
    QLabel *delayLabel;
    QSpinBox *delaySpinBox;
    QCheckBox *hideThisWindowCheckBox;
    QPushButton *newScreenshotButton;
    QPushButton *saveScreenshotButton;
    QPushButton *printerBtn;
    QPushButton *pdfBtn;
    QPushButton *quitButton;
};
我们分别重写resizeEvent事件和keyPressEvent,重写resizeEvent事件是为了在改变界面大小的时候screenshotLabel的大小也会随之发生变化,那么我们通过调整pixmap的大小来实现当拉伸窗口的时候pixmap的大小也随之发生变化。重写keyPressEvent是为了实现自定义截屏按钮,本例中我捕获F1键,当按下F1键的时候执行截屏功能。
同时我们需要实现对应的槽函数:
1.newScreenshot()槽函数想要新的截屏操作。
2.saveScreenshot()槽函数实现保存图片功能。
3. saveScreenshot() 槽函数实现真正的截屏功能。
4.updateCheckBox()槽函数实现hideThisWindowCheckBox的状态更新
5.printerImage()槽函数实现打印图片功能。
6.storeImageToPDF()槽函数实现将图片保存为PDF格式的文件。
ScreenShoot::ScreenShoot(QWidget *parent)
    : QWidget(parent)
{

    screenshotLabel = new QLabel(this);
    screenshotLabel->setSizePolicy(QSizePolicy::Expanding,QSizePolicy::Expanding);//设置其伸缩策略,x方向和y方向扩张
    screenshotLabel->setAlignment(Qt::AlignCenter);//位于中心位置

    const QRect screenGeometry = QApplication::desktop()->screenGeometry(this);//获取桌面的矩形大小
    screenshotLabel->setMinimumSize(screenGeometry.width()/8,screenGeometry.height()/8);//设置label最小值
    QVBoxLayout *topLayout = new QVBoxLayout();
    topLayout->addWidget(screenshotLabel);

    QGroupBox *optionsGroupBox = new QGroupBox(tr("Options"));
    delayLabel = new QLabel(tr("Screenshot Delay:"));
    delaySpinBox = new QSpinBox();
    delaySpinBox->setSuffix(tr(" s"));
    delaySpinBox->setRange(0,20);
    delaySpinBox->setValue(3);
    hideThisWindowCheckBox = new QCheckBox(tr("Hide This Window"));
    QGridLayout *midLayout = new QGridLayout();
    midLayout->addWidget(delayLabel,0,0);
    midLayout->addWidget(delaySpinBox,0,1);
    midLayout->addWidget(hideThisWindowCheckBox,1,0);
    optionsGroupBox->setLayout(midLayout);

    newScreenshotButton = new QPushButton(tr("New Screenshot"));
    saveScreenshotButton = new QPushButton(tr("Save Screenshot"));
    quitButton = new QPushButton(tr("Quit"));
    quitButton->setShortcut(Qt::CTRL + Qt::Key_Q);//创建快捷键

    printerBtn = new QPushButton(tr("Printer"));
    pdfBtn = new QPushButton(tr("PDF"));

    QHBoxLayout *bottomLayout = new QHBoxLayout();
    bottomLayout->addWidget(newScreenshotButton);
    bottomLayout->addWidget(saveScreenshotButton);
    bottomLayout->addWidget(printerBtn);
    bottomLayout->addWidget(pdfBtn);
    bottomLayout->addWidget(quitButton);

    QVBoxLayout *mainLayout = new QVBoxLayout(this);
    mainLayout->addLayout(topLayout);
    mainLayout->addWidget(optionsGroupBox);
    mainLayout->addLayout(bottomLayout);

    connect(newScreenshotButton,&QPushButton::clicked,this,&ScreenShoot::newScreenshot);
    connect(saveScreenshotButton,&QPushButton::clicked,this,&ScreenShoot::saveScreenshot);
    connect(delaySpinBox,QOverload::of(&QSpinBox::valueChanged),this,&ScreenShoot::updateCheckBox);
    connect(quitButton,&QPushButton::clicked,this,&ScreenShoot::close);
    connect(printerBtn,&QPushButton::clicked,this,&ScreenShoot::printerImage);
    connect(pdfBtn,&QPushButton::clicked,this,&ScreenShoot::storeImageToPDF);
    //shootScreen();
    setWindowTitle(tr("Screen Shot"));
    resize(300, 200);
}
void ScreenShoot::resizeEvent(QResizeEvent *event)
{
    QSize scaledSize = originalPixmap.size();
    originalPixmap.scaled(screenshotLabel->size(),Qt::KeepAspectRatio);
    if(!screenshotLabel->pixmap() || scaledSize != screenshotLabel->pixmap()->size())
        updateScreenshotLabel();
}
为了不让pixmap过大而超出label的范围,需要将pixmap和screenshotLabel的大小设置为一样大,因此我采用scaled来缩放pixmap,第二个参数为Qt::KeepAspectRatio,指的是在指定的矩形区域内尽可能的填充,但是需要保持横纵比,当label还没有设置pixmap或者他们大小不一致的时候需要更新pixmap的大小。
void ScreenShoot::newScreenshot()
{
    if(hideThisWindowCheckBox->isChecked())
        hide();
    newScreenshotButton->setDisabled(true);
    QTimer::singleShot(delaySpinBox->value()*1000,this,&ScreenShoot::shootScreen);
}
当需要再次截屏的时候我们首先需要判断hideThisWindowCheckBox是否选中,若处于选中的状态,那么就先隐藏窗口,然后实现截屏,当在截屏完成之后再显示主界面,可以看到我们直接使用了QTimer的静态函数,改函数和timeout信号是有同样的功能,但是只出发一次,因为使用它我们不需要用实现timerEvent或者创建一个QTimer对象。
void ScreenShoot::updateCheckBox()
{
    if(delaySpinBox->value() == 0)
    {
        hideThisWindowCheckBox->setDisabled(true);
        hideThisWindowCheckBox->setChecked(false);
    }
    else {
        hideThisWindowCheckBox->setDisabled(false);
    }
}
hideThisWindowCheckBox是的disable或者able取决于是否需要延迟截屏,当不需要的时候应该是的主窗口不可以隐藏并且CheckBox处于disable状态。
void ScreenShoot::shootScreen()
{
    QScreen *screen = QGuiApplication::primaryScreen();
    if(const QWindow *window = windowHandle())
        screen = window->screen();
    if(!screen)
        return;

    originalPixmap = screen->grabWindow(0);
    updateScreenshotLabel();
    if(delaySpinBox->value() != 1)
        QApplication::beep();

    newScreenshotButton->setDisabled(false);
    if(hideThisWindowCheckBox->isChecked())
        show();
}
通过primaryScreen()获得应用程序的主屏幕,windowHandle()函数获得当前活动窗口的QWindow,再获取当前活动窗口的信息。利用grabWindow()函数来截取屏幕信息,该函数给其传递一个窗口的ID从而将对应窗口的图形写到一个pixmap中并且将其返回,我们传递的参数为0,主要是为了抓取获取整个屏幕。
void Screenshot::updateScreenshotLabel()
  {
      screenshotLabel->setPixmap(originalPixmap.scaled(screenshotLabel->size(),
                                                       Qt::KeepAspectRatio,
                                                       Qt::SmoothTransformation));
  }
在任何需要改变截屏内容或者窗口大小改变的时候都需要调用改私有函数,它通过使用setpixamp函数和scaled函数来实现。
void ScreenShoot::printerImage()
{
    QPrinter printer;
    QPrintDialog printerDialog(&printer,this);

    if(printerDialog.exec())
    {
        QPainter painter(&printer);
        QRect rect = painter.viewport();
        QSize size = originalPixmap.size();

        size.scale(rect.size(),Qt::KeepAspectRatio);
        painter.setViewport(rect.x(),rect.y(),size.width(),size.height());
        painter.setWindow(originalPixmap.rect());
        painter.drawPixmap(0,0,originalPixmap);
    }
}
创建打印预览对话框,当点击确认的时候执行打印图片,首先需要一个QPrinter对象,因为我们是将图片画到printer中,因为有的时候图片的大小和我们QPianter的矩形区域不一致,因此我们就需要缩放我们的pixmap。我们获取pixmap的大小,将其大小设置为painter的矩形区域,然后我们重置painter视图矩形区域。
void ScreenShoot::storeImageToPDF()
{
    QPrinter printer(QPrinter::HighResolution);
    printer.setPageOrientation(QPageLayout::Landscape);
    printer.setPageSize(QPrinter::A4);  //设置纸张大小为A4
    printer.setOutputFormat(QPrinter::PdfFormat);  //设置输出格式为pdf
    printer.setOutputFileName("..//test_pixmap.pdf");   //设置输出路径

    QPainter painter_pixmap;
    painter_pixmap.begin(&printer);
    QRect rect = painter_pixmap.viewport();
    QSize size = originalPixmap.size();
    size.scale(rect.width(),rect.height(),Qt::KeepAspectRatio);
    painter_pixmap.setViewport(rect.x(),rect.y(),size.width(),size.height());
    painter_pixmap.setWindow(originalPixmap.rect());
    painter_pixmap.drawPixmap(0, 0, originalPixmap);  //画图
    painter_pixmap.end();
}
和打印的原理是一样的,但是不同的地方是我们需要将QPrinter的输出格式设置为pdf,接下来就是调整pixmap的大小和显示区域的大小,但是我们这里添加了printer.setPageOrientation(QPageLayout::Landscape),这是因为有的时候打印或者转换为pdf格式的文件的时候,横向打印看着不是很美观,我们就可以通过调整打印页的方向来实现自由方向的打印。
void ScreenShoot::saveScreenshot()
{
const QString format = "png";
QString initialPath = QStandardPaths::writableLocation(QStandardPaths::PicturesLocation);
if(initialPath.isEmpty())
return;
initialPath = QDir::currentPath();
initialPath += tr("/untitled.") + format;
QFileDialog fileDialog(this,tr("Save AS"),initialPath);
fileDialog.setAcceptMode(QFileDialog::AcceptSave);
fileDialog.setFileMode(QFileDialog::AnyFile);
fileDialog.setDirectory(initialPath);
QStringList mimeTypes;
foreach (const QByteArray &bf, QImageWriter::supportedMimeTypes()) {
mimeTypes.append(QLatin1String(bf));
}
fileDialog.setMimeTypeFilters(mimeTypes);
fileDialog.selectMimeTypeFilter("image/" + format);
fileDialog.setDefaultSuffix(format);
if (fileDialog.exec() != QDialog::Accepted)
return;
const QString fileName = fileDialog.selectedFiles().first();
if (!originalPixmap.save(fileName)) {
QMessageBox::warning(this, tr("Save Error"), tr("The image could not be saved to \"%1\".")
.arg(QDir::toNativeSeparators(fileName)));
}
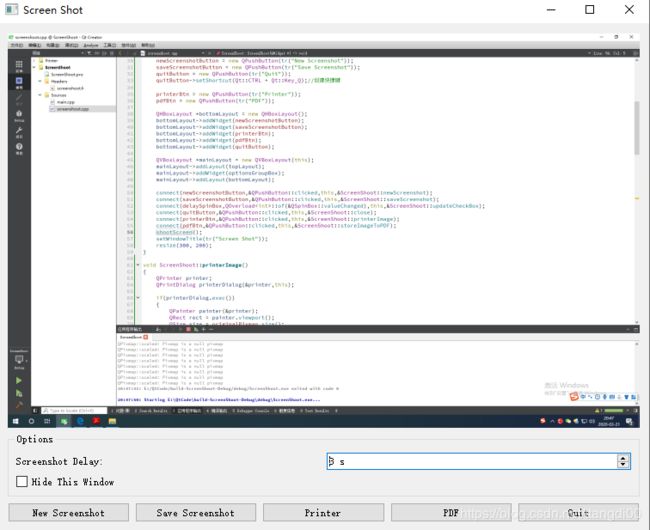
}实现的效果图如下: