记录deepin V20安装obs25.0.7的过程(obs捕获视频模拟一个照相机)
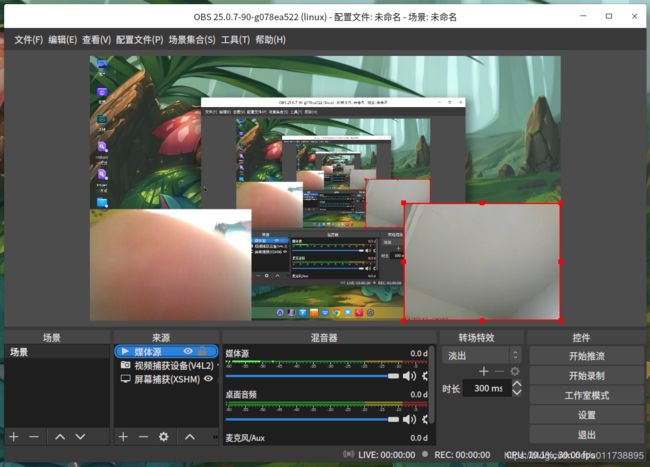
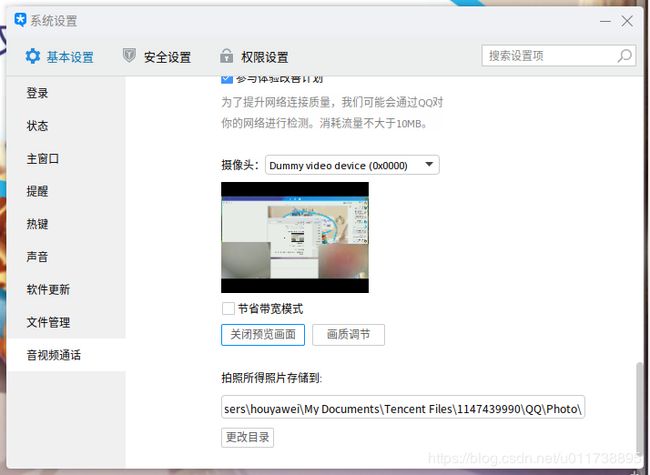
本来想要用obs模拟一个虚拟摄像头,和别人视频的时候可以显示自己的电脑屏幕以及手机摄像头,不过后来发现v4l2sink安装上去没反应,不知道是不是源里的obs有点老了,就从官网编译了一个最新版。反正挺麻烦的,就记录了一下。想实现的效果如图。
先把编译包放出来,我安装的时候提示有个包重写失败,我是手动把它卸载,之后安装obs,最后补全依赖sudo apt install -f就好了。
https://ww.lanzous.com/icb9g3g
下面是一个小白的折腾全程
1.按照obs官网教程安装
链接:https://github.com/obsproject/obs-studio/wiki/Install-Instructions#debian-installation-unofficial
Debian-based Build Directions
Get the required packages:

  sudo apt-get install \
             build-essential \
             checkinstall \
             cmake \
             git \
             libmbedtls-dev \
             libasound2-dev \
             libavcodec-dev \
             libavdevice-dev \
             libavfilter-dev \
             libavformat-dev \
             libavutil-dev \
             libcurl4-openssl-dev \
             libfdk-aac-dev \
             libfontconfig-dev \
             libfreetype6-dev \
             libgl1-mesa-dev \
             libjack-jackd2-dev \
             libjansson-dev \
             libluajit-5.1-dev \
             libpulse-dev \
             libqt5x11extras5-dev \
             libspeexdsp-dev \
             libswresample-dev \
             libswscale-dev \
             libudev-dev \
             libv4l-dev \
             libvlc-dev \
             libx11-dev \
             libx264-dev \
             libxcb-shm0-dev \
             libxcb-xinerama0-dev \
             libxcomposite-dev \
             libxinerama-dev \
             pkg-config \
             python3-dev \
             qtbase5-dev \
             libqt5svg5-dev \
             swig \
             libxcb-randr0-dev \
             libxcb-xfixes0-dev \
             libx11-xcb-dev \
             libxcb1-dev
Building and installing OBS:

If building with browser source:

wget https://cdn-fastly.obsproject.com/downloads/cef_binary_3770_linux64.tar.bz2
tar -xjf ./cef_binary_3770_linux64.tar.bz2
git clone --recursive https://github.com/obsproject/obs-studio.git
cd obs-studio
mkdir build && cd build
cmake -DUNIX_STRUCTURE=1 -DCMAKE_INSTALL_PREFIX=/usr -DBUILD_BROWSER=ON -DCEF_ROOT_DIR="../../cef_binary_3770_linux64" ..
make -j4
sudo checkinstall --default --pkgname=obs-studio --fstrans=no --backup=no --pkgversion="$(date +%Y%m%d)-git" --deldoc=yes
If building without browser source

git clone --recursive https://github.com/obsproject/obs-studio.git
cd obs-studio
mkdir build && cd build
cmake -DUNIX_STRUCTURE=1 -DCMAKE_INSTALL_PREFIX=/usr ..
make -j4
sudo checkinstall --default --pkgname=obs-studio --fstrans=no --backup=no --pkgversion="$(date +%Y%m%d)-git" --deldoc=yes2.git clone的时候设置了代理,不然速度太慢,也试过用码云下载,刚开始挺快后面某些子组件又转到github下载,很慢。估计是要自己加一个新仓库才行,我当时看见上面有这个仓库就没有新建。
git config --global http.proxy 'socks5://127.0.0.1:1080'
git config --global https.proxy 'socks5://127.0.0.1:1080'3.装的过程中发现源里没有checkinstall,这也要改好多东西,不然最后一步没法进行。
参考https://blog.51cto.com/shugao/1360193,https://blog.51cto.com/thinkman/1135049
下载最新版本的checkinstall:
wget http://asic-linux.com.mx/~izto/checkinstall/files/source/checkinstall-1.6.2.tar.gz

tar -xvzf checkinstall-1.6.2.tar.tar
cd checkinstall-1.6.2
直接make 会报错

installwatch.c:2942: error: conflicting types for 'readlink'
/usr/include/unistd.h:828: note: previous declaration of 'readlink' was here
installwatch.c:3080: error: conflicting types for 'scandir'
/usr/include/dirent.h:252: note: previous declaration of 'scandir' was here
installwatch.c:3692: error: conflicting types for 'scandir64'
/usr/include/dirent.h:275: note: previous declaration of 'scandir64' was here

vim installwatch/installwatch.c


at line 101, change:
static int (*true_scandir)( const char *,struct dirent ***,
    int (*)(const struct dirent *),
    int (*)(const void *,const void *));

to:
static int (*true_scandir)( const char *,struct dirent ***,
    int (*)(const struct dirent *),
    int (*)(const struct dirent **,const struct dirent **));


at line 121, change:
static int (*true_scandir64)( const char *,struct dirent64 ***,
    int (*)(const struct dirent64 *),
    int (*)(const void *,const void *));

to:
static int (*true_scandir64)( const char *,struct dirent64 ***,
    int (*)(const struct dirent64 *),
    int (*)(const struct dirent64 **,const struct dirent64 **));


at line 2941, change:
#if (GLIBC_MINOR <= 4)
to:
#if (0)
at line 3080, change:
int scandir( const char *dir,struct dirent ***namelist,
  int (*select)(const struct dirent *),
  int (*compar)(const void *,const void *) ) {

to:
int scandir( const char *dir,struct dirent ***namelist,
  int (*select)(const struct dirent *),
  int (*compar)(const struct dirent **,const struct dirent **) ) {

at line 3692, change:
int scandir64( const char *dir,struct dirent64 ***namelist,
  int (*select)(const struct dirent64 *),
  int (*compar)(const void *,const void *) ) {

to:
int scandir64( const char *dir,struct dirent64 ***namelist,
  int (*select)(const struct dirent64 *),
  int (*compar)(const struct dirent64 **,const struct dirent64 **) ) {
完成后make
直接make install 虽然不会报错但是在使用checkinstall 的时候,会报错
“checkinstall error: File not found: /root/rpmbuild/BUILDROOT/”这种蛋疼的错误;
vim checkinstall
at line 495, change: CHECKINSTALLRC=${CHECKINSTALLRC:-${INSTALLDIR}/checkinstallrc}
to:
CHECKINSTALLRC=${CHECKINSTALLRC:-${INSTALLDIR}/lib/checkinstall/checkinstallrc}

at line 2466, change: $RPMBUILD -bb ${RPM_TARGET_FLAG}${ARCHITECTURE} "$SPEC_PATH" &> ${TMP_DIR}/rpmbuild.log
to:
$RPMBUILD -bb ${RPM_TARGET_FLAG}${ARCHITECTURE} --buildroot $BROOTPATH "$SPEC_PATH" &> ${TMP_DIR}/rpmbuild.log
Now, as root, run:
make install

在使用makeinstall 的时候如果报“/root/rpmbuild has no SOURCES driectory”的错误,执行mkdir -p /root/rpmbuild/SOURCES命令;4.安装v4l2loopback-dkms_0.12.5-1
链接:https://packages.debian.org/sid/all/v4l2loopback-dkms/download
5.加载v4l2loopback模块
sudo modprobe v4l2loopback6.安装obs-v4l2sink(类似Windows版的obs虚拟摄像头插件)
链接:https://github.com/CatxFish/obs-v4l2sink/releases
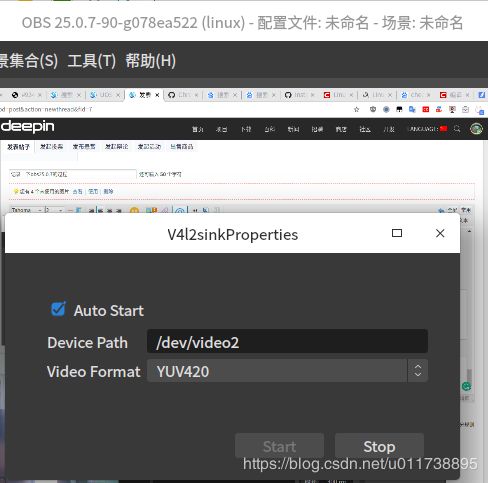
7.在obs里面选择:工具—>v4l5sink->填一个能用的设备videoX,start。
现在obs里面捕获的视频就可以模仿一个虚拟摄像头了。


